Rotary Dial Kit Assembly Guide
 Nick Poole
Example Code
Note: This example assumes you are using the latest version of the Arduino IDE on your desktop. If this is your first time using Arduino, please review our tutorial on installing the Arduino IDE. If you have not previously installed an Arduino library, please check out our installation guide.
Hookup Table
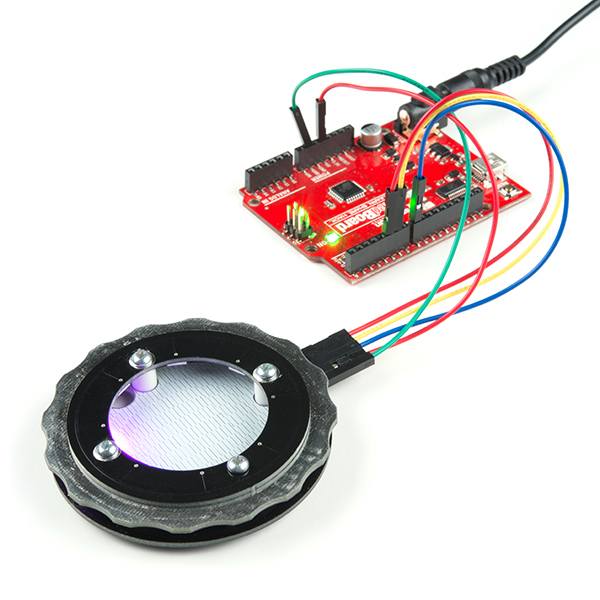
Here are two simple Arduino examples to get you started. Both of them have been tested to work with the SparkFun RedBoard with the following connections:
| RedBoard | Rotary Dial |
|---|---|
| GND | GND |
| 5V | 5V |
| D8 | LED IN |
| D5 | ENC A |
| D6 | ENC B |
Once connected, your setup should look similar to the image below.
Both examples also make use of the PJRC Encoder Library and the Adafruit NeoPixel Library.
Example 1 - Color Wheel
This example uses pieces of the NeoPixel example code combined with pieces of the Encoder example code to implement a color selector. As you turn the encoder wheel one direction or the other, you will cycle through the RGB color space on all eight RGB LEDs at once.
language:c
#include <Adafruit_NeoPixel.h>
#include <Encoder.h>

Encoder myEnc(5, 6);

Adafruit_NeoPixel strip = Adafruit_NeoPixel(8, 8, NEO_GRB + NEO_KHZ800);

void setup() {
  strip.begin();
  strip.show();
}

long oldPosition  = -999;

void loop() {
  long newPosition = myEnc.read();
  if (newPosition != oldPosition) {
    oldPosition = newPosition;

    for(int i = 0 ; i < 8; i++){
      strip.setPixelColor(i, Wheel((newPosition*5) & 255));
    }

    strip.show();

  }

}

// Input a value 0 to 255 to get a color value.
// The colours are a transition r - g - b - back to r.
uint32_t Wheel(byte WheelPos) {
  WheelPos = 255 - WheelPos;
  if(WheelPos < 85) {
    return strip.Color(255 - WheelPos * 3, 0, WheelPos * 3);
  }
  if(WheelPos < 170) {
    WheelPos -= 85;
    return strip.Color(0, WheelPos * 3, 255 - WheelPos * 3);
  }
  WheelPos -= 170;
  return strip.Color(WheelPos * 3, 255 - WheelPos * 3, 0);
}
Example 2 - Rotary Selector
This example is almost identical except that as you turn the encoder ring, only one LED will light at a time, moving in the same direction that you turn the ring.
language:c
#include <Adafruit_NeoPixel.h>
#include <Encoder.h>

Encoder myEnc(5, 6);

Adafruit_NeoPixel strip = Adafruit_NeoPixel(8, 8, NEO_GRB + NEO_KHZ800);

void setup() {
  strip.begin();
  strip.show();
}

long oldPosition  = -999;

void loop() {
  long newPosition = myEnc.read();
  if (newPosition != oldPosition) {
    oldPosition = newPosition;

    for(int i = 0 ; i < 8; i++){
      strip.setPixelColor(i, 0);
    }

    int dot = abs(newPosition)%8;
    strip.setPixelColor(dot, Wheel((newPosition*5) & 255));
    strip.show();

  }

}

// Input a value 0 to 255 to get a color value.
// The colours are a transition r - g - b - back to r.
uint32_t Wheel(byte WheelPos) {
  WheelPos = 255 - WheelPos;
  if(WheelPos < 85) {
    return strip.Color(255 - WheelPos * 3, 0, WheelPos * 3);
  }
  if(WheelPos < 170) {
    WheelPos -= 85;
    return strip.Color(0, WheelPos * 3, 255 - WheelPos * 3);
  }
  WheelPos -= 170;
  return strip.Color(WheelPos * 3, 255 - WheelPos * 3, 0);
}
