SIK Experiment Guide for Arduino - V3.3
This Tutorial is Retired!
View the updated tutorial: SparkFun Inventor's Kit Experiment Guide - v4.0
 HelloTechie,
  Toni_K
Experiment 3: Driving an RGB LED
Introduction
You know what’s even more fun than a blinking LED? Changing colors with one LED. RGB, or red-green-blue, LEDs have three different color-emitting diodes that can be combined to create all sorts of colors. In this circuit, you’ll learn how to use an RGB LED to create unique color combinations. Depending on how bright each diode is, nearly any color is possible!
Parts Needed
You will need the following parts:
- 1x RedBoard + USB mini-B Cable or Arduino Uno R3 + USB A-to-B Cable
- 1x Breadboard
1x LED - RGB Common Cathode - 3x 330Ω Resistor
- 5x Jumper Wires
Hardware Hookup
Ready to start hooking everything up? Check out the Fritzing diagram and hookup table below, to see how everything is connected.
| Polarized Components | Pay special attention to the component’s markings indicating how to place it on the breadboard. Polarized components can only be connected to a circuit in one direction. |
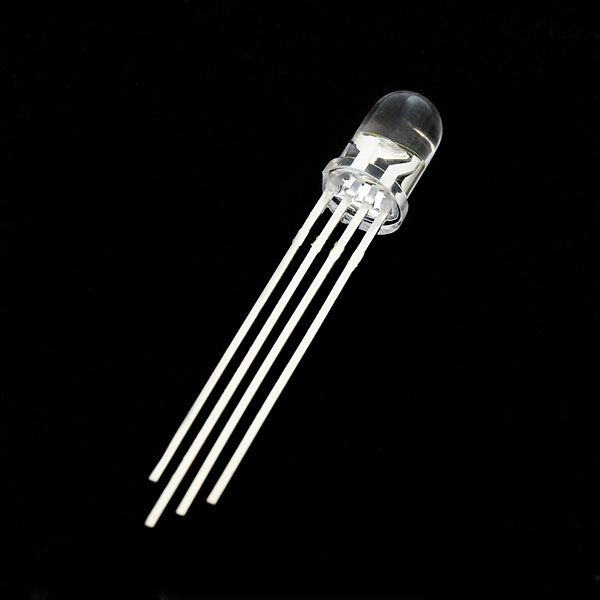
The Red Green Blue (RGB) LED is 3 LEDs in one. The RGB has four pins with each of the three shorter pins controlling an individual color: red, green or blue. The longer pin of the RGB is the common ground pin. You can create a custom colored LED by turning different colors on and off to combine them. For example, if you turn on the red pin and green pin, the RGB will light up as yellow.
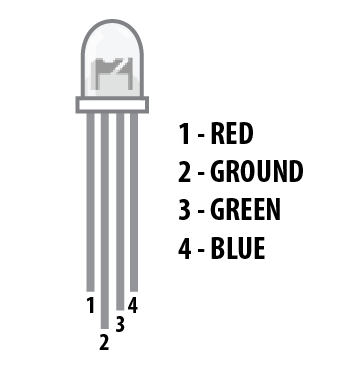
But which pin is which color? Pick up the RGB so that the longest pin (common ground) is aligned to the left as shown in the graphic below. The pins are Red, Ground, Green, and Blue -- starting from the far left.
**Note: When wiring the RGB, each colored pin still needs a current-limiting resistor in-line with the I/O pin that you plan to use to control it, as with any standard LED. **
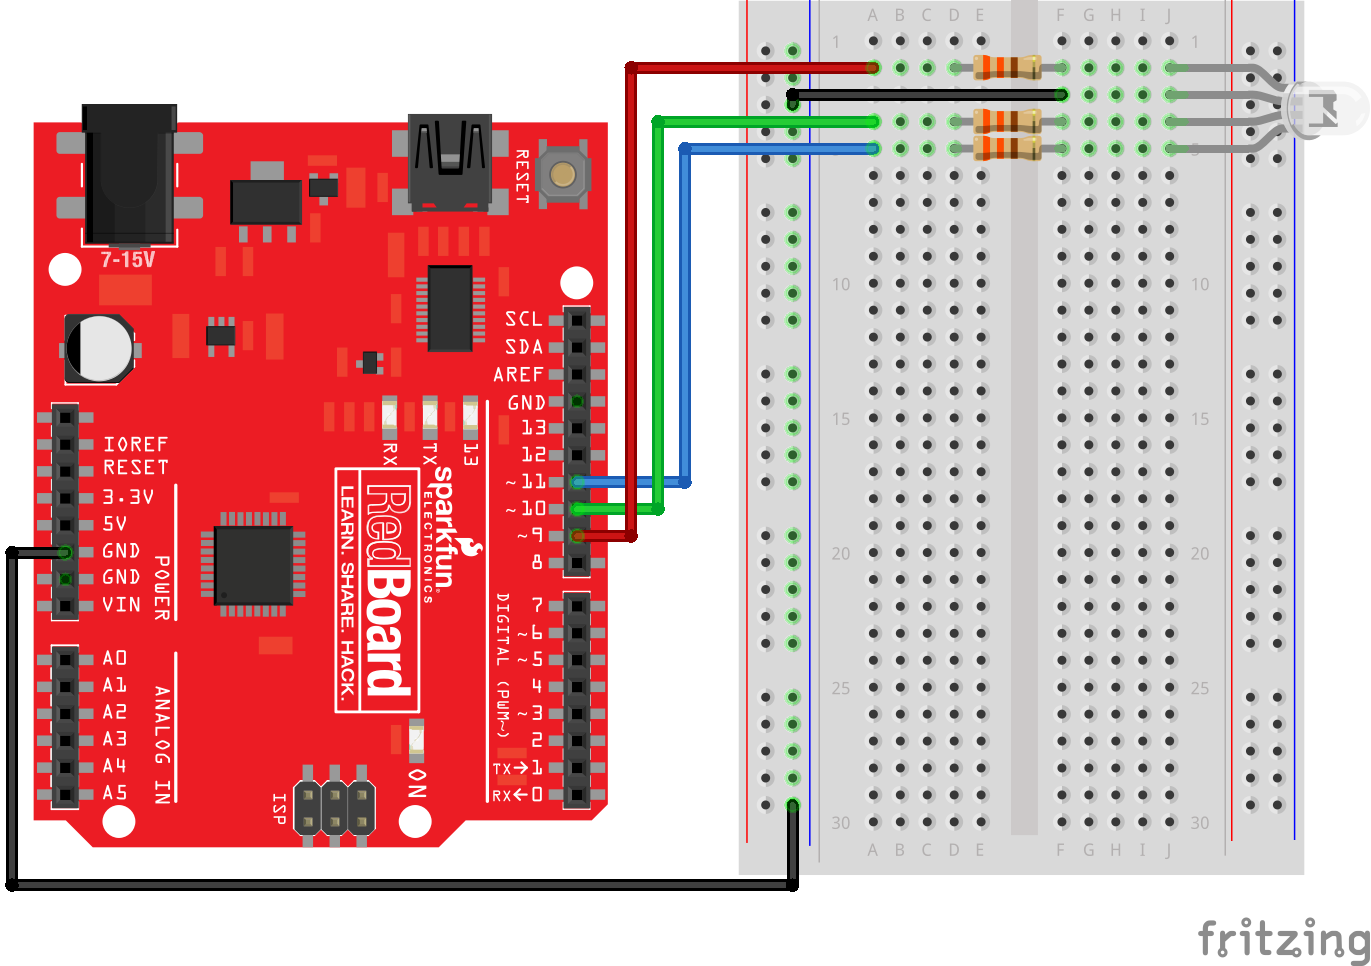
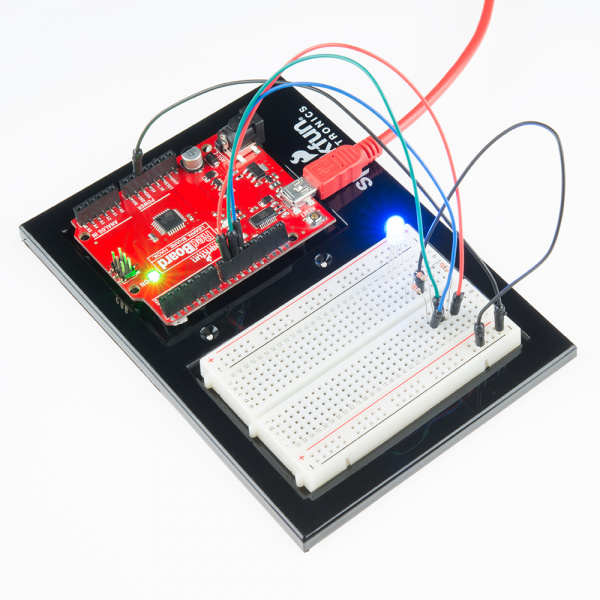
Fritzing Diagram for RedBoard
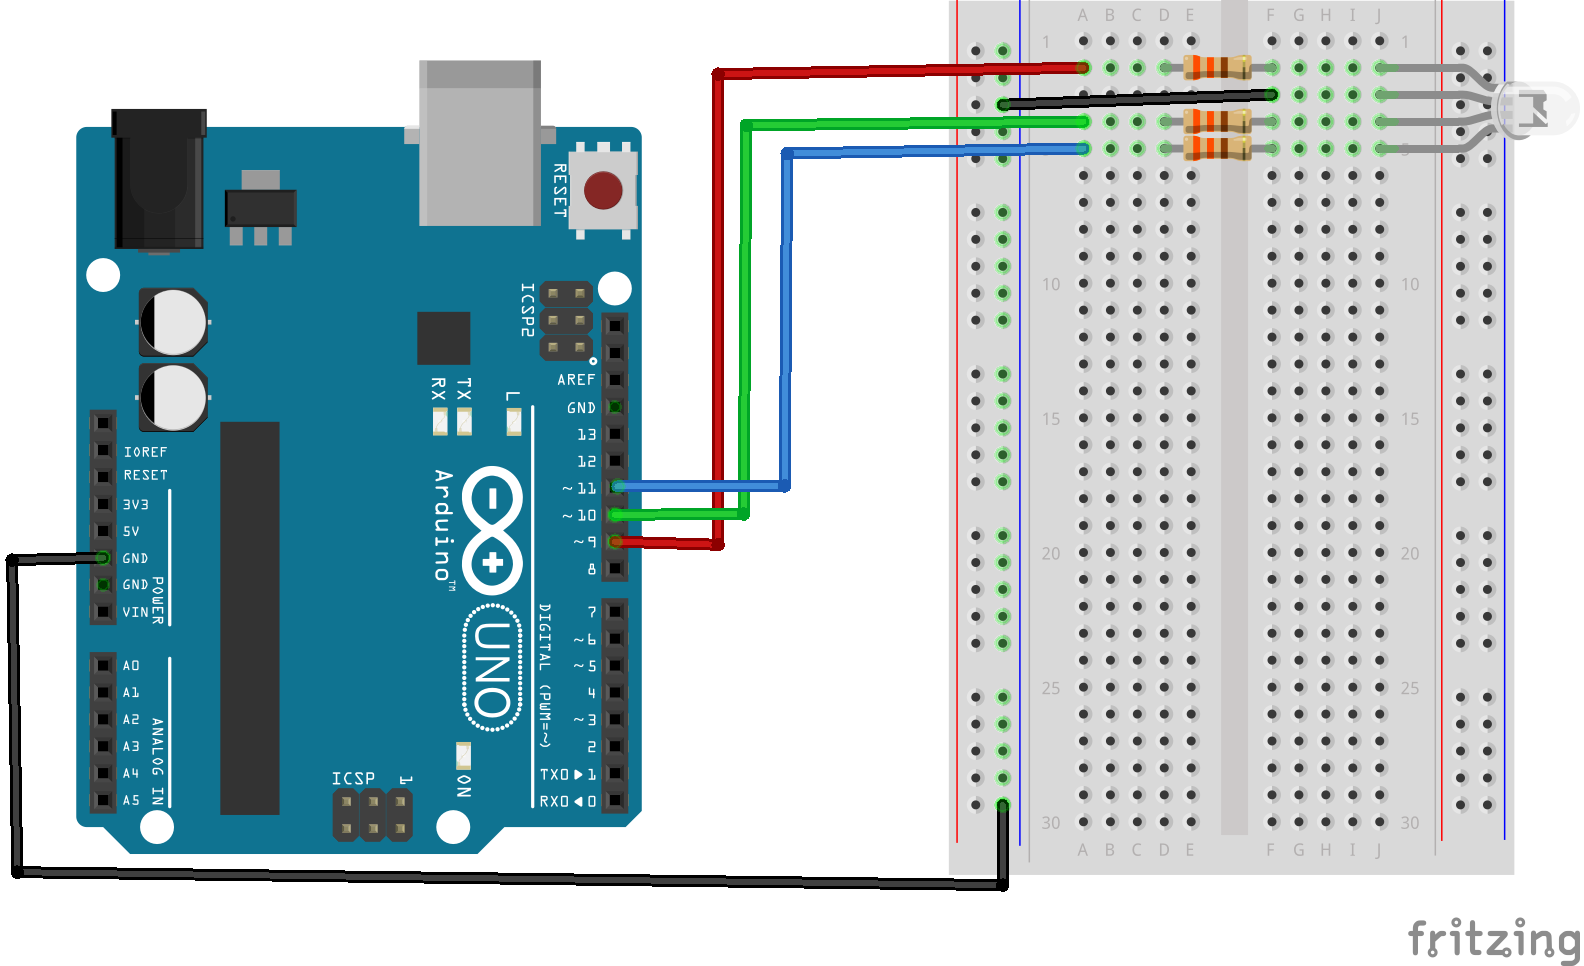
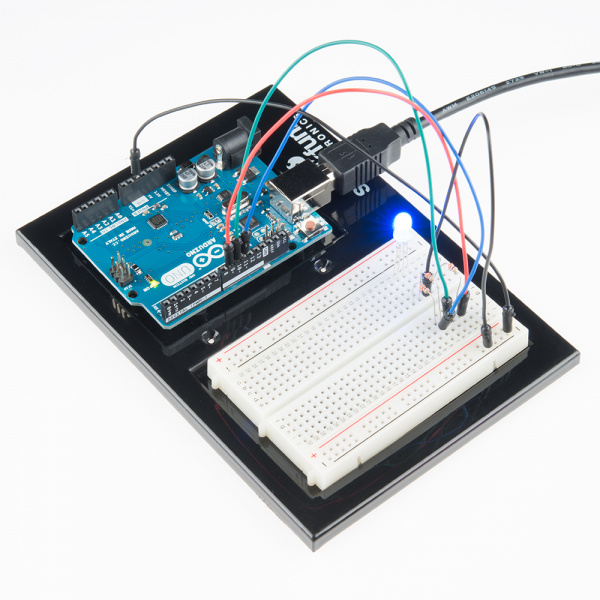
Fritzing Diagram for Arduino
Open the Sketch
Open Up the Arduino IDE software on your computer. Coding in the Arduino language will control your circuit. Open the code for Circuit 3 by accessing the “SIK Guide Code” you downloaded and placed into your “Examples” folder earlier.
To open the code go to: File > examples > SIK Guide Code > SIK_circuit03_rgbLED
You can also copy and paste the following code into the Arduino IDE. Hit upload, and see what happens!
language:cpp
/******************************************************************
 * SparkFun Inventor's Kit
 * Example sketch 03 -- RGB LED
 *
 * Make an RGB LED display a rainbow of colors!
 *
 * This sketch was written by SparkFun Electronics,
 * with lots of help from the Arduino community.
 * Visit http://learn.sparkfun.com/products/2 for SIK information.
 * Visit http://www.arduino.cc to learn about the Arduino.
 *
 * Version 2.0 6/2012 MDG
 * Version 2.1 9/2014 BCH
 *****************************************************************/
const int RED_PIN = 9;
const int GREEN_PIN = 10;
const int BLUE_PIN = 11;

const int DISPLAY_TIME = 1000;  // used in mainColors() to determine the
// length of time each color is displayed.

void setup()    //Configure the Arduino pins to be outputs to drive the LEDs
{
  pinMode(RED_PIN, OUTPUT);
  pinMode(GREEN_PIN, OUTPUT);
  pinMode(BLUE_PIN, OUTPUT);
}

void loop()
{
  mainColors();        // Red, Green, Blue, Yellow, Cyan, Purple, White
  //  showSpectrum();    // Gradual fade from Red to Green to Blue to Red
}

/******************************************************************
 * void mainColors()
 * This function displays the eight "main" colors that the RGB LED
 * can produce. If you'd like to use one of these colors in your
 * own sketch, you can copy and paste that section into your code.
/*****************************************************************/
void mainColors()
{
  // all LEDs off
  digitalWrite(RED_PIN, LOW);
  digitalWrite(GREEN_PIN, LOW);
  digitalWrite(BLUE_PIN, LOW);
  delay(DISPLAY_TIME);

  // Red
  digitalWrite(RED_PIN, HIGH);
  digitalWrite(GREEN_PIN, LOW);
  digitalWrite(BLUE_PIN, LOW);
  delay(DISPLAY_TIME);

  // Green
  digitalWrite(RED_PIN, LOW);
  digitalWrite(GREEN_PIN, HIGH);
  digitalWrite(BLUE_PIN, LOW);
  delay(DISPLAY_TIME);

  // Blue
  digitalWrite(RED_PIN, LOW);
  digitalWrite(GREEN_PIN, LOW);
  digitalWrite(BLUE_PIN, HIGH);
  delay(DISPLAY_TIME);

  // Yellow (Red and Green)
  digitalWrite(RED_PIN, HIGH);
  digitalWrite(GREEN_PIN, HIGH);
  digitalWrite(BLUE_PIN, LOW);
  delay(DISPLAY_TIME);

  // Cyan (Green and Blue)
  digitalWrite(RED_PIN, LOW);
  digitalWrite(GREEN_PIN, HIGH);
  digitalWrite(BLUE_PIN, HIGH);
  delay(DISPLAY_TIME);

  // Purple (Red and Blue)
  digitalWrite(RED_PIN, HIGH);
  digitalWrite(GREEN_PIN, LOW);
  digitalWrite(BLUE_PIN, HIGH);
  delay(DISPLAY_TIME);

  // White (turn all the LEDs on)
  digitalWrite(RED_PIN, HIGH);
  digitalWrite(GREEN_PIN, HIGH);
  digitalWrite(BLUE_PIN, HIGH);
  delay(DISPLAY_TIME);
}

/******************************************************************
 * void showSpectrum()
 *
 * Steps through all the colors of the RGB LED, displaying a rainbow.
 * showSpectrum() calls a function RGB(int color) that translates a number
 * from 0 to 767 where 0 = all RED, 767 = all RED
 *
 * Breaking down tasks down into individual functions like this
 * makes your code easier to follow, and it allows.
 * parts of your code to be re-used.
/*****************************************************************/

void showSpectrum()
{
  for (int x = 0; x <= 767; x++)
  {
    RGB(x);      // Increment x and call RGB() to progress through colors.
    delay(10);   // Delay for 10 ms (1/100th of a second) - to help the "smoothing"
  }
}

/******************************************************************
 * void RGB(int color)
 *
 * RGB(###) displays a single color on the RGB LED.
 * Call RGB(###) with the number of a color you want
 * to display. For example, RGB(0) displays pure RED, RGB(255)
 * displays pure green.
 *
 * This function translates a number between 0 and 767 into a
 * specific color on the RGB LED. If you have this number count
 * through the whole range (0 to 767), the LED will smoothly
 * change color through the entire spectrum.
 *
 * The "base" numbers are:
 * 0   = pure red
 * 255 = pure green
 * 511 = pure blue
 * 767 = pure red (again)
 *
 * Numbers between the above colors will create blends. For
 * example, 640 is midway between 512 (pure blue) and 767
 * (pure red). It will give you a 50/50 mix of blue and red,
 * resulting in purple.
/*****************************************************************/
void RGB(int color)
{
  int redIntensity;
  int greenIntensity;
  int blueIntensity;

  color = constrain(color, 0, 767); // constrain the input value to a range of values from 0 to 767

    // if statement breaks down the "color" into three ranges:
  if (color <= 255)       // RANGE 1 (0 - 255) - red to green
  {
    redIntensity = 255 - color;    // red goes from on to off
    greenIntensity = color;        // green goes from off to on
    blueIntensity = 0;             // blue is always off
  }
  else if (color <= 511)  // RANGE 2 (256 - 511) - green to blue
  {
    redIntensity = 0;                     // red is always off
    greenIntensity = 511 - color;         // green on to off
    blueIntensity = color - 256;          // blue off to on
  }
  else                    // RANGE 3 ( >= 512)- blue to red
  {
    redIntensity = color - 512;         // red off to on
    greenIntensity = 0;                 // green is always off
    blueIntensity = 767 - color;        // blue on to off
  }

  // "send" intensity values to the Red, Green, Blue Pins using analogWrite()
  analogWrite(RED_PIN, redIntensity);
  analogWrite(GREEN_PIN, greenIntensity);
  analogWrite(BLUE_PIN, blueIntensity);
}
Code To Note
language:cpp
for (x = 0; x < 768; x++)
{}
A for() loop is used to repeat an action a set number of times across a range, and repeatedly runs code within the brackets {}. Here the variable "x" starts a 0, ends at 767, and increases by one each time ("x++").
language:cpp
if (x <= 255)
{}
else
{}
"If / else" statements are used to make choices in your programs. The statement within the parenthesis () is evaluated; if it's true, the code within the first brackets {} will run. If it's not true, the code within the second brackets {} will run.
What You Should See
You should see your LED turn on, but this time in new, crazy colors! If it isn't, make sure you have assembled the circuit correctly and verified and uploaded the code to your board or see the troubleshooting section.
Real World Application
Many electronics such as video game consoles use RGB LEDs to have the versatility to show different colors in the same area. Often times the different colors represent different states of working condition.
Troubleshooting
LED Remains Dark or Shows Incorrect Color
With the four pins of the LED so close together, it’s sometimes easy to misplace one. Double check each pin is where it should be.
Seeing Red
The red diode within the RGB LED may be a bit brighter than the other two. To make your colors more balanced, use a higher ohm resistor, or adjust in the code.
analogWrite(RED_PIN, redIntensity);
to
analogWrite(RED_PIN, redIntensity/3);