SIK Experiment Guide for the Arduino 101/Genuino 101 Board (French)
This Tutorial is Retired!
This tutorial covers concepts or technologies that are no longer current. It's still here for you to read and enjoy, but may not be as useful as our newest tutorials.
 D___Run___
 Expérience 17 : Utiliser un écran LCD
Introduction
Dans cette expérience, vous allez apprendre à utiliser un écran LCD. Un écran à cristaux liquides (LCD, Liquid Crystal Display) est un dispositif simple permettant d'afficher des commandes, des informations ou des valeurs lues par un capteur. Cela dépend de la façon dont vous programmez votre carte. Dans ce circuit, vous apprendrez les bases pour intégrer un écran LCD à votre projet.
Composants nécessaires
Vous aurez besoin des composants suivants :
- 1 plaque Breadboard
- 1 carte Arduino 101 ou Genuino 101
- 1 potentiomètre
- 1 écran LCD 3,3 V
- 16 cavaliers
Vous n'avez pas le SIK ?
Pour réaliser cette expérience sans le SIK, nous vous suggérons d'utiliser les composants suivants :


Vous aurez également besoin d'une carte Arduino 101 ou Genuino 101.


Présentation de l'écran LCD

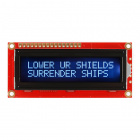
Le SIK 101 inclut un écran LCD) similaire à celui de votre four micro-ondes, du tableau de bord de votre voiture ou, si vous étiez né, à La Dictée Magique. Les écrans LCD sont parfaits pour afficher des données ou des informations provenant de votre carte 101 sans avoir à la connecter à votre ordinateur.
Cet écran LCD possède au total 32 espaces de caractères possibles disposés dans une grille composée de deux lignes de 16 caractères. Il est contrôlée via une bibliothèque qui facilite nettement son utilisation avec la carte 101. Le câblage peut sembler un peu complexe, mais cela vaut le coup de relever ce défi.
**Astuce de pro : Pour câbler l'écran LCD, commencez par un côté de broches en revenant vers le centre. Quand vous arrivez à une broche vide, passez à l'autre côté et répétez la procédure. Cette méthode vous empêchera de manquer une broche ou de mal câbler l'écran. **
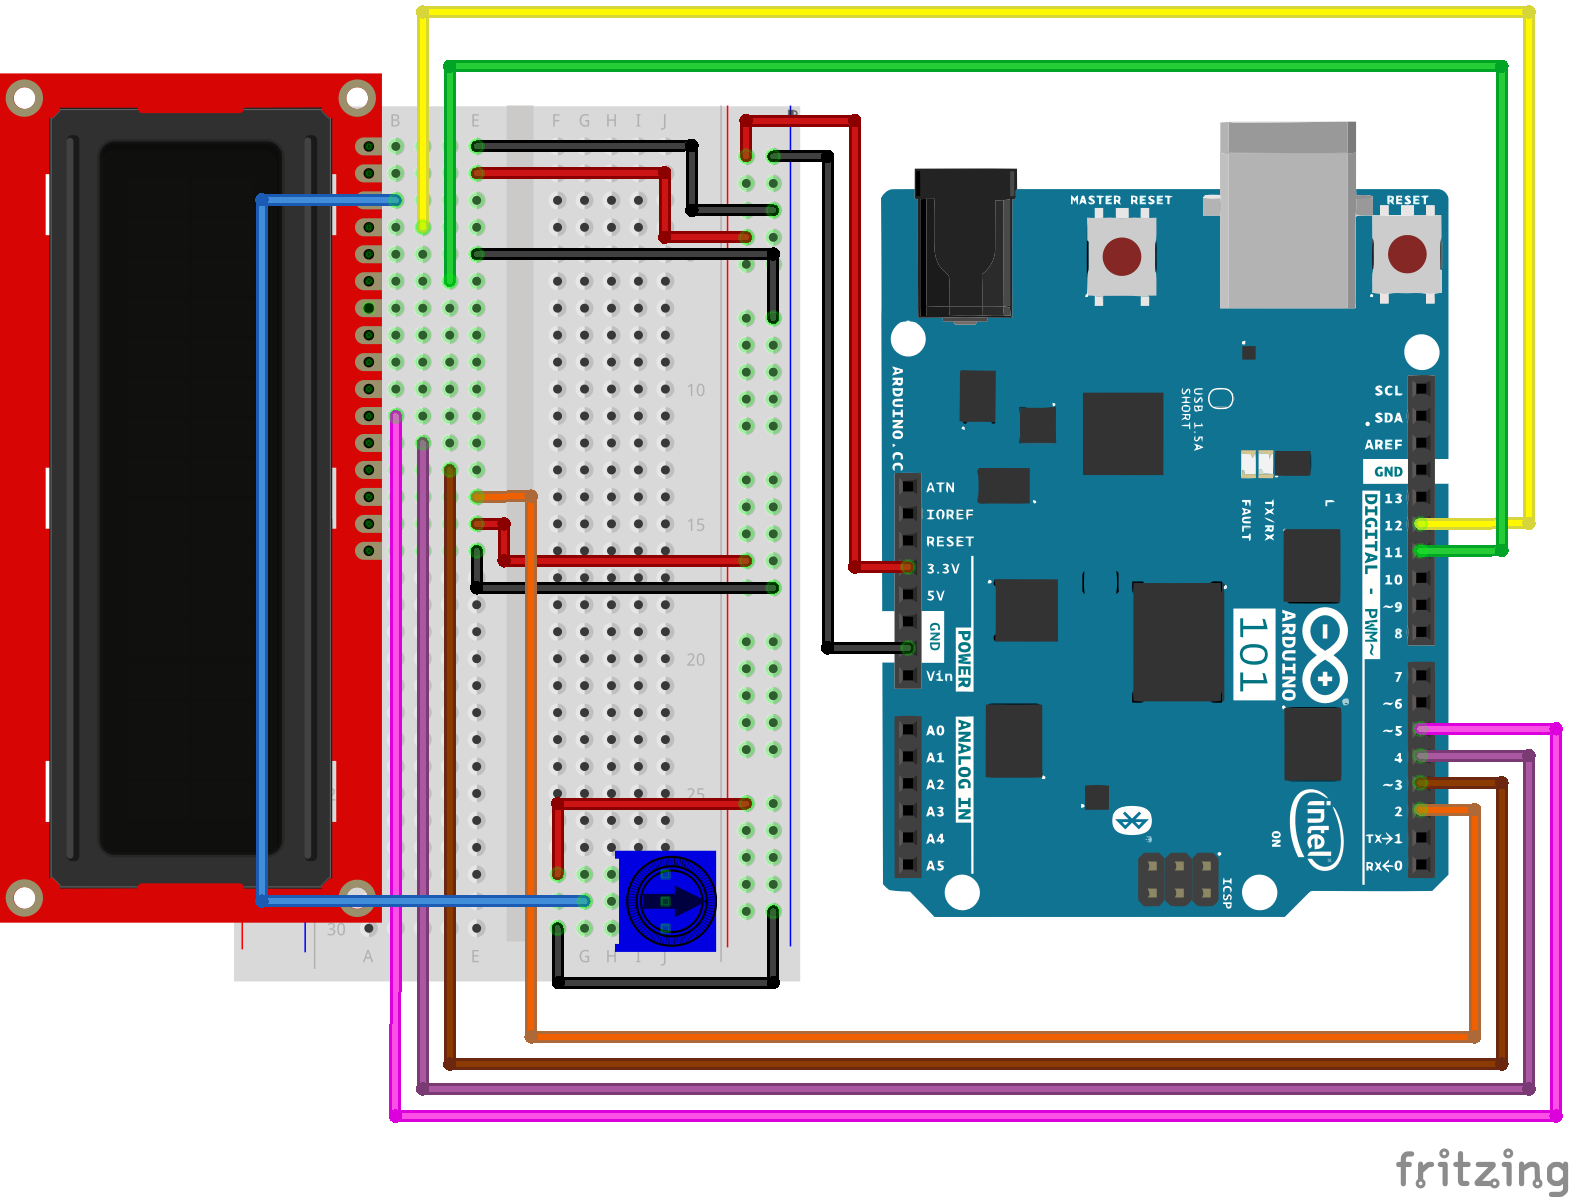
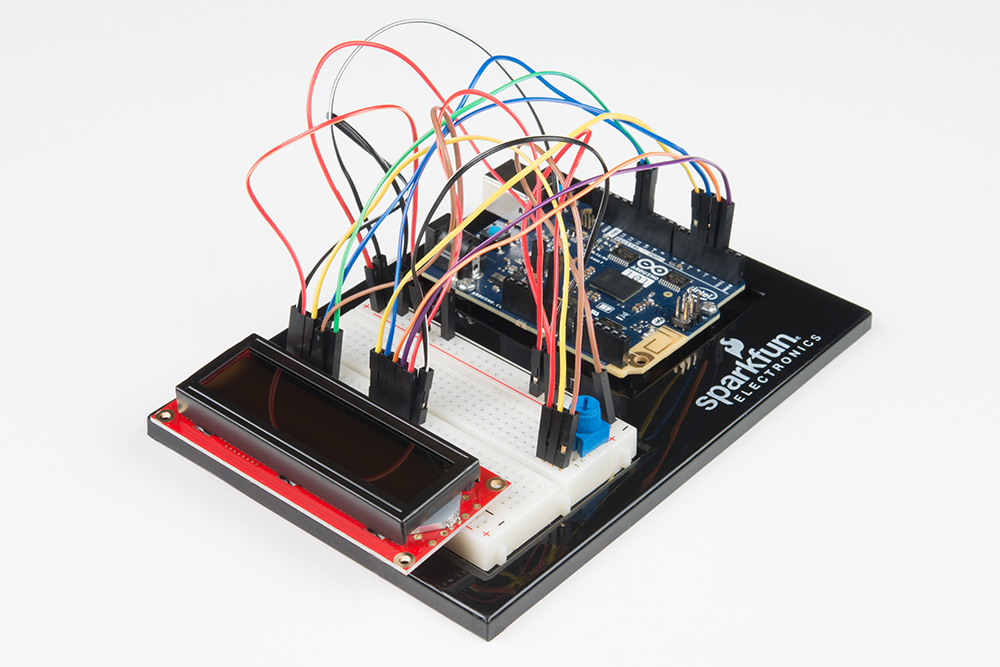
Branchement du matériel
Vous êtes prêt à tout raccorder ? Consultez le schéma de câblage ci-dessous pour savoir comment faire.
| Composants polarisés | Faites particulièrement attention aux marquages indiquant comment placer les composants sur la plaque breadboard, car les composants polarisés ne peuvent être connectés à un circuit que dans une direction. |
Schéma de câblage de l'expérience
Ouverture du sketch
Ouvrez l'EDI Arduino sur votre ordinateur. Le codage en langage Arduino contrôlera votre circuit. Ouvrez le code du Circuit 17 en accédant au « Code du guide SIK 100 » que vous avez précédemment téléchargé et placé dans votre dossier « Examples ».
Pour ouvrir le code, cliquez sur : File > Examples > 101 SIK Guide Code > Circuit_17
Vous pouvez également copier et coller le code suivant dans l'EDI Arduino. Cliquez sur Télécharger et observez ce qu'il se passe.
language:cpp
/*
SparkFun Inventor's Kit
Example sketch 17

LIQUID CRYSTAL DISPLAY (LCD)

  This sketch will show you how to connect an LCD to your Arduino
  and display any data you wish.

This sketch was written by SparkFun Electronics,
with lots of help from the Arduino community.
This code is completely free for any use.
Visit https://www.sparkfun.com/products/12060 for SIK information.
Visit http://www.arduino.cc to learn more about Arduino.
*/

// Load the LiquidCrystal library, which will give us
// commands to interface to the LCD:

#include

// Initialize the library with the pins we're using.
// (Note that you can use different pins if needed.)
// See http://arduino.cc/en/Reference/LiquidCrystal
// for more information:

LiquidCrystal lcd(12,11,5,4,3,2);

void setup()
{
  // The LiquidCrystal library can be used with many different
  // LCD sizes. We're using one that's 2 lines of 16 characters,
  // so we'll inform the library of that:

  lcd.begin(16, 2);

  // Data sent to the display will stay there until it's
  // overwritten or power is removed. This can be a problem
  // when you upload a new sketch to the Arduino but old data
  // remains on the display. Let's clear the LCD using the
  // clear() command from the LiquidCrystal library:

  lcd.clear();

  // Now we'll display a message on the LCD!

  // Just as with the Arduino IDE, there's a cursor that
  // determines where the data you type will appear. By default,
  // this cursor is invisible, though you can make it visible
  // with other library commands if you wish.

  // When the display powers up, the invisible cursor starts
  // on the top row and first column.

  lcd.print("hello, world!");

  // Adjusting the contrast (IMPORTANT!)

  // When you run the sketch for the first time, there's a
  // very good chance you won't see anything on the LCD display.
  // This is because the contrast likely won't be set correctly.
  // Don't worry, it's easy to set, and once you set it you won't
  // need to change it again.

  // Run the sketch, then turn the potentiometer until you can
  // clearly see the "hello, world!" text. If you still can't
  // see anything, check all of your connections, and ensure that
  // the sketch was successfully uploaded to the Arduino.
}

void loop()
{
  // You can move the invisible cursor to any location on the
  // LCD before sending data. Counting starts from 0, so the top
  // line is line 0 and the bottom line is line 1\. Columns range
  // from 0 on the left side, to 15 on the right.

  // In additon to the "hello, world!" printed above, let's
  // display a running count of the seconds since the Arduino
  // was last reset. Note that the data you send to the display
  // will stay there unless you erase it by overwriting it or
  // sending an lcd.clear() command.

  // Here we'll set the invisible cursor to the first column
  // (column 0) of the second line (line 1):

  lcd.setCursor(0,1);

  // Now we'll print the number of seconds (millis() / 1000)
  // since the Arduino last reset:

  lcd.print(millis()/1000);

  // TIP: Since the numeric data we're sending is always growing
  // in length, new values will always overwrite the previous ones.
  // However, if you want to display varying or decreasing numbers
  // like a countdown, you'll find that the display will leave
  // "orphan" characters when the new value is shorter than the
  // old one.

  // To prevent this, you'll need to erase the old number before
  // writing the new one. You can do this by overwriting the
  // last number with spaces. If you erase the old number and
  // immediately write the new one, the momentary erase won't
  // be noticeable. Here's a typical sequence of code:

  // lcd.setCursor(0,1);   // Set the cursor to the position
  // lcd.print("       "); // Erase the largest possible number
  // lcd.setCursor(0,1);   // Reset the cursor to the original position
  // lcd.print(millis()/1000); // Print our value

  // NEXT STEPS:

  // Now you know the basics of hooking up an LCD to the Arduino,
  // and sending text and numeric data to the display!

  // The LCD library has many commands for turning the
  // cursor on and off, scrolling the screen, etc. See:
  // http://arduino.cc/en/Reference/LiquidCrystal
  // for more information.

  // Arduino also comes with a number of built-in examples
  // showing off the features of the LiquidCrystal library.
  // These are locted in the file/examples/LiquidCrystal menu.

  // Have fun, and let us know what you create!
  // Your friends at SparkFun.
}
À propos du code
#include<liquidcrystal.h></liquidcrystal.h>
Cette partie de code indique à votre EDI Arduino qu'il doit inclure la bibliothèque d'un écran LCD simple. Sans elle, aucune commande ne fonctionnera ; n'oubliez donc pas de l'inclure !
lcd.print(“hello, world!”);
C'est la première fois que vous allez afficher quelque chose sur votre écran. Il vous faudra peut-être régler le contraste pour rendre le texte visible. Tournez le potentiomètre jusqu'à ce que vous le voyiez clairement.
lcd.clear();
Vous avez sûrement deviné que cette méthode sert à effacer ce qui se trouve sur l'écran LCD.
lcd.setCursor(0,1);
Si vous regardez attentivement, vous remarquerez que chaque caractère est entouré d'une petite case et que ces cases se trouvent dans une grille 2x16. Le premier chiffre de cette méthode représente la colonne (à partir de zéro, il faudra vous y habituer...) et le second la ligne. Par conséquent, la valeur 0,1 indique la première colonne, deuxième ligne.
Ce que vous devez voir
Vous devez initialement voir les mots « hello, world! » sur votre écran LCD. N'oubliez pas que vous pouvez régler le potentiomètre si vous ne voyez pas le texte clairement. En cas de problème, vérifiez votre code et vos connexions. Si le problème persiste, consultez la section Dépannage.
Dépannage
L'écran est vide ou complètement allumé
Réglez le contraste en tournant le potentiomètre. S'il est mal réglé, vous ne pouvez pas lire le texte.
Ne fonctionne pas du tout
Vérifiez le code, en particulier que vous avez inclus la bibliothèque de l'écran LCD.
L'écran clignote
Vérifiez les connexions avec la plaque breadboard et la carte 101.