Simon Says Assembly Guide
 Joel_E_B
 QCPete
 bboyho
Quickstart - Your First Component
We'll go over over in detail how to solder on the first part. Then we'll show you which parts go where and let you have at it. The booklet that comes with the Simon Says has been carefully crafted and goes over the assembly in lots of detail. We'll follow along here. Click on the image for a larger view, or you can download the entire guide here.
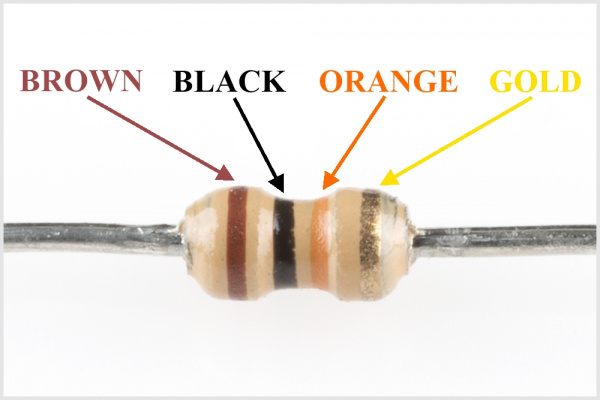
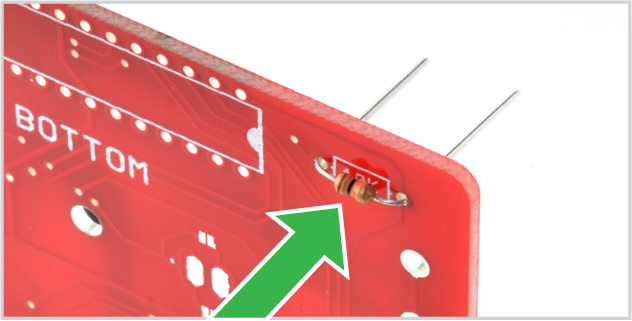
10kΩ Resistor
Locate the 10kΩ resistor.
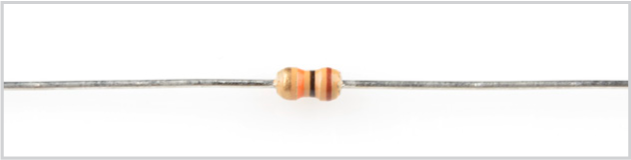
If you look closely, it has a specific pattern of stripes on it: BROWN, BLACK, ORANGE, GOLD.
Bend the legs downward.

Locate the 10kΩ resistor position on the board
Insert the resistor into the PCB.
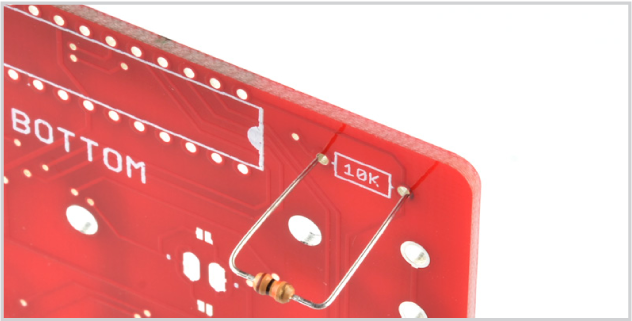
Push the resistor in so it is nearly flush with the board.
| Polarized Component | Pay special attention to the component’s markings indicating how to place it on the PCB. Polarized components can only be connected to a circuit in one direction. |
Slightly bend the legs outward to hold it in place.

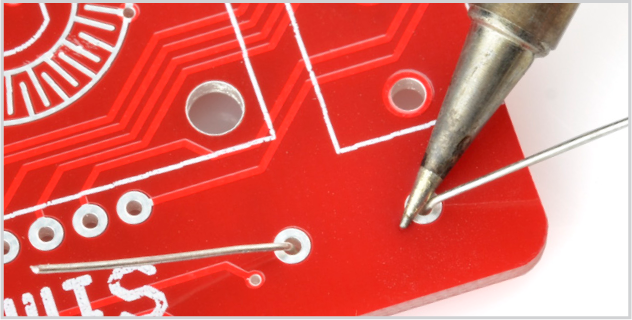
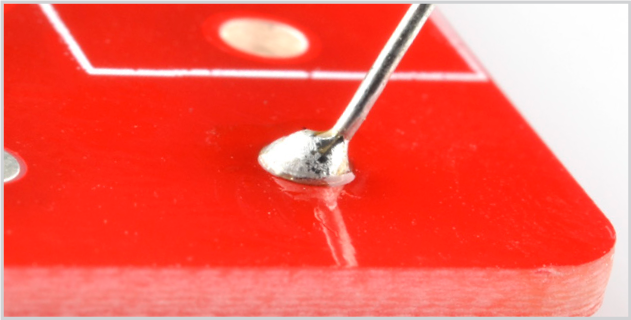
Flip the board over. Hold the soldering iron's "Sweet Spot" so it touches both the leg and the metal ring. Hold for 2 seconds.
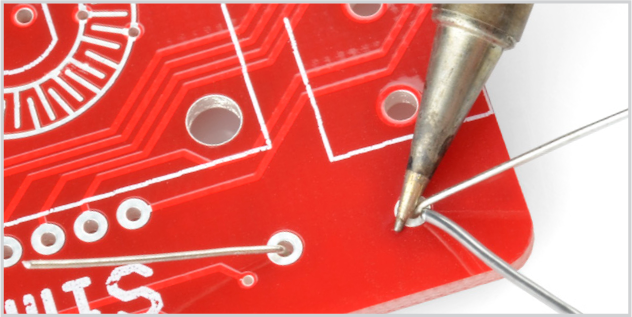
Feed solder into the joint.
First, pull away the solder. Second, pull away the iron.
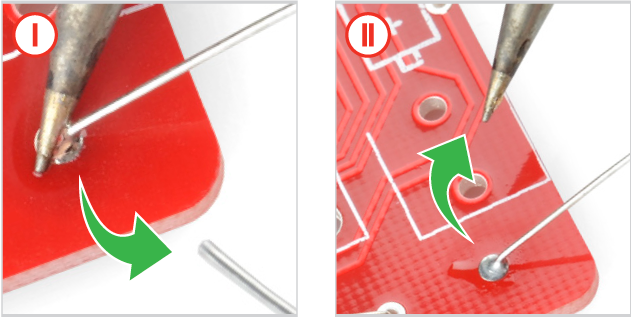
Your solder joints should look like this - a tiny volcano.
Clip off any excess legs.
