SparkFun Blocks for Intel® Edison - Pi Block
 Shawn Hymel
C++ Examples
We're assuming that you're using the Eclipse IDE as detailed in our Beyond Arduino tutorial. If you aren't, you'll need to go to that tutorial to get up to speed.
Hardware Connection
Hardware support for this library is simple; one basic red LED and one momentary pushbutton. We're using a 2N3904 NPN transistor to drive the LED, however, as the drive strength of the outputs on the Pi Block is quite weak. As you can see in the diagram, you'll also need a couple of 1kΩ resistors and a single 330Ω resistor.
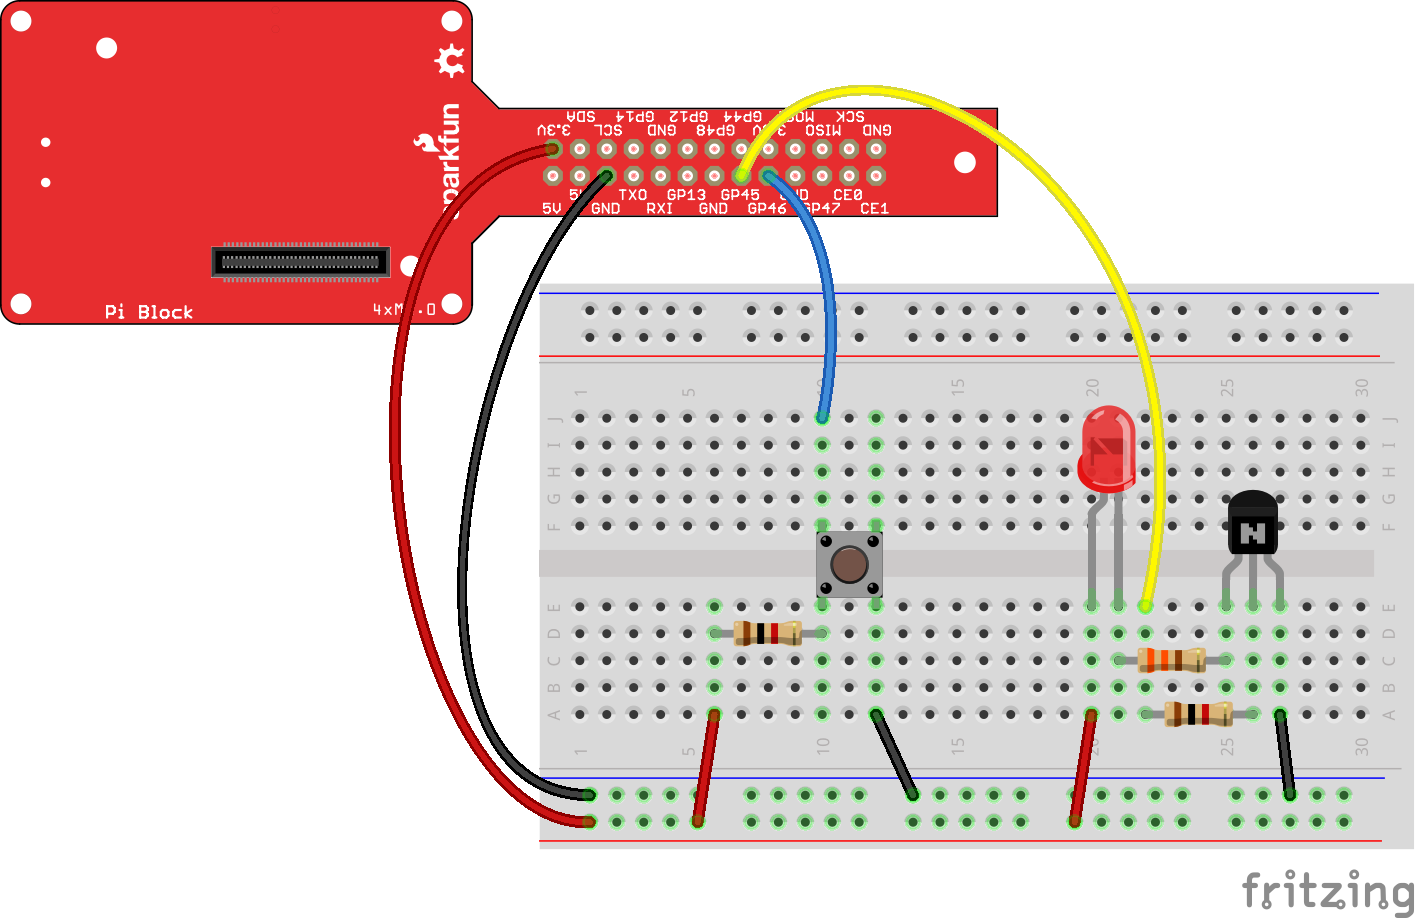
While we've used GPIO45 and GPIO46 in this example, this code can be used with any of the pins on the Pi breakout. The GPIO to MRAA pin map can be found in the Resources and Going Further section.
Code
Follow the instructions in the programming tutorial to create a new project named "SparkFun_Pi_Block_Example". Once you've created the project, open the "SparkFun_Pi_Block_Example.cpp" file and replace all the existing code with the code block below.
language:c
  /****************************************************************
  Example file for SparkFun Pi Block Support

  14 Jul 2015- Mike Hord, SparkFun Electronics
  Code developed in Intel's Eclipse IOT-DK

  Modified on July 30, 2015 by Shawn Hymel, SparkFun Electronics

  This code requires the Intel mraa library to function; for more
  information see https://github.com/intel-iot-devkit/mraa

  This code is beerware; if you use it, please buy me (or any other
  SparkFun employee) a cold beverage next time you run into one of
  us at the local.
  ****************************************************************/

#include "mraa.hpp"

#include <iostream>
#include <unistd.h>

using namespace mraa;
using namespace std;

int main()
{

  // Oddly, GPIO pin assignment numbers when using the MRAA libraries are not
  //  the same as those inside the operating system. Thus, while we're using
  //  pin 46 as far as the OS is concerned to drive the LED, we're using pin 32
  //  as far as MRAA is concerned. The cheat sheet for that can be found here:
  //  https://github.com/intel-iot-devkit/mraa/blob/master/docs/edison.md
  Gpio LEDPin(45);
  LEDPin.dir(DIR_OUT);

  // Now do a quick little flicker.
  LEDPin.write(0);
  usleep(100000);
  LEDPin.write(1);
  usleep(100000);
  LEDPin.write(0);

  // Alternatively, we can declare the pin in "raw" mode, which has a slightly
  //  different and more unwieldy constructor.
  Gpio buttonPin(32, true, true);
  buttonPin.dir(DIR_IN);

  // In this infinite loop, we'll blink the LED once whenever someone presses
  //  the button.
  while (1)
  {
    // We *know* that if the IO pin reads as 0, or is low, read() returns zero.
    //  However, if it's high, it *may* return something else; the only guarantee
    //  is that it will be nonzero. Thus, don't test to see if a read() returned
    //  a 1!!!
    if (buttonPin.read() == 0)
    {
      LEDPin.write(1);
      sleep(1);
      LEDPin.write(0);
      sleep(1);
    }
  }

  return MRAA_SUCCESS;
}
Additional Examples
Because this block is just a GPIO access device, the existing MRAA GPIO examples can be used with it.

When you create a new project in the Eclipse IDE, it will offer you the option of several starter projects. Some of them, noted above, are good examples of using the MRAA GPIO functions. They're more complex than what we've provided here, however.
For full documentation of the C++ API for GPIO pins, please visit the official MRAA documentation.