SparkFun Inventor's Kit for Edison Experiment Guide
 Shawn Hymel
Connecting to WiFi
We will want connect our Edison to a local WiFi network if we want to program it using the XDK or complete some of the experiments that require Internet access.
Connecting Over Serial
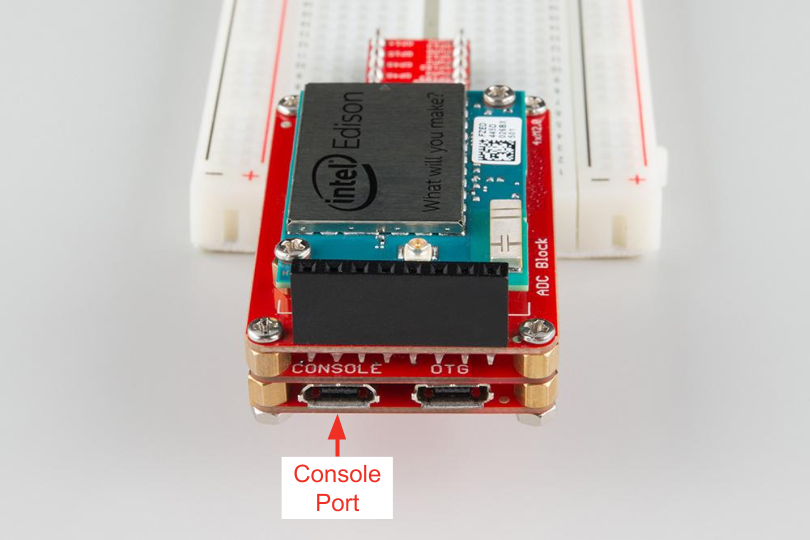
Unplug the USB cable from the OTG port on the Base Block, and plug it into Console port.
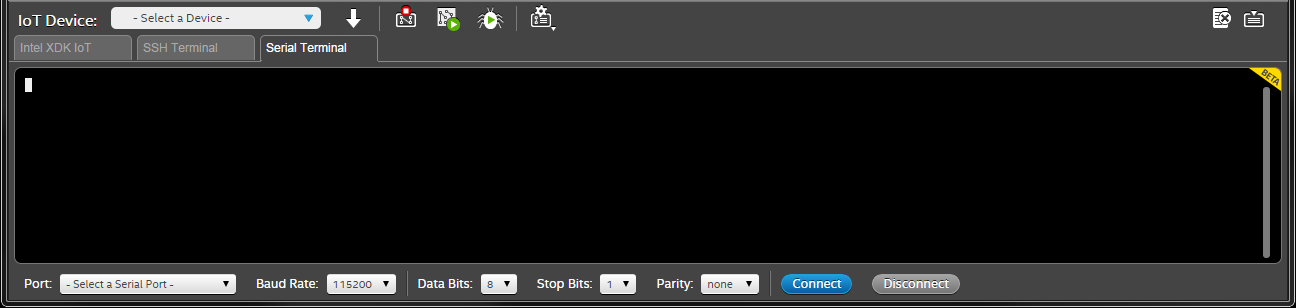
If it is not already open, start the XDK, and create a blank project (like we did in Using the XDK). Click on the Serial Terminal tab.
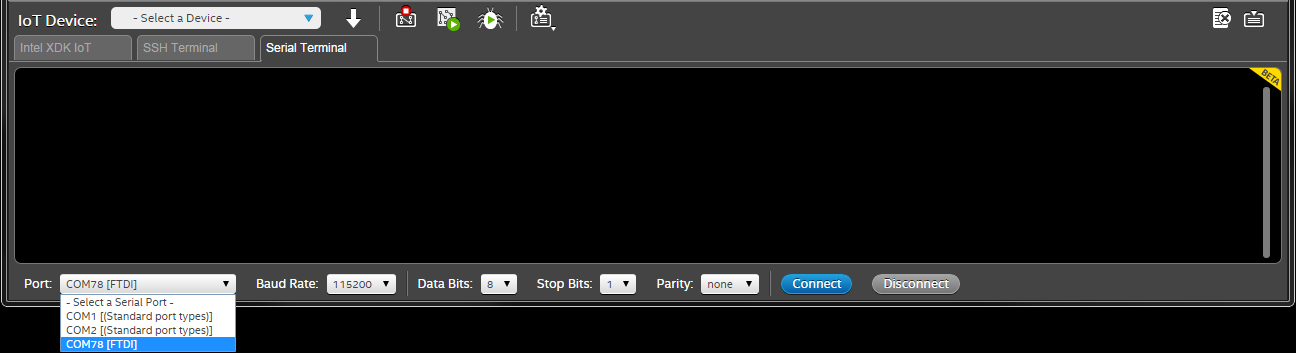
At the very bottom, click the drop-down list for Port and select the Edison device. This will change depending on the operating system. For example, it might be /dev/tty.usbserial-A402IXA0 in OS X, /dev/ttyUSB0 in Linux, or COM78 in Windows. Note that in Windows, you want COMxx[FTDI], not the Standard Serial Port option.
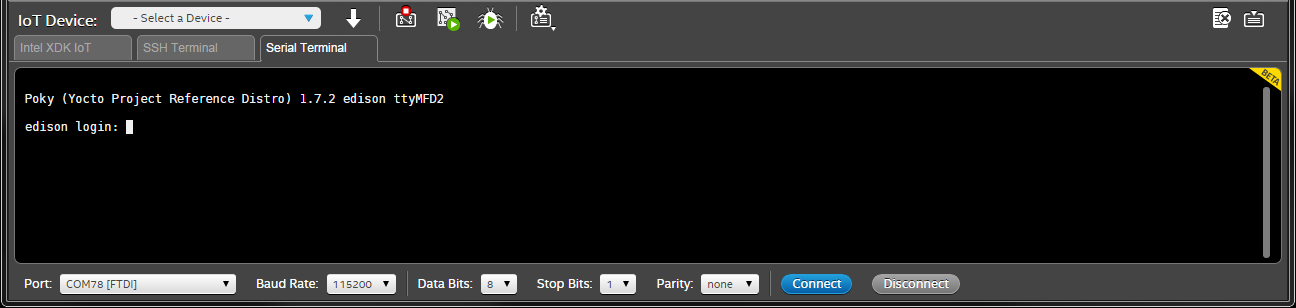
Make sure that the Baud Rate is 115200, Data Bits is 8, Stop Bits is 1, and Parity is "none." Click Connect, and you should see the Edison's terminal login appear.
Getting on the Internet
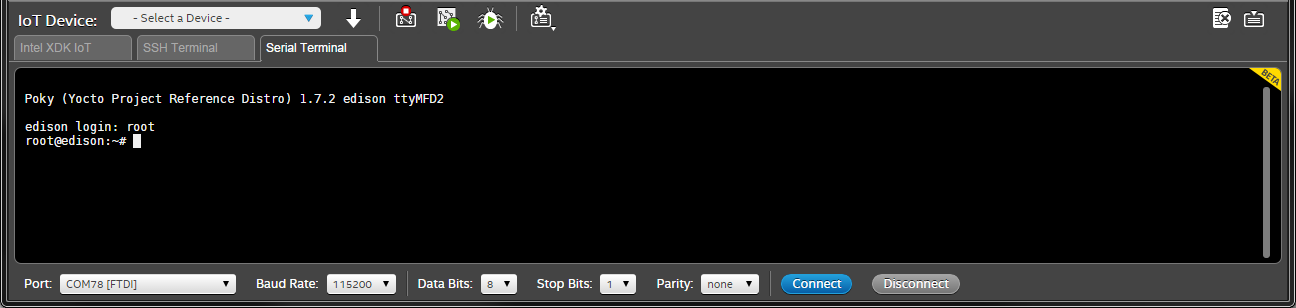
Click in the Serial Terminal window and log in to the Edison:
Username: root
Hit 'enter' (there is no password). You should be presented with a root command prompt.
Enter configure_edison --setup. You will be walked through a series of steps. The first will ask you to create a password.
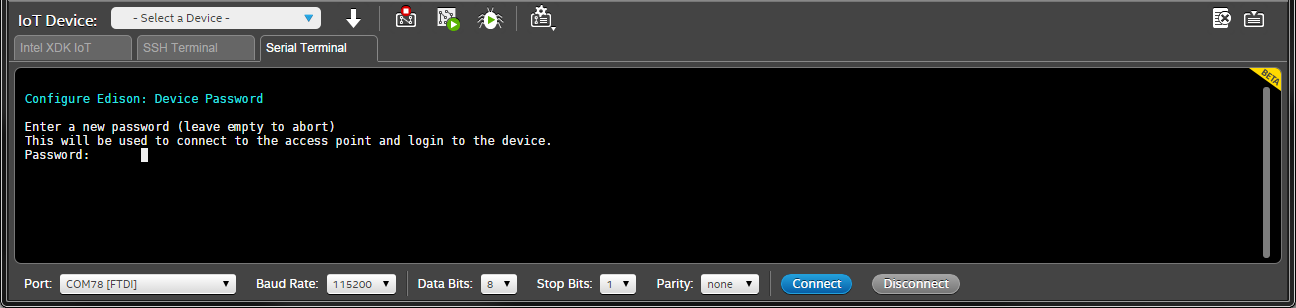
We definitely recommend you set a password! It can be anything you want, so long as you can remember it. If you don't set a password, evil hackers might be able to control your lights from their car. Or read your emails. That would be bad.
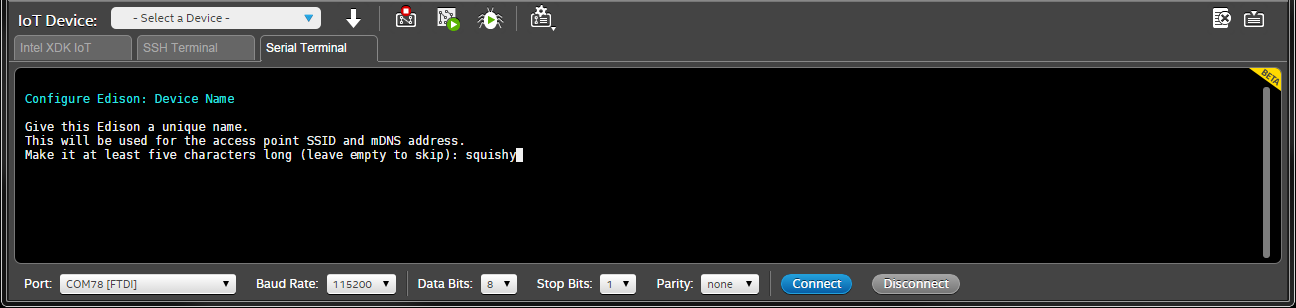
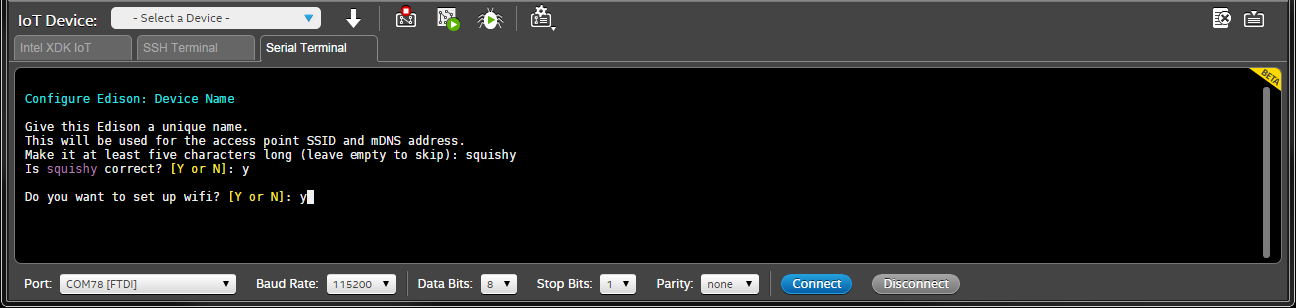
Press 'enter' and enter your password again. On the next screen, you will be asked to rename the Edison. You can give it a unique name or just press 'enter' to keep the default name. I shall call mine squishy.
The Edison will ask you to confirm the name. Type 'y' and press 'enter'. You will then be asked to set up WiFi. Enter 'y' again.
Wait while the Edison scans for networks. You will then be presented with a list of available networks.
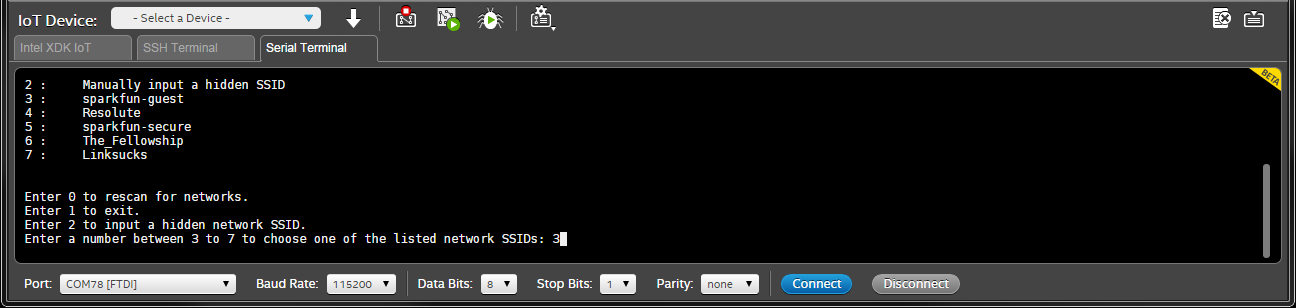
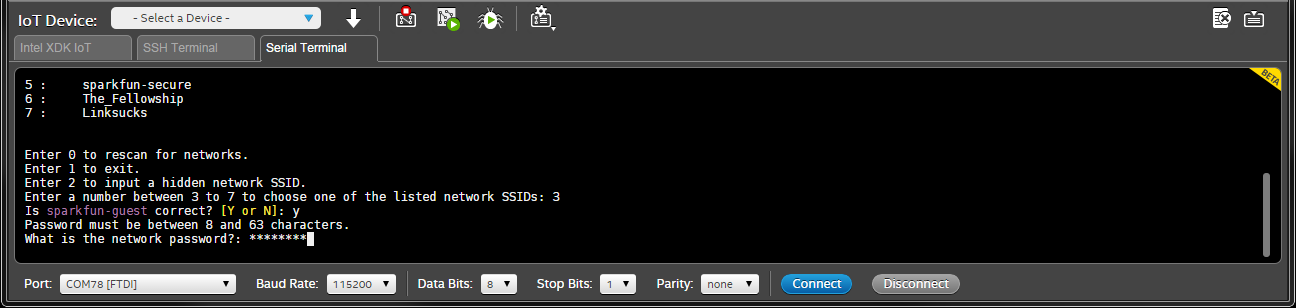
Type the number of the network you would like to join and press 'enter'. Enter 'y' to accept the network, and enter the password for that network.
The Edison should automatically connect to the network. Enter ping 8.8.8.8 to try pinging one of Google's Public DNS servers.
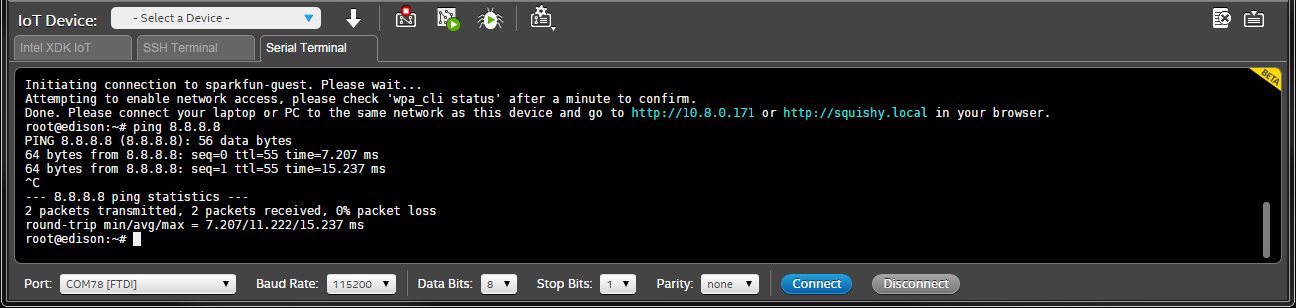
You should see a few responses in the form of "bytes received from 8.8.8.8." Press 'ctrl+c' to stop the pinging. You can get the IP address of the Edison by entering ifconfig.

Under the wlan0 entry, make a note of the inet addr. In my case, it is 10.8.0.171. You can use this to connect to your Edison manually from the IoT Device drop-down menu if, for example, the Bonjour service is not running (if you ran the Installer and accepted all the defaults, Bonjour should have been installed).
ifconfig to see that address if you need it. You can also give your Edison a static IP address, if you so desire. See here to lear more about networking in Linux.