SparkFun Inventor's Kit for Edison Experiment Guide
 Shawn Hymel
 Experiment 9: Weather on an LCD
Introduction
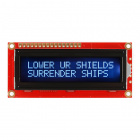
While the Edison itself has no standard port for monitors, we can make use of the GPIO pins to drive a different type of display: the character LCD! These somewhat simplistic liquid crystal displays (LCDs) are capable of drawing characters (and some basic shapes) in 1 or more rows.
In this exercise, we will show how to first display simple strings on the character LCD and then pull weather forecast data from the Internet and display it on the LCD.
Parts Needed
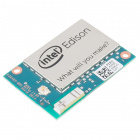
In addition to the Edison and Block Stack, you will need the following parts:
- 1x Breadboard
- 1x Character LCD
- 1x 10k Potentiometer
- 16x Jumper Wires


Suggested Reading
- How LCDs Work -- Learn how a liquid crystal display does its thing
- OpenWeatherMap -- Why is it cool?
Concepts
Parallel Interface
The character LCD that we will be using relies on a parallel interface. Instead of a predefined protocol like I2C or UART, the parallel interface sets up the bits on the wires and clocks them in on another wire.
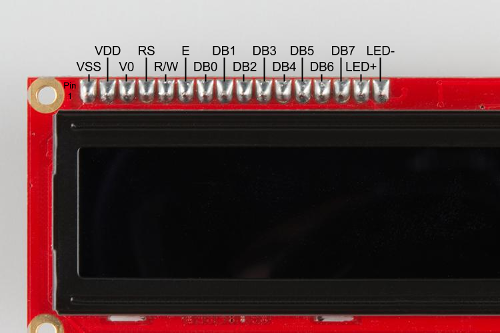
In our case, we will be using the LCD in 4-bit mode. We write a half-byte (nybble) by setting D4-D7 to the nybble. For example, b1011 would be HIGH, LOW, HIGH, HIGH on D4-D7. Then, we would set the R/W pin to LOW (for "write"). Finally, we toggle the E pin from LOW to HIGH, hold it for at least 150 ns, and then toggle it back LOW. This "latches" the data into the LCD. We can send all sorts of commands and data over to LCD with this!
Luckily, we won't have to write that interface in code ourselves. We have Johnny Five to the rescue!
Johnny Five

Johnny-Five is a JavaScript framework for programming robotics. Much like MRAA, it simplifies the calls we need to make to control various pieces of hardware. At the time of this writing, MRAA did not support parallel interface character LCDs, but Johnny-Five does!
Johnny-Five has support for several boards, and the Edison is one of them. As a result, we can include Johnny-Five in our program (like any Node module), and have it handle LCD communications for us.
Yahoo Weather
There are plenty of weather APIs out there, and all of them would likely work for getting current weather data about a particular city. However, Yahoo Weather allows us to make calls without signing up for an account and returns data in JSON format, which is easily parsed by JavaScript.
We can perform a database lookup on Yahoo's weather servers by constructing a SQL-like string called "YQL". In this example, we will ultimately create a program that constructs a YQL that requests weather data for a particular city and sends it to Yahoo. Yahoo then returns a JSON object that we can parse for temperature and weather conditions.
We realize that we are glossing over SQL and YQL, as they are languages in their own right. To learn more about YQL, visit the Yahoo YQL page.
JSON
JavaScript Object Notatation, or JSON, is a text format for exchanging data between computers. It has the benefit of also being easily read by humans. It consists of a collection of name and value pairs (given as "name" : "value") within an object (as denoted by curly braces {}).
Objects and strings within JSON can aslo be stored in an ordered array (as denoted by brackets []).
Here is an example of a JSON object (from http://json.org/example.html):
language:javascript
{
    "glossary": {
        "title": "example glossary",
        "GlossDiv": {
            "title": "S",
            "GlossList": {
                "GlossEntry": {
                    "ID": "SGML",
                    "SortAs": "SGML",
                    "GlossTerm": "Standard Generalized Markup Language",
                    "Acronym": "SGML",
                    "Abbrev": "ISO 8879:1986",
                    "GlossDef": {
                        "para": "A meta-markup language, used to create markup languages such as DocBook.",
                        "GlossSeeAlso": ["GML", "XML"]
                    },
                    "GlossSee": "markup"
                }
            }
        }
    }
}
Because this looks very much like a JavaScript object, we can easily parse it with the JSON.parse() method. After that, we can access values just by giving the name. For example, if we assigned the above example to myJSON and parsed it, myJSON.glossary.GlossDiv.title would return the string S.
Hardware Hookup
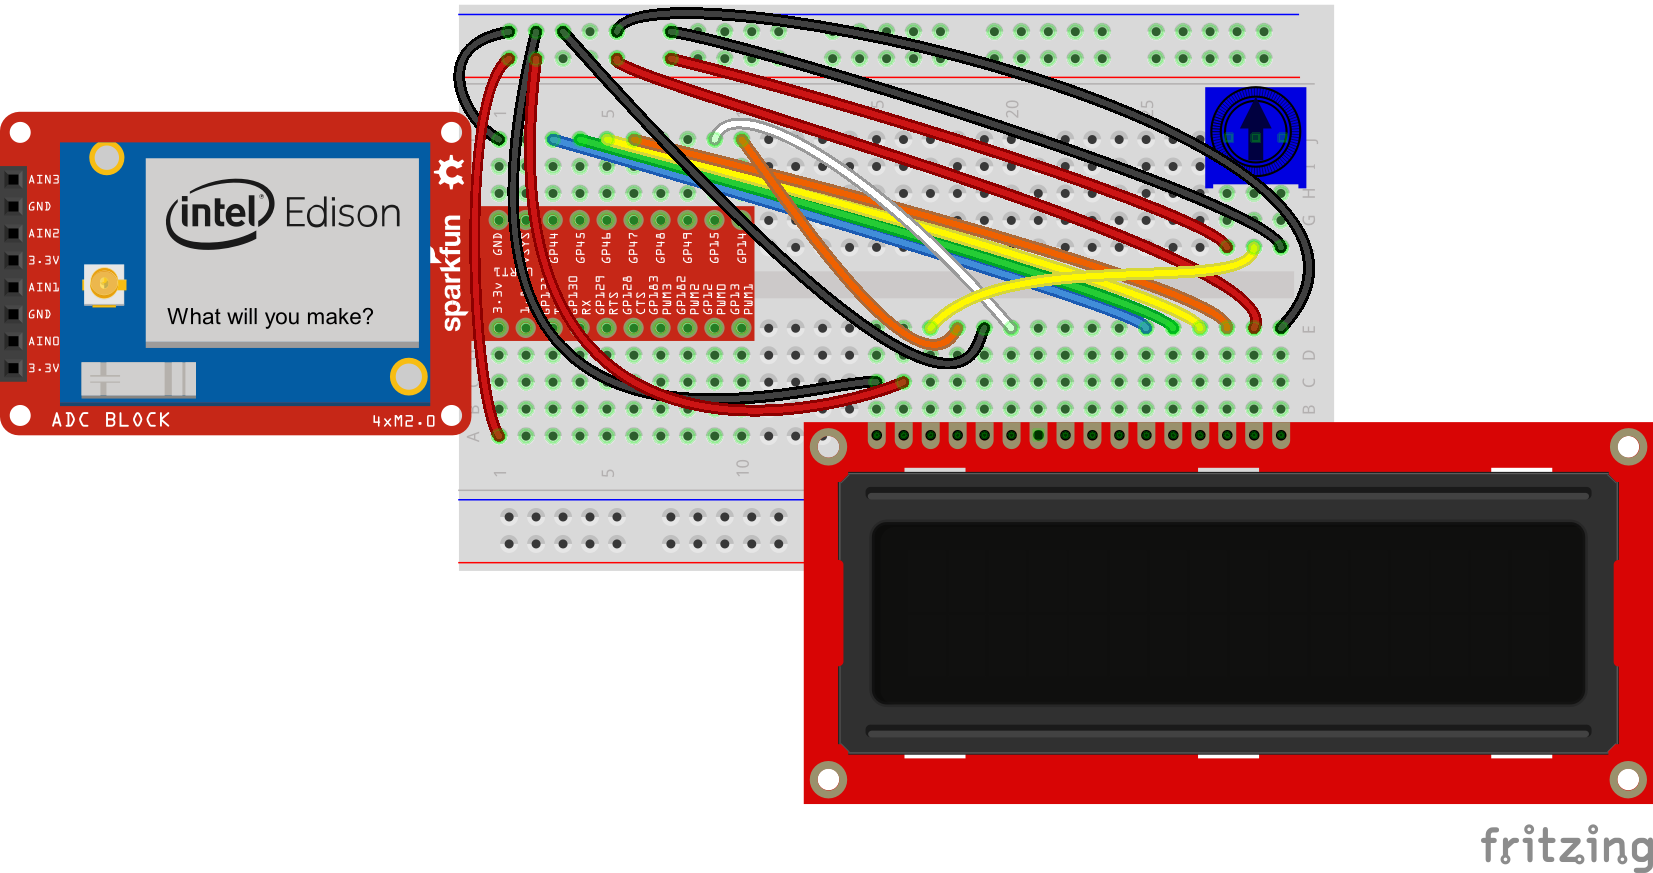
Part 1: A Simple LCD Message
The Code
Create a new Blank Template IoT Application. In package.json, paste in the following:
language:javascript
{
  "name": "blankapp",
  "description": "",
  "version": "0.0.0",
  "main": "main.js",
  "engines": {
    "node": ">=0.10.0"
  },
  "dependencies": {
      "johnny-five": "0.9.11",
      "edison-io": "0.8.18"
  }
}
In main.js, paste in the following:
language:javascript
/*jslint node:true, vars:true, bitwise:true, unparam:true */
/*jshint unused:true */
// Leave the above lines for propper jshinting

/**
 * SparkFun Inventor's Kit for Edison
 * Experiment 9 - Part 1: Character LCD
 * This sketch was written by SparkFun Electronics
 * November 28, 2015
 * https://github.com/sparkfun/Inventors_Kit_For_Edison_Experiments
 *
 * Display a simple string on the character LCD.
 *
 * Released under the MIT License(http://opensource.org/licenses/MIT)
 */

// We'll need johnny-five and its Edison wrapper
var five = require('johnny-five');
var Edison = require('edison-io');

// Create a new Johnny-Five board object that we will use to talk to the LCD
var board = new five.Board({
    io: new Edison()
});

// Global variables
var lcd;

// Initialization callback that is called when Johnny-Five is done initializing
board.on('ready', function() {

    // Create our LCD object and define the pins
    // LCD pin name:    RS  EN DB4 DB5 DB6 DB7
    // Edison GPIO:     14  15  44  45  46  47
    lcd = new five.LCD({
        pins: ["GP14", "GP15", "GP44", "GP45", "GP46", "GP47"],
        rows: 2,
        cols: 16
    });

    // Make sure the LCD is on, has been cleared, and the cursor is set to home
    lcd.on();
    lcd.clear();
    lcd.home();

    // Print our string
    lcd.print("Hello, world...");

    // Move to the second line, and continue our thought
    lcd.cursor(1, 0);
    lcd.print("...again.");
});
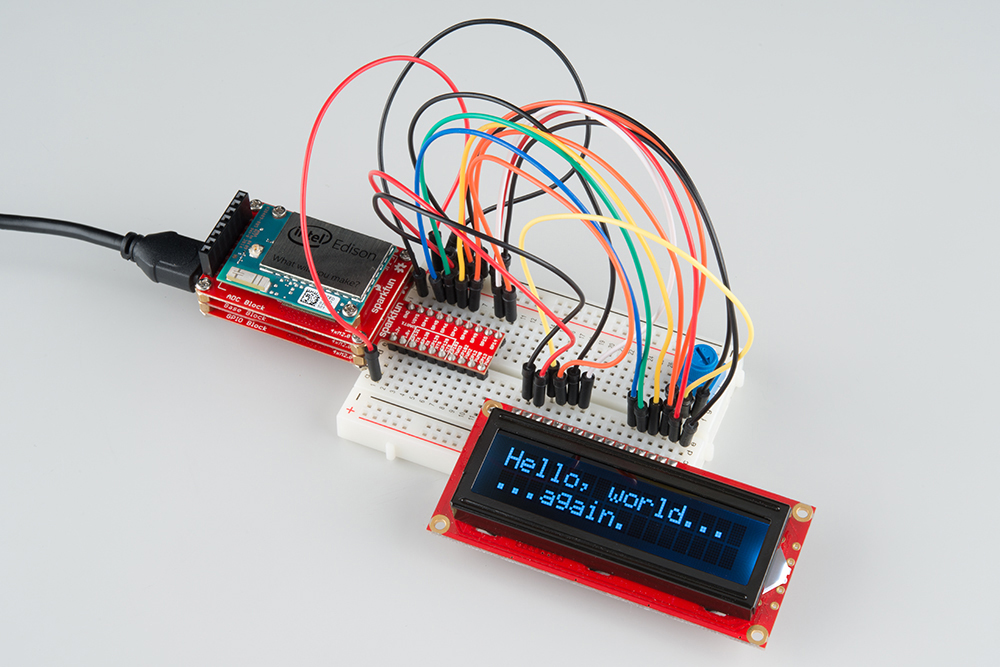
What You Should See
Run the program, and you should see some familiar text on the LCD. Turn the potentiometer's knob to adjust the contrast of the LCD until you see the text appear.
Code to Note
Like any good asynchronous JavaScript library, Johnny-Five requires us to create an instance of the boarr, which we do with new five.Board(), and then wait for the board to finish initializing. We provide a callback function within board.on('ready', ...) that is run when Johnny-Five is done initializing.
Within that callback, we create an instance of our LCD (affectionately named lcd), which is part of hte Johnny-Five library. When we create the LCD object, we assign raw pin numbers to the LCD. After that, we are free to use any of the LCD methods as defined by the API. For our purposes, we make sure the LCD is on, clear it, move the cursor back to the starting position, and write some text to it.
Part 2: Weather Information
The Code
Now, we get to make our LCD do something a little more interesting. Create a new blank IoT Application template, and copy the following into package.json:
language:javascript
{
  "name": "blankapp",
  "description": "",
  "version": "0.0.0",
  "main": "main.js",
  "engines": {
    "node": ">=0.10.0"
  },
  "dependencies": {
      "johnny-five": "0.9.11",
      "edison-io": "0.8.18"
  }
}
In main.js, copy in the following code:
language:javascript
/*jslint node:true, vars:true, bitwise:true, unparam:true */
/*jshint unused:true */
// Leave the above lines for propper jshinting

/**
 * SparkFun Inventor's Kit for Edison
 * Experiment 9 - Part 2: Weather
 * This sketch was written by SparkFun Electronics
 * November 29, 2015
 * https://github.com/sparkfun/Inventors_Kit_For_Edison_Experiments
 *
 * Download a city's weather information from Yahoo Weather
 * (https://developer.yahoo.com/weather/) and display that city's
 * temperature and current condition.
 *
 * Released under the MIT License(http://opensource.org/licenses/MIT)
 */

// We'll need johnny-five, the Edison wrapper, and OpenWeatherMap
var five = require('johnny-five');
var Edison = require('edison-io');
var http = require('http');

// Replace this with the city you want to get the weather from
var cityStr = "Boulder, CO";

// Create a new Johnny-Five board object that we will use to talk to the LCD
var board = new five.Board({
    io: new Edison()
});

// Initialization callback that is called when Johnny-Five is done initializing
board.on('ready', function() {

    // Create our LCD object and define the pins
    // LCD pin name:    RS  EN DB4 DB5 DB6 DB7
    // Edison GPIO:     14  15  44  45  46  47
    lcd = new five.LCD({
        pins: ["GP14", "GP15", "GP44", "GP45", "GP46", "GP47"],
        rows: 2,
        cols: 16
    });

    // Make sure the LCD is on, has been cleared, and the cursor is set to home
    lcd.on();
    lcd.clear();
    lcd.home();

    // Print a splash string
    lcd.print("My Weather App");

    // Start getting weather data
    setInterval( function() {
        getTemperature(cityStr, lcd);
    }, 5000);
});

// A function to make a request to the Yahoo Weather API
function getTemperature(cityReq, lcd) {

    // Construct YQL (https://developer.yahoo.com/weather/)
    var yql = "select * from weather.forecast where woeid in " +
              "(select woeid from geo.places(1) where text='" + cityReq + "')";

    // Construct GET request
    var getReq = "http://query.yahooapis.com/v1/public/yql?q=" +
                    yql.replace(/ /g,"%20") +
                    "&format=json&env=store%3A%2F%2Fdatatables.org%2" +
                    "Falltableswithkeys";

    // Make the request
    var request = http.get(getReq, function(response) {

        // Where we store the response text
        var body = '';

        //Read the data
        response.on('data', function(chunk) {
            body += chunk;
        });

        // Print out the data once we have received all of it
        response.on('end', function() {
            if (response.statusCode === 200) {
                try {

                    // Parse the JSON to get the pieces we need
                    var weatherResp = JSON.parse(body);
                    var channelResp = weatherResp.query.results.channel;
                    var conditionResp = channelResp.item.condition;

                    // Extract the city and region
                    var city = channelResp.location.city;
                    var region = channelResp.location.region;

                    // Get the local weather
                    var temperature = conditionResp.temp;
                    var tempUnit = channelResp.units.temperature;
                    var description = conditionResp.text;

                    // Construct city and weather strings to be printed
                    var cityString = city + ", " + region;
                    var weatherString = temperature + tempUnit + " " +
                                        description;

                    //Print the city, region, time, and temperature
                    console.log(cityString);
                    console.log(weatherString + "\n");

                    // Truncate the city and weather strings to fit on the LCD
                    cityString = cityString.substring(0, 16);
                    weatherString = weatherString.substring(0, 16);

                    // Print them on the LCD
                    lcd.clear();
                    lcd.home();
                    lcd.print(cityString);
                    lcd.cursor(1, 0);
                    lcd.print(weatherString);

                } catch(error) {

                    // Report problem with parsing the JSON
                    console.log("Parsing error: " + error);
                }
            } else {

                // Report problem with the response
                console.log("Response error: " +
                            http.STATUS_CODES[response.statusCode]);
            }
        })
    });

    // Report a problem with the connection
    request.on('error', function (err) {
        console.log("Connection error: " + err);
    });
}
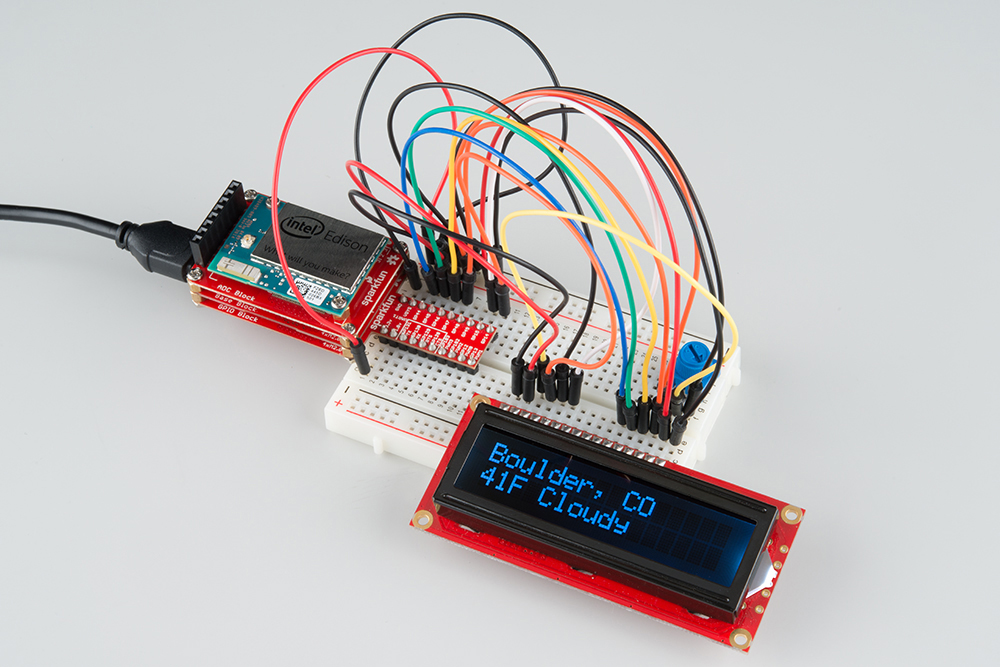
What You Should See
Run the code on the Edison, and you should see a splash screen of "My Weather App", which will then change into the weather for Boulder, CO.
Code to Note
We have used the http module before to create a server, but now, we are using it to issue HTTP GET requests to a remote server. In this case, we construct a query consisting of the city we want to search for usign YQL. We send that request to Yahoo with http.get().
Once again, we create a callback, but this time in http.get(). If all goes well, Yahoo's server responds with the code "200" (which means "OK" in HTTP code-speak) along with a JSON containing the requested data.
We parse that data with JSON.parse() and extract the pieces we want (city, region, temperature, temperature unit, and weather condition. We then display that information both in the console and on the LCD.
Troubleshooting
- The LCD does not work or displays garbage -- More than likely, this is a wiring problem. Double-check the wires and move them around to make sure they are making good contact in the breadboard.
- The LCD is on but not displaying anything -- Turn the knob on the potentiometer to adjust the contrast on the LCD.
- I get errors trying to request weather data -- This could be a few things:
- Make sure the Edison has an Internet connection (try logging in and issuing a
pingcommand from the Edison) - Make sure that
citystris a viable location request to YQL. Try a known location first, such as "Boulder, CO".
- Make sure the Edison has an Internet connection (try logging in and issuing a
Going Further
Challenges
- Go back to part 1 and make the LCD say something of your choosing, for example, your name.
- Notice that we are truncating the strings before we send them to the LCD in part 2. Have the LCD scroll the text so that we don't have to truncate it. Hint: See the Johnny-Five LCD API.
- Display a different piece of weather information on the LCD. For example, show the wind speed of a city of your choosing.