SparkFun Inventor's Kit for Edison Experiment Guide
 Shawn Hymel
Using the XDK
If you have used other Integrated Development Environments before, the Intel® XDK IoT Edition might look familiar. If not, no worries! We will walk you through how to use the XDK (don't worry, it's not very complicated). If you would like to take a look at Intel's official documentation on the XDK, it can be found here:
Starting the XDK for the First Time
Start the Intel® XDK IoT Edition program, and you should be presented with a login screen.

Click Sign Up if you do not already have an Intel Developer Zone Account (don't worry, it's free), and follow the on-screen instructions to create a new account. You will need to accept another Terms and Conditions statement.
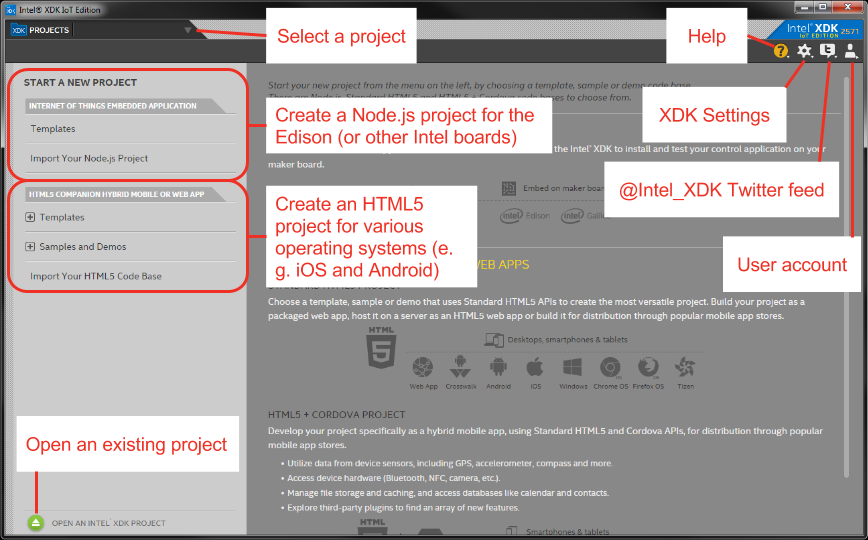
The Welcome Screen
Once you have created an account (or not), you will be presented with the welcome screen. In this screen, you can choose an existing project to work on or create a new one.
Creating a Project
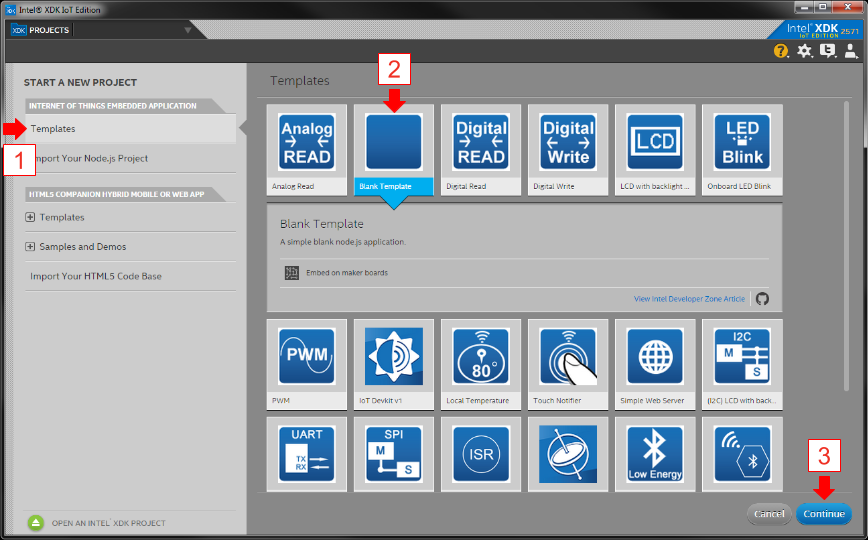
To familiarize ourselves with the XDK IDE, we will create a blank project. Click on Templates under the Internet of Things Embedded Application tab. You will see a number of different templates appear that will help you get started with your IoT program. Select the Blank Template.
Click Continue, and you will be presented with a pop-up window to name your project. You can name it anything you want, as we are just using it to explore the IDE right now. To keep all my XDK projects together, I like to use the prefix "XDK_". I will use "XDK_Blank" for this example.
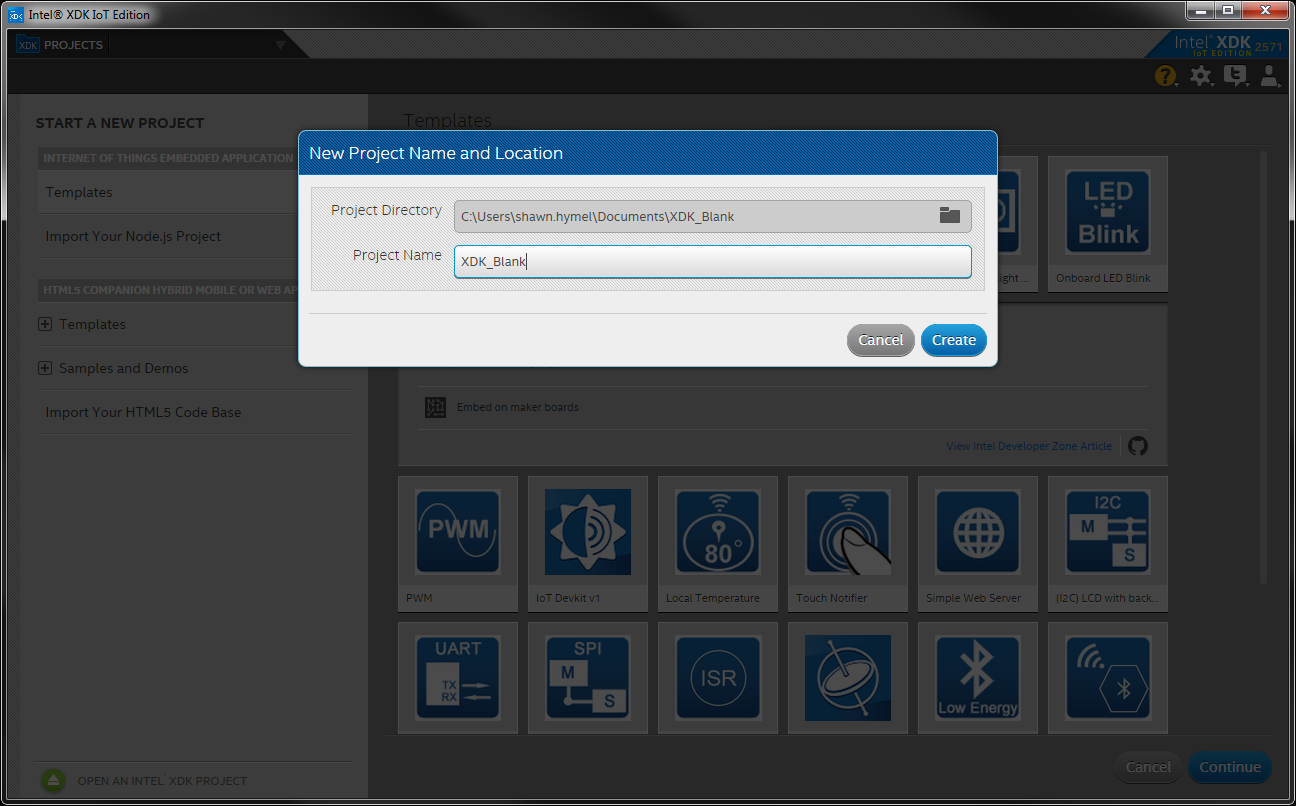
Click Create. The project screen will greet you with a mostly empty JavaScript file.
The Project Screen
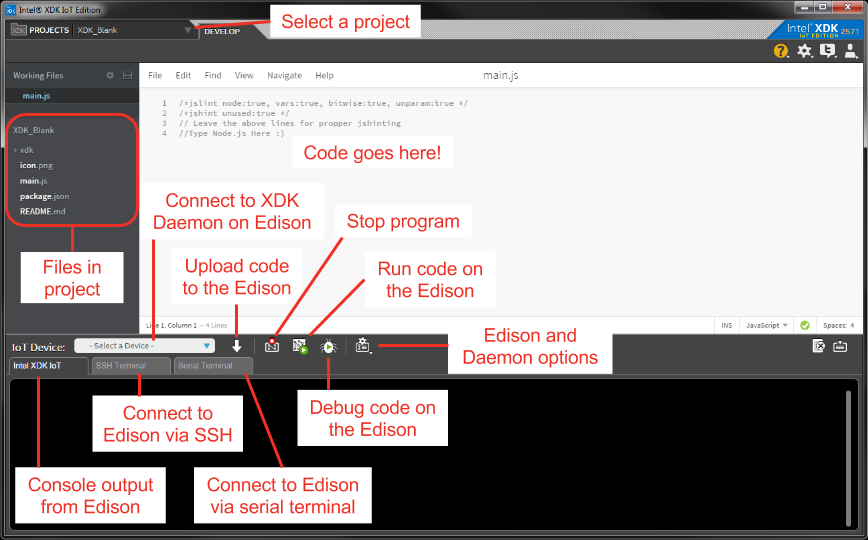
We use the XDK to write code. There are several tools available that help us do that: code examples, syntax completion, a debugging interface, and so on. Once we have finished writing code, we click the Upload button to send that code to the Edison. The Run button then tells the Edison to run the code we just sent to it.
By default, the Yocto image on the Edison contains an "XDK Daemon." A daemon is a computer program that runs in the background (at least according to Wikipedia). The XDK Daemon begins running as soon as the Edison boots and listens for a connection from a host computer (i.e. one running the XDK IoT Edition). It knows how to receive and store new code, and it will accept commands from the host computer to run, stop, and debug that program.