SparkFun Inventor's Kit for Photon Experiment Guide
 Joel_E_B
 b_e_n
b_e_n HelloTechie
 Knutson
 jimblom
 RBERLIA
Experiment 3: Houseplant Monitor
Introduction
This experiment uses a soil moisture sensor to allow you to monitor your houseplants. The first half of the experiment will introduce the concept of Analog Inputs, which allow us to read values that vary between two known thresholds rather than just being a HIGH or LOW digital value. You will use a built in Analog-to-Digital Converter on the Photon RedBoard to read the analog value coming from the soil moisture sensor. In the second half, we will expose that analog variable to the Particle Cloud so that other online applications can request the current moisture content and send you notifications when your plant needs watering.
Parts Needed
You will need the following parts:
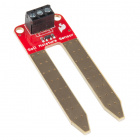
- 1x Soil Moisture Sensor
- 3x Jumper Wire

Tools Needed
You will need the screwdriver included in the Photon SIK. Find the second smallest flathead head tip, labeled CR-V 2.0, and insert it into the tip of the screwdriver.
Suggested Reading
Before continuing on with this experiment, we recommend you be familiar with the concepts in the following tutorials:
- Analog vs Digital - Before you can use analog inputs, you should have a good understanding of the difference between analog and digital.
- Analog to Digital Conversion (ADC) - This is a general explanation of how analog inputs work.
- Particle Cloud Variables - We will use this feature to expose our variable to the Internet in the second half of the experiment.
- Soil Moisture Sensor Hookup Guide - For more information on the soil moisture sensor, visit this tutorial.
- Serial Terminal Basics - This experiment will introduce you to Serial Print, which is a great way to print out variables and other info for testing and troubleshooting.
Hardware Hookup
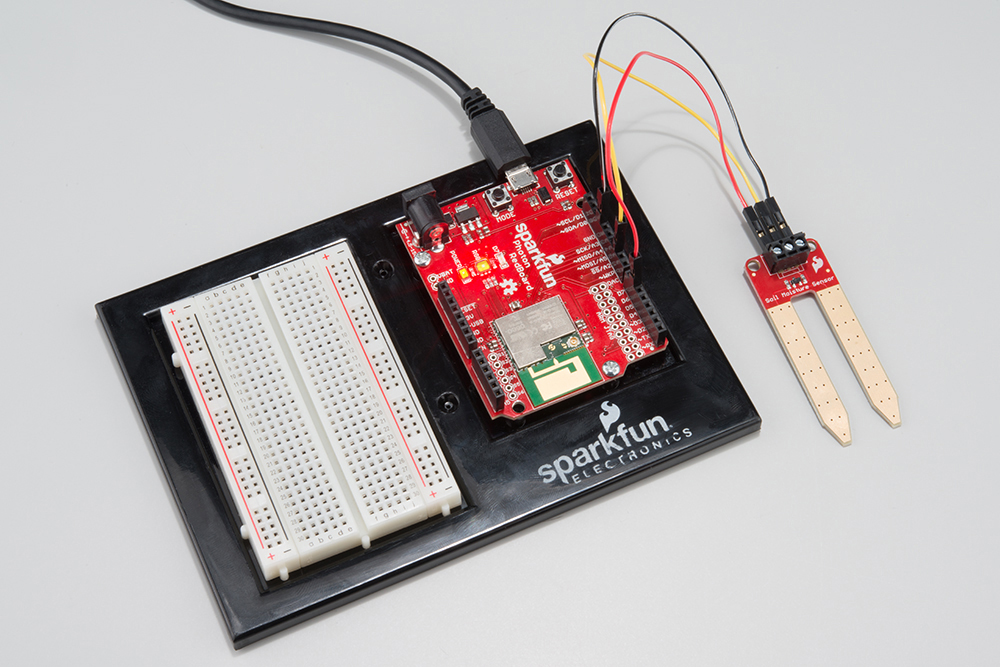
Hook up your circuit as pictured below:
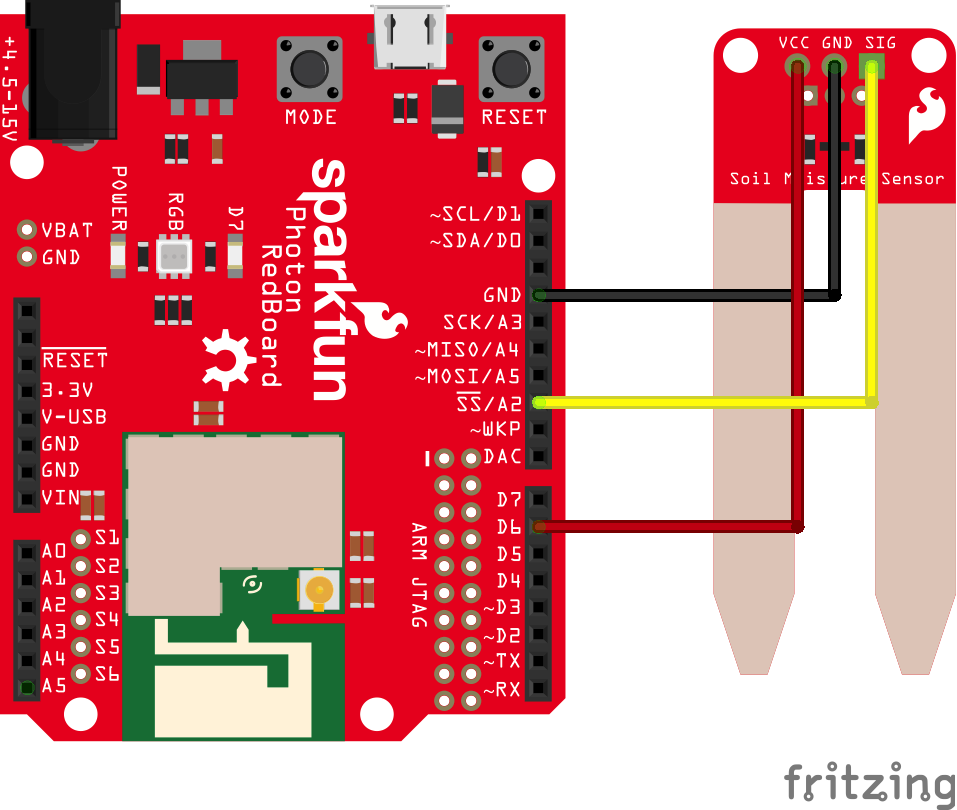
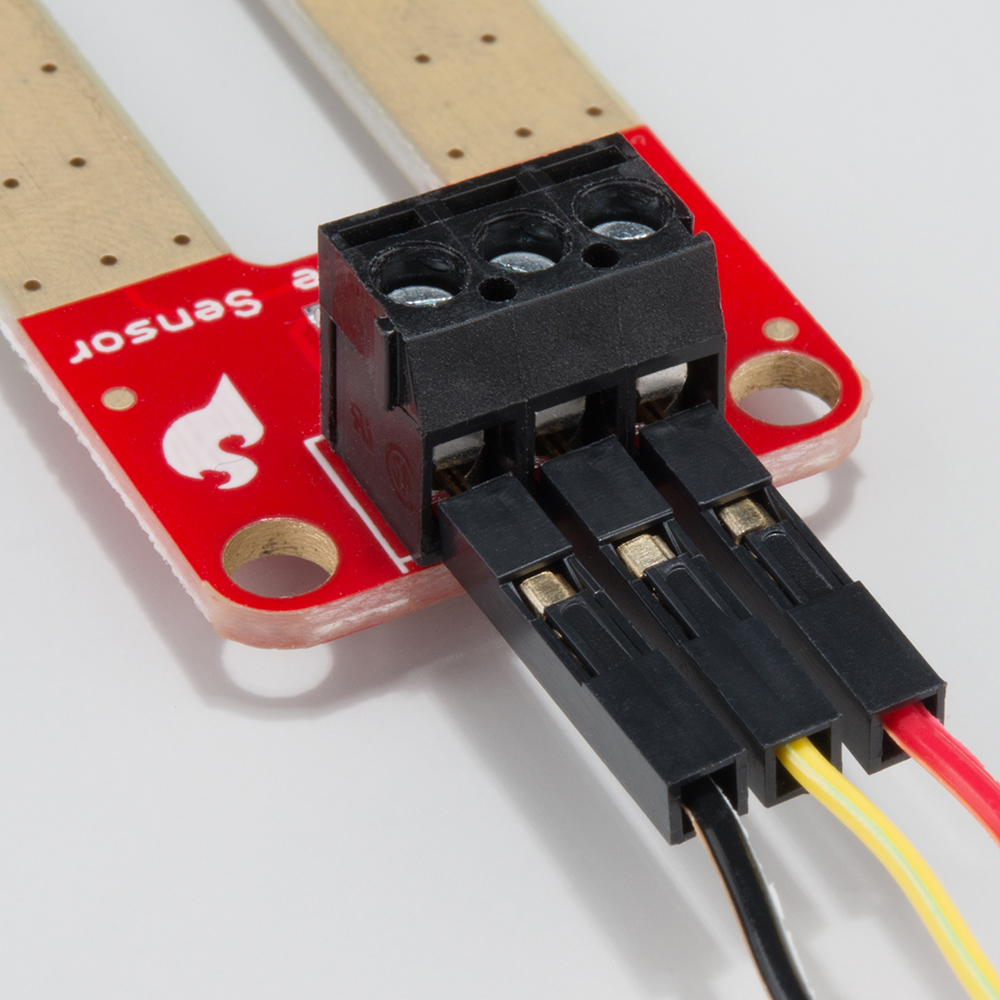
The easiest way to connect the soil moisture sensor to the RedBoard is to insert one end of each jumper wire into the 3-pin screw terminal attached to the soil sensor, and then screw each pin down until the jumper wire is secured and won't pull out of the screw terminal.
Photon Code
Copy and paste this code into the IDE. Then upload.
language:c
/*  SparkFun Inventor's Kit for Photon
    Experiment 3 - Part 1: LED Houseplant Monitor
    This sketch was written by SparkFun Electronics
    Joel Bartlett <joel@sparkfun.com>
    August 31, 2015
    https://github.com/sparkfun/Inventors_Kit_For_Photon_Experiments

    This application monitors the moisture level of your houseplant
    and turns the RGB LED red when the plant needs watered.
    Development environment specifics:
    Particle Build environment (https://www.particle.io/build)
    Particle Photon RedBoard
    Released under the MIT License(http://opensource.org/licenses/MIT)
*/
int val = 0;//variable to store soil value
int soil = A2;//Declare a variable for the soil moisture sensor
int soilPower = D6;//Variable for Soil moisture Power
//Rather than powering the sensor through the V-USB or 3.3V pins,
//we'll use a digital pin to power the sensor. This will
//prevent oxidation of the sensor as it sits in the corrosive soil.

void setup()
{
Serial.begin(9600);   // open serial over USB

pinMode(soilPower, OUTPUT);//Set D6 as an OUTPUT
digitalWrite(soilPower, LOW);//Set to LOW so no power is flowing through the sensor
}

void loop()
{
Serial.print("Soil Moisture = ");
//get soil moisture value from the function below and print it
Serial.println(readSoil());

delay(1000);//take a reading every second
//This time is used so you can test the sensor and see it change in real-time.
//For in-plant applications, you will want to take readings much less frequently.

    //If your soil is too dry, turn on Red LED to notify you
    //This value will vary depending on your soil and plant
    if(readSoil() < 200)
    {
      // take control of the RGB LED
      RGB.control(true);
      RGB.color(255, 0, 0);//set RGB LED to Red
    }
    else
    {
      // resume normal operation
      RGB.control(false);
    }
}
//This is a function used to get the soil moisture content
int readSoil()
{
    digitalWrite(soilPower, HIGH);//turn D6 "On"
    delay(10);//wait 10 milliseconds
    val = analogRead(soil);
    digitalWrite(soilPower, LOW);//turn D6 "Off"
    return val;
}
What You Should See
Once the code is uploaded to your Photon RedBoard, open your favorite Serial Terminal program. Connect to the Photon RedBoard. You should see soil moisture data begin to stream in the window.
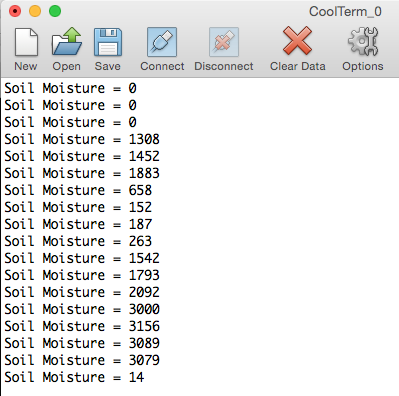
When the sensor detects very little moisture, the RGB LED on the Photon RedBoard will turn Red, notifying you that your plant needs watered. When the moisture level is satisfactory, the LED will breathe cyan, as usual.
Code to Note
Serial
Among other things, this example introduces serial communication with functions like Serial.begin() and Serial.print(). To initialize a serial interface, call Serial.begin([baud]) where [baud] sets the baud rate of the interface. In this example, we set the baud rate to 9600bps -- a reliable (if slow) standard rate -- in the setup() function:
language:c
void setup()
{
    ...
    Serial.begin(9600); // Start the serial interface at 9600 bps
    ...
}
To send data out of a serial interface, use either Serial.print(), Serial.println(), or Serial.write(). This example only uses the first two.
language:c
Serial.print("Soil Moisture = ");
//get soil moisture value from the function below and print it
Serial.println(readSoil());
For more information on Serial functions, check out Particle's reference documentation.
Functions
int readSoil() is a user-made function. As with any other object-oriented language, you can declare your own functions that can be passed and can return different types of variables.
This function has no parameters passed to it, but it does return the soil moisture value as an integer (INT). You can create your own functions to accomplish tasks that you do not want to type out over and over again. Instead, you can call that function anywhere you would have written all that other code.
Troubleshooting
- Configuring the soil sensor can take a little trial and error. Different soils and moisture levels will result in different data. To get good values on which to base your plant's condition, it best to take a reading when it is is as dry as possible without jeopardizing the plant's well being. Take another reading after you've recently watered the plant to get your upper threshold. You can then adjust the code accordingly.
Part 2: Particle Variables
Being notified visually that your plant needs watered is useful, but what about when you leave for a week? How will you know if your plant is happy and thriving while you're gone? One way to give you a view into your plants status is to use the Particle.variable function, which is a built-in feature of the Particle firmware. This second example will use this feature to allow you to check the status of your plant anywhere that you have an Internet connection.
New Photon Code
Copy, paste and upload this new sketch. You'll notice not much has changed. The Particle.variable("soil", &val, INT); line is the only new addition.
language:c
/*  SparkFun Inventor's Kit for Photon
    Experiment 3 - Part 2: Internet Houseplant Monitor
    This sketch was written by SparkFun Electronics
    Joel Bartlett <joel@sparkfun.com>
    August 31, 2015
    https://github.com/sparkfun/Inventors_Kit_For_Photon_Experiments

    This application monitors the moisture level of your houseplant
    and exposes that data to be monitored via the Internet.
    Development environment specifics:
    Particle Build environment (https://www.particle.io/build)
    Particle Photon RedBoard
    Released under the MIT License(http://opensource.org/licenses/MIT)
*/
int val = 0;//variable to store soil value
int soil = A2;//Declare a variable for the soil moisture sensor
int soilPower = D6;//Variable for Soil moisture Power
//Rather than powering the sensor through the V-USB or 3.3V pins,
//we'll use a digital pin to power the sensor. This will
//prevent oxidation of the sensor as it sits in the corrosive soil.

void setup()
{
Serial.begin(9600);   // open serial over USB

pinMode(soilPower, OUTPUT);//Set D6 as an OUTPUT
digitalWrite(soilPower, LOW);//Set to LOW so no power is flowing through the sensor

//This line creates a variable that is exposed through the cloud.
//You can request its value using a variety of methods
Particle.variable("soil", &val, INT);
}

void loop()
{
Serial.print("Soil Moisture = ");
//get soil moisture value from the function below and print it
Serial.println(readSoil());

delay(1000);//take a reading every second
//This time is used so you can test the sensor and see it change in real-time.
//For in-plant applications, you will want to take readings much less frequently.

    //If your soil is too dry, turn on Red LED to notify you
    //This value will vary depending on your soil and plant
    if(readSoil() < 200)
    {
      // take control of the RGB LED
      RGB.control(true);
      RGB.color(255, 0, 0);//set RGB LED to Red
    }
    else
    {
      // resume normal operation
      RGB.control(false);
    }
}
//This is a function used to get the soil moisture content
int readSoil()
{
    digitalWrite(soilPower, HIGH);//turn D6 "On"
    delay(10);//wait 10 milliseconds
    val = analogRead(soil);
    digitalWrite(soilPower, LOW);//turn D6 "Off"
    return val;
}
What You Should See
If you haven't already, place your sensor in the plant you would like to monitor.

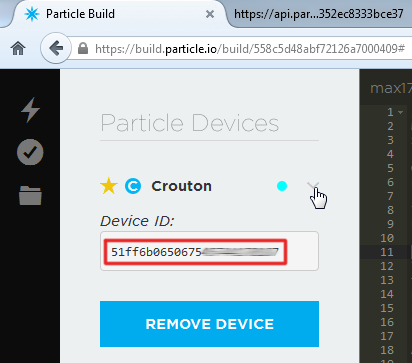
You can open the serial terminal to see the soil moisture value, as in the previous example. However, you can now also request that same value through the web. In order to do so, you'll need your Photon's device ID as well as your account's access token. The device ID can be found in Particle Build by clicking the '>' next to your device name.
Your access token can be found under the "Settings" tab.

Armed with those long strings of hex characters, open a new browser tab and navigate to:
https://api.particle.io/v1/devices/DEVICE_ID/soil?access_token=ACCESS_TOKEN
Make sure to sub in the proper values for DEVICE_ID and ACCESS_TOKEN.
If everything was entered correctly, you should see something like this where 'result' is the current value:
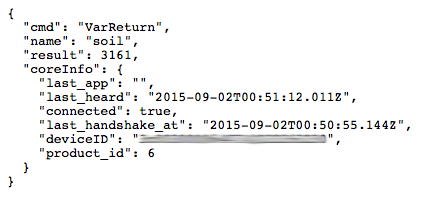
Now, you can create a bookmark using that URL. Every time you refresh that page, you'll get the current status of your plant! You can expand upon this in many ways. You can use examples from other experiments to get email notifications when your plant needs water, or you could even build an webpage that pulls that value in and displays it in a more visually appealing manner.
Code to Note
The Particle.variable("soil", &val, INT); line is the only new addition to this code, however, it is a very important addition, allowing for other applications to request the soil moisture value. The first parameter is the name of the exposed variable. This will be the name your request in the URL. You can declare up to 10 cloud variables, and each variable name is limited to a max of 12 characters. The second parameter requires a basic understanding of pointers. The ampersand (&) symbol means the address of the variable it precedes, so in this case it's requesting the value that resides at the memory address allocated to the val variable, which contains the current soil moisture value. The last parameter is the type of variable that will be exposed, in this case an integer. For more info on cloud variables, visit the particle website.
Troubleshooting
- Having issues seeing the online data? Make sure you have grabbed the correct Device ID for the board you are working with. If you have numerous Particle devices associated with your account, it's easy to get the device ID from device mixed up with that of another. If you see a 'Permission Denied' error like the one below, you either have the wrong device ID, or there is a typo in the ID you're attempting to use.

- Similarly, you may get an access token error. If so, visit the Settings section of Particle Build, and reset your access token or make sure there is no typos.


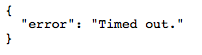
- If you get a time out error, make sure your device is properly powered and connected to the web.