SparkFun ProDriver Hookup Guide
 QCPete, santaimpersonator
Hardware Assembly
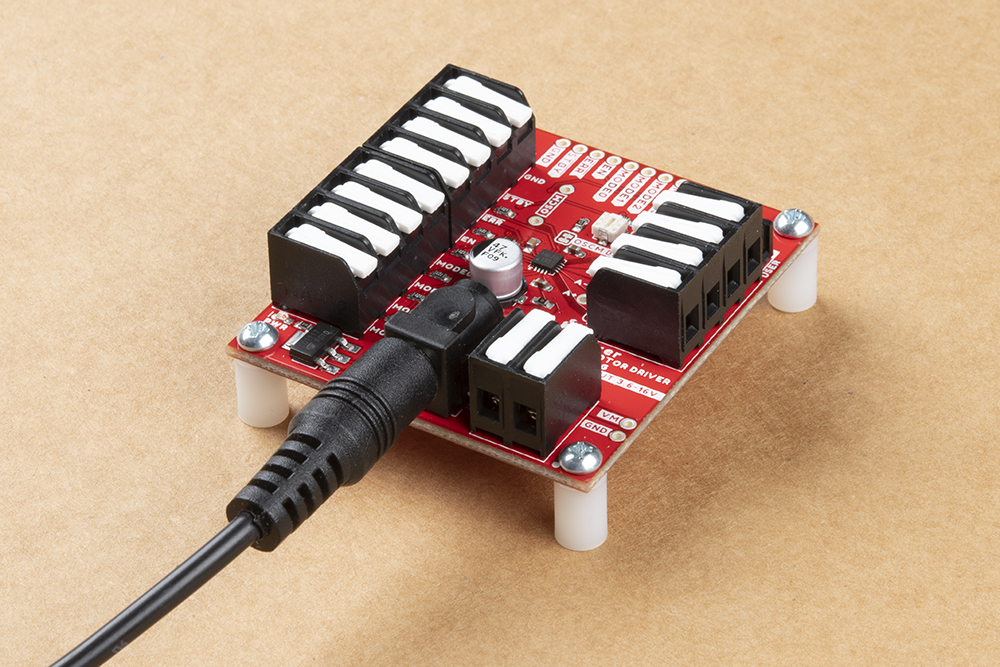
Power Connection
On the Prodriver, we recommend one of our wall adapter, power supplies to connect to the DC barrel jack. Otherwise, users can utilize the (VM and GND) PTH or latch pins to attach an external power supply. REMEMBER to disconnect the power before connecting/disconnecting your motor.
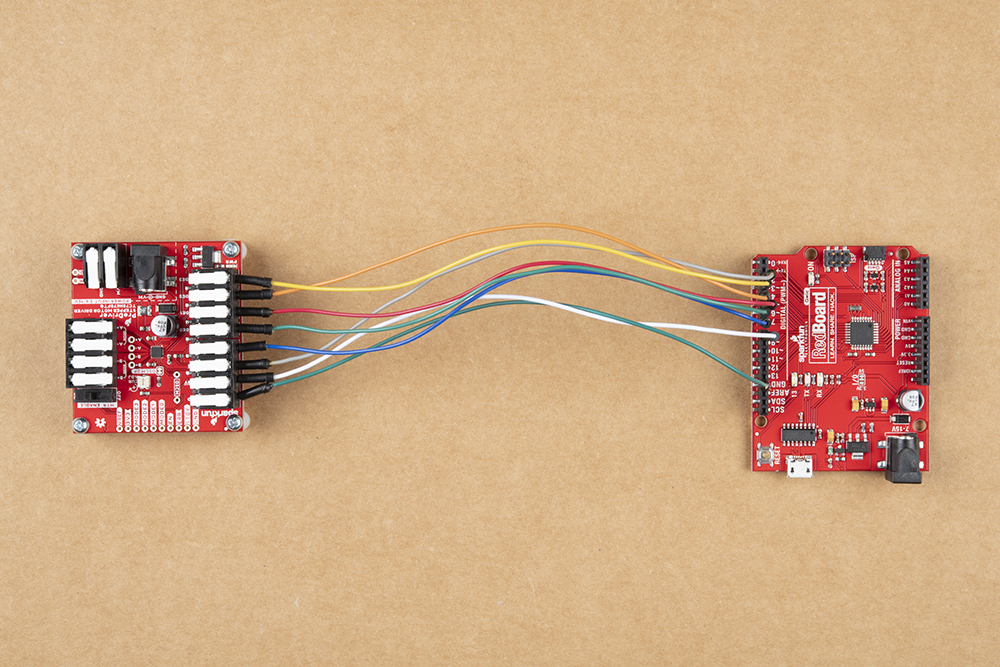
Input Control Pin Connections
The input control pins need to be connected to a microcontroller. To utilize the Arduino examples below, without modifying the code, we recommend using the SparkFun RedBoard (Qwiic) as the microcontroller. Use the table and image below to hookup the SparkFun RedBoard to the ProDriver with some jumper wires.
| ProDriver Control Pins | STBY |
EN |
MODE0 |
MODE1 |
MODE2 |
MODE3 |
ERR |
|---|---|---|---|---|---|---|---|
| RedBoard Pins | D8 |
D7 |
D6 |
D5 |
D4 |
D3 |
D2 |
MODE 1 pins. Each ProDriver board requires a seperate pin on the microcontroller to operate their MODE 1 pin. (See the example below)Motor Channel Output Connections
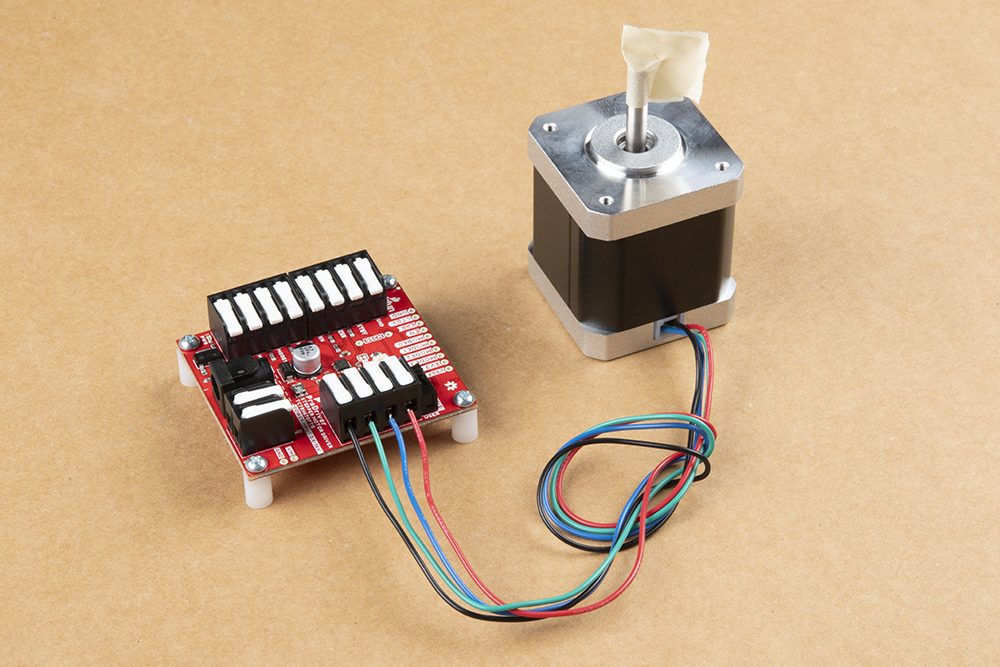
The output channels for the H-Bridges need to be connected to the stepper motor. Users need to hookup the wire pairs for each coil to individual channels. However, the polarity of the connections isn't very important as the direction of the motor rotation can be controlled in software. For the recommended stepper motor, use the table and image below to hookup the motor to the ProDriver.
| Motor Driver Output Channels | A+ |
A- |
B+ |
B- |
|---|---|---|---|---|
| Stepper Motor Wires | Black | Green | Red | Blue |
⚡ Note: Do not connect or disconnect the motor while the ProDriver is powered; as it may damage the ProDriver.
Motor Coil Pairs
In order to determine the wire pairs for each coil on their stepper motor, users can refer to the datasheet for the stepper motor. Often, the relevant information is indicated as shown in the diagram below.
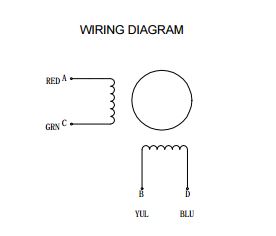
For a 4-wire motor, users can alternatively use a multimeter to determine the wire pairs for the coils. This is done by comparing the resistance of one wire and against each of the three remaining wires. Whichever wire shows the lowest resistance against the first wire is the pair mate. The remaining two wires should show similar resistance between the two of them.
Examples
Single ProDriver
Utilizing the instructions above, an example of the standard assembly used for most of the examples in the Arduino library, is shown below.
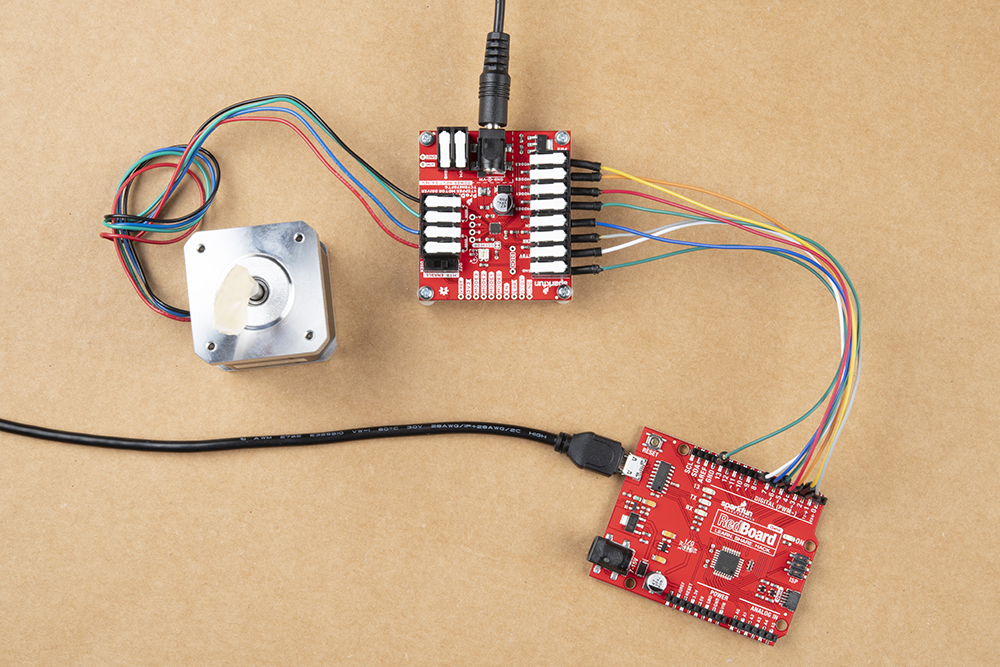
| ProDriver Control Pins | STBY |
EN |
MODE0 |
MODE1 |
MODE2 |
MODE3 |
ERR |
|---|---|---|---|---|---|---|---|
| RedBoard Pins | D8 |
D7 |
D6 |
D5 |
D4 |
D3 |
D2 |
Multiple ProDrivers
For users interested in utilizing multiple ProDrivers, we have provided an additional Arduino example for hooking up two ProDrivers in parallel. Use the table and image below to hookup the SparkFun RedBoard to the two ProDrivers with some jumper wires.
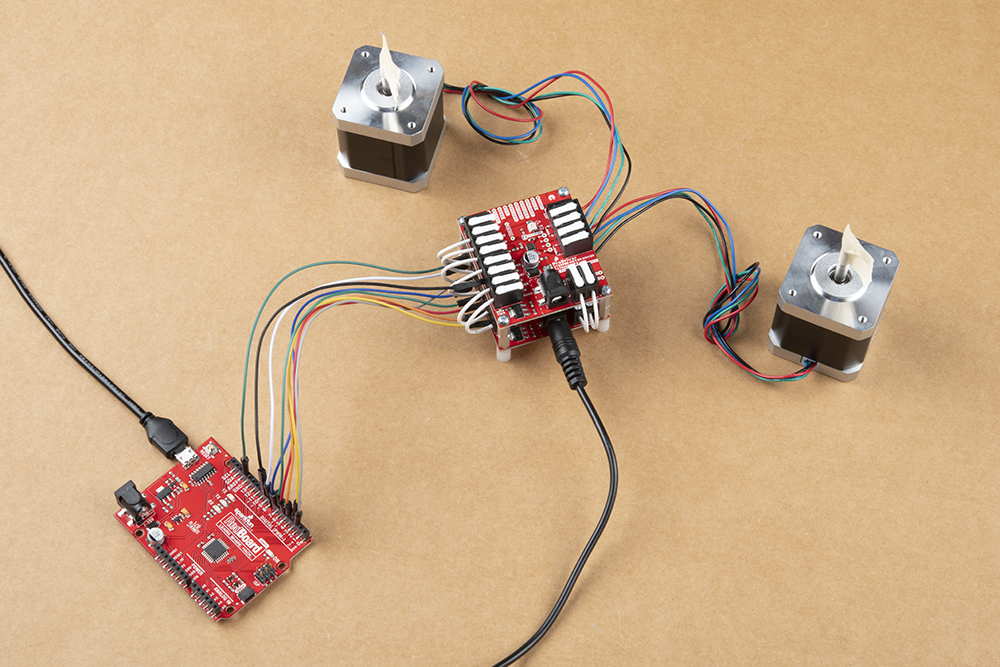
MODE 1 pins. Each ProDriver utilizes a different pin on the RedBoard, for their MODE 1 pin.| ProDriver (1) Control Pins | STBY |
EN |
MODE0 |
MODE1 |
MODE2 |
MODE3 |
ERR |
|
|---|---|---|---|---|---|---|---|---|
| ProDriver (2) Control Pins | STBY |
EN |
MODE0 |
MODE1 |
MODE2 |
MODE3 |
ERR |
|
| RedBoard Pins | D8 |
D7 |
D6 |
D5 |
D9 |
D4 |
D3 |
D2 |