SparkFun Thing Plus Matter - MGM240P Hookup Guide
Blink Example
Now that the Thing Plus Matter - MGM240P is installed in Simplicity Studio we can move on to a basic test to make sure everything is working as intended. For this example we'll be setting up and uploading a Blink test to turn the Status LED on and off.
Blink Example
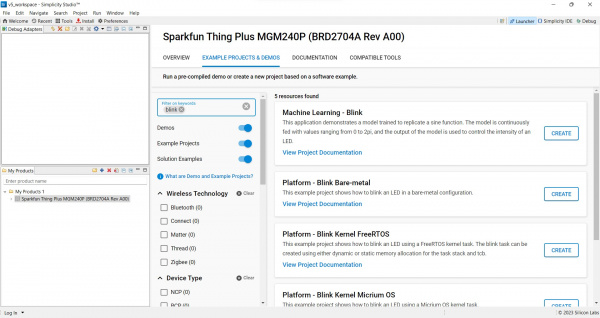
In the Launcher with the SparkFun Thing Plus MGM240P selected for your product, navigate to the "Example Projects & Demos" tab. Now type "Blink" into the "Filter on keywords" search bar and select "Platform - Blink Bare-metal" and click "Create".
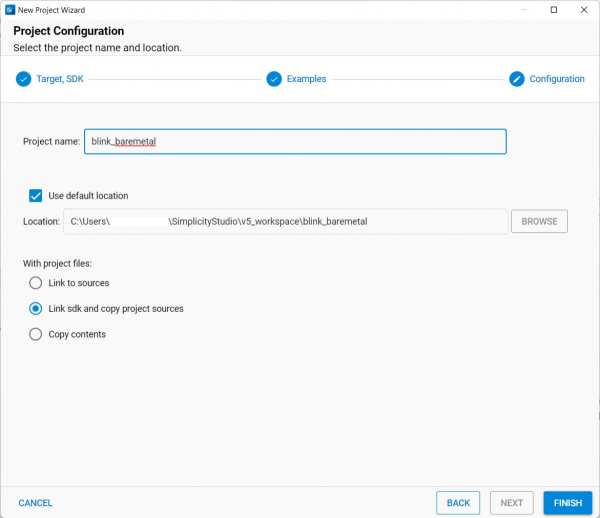
This opens the New Project Wizard window where you can change the project name, filepath, and project file options. For now, leave all of that with the default settings and click "Finish".
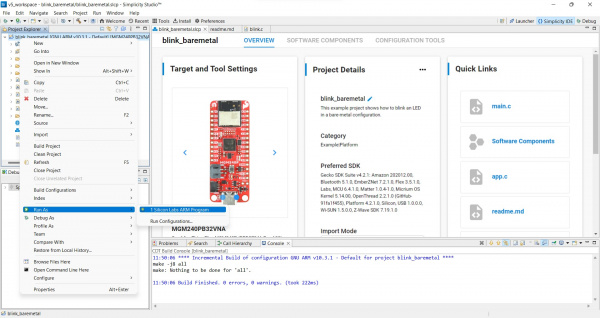
Once you've created the new project you can double-click on the containing folder in the "Project Explorer" window to open all the files included with the Blink project which includes any binaries, configs, header and C files if you prefer. For now, we're just going to build and flash the project to get the Status LED blinking. To do that, right click on the "blink_baremetal" folder and scroll down to "Run As" and select "1 Silicon Labs ARM Program". This builds and flashes the project to your board and once it completes the Blue STAT LED should be blinking on and off every second.
This is obviously one of the most basic projects for the Thing Plus Matter so from here you can explore other example projects and demos for the Thing Plus or start building your own.


