SparkFun Top pHAT Hookup Guide
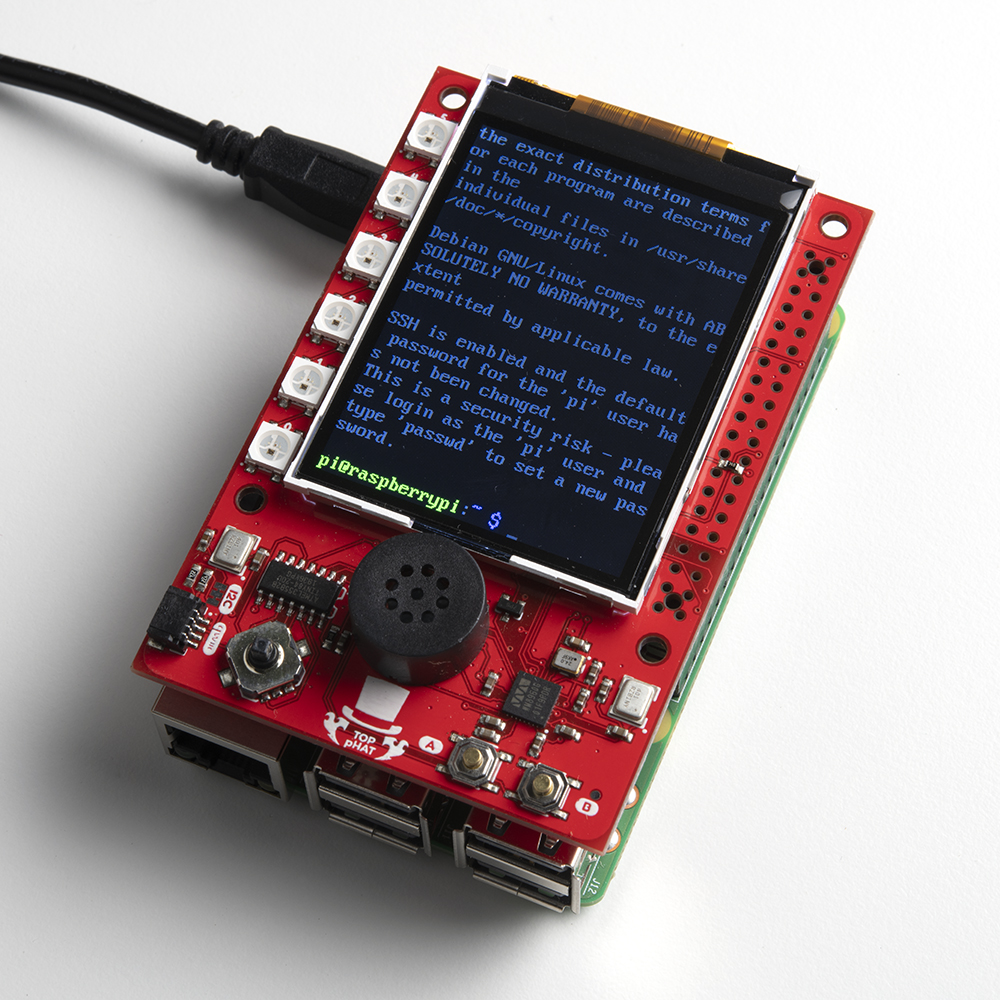
2.4" TFT Display (Archived)
Archived Instructions: The following instructions are only valid for Raspberry Pi OS (or Raspbian) distributions, prior to the Linux 5.4 update. This has been reported to have occurred with the Aug 2020 release (2020-08-20).
There are two steps for the modules required for the 2.4" TFT Screen; adding the driver modules and then a module configuration.
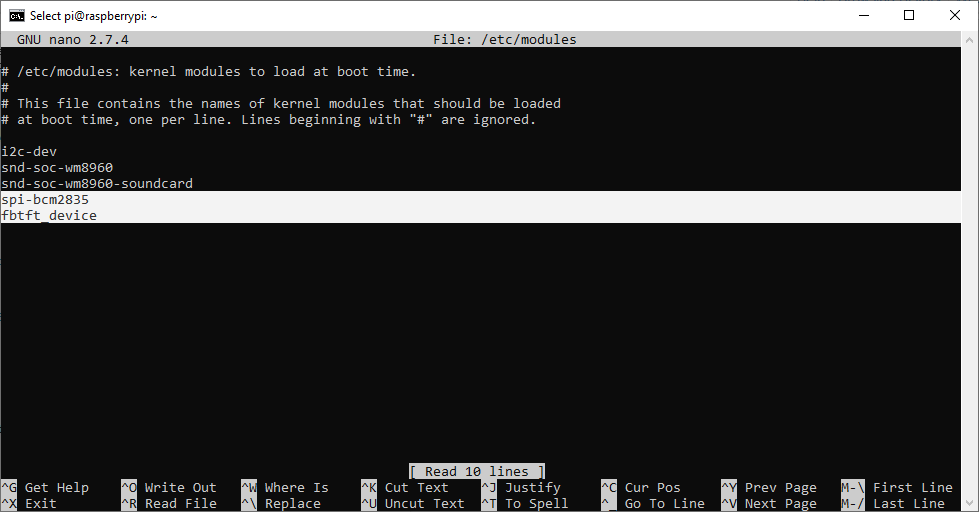
Add Driver Modules
Use your preferred text editor to add the required modules to /etc/modules. The example below uses nano with the following command: sudo nano /etc/modules.
Add the following lines in the file:
spi-bcm2835
fbtft_device
Module Configuration
Again, use your preferred text editor to add the required modules to /etc/modprobe.d/fbtft.conf.
Add the following text to the file:
options fbtft_device name=fb_ili9341 gpios=reset:23,dc:24 speed=16000000 bgr=1 rotate=180 custom=1
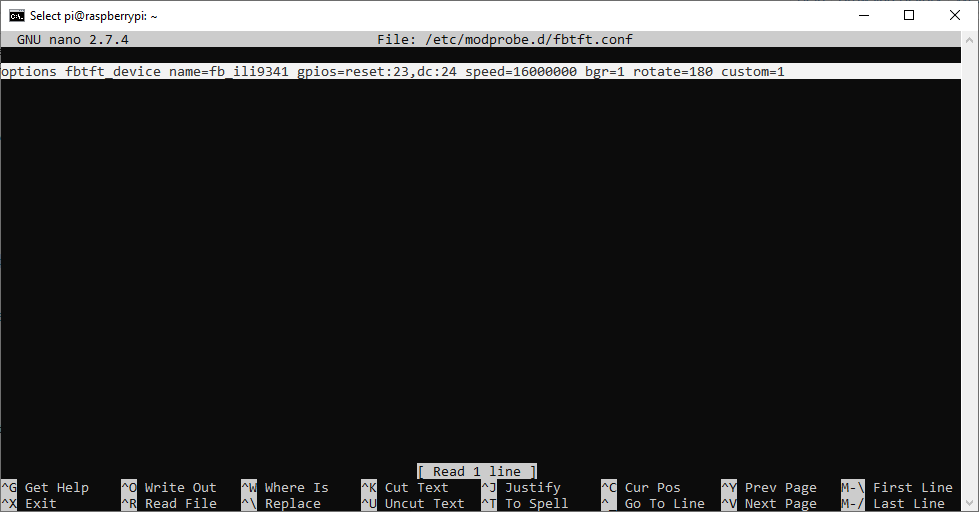
fbtft module. (Click to enlarge) Once these changes have been made, reboot the Raspberry Pi with the sudo reboot command for the changes to take effect.
Note: Users with the touch screen (from the initial release) should, instead, add the following text to configure the screen properly:
options fbtft_device name=fb_ili9341 gpios=reset:23,dc:24 speed=16000000 bgr=1 rotate=180 custom=1 init=\
-1,0x28,-2,20,-1,0x21,-1,0xCF,0x00,0x83,0x30,-1,0xED,0x64,0x03,0x12,0x81,-1,0xE8,0x85,0x01,0x79,\
-1,0xCB,0x39,0x2c,0x00,0x34,0x02,-1,0xF7,0x20,-1,0xEA,0x00,0x00,-1,0xC0,0x26,-1,0xC1,0x11,\
-1,0xC5,0x35,0x3E,-1,0xC7,0xBE,-1,0xB1,0x00,0x1B,-1,0xB6,0x0a,0x82,0x27,0x00,-1,0xB7,0x07,\
-1,0x3A,0x55,-1,0x36,0x38,-1,0x11,-2,120,-1,0x29,-2,20,-3
For users, unsure about the production model they have, the Top pHAT has separate SKUs. However, the most apparent differences are the screen's colors appear inverted when using the wrong setting; or the chip on the screen's ribbon cable that is utilized for the touch capability.
DEV-16301

Initial product release with touch screen. The additional chip for the touch capability can be seen on the right, attached to the ribbon cable.
DEV-16653
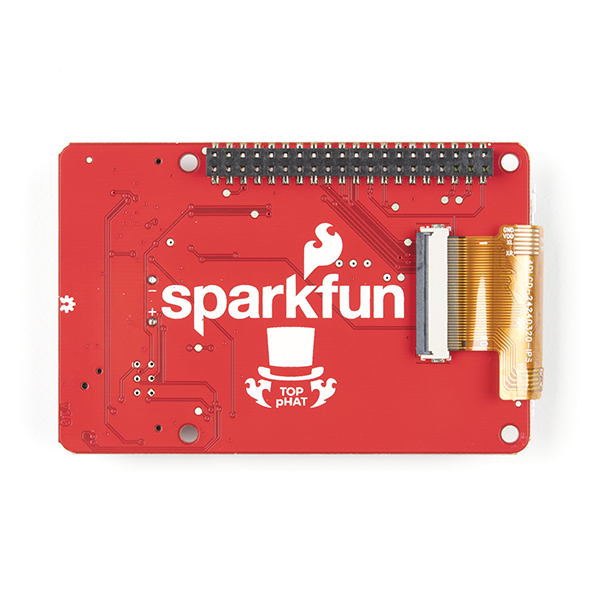 Updated product release without the touch capability; no chip is attached to the ribbon cable. The touch screen was initially used due to supply shortages.
Screen Operation
To utilize the screen, users will call the con2fbmap command. The command is followed by two inputs; the terminal to be displayed and the frame buffer, in that order.
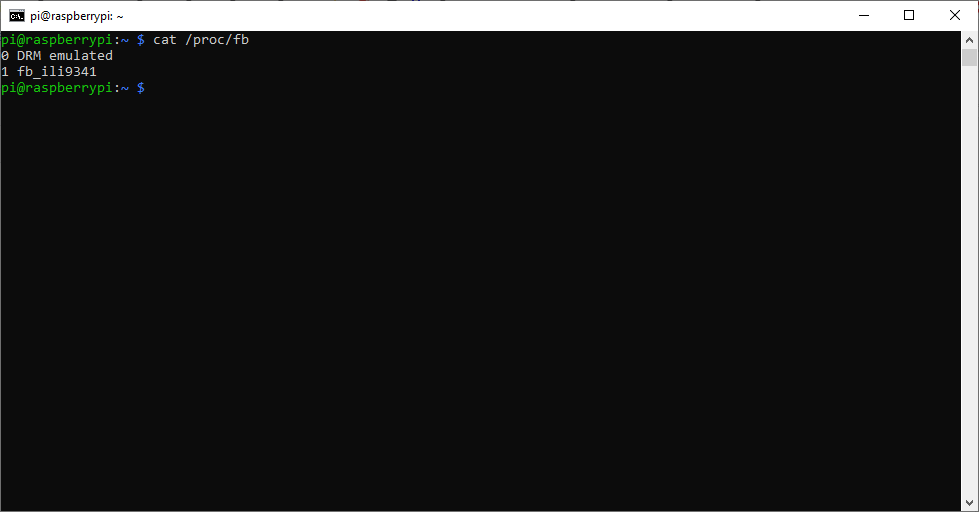
List Frame Buffer
Get the input for the frame buffer, use the cat /proc/fb, it will list what the fb numbers are.
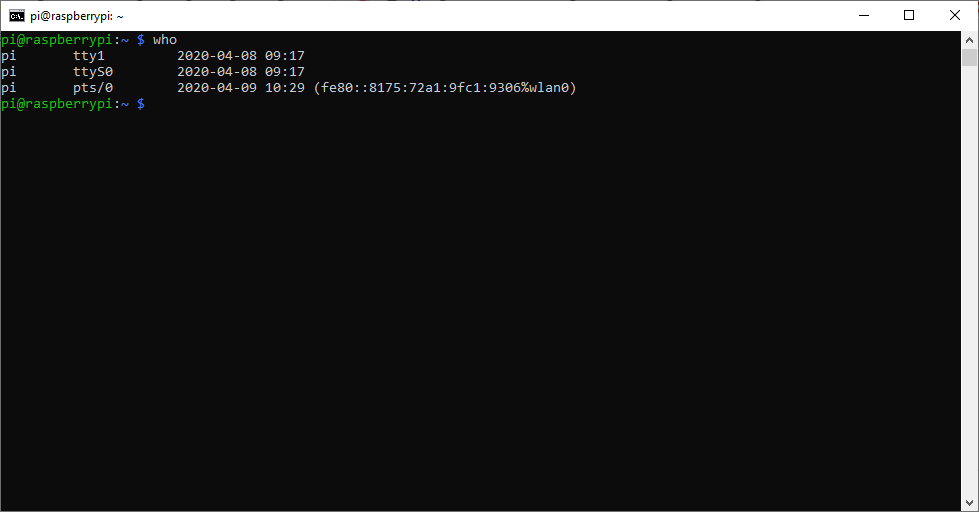
List Users and their Terminals
To list the active users and their terminals, the who command can be used.
Examples
Below is are some examples for using the screen. (*Don't forget to reboot the Raspberry Pi for the previous configurations to take effect.)
- Display terminal on the TFT using the
con2fbmap 1 1command in the terminal or CLI. Then exit to the virtual terminal using Ctrl + Alt + F1. - To swap between the display and the HDMI output, use the
startxcommand in the terminal or CLI initiate the PIXEL desktop through the HDMI output. To revert back to the display, click on Raspberry Pi icon -> Shutdown -> Exit to Commandline. - In order to utilize the display on startup, users can modify the
/etc/rc.localfile using thesudo nano /etc/rc.localcommand in the terminal or CLI. Users will need to add thecon2fbmap 1 1command just above theexit 0entry.