Spectacle Sound Kit Hookup Guide
 SFUptownMaker
Converting Sounds to OGG Vorbis Format
The files used by the Spectacle Audio Board must be in OGG Vorbis format. This free, lossy codec has a higher compression ratio than MP3, and, more importantly, can be used without paying a licensing fee to any third part organization.
Download and Install Audacity
We'll be using the free, open source program "Audacity" to convert from whatever your file's current format is to OGG Vorbis.
Audacity is available across all three major operating systems, so you shouldn't have any trouble getting it installed.
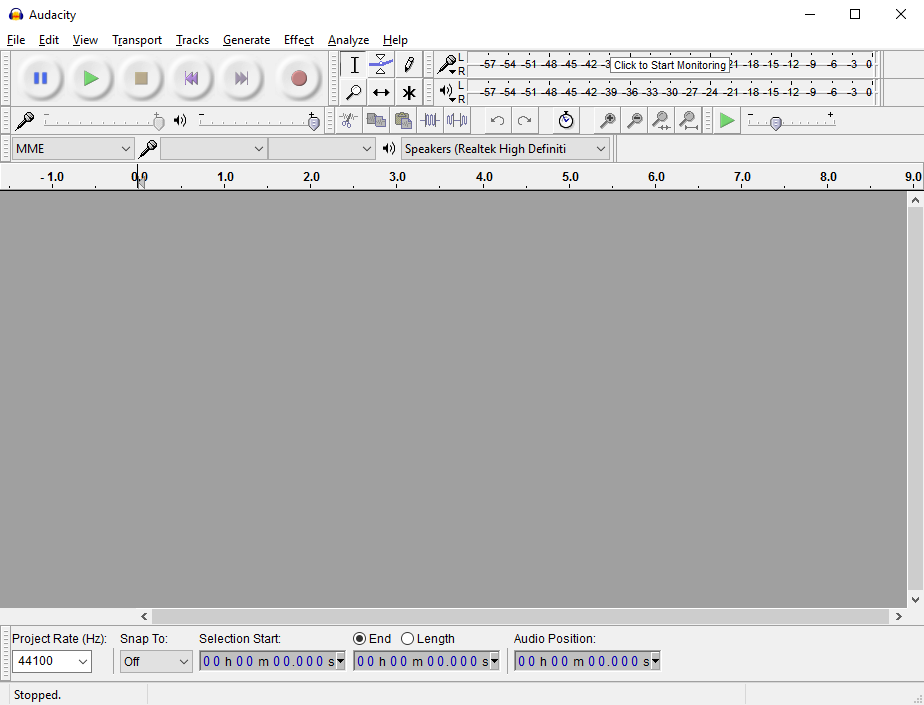
When you start Audacity, you'll see this screen, or one very like it. While at first blush it seems extremely complex, none of this crap is important to us, so don't panic.
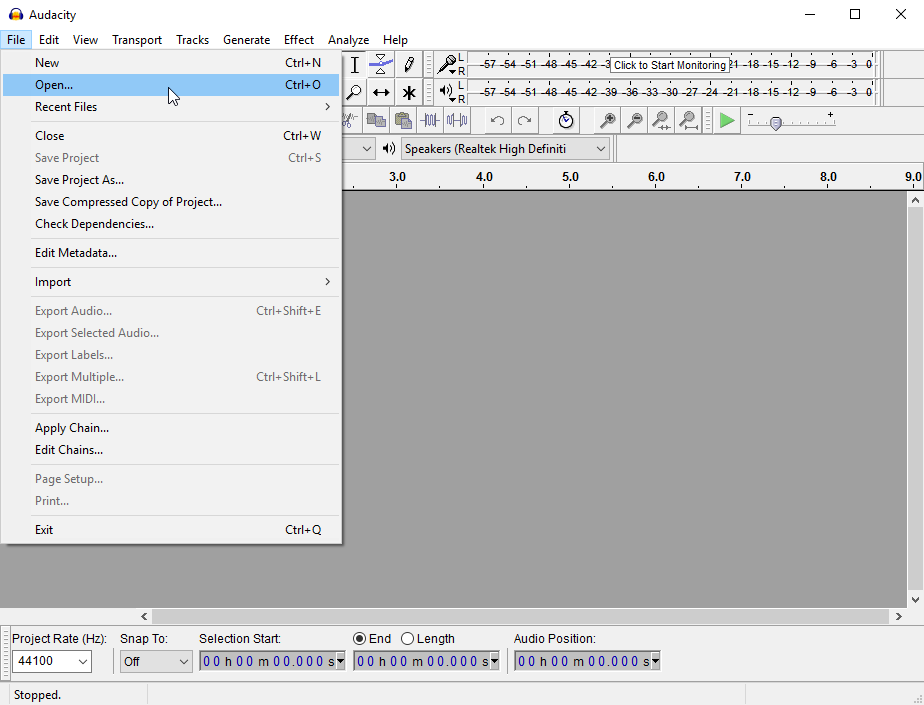
Load a file
Like most programs, "loading a file" just means selecting "Open" from the File menu and choosing which file you wish to convert. Audacity is capable of editing most types of audio files: WAV, AIFF, FLAC, MP3, and others.
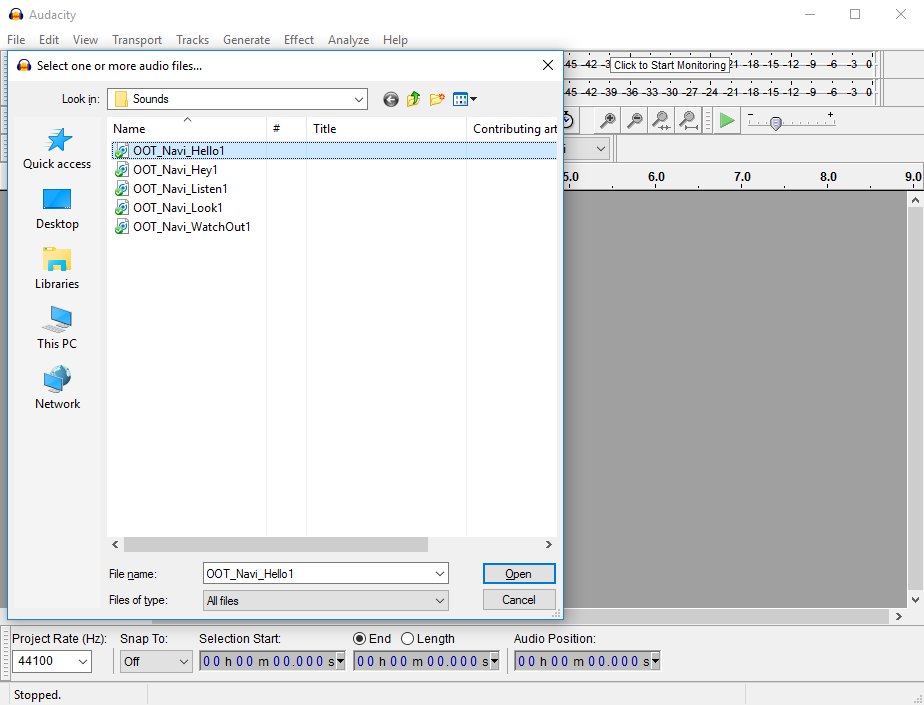
By default, Audacity shows all files, not just compatible audio files, when you bring up the open dialog. There's a dropdown menu that allows you to change that so it shows only compatible audio files along the bottom edge of the window.
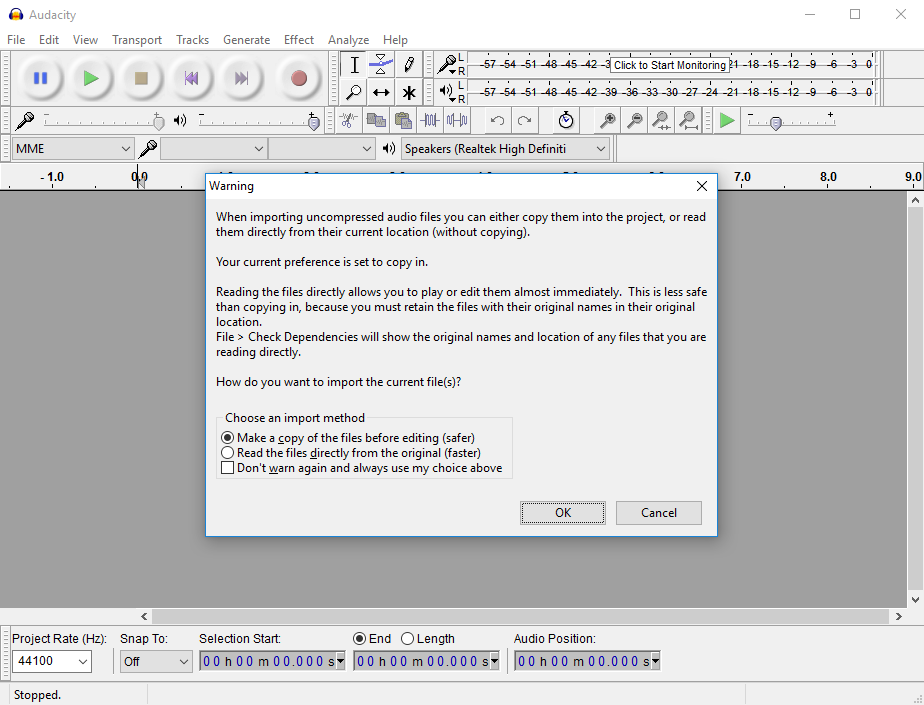
Once you select which file you wish to edit, a rather alarmist message may pop up warning you about editing files without making a copy of them. Just click "OK".
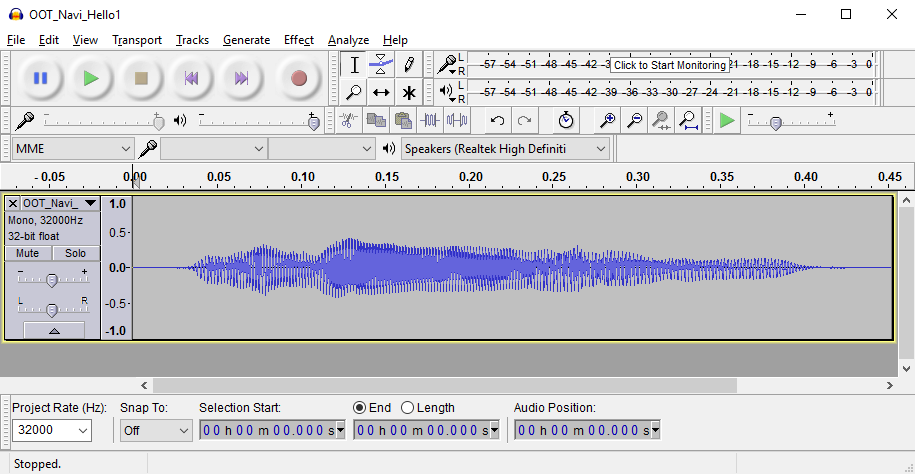
You'll see, then, something like this show up. This is what your audio file looks like, to the computer. Again, don't panic! Unless you want to edit the sound in some way (which we don't), none of the settings or pieces of information that have popped up here matter to us.
Convert to OGG
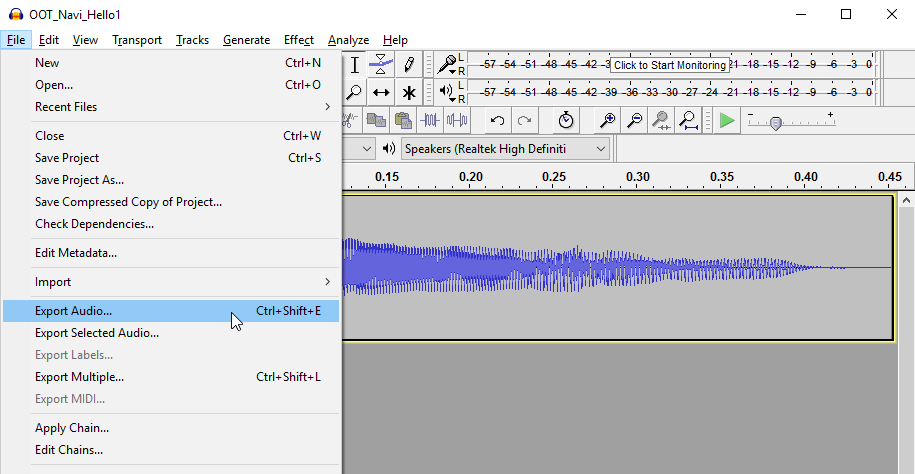
Now that you have the file loaded, you need to convert it to OGG Vorbis format. To do so, open the "File" menu and select the "Export Audio..." menu item about halfway down. A familiar looking save window should pop up.
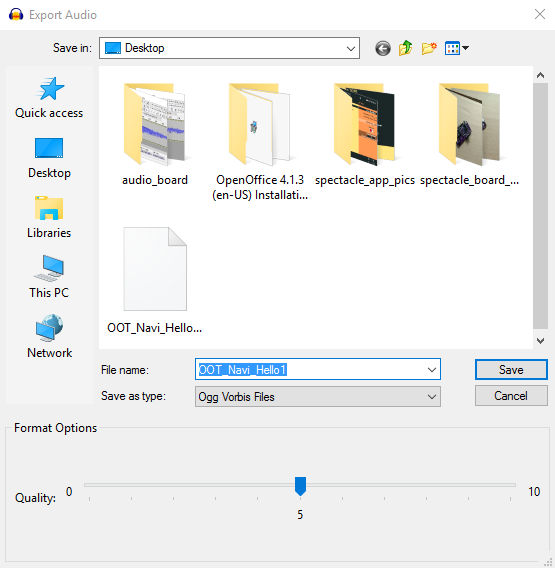
Right below the "File name:" field you'll see a drop-down menus labeled "Save as type:". Select "Ogg Vorbis Files" in that drop down.
A slider will appear at the bottom of the window. The default value of '5' is probably good enough for most purposes. Click "Save" and another window will pop up.
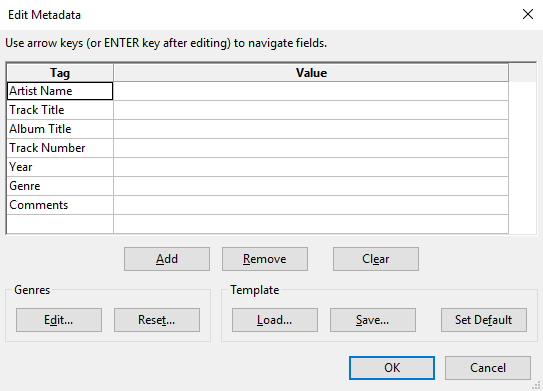
This one allows you to set metadata about the file. You can ignore everything and just click "OK" to skip past this.
Congratulations! You've successfully converted a file to OGG Vorbis format. You may now copy that file to the Micro SD card (don't forget to rename it to a number!) for use with the Spectacle Audio Board.
Extra credit- trimming the fat and making the sound louder
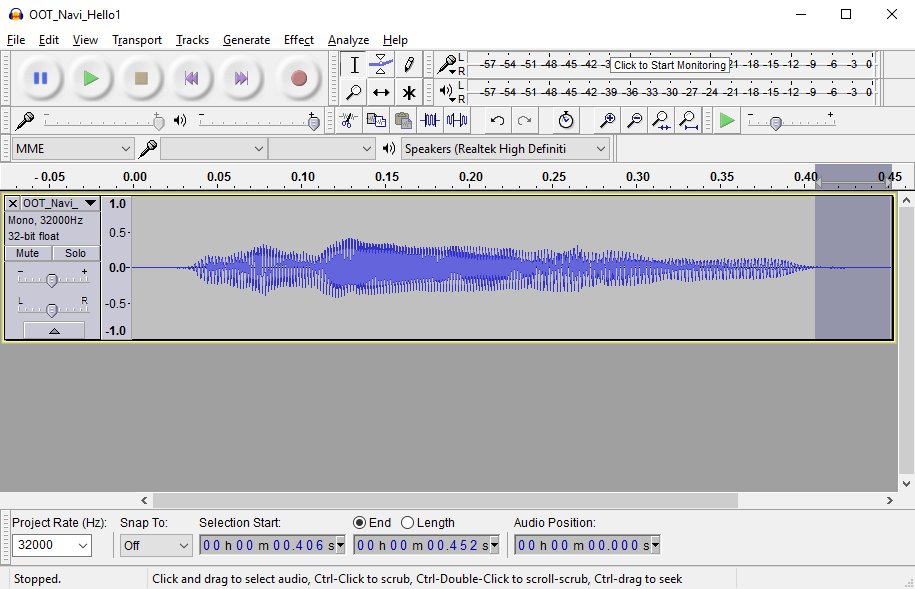
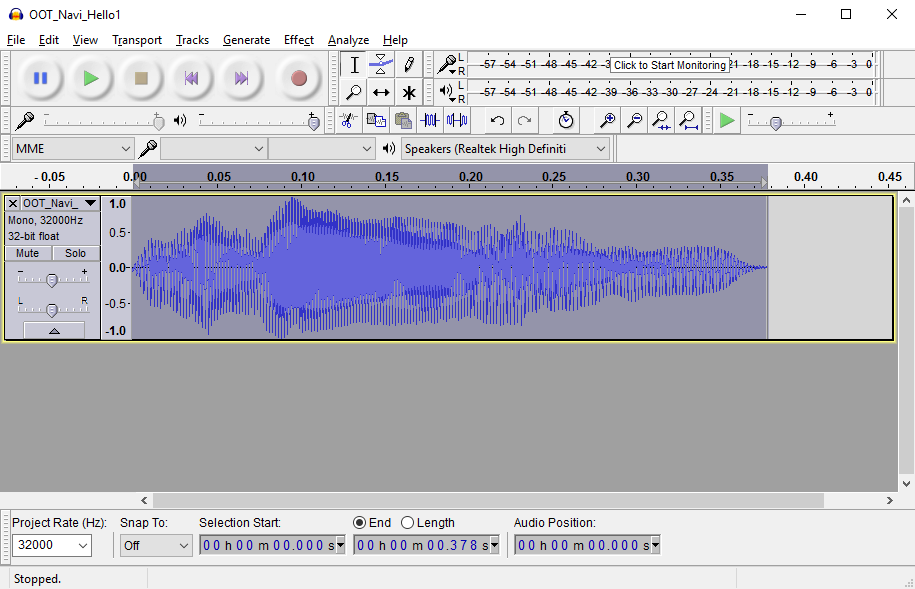
As you can see in my file above, there's a great deal of room between the extents of the sound and the extents of the window. In the time (horizontal) axis, this manifests as flat lines before and after the content of the sound file. In the "loudness" (vertical) axis, this manifests as space between the top and bottom of the waveform file and the top and bottom of the playback position window.
Let's eliminate some of that dead time before and after the sound plays. To do so, simply click inside the playback position window and drag, as though you are trying to select a section of text. The part you've selected will be highlighted, as above. Now, just hit the "Delete" key on your keyboard, and that section will be removed. Repeat the process at the other end of the sound.
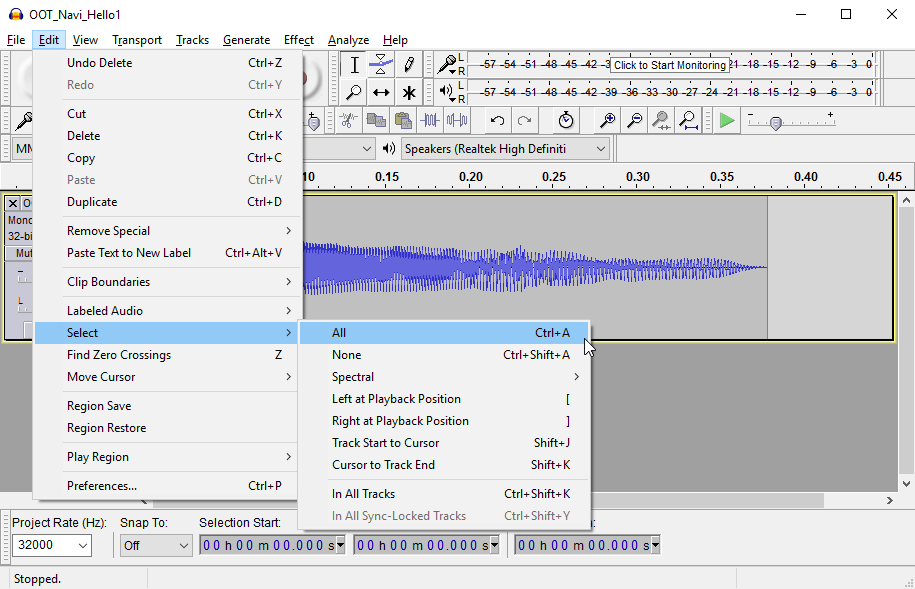
Now, let's see what we can do about volume. Under the "Edit" menu, look for the "Select" submenu, and choose "All" to select the entire sound. You can also just use the drag-and-highlight method from above.
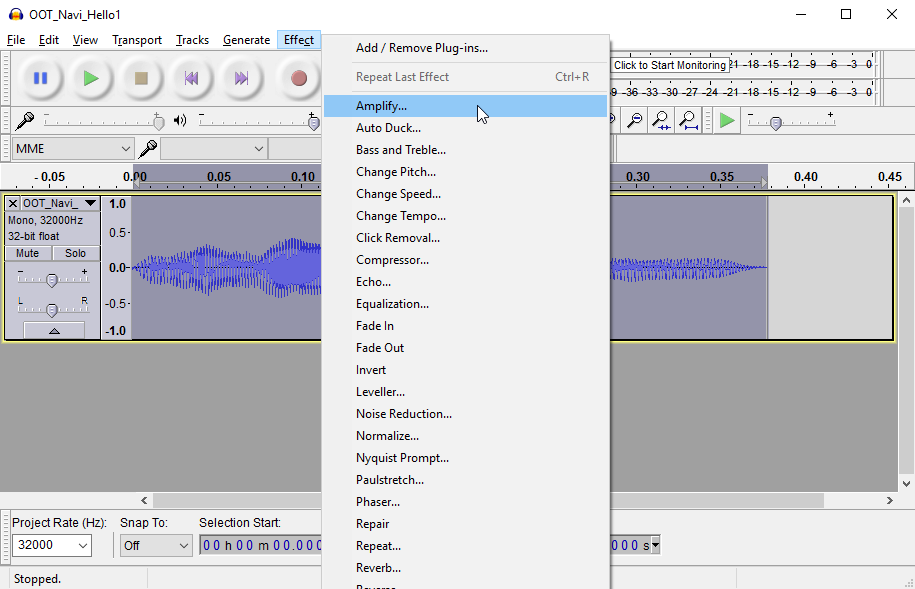
Now that you've got the entire sound selected, click on the "Effect" menu and select the "Amplify..." option.
A new window will pop up with a slider, a couple of text boxes, and one checkbox. The slider will be pre-positioned to amplify the sound as much as possible without "clipping" it. "Clipping" occurs when you try to amplify a sound more than the system you're playing it through can stand, and it results in a sort of grating buzzing noise during playback.
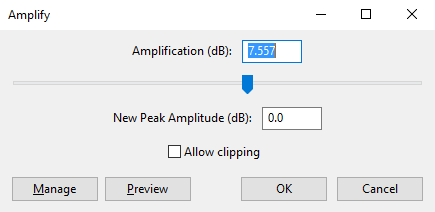
You have a choice, now: you can either accept the system's suggested level, or you can click on the "Allow Clipping" check box and increase the amplification more with the slider. I've chosen to accept the clipping limitation for the image above; comparing it to the image of the file higher up, you can see how I've trimmed the dead time at the ends and increased the amplitude vertically.
Why would you want to allow your sound to clip? Well, first of all, the preset amplification only takes into account the peak value of your sound, so if one small section of the audio is allowed to clip, it may allow the vast majority of the sound to be substantially louder. Secondly, if you're playback device is of relatively poor quality, or the sound file itself is, allowing clipping may increase volume significantly without making the sound quality too much worse than it already is. Thirdly, volume intensity may be far more important than sound quality, and allowing clipping lets you push the volume as high as you can.
Now that you've successfully edited the sound, export it to OGG Vorbis as we covered above.