Stepoko: Powered by grbl Hookup Guide
 MTaylor
Cutting a Square
If you've never used a mill before, start by cutting out a simple shape. For this, the design step will be skipped. We'll go directly to CAM and use it to put in a basic shape.
The first step is to open MakerCam in a new window. If you have ad blocking software enabled, you may have to disable it.
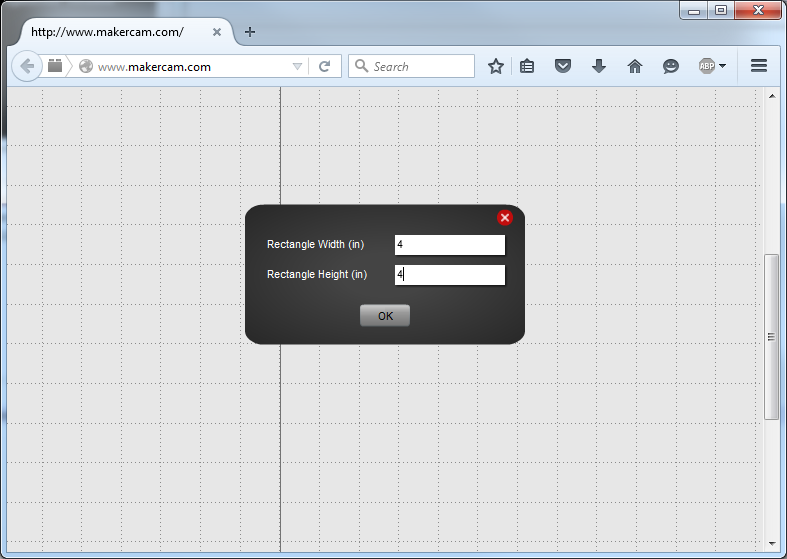
Next, use the menu to add a square (or any shape). A window will open that lets you specify some of the parameters.
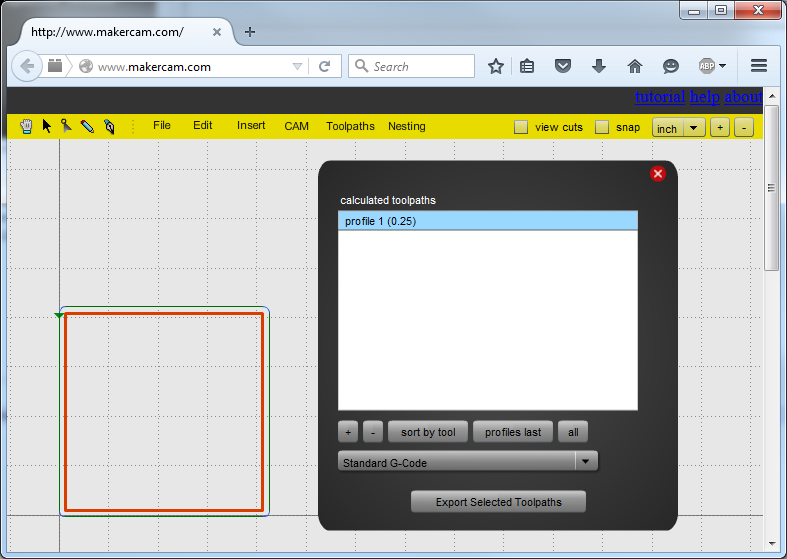
The real purpose of the cam software is to determine how to make a real machine do some movement that yields the desired shape remaining at the end of the whole thing. To do this, drop down the CAM menu and select profile. This means the tool will move around the outside of whatever the shape is that's selected. Other options are engrave, to follow the line exactly, and pocket, which removes all the material inside the shape.
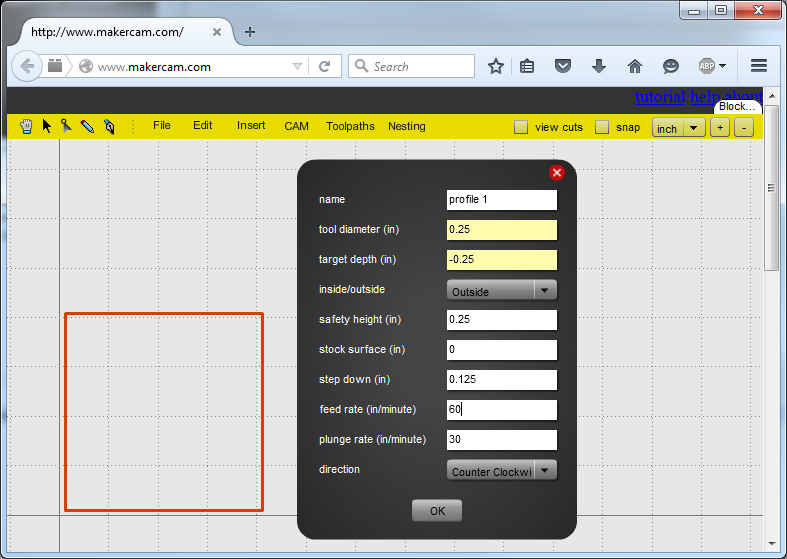
From this window, the cam software takes into account the geometries of the actual mill. Set the tool diameter, safety height (how far above the surface to go before X-Y movement), and step increment. Stock surface is important too, but for now leave it a 0. It can be used for multiple path jobs where one path takes the stock surface down, and the next cuts from that level.
I've selected quarter inch depth with eighth inch depth per cut. Hit 'OK'
Now we need to calculate a path based on the parameters. From the CAM menu, select 'calculate all'
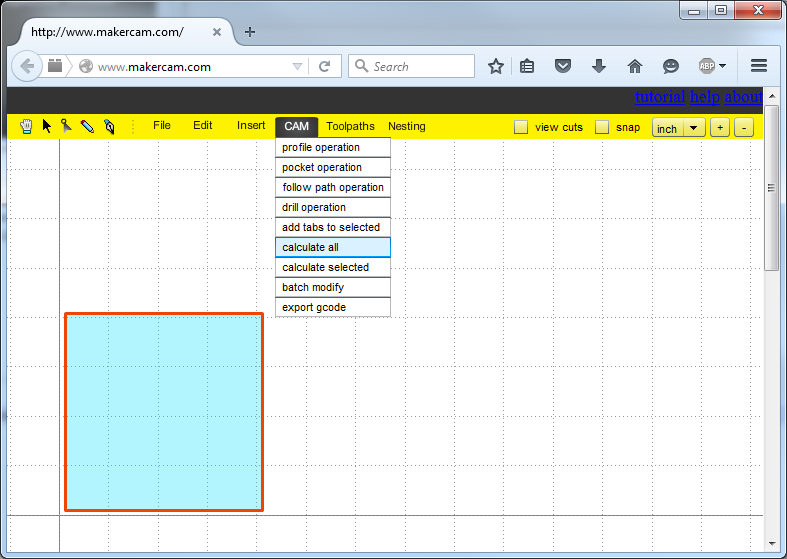
Now a green line with arrows appears above the part. This shows how the tool will move. This path becomes the gcode, so the next step is to export (again, from the CAM menu). There should only be one path available to select.
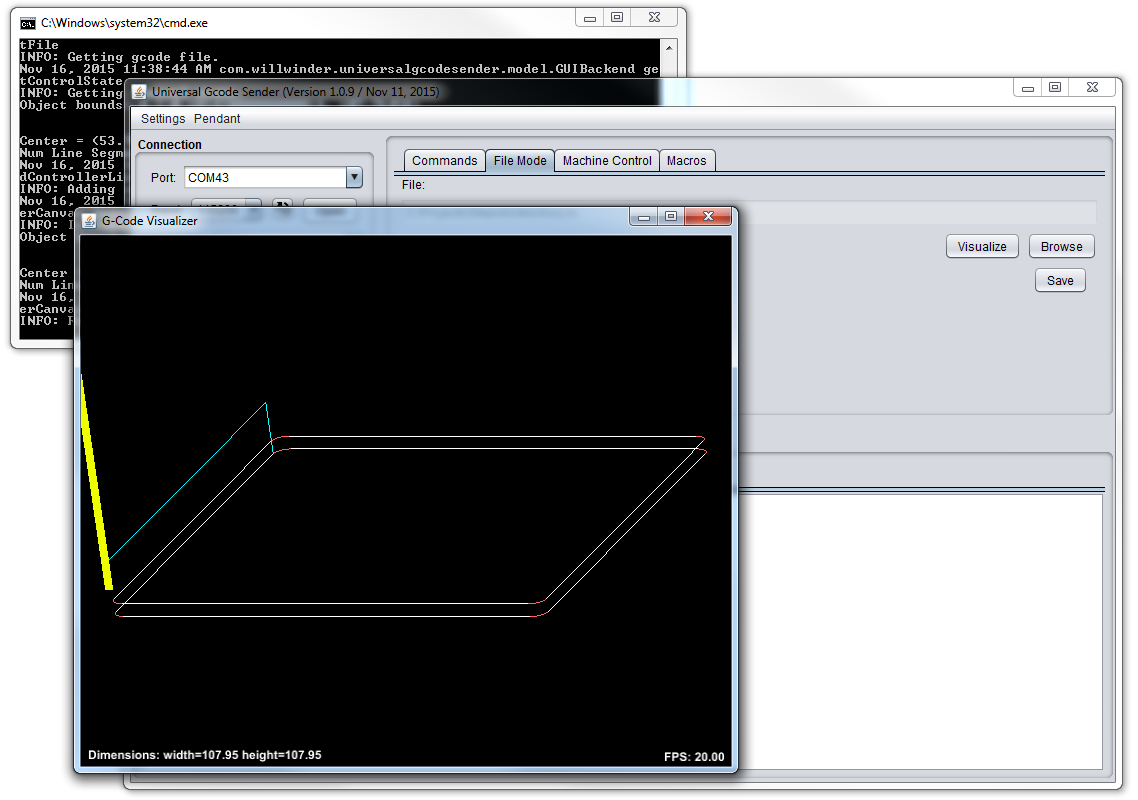
Got it? OK, now put MakerCam aside and open Universal Gcode Sender. Then load the file and click visualize. By holding down the mouse button in the visualization window, the view can be rotated.
When you're confident that the mill head has enough room to complete the pass, zero it out, and hit go. Running a couple inches above the table is a good way to build confidence in the job. Be ready to hit the estop if something goes amiss. When you're good and ready, turn on your active cutting device and let 'er rip.