Tinker Kit Circuit Guide
 Joel_E_B
 bboyho
 El Duderino
Connect the RedBoard to Your Computer
Connect the RedBoard Qwiic to one of your computer's USB inputs using the included micro-USB cable.
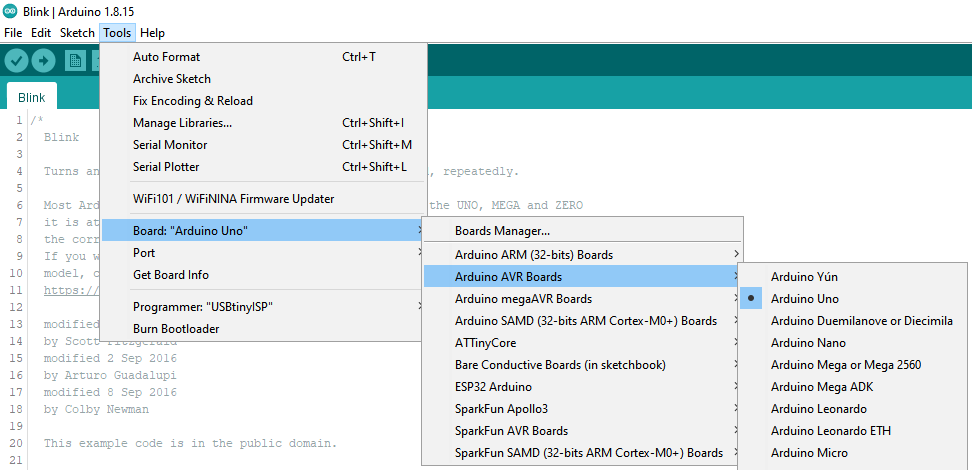
Select Your Board: Arduino Uno
Before we can start jumping into the experiments, there are a couple adjustments we need to make. This step is required to tell the Arduino IDE which of the many Arduino boards we have. Go up to the Tools menu then hover over Board and select Arduino Uno.
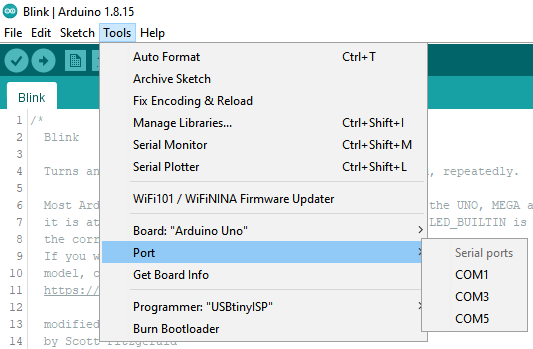
Select a Serial Port
Next up we need to tell the Arduino IDE which of our computer's serial ports the microcontroller is connected to. For this, again go up to the Tools menu, then hover over Port and select your RedBoard's serial port. If you're not sure about which port is correct, open the Port menu without the RedBoard connected, take note of the ports available, connect the RedBoard and see which port appears. That new port is your RedBoard's port.
With that, you're ready to build your first circuit!