Tiny AVR Programmer Hookup Guide
 jimblom
Programming in Arduino
Everyone loves Arduino! The simplified language makes programming AVRs and more complicated microcontrollers incredibly easy. Unfortunately, Arduino doesn't have any built-in functionality to program tiny AVRs, but that doesn't mean we can't add it!
On this page we'll go over all of the steps necessary to enable ATtiny45/85 programming in Arduino, using the Tiny AVR Programmer.
Step 0: Install Arduino
If you've never used Arduino before (where have you been?!), make sure you follow our What is an Arduino? and Installing Arduino tutorials before continuing on.
What is an Arduino?
Installing Arduino IDE
Step 1: Installing the ATtiny Add-On
The next step is to install the Attiny addon. The following steps in 1a and 1b will explain how to manually install the ATtiny board files for Arduino.
Step 1a: Download the ATtiny Addon
To manually add ATtiny's to the standard Arduino IDE Board menu, you'll need to add a few files that help define the hardware. The latest ATtiny hardware definitions are kept in a repository on GitHub.
You can download them from there, or simply click on the archived links below (note: There are different files depending on which version of Arduino you are using):
Extract the ZIP folder, and don't forget where you put it!
Step 1b: Move the attiny Folder
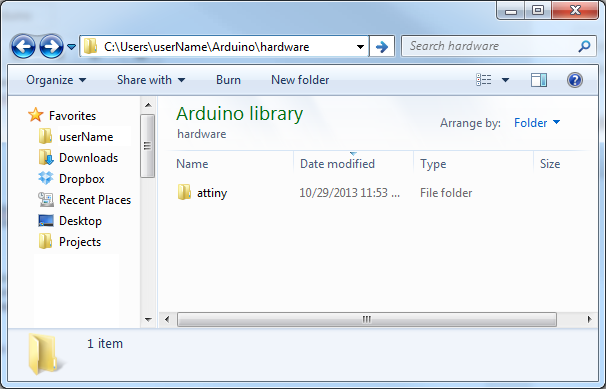
There should be an attiny folder living within the attiny-ide-1.x.x.zip file you downloaded. Copy that folder and paste it into a folder called hardware within your Arduino Sketchbook directory.
If you're not sure where your Arduino sketchbook is, open Arduino and go to File > Preferences. The Sketchbook location should be the topmost entry in the Preferences dialog. By default, the sketchbook is usually an Arduino folder within your home folder (e.g. C:\Users\userName\Arduino on Windows, or /Users/userName/Documents/Arduino on Mac).
If there's not a hardware folder already in your Sketchbook make one. After placing the attiny folder in there, your directory structure should look a little something like this:
Step 2: Open and Configure Arduino
Almost to the fun part! Open Arduino. If you opened Arduino in the last step, close it and restart it.
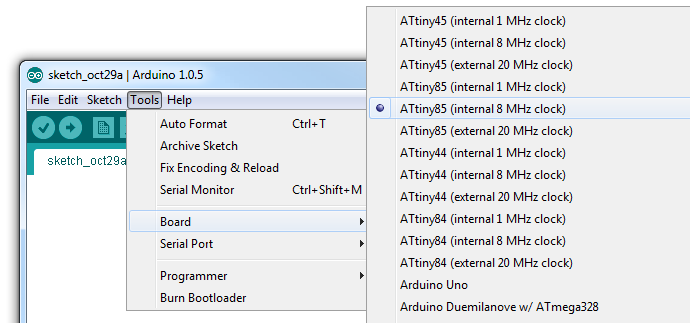
Under the Tools > Board menu, you'll find the effects of the attiny folder. There should be twelve new entires in the board list, which allow you to program ATtiny45's, 85's, 44's and 84's. Each microcontroller can be set to a variety of clock speeds -- internal 1MHz or 8MHz or external 20MHz.
If you're using a bare, previously untouched ATtiny85 select ATtiny85 (internal 1 MHz clock). Be careful selecting here, selecting the 8 MHZ option will only make your sketch run slow, but selecting the 20 MHz option can "brick" your ATtiny. Do not select the 20 MHz option unless you have an external clock attached!
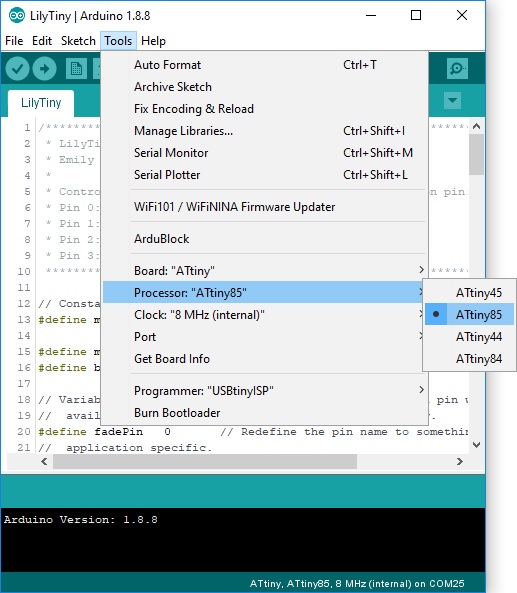
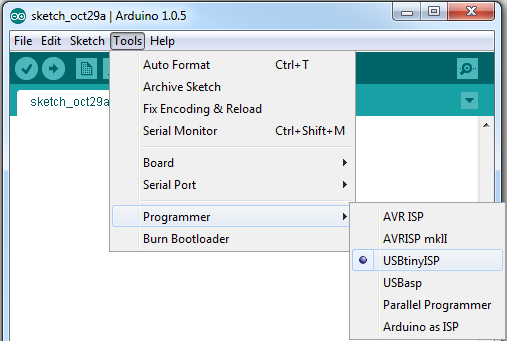
Unlike other Arduino boards, you don't have to select a Serial Port when using the Tiny AVR Programmer. But you do need to select a Programmer. Under the Tools > Programmer menu, select USBtinyISP.
Step 3: Plug in the ATtiny
Getting close to blinking! When you plug the ATtiny into your Programmer, make sure you get the polarity correct. The small, etched circle on the IC should line up with the "notch" on the Programmer's socket and silkscreen.
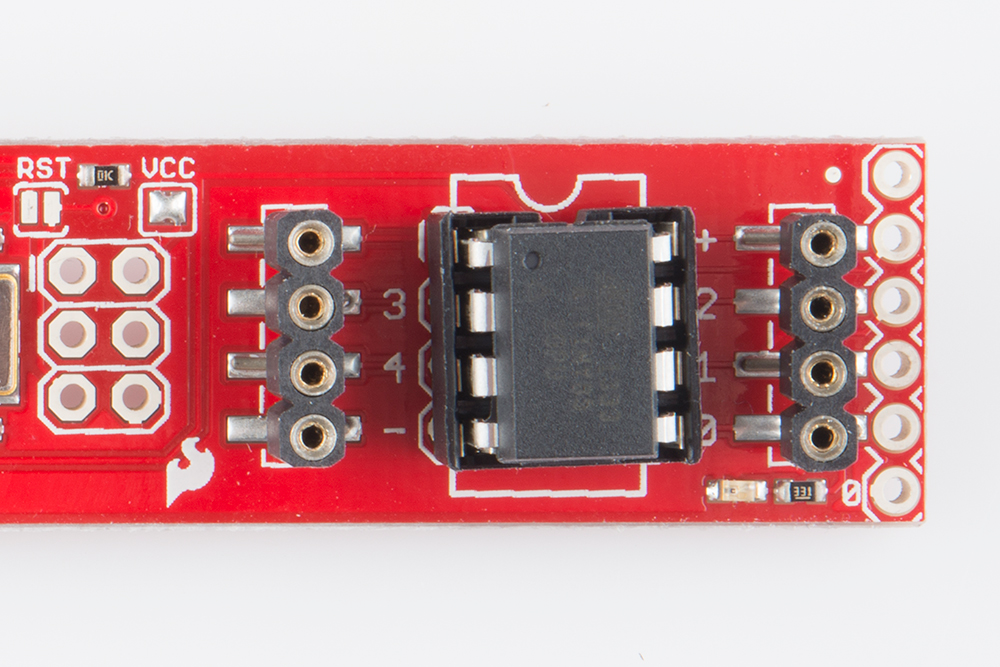
To get the IC into the socket, you may need to bend the legs on each side inwards a tad.
Step 4: Upload Code!
Time for the Blink sketch! The Tiny AVR Programmer has an on-board LED, connected to the ATtiny, which we can use to verify that code on the IC is running. The LED is connected to pin 0 in the Arduino environment. Copy/paste this code into your Arduino window:
language:c
int blinkPin = 0;

void setup()
{
  pinMode(blinkPin, OUTPUT);
}

void loop()
{
  digitalWrite(blinkPin, HIGH);
  delay(500);
  digitalWrite(blinkPin, LOW);
  delay(500);
}
Then click the Upload button just as you would with any Arduino board. The code will compile, and then it should upload insanely fast. That's the wonders of direct in-system programming for you. If successful, the on-board amber LED should start blinking.
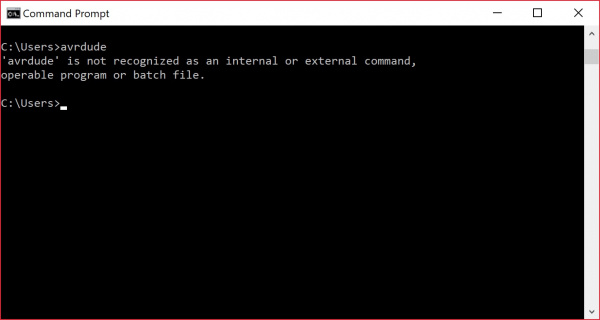
avrdude: Error: Could not find USBtiny device (0x1781/0xc9f)
If the issue is related to the connection, try unplugging/replugging the AVR programmer back into your USB cable or USB port. You also want to try a different USB cable.
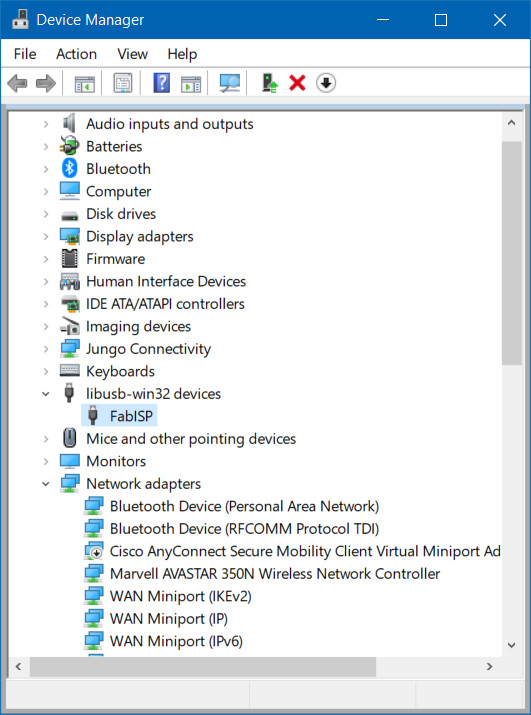
Otherwise, the issue may be due to the drivers. This may be caused by the driver not being installed correctly, or there is a driver conflict. Open up your device manager to view the device. The image on the left shows the device showing up as the libusb-win32 devices > FabISP. The image on the right shows the device showing up as Other devices > FabISP.
 |
 |
| Conflicting Driver | Driver Not Installed |
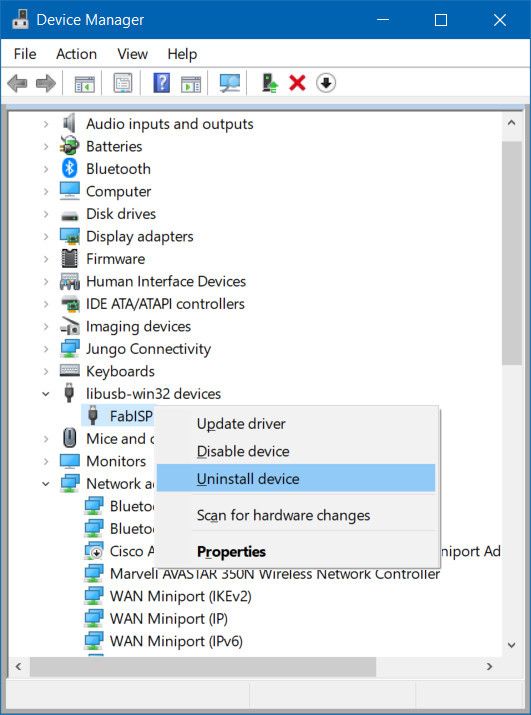
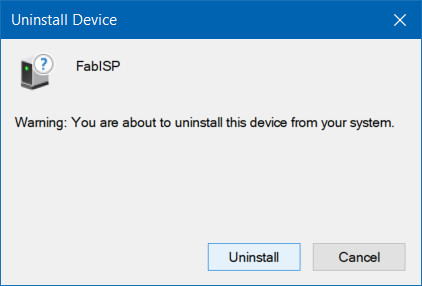
You may see a window pop up similar to the image below. Click on the button labeled Uninstall. In some cases, Windows may provide an option to "Delete the driver software for this device." if the option is provided, simply mark the checkbox before clicking on the button to uninstall.
Unplug and replug the AVR programmer back to your computer's USB port. Head back to the Driver Installation section and follow the instructions to Automatically Install the Drivers using Zadig.
Uploading Code the Hard Way
If you’re looking for more control over your Tiny AVR Programmer – and the AVR it’s connected to – follow along the tutorial for the Pocket AVR Programmer. While the tutorial was written for the Pocket AVR Programmer, it is functionally the same for the Tiny AVR Programmer. Just make sure to connect to the respective ICSP pins on the target AVR chip.