Using GitHub
 Nate
Nate 
Managing Repos
To start, you’ll need to create an account on GitHub. Don’t worry, it’s free for regular users.

There are plenty of Git clients for Mac and Linux but this tutorial will focus on Windows. If you’re a Windows or Mac user I highly recommend you try out the GitHub Desktop GUI. The following tutorial will focus on this client so please download and install the software.
During installation, it will ask you for things such as your login information, name and email address. All of this information will be associated with the commits you make.
During installation, it may ask you to scan for repos on your computer. I recommend you don’t do this. The scan can take a long time and because you’re reading this tutorial, you probably won’t have any repos.
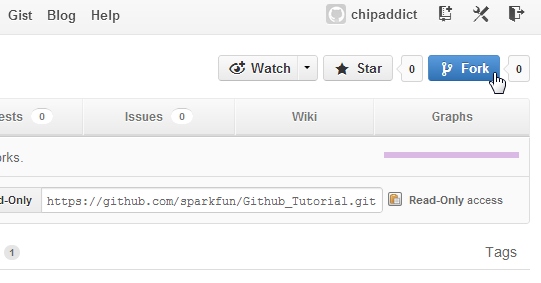
Once the GUI is launched you’ll probably not have any local repos. Let’s go get one from the SparkFun GitHub account. Let’s grab the GitHub Tutorial repo. Once you are logged in to GitHub, click on the ‘Fork’ button.
We have now created a ‘fork’ or a copy of this repo and is located within your GitHub account. Note the words in the upper left corner of the window "chipaddict/Github_Tutorial" and the words underneath "forked from sparkfun/Github_Tutorial". This shows that you have this project on your account (your account name will be different).
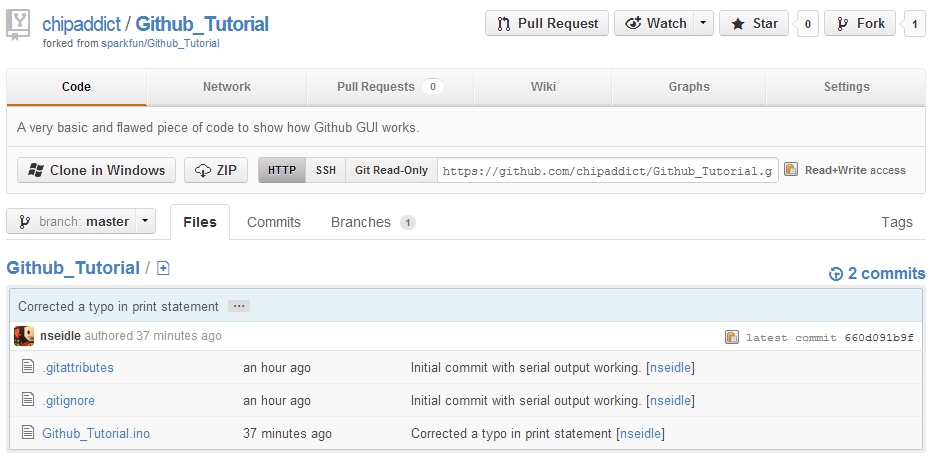
Now you can make lots of changes to this repo without affecting the original project. This is helpful if someone has some example code that is close to what you need but needs lots of modifications for your plans.
Now that you have your own copy of the project online, click on the ‘Clone or Download' button then the 'Open in Desktop' button. If you are not logged in, it may take you to the GitHub Windows page.
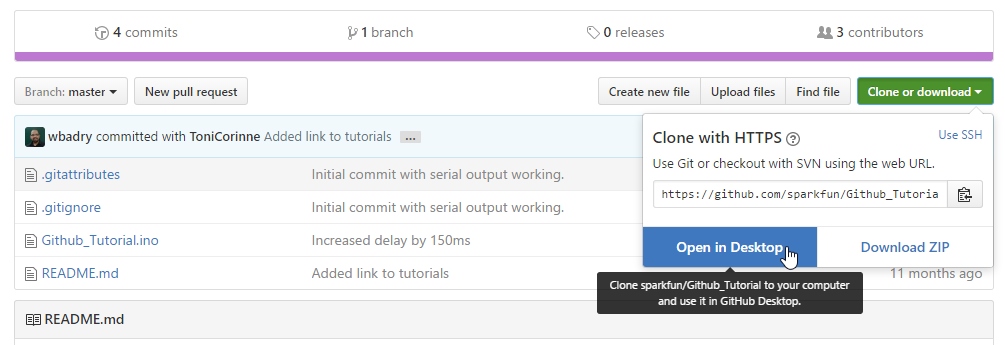
Windows may ask you for permission to allow the link to launch and use the GitHub software. This is ok. The GitHub GUI will open and a download will begin.
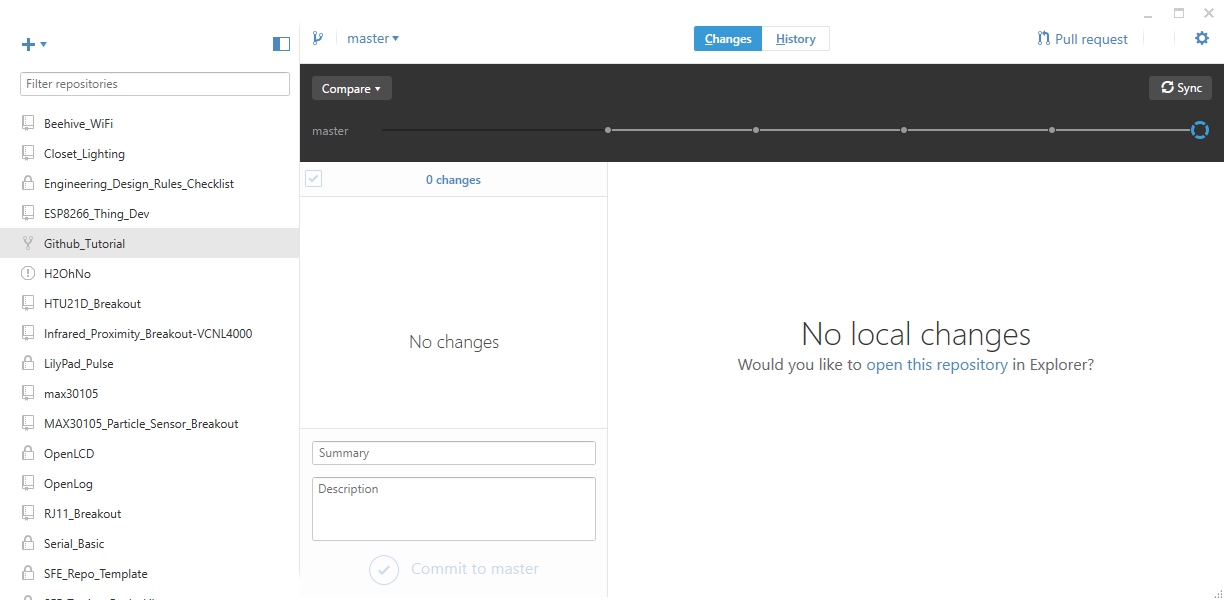
Because we just forked this repo there are no changes. Previous versions of the GitHub Desktop GUI had a timeline dot. If you click on any of the dots at the top we can go back in time and see what's changed over time. Otherwise, there will be a tab on the left hand side listing the changes and history. You can see the file that was changed and what was added (in green) to the file.
Hey thanks Waleed! He suggested a change to the README and added a link back to this tutorial. Smart.

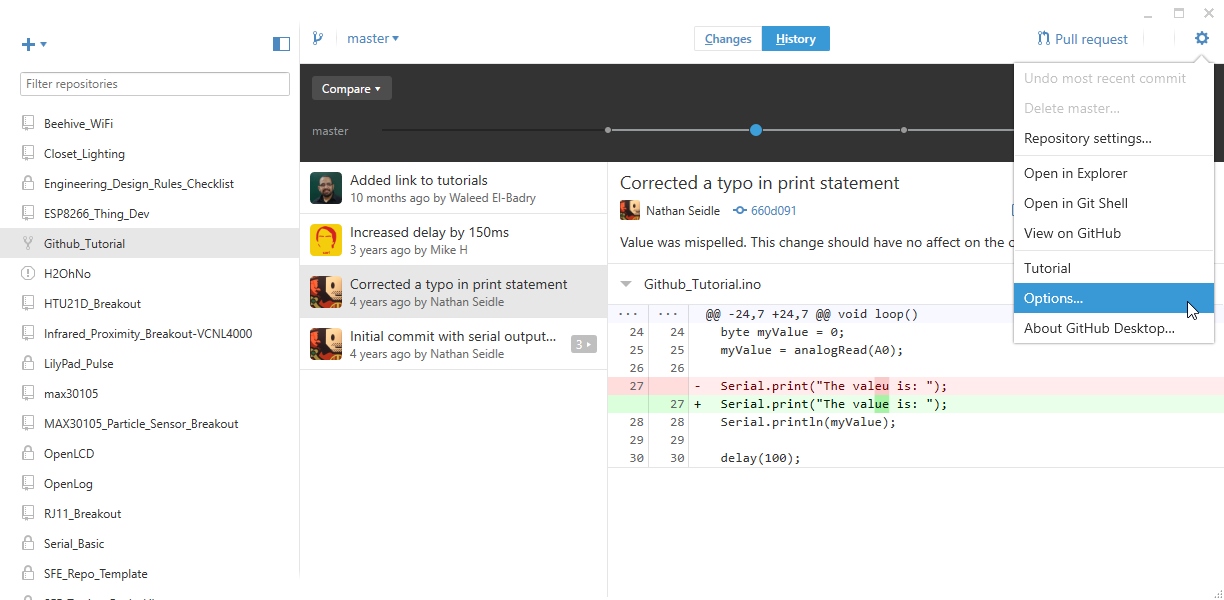
Even further back in time we can see there was a comment ‘Corrected a typo in print statement’ and below that we can see the lines of code that were altered - red was removed, green was added. We can do lots of fun stuff like ‘revert commit’ and ‘roll back this commit’ but for now, let’s see how revision tracking works.

For older versions, click on the gear in the upper right corner and selection 'Options...'. For the latest version, this will be located 'File > Clone repository...' .
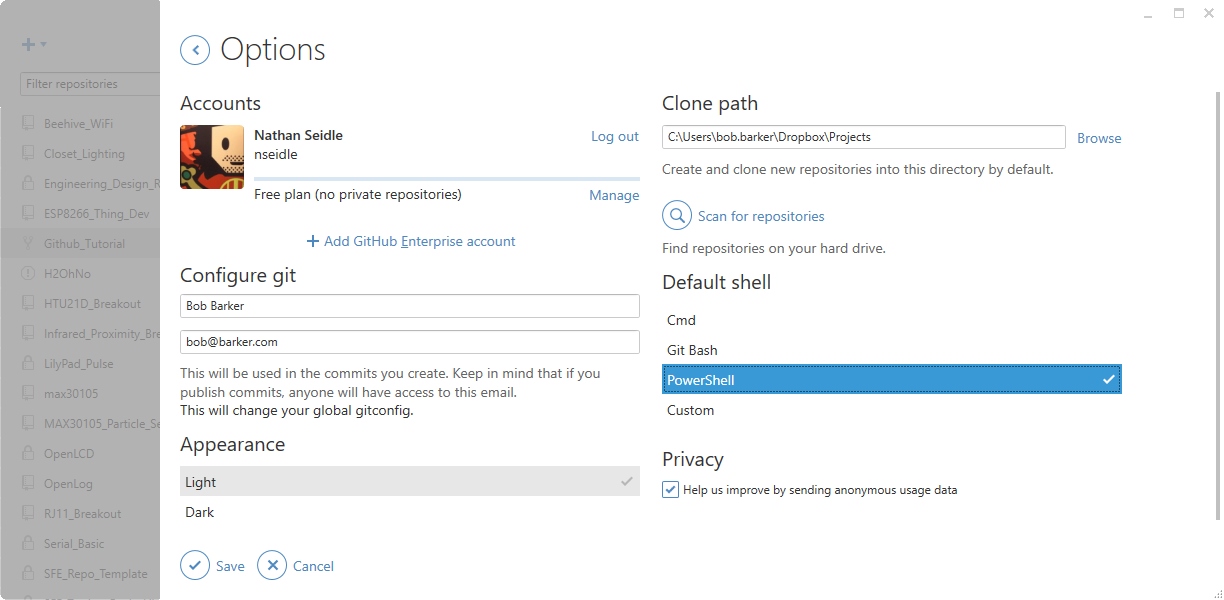
You will be able to find where your repositories are being stored under ‘Clone path’. I changed this to store my repositories in a Dropbox folder. I use Dropbox liberally in conjunction with GitHub so that I can work on projects across devices and then push code up to GitHub once the project has reached a level of stability.
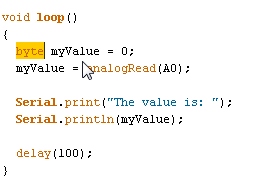
You should now know where your repos are stored. Navigate to that directory and open up the Github_Tutorial.ino file. From the Arduino IDE or Windows Notepad let’s correct the variable declaration from byte to an int. Save the modification and return to the GitHub GUI.
GitHub has noticed that a file has changed! For older versions, you should see a dot on the changes button. Otherwise, you will noticed that there are items in the Changes tab.
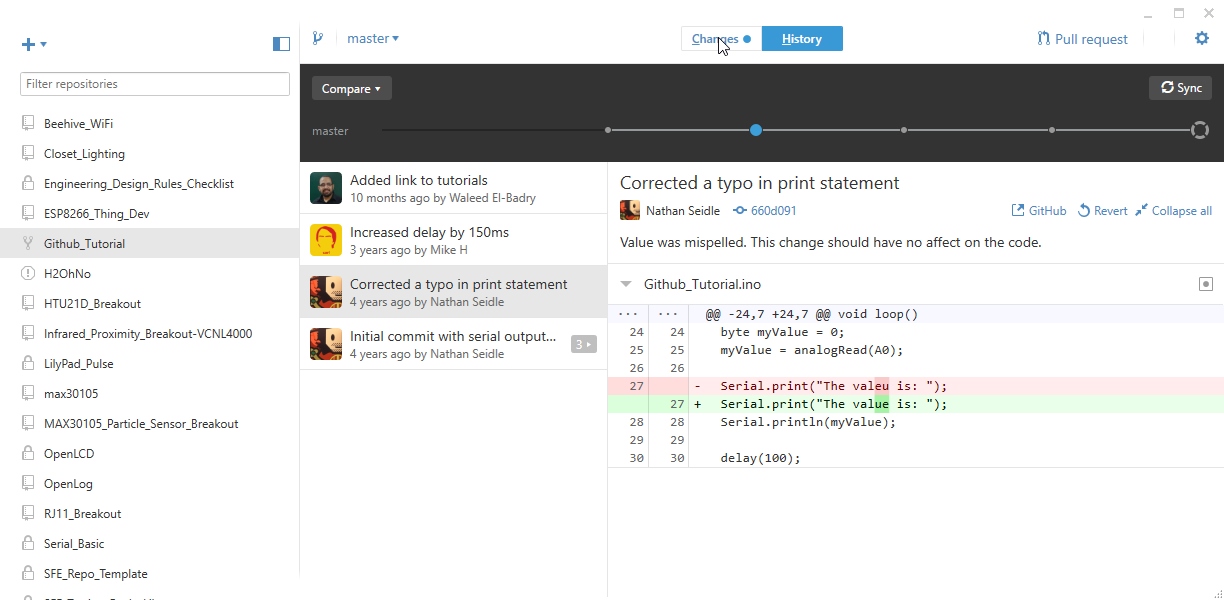
You will see the main screen change as well showing the changes that git has detected:
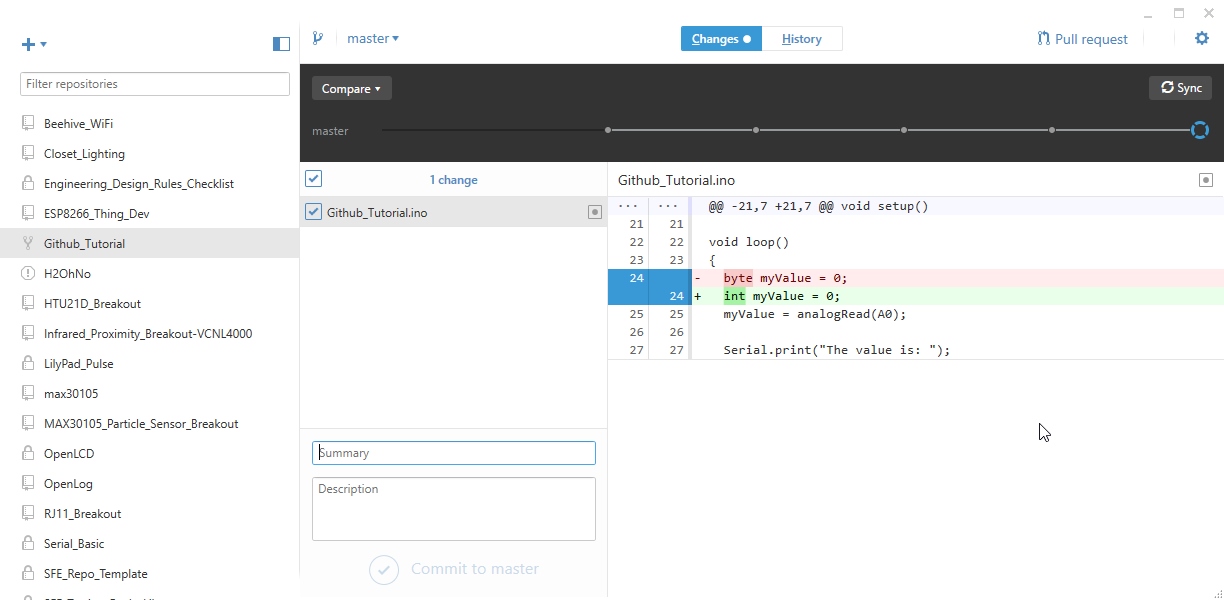
Wow! The small change we made is now nicely highlighted.
Now let’s talk about how repos work. You have a local working copy, a local repo, and a global repo.
Local Working Copy
Local working copy: You generally write code, layout PCBs, and hack on documentation on your local computer on a local copy. Throughout the day you would use the GitHub window to ‘commit’ these changes to the a local repo. The changes you’ve made throughout the day are not known to the world, only to your local repo on your local computer.
Local Repo
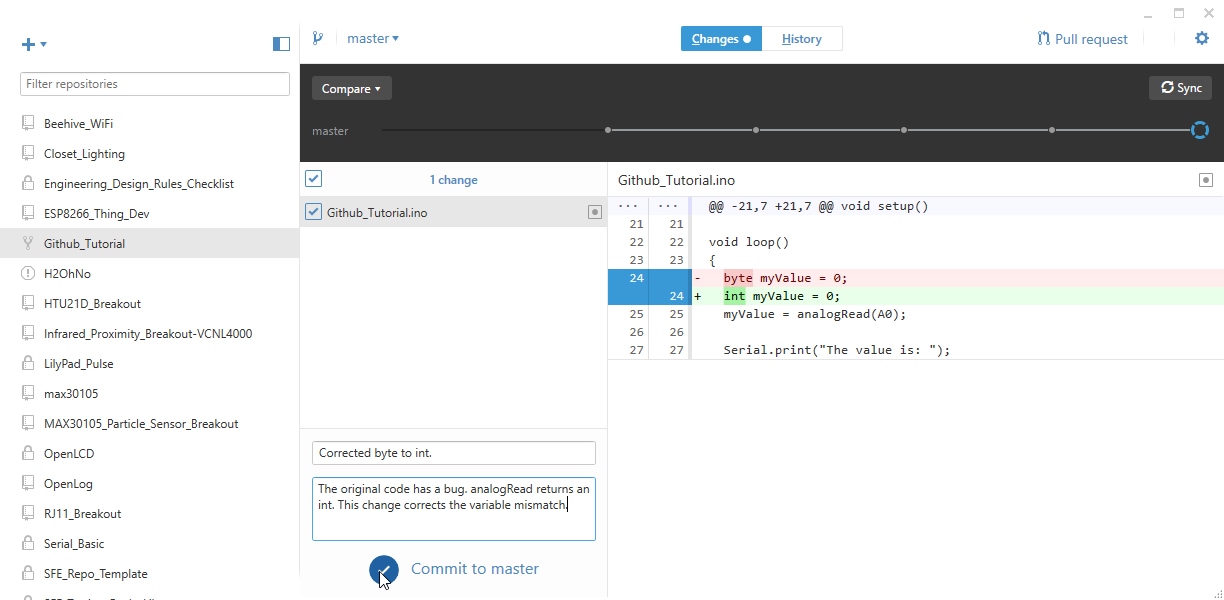
Local repo: Now let’s commit the change we’ve made to our local repo. We must comment about what we changed before we can commit it. Thoroughly describe what you did and then hit 'Commit to master'.
As a general rule, try to commit small changes, frequently. If you wait 4 months between commits it is going to be very difficult for you to remember why you changed 5 lines of a subfunction.
After pressing commit, the Sync button appears.

We now have no uncommitted changes but we do have unsynced commits. This means we’ve committed the changes to our local repo but we have not yet pushed (synchronized) the changes to our global repo.
Global Repo
Global repo: Press 'Sync'. This will push the changes that we made within our local repo up to GitHub and to our account.

Nice job Bob! We have successfully pushed this corrected code up to the global repo on GitHub. Now go online and look at your repo.
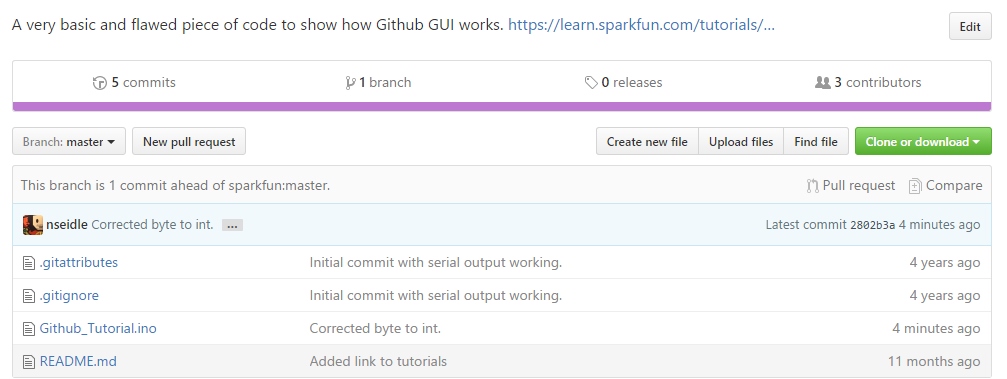
We can see the notes from the commit we made as well as the status of this fork vs the original sparkfun repo: "This branch is 1 commit ahead of sparkfun:master".
The GitHub web interface is similar to the Windows GUI but adds many advanced options. Use the web for changing properties of the project; use the GUI for routine commits to the local repo and global syncs.
Beyond Free
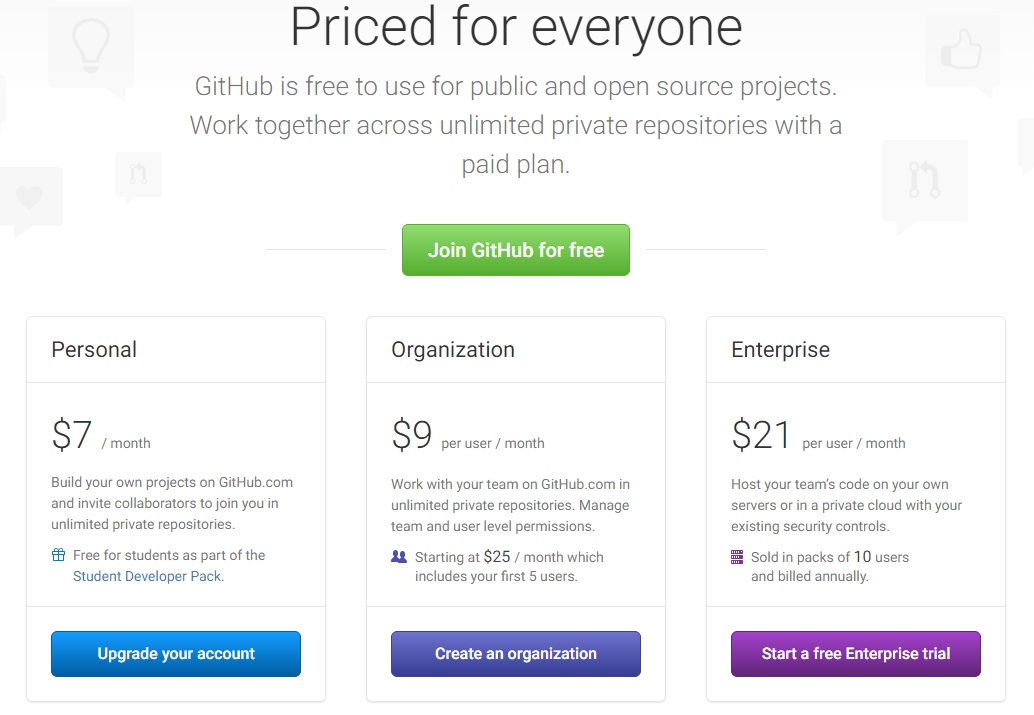
GitHub has a variety of pricing models but there's a free version that has all the power and as many public repositories as you want (yay Open Source Hardware!) but if you want private repos, you have to pay. SparkFun pays for the Organizational level because we love GitHub, use them extensively for our web development and use GitHub for our public hardware projects. We generally create a private repo for a new project and turn it public as we near the release date for the product.
That’s it for this section. These steps of forking a repo or creating your repo should allow you to create code projects, PCB layouts (we push Eagle files up to GitHub all the time), documents, images and even binary files.
In this section we found a bug and corrected it, but we have not yet let the original project know about the error. The next section will cover how to send corrections and improvements back to the original project through pull-requests.