Using Home Assistant to Expand Your Home Automations
 Alex the Giant
Configuring Home Asssistant
Now that we have Home Assistant set up, we need to configure it. One of the benefits of Home Assistant is it's open source, allowing people from the community to create their own add-ons on top of the officially supported add-ons, which can make customizing it a lot faster and easier than other options. In this section we'll need to enable two extensions: Configurator and MQTT.
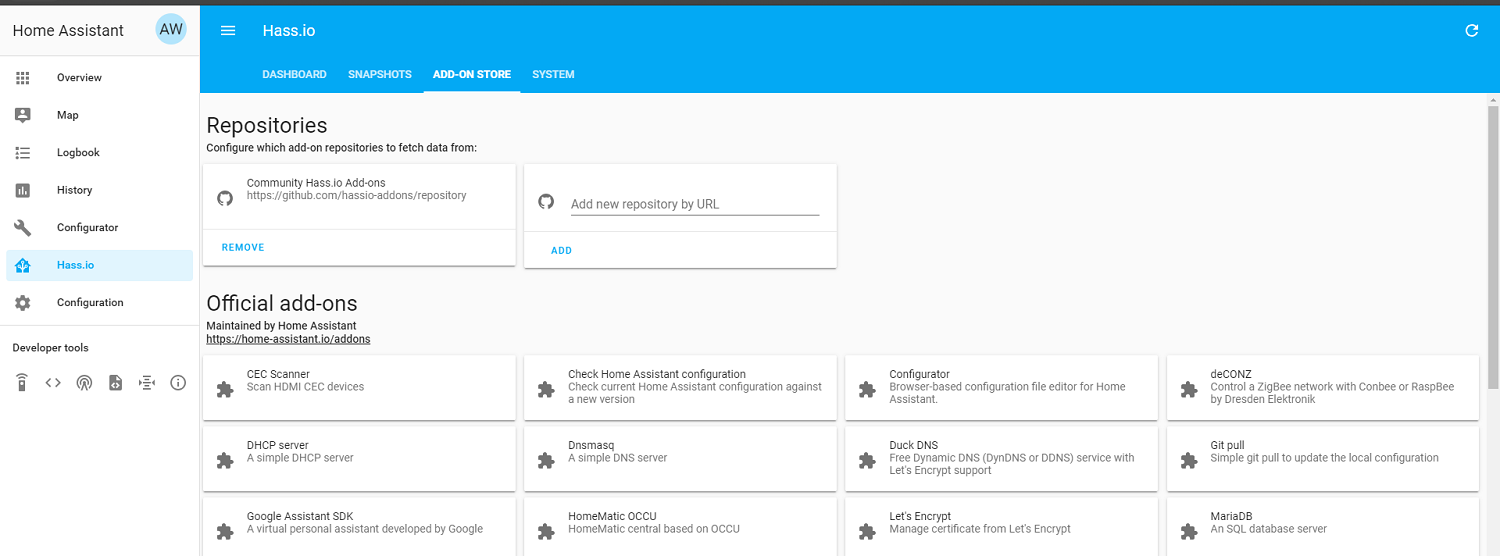
To view the available add-ons, click on the Hass.io tab on the left side menu, followed by clicking on the ADD-ON STORE tab along the top as shown below (similarly, you can go to http://hassio.local:8123/hassio/store).
Adding the Configurator Add-On
Regardless of what you ultimately use Home Assistant for, one add-on that will make configuring Home Assistant easy without having to SSH into your Pi is the Configurator under Official add-ons. The Configurator allows you to browse and modify the files on your Pi. Later on we'll be using this add-on to modify the configuration.yaml and automations.yaml files.
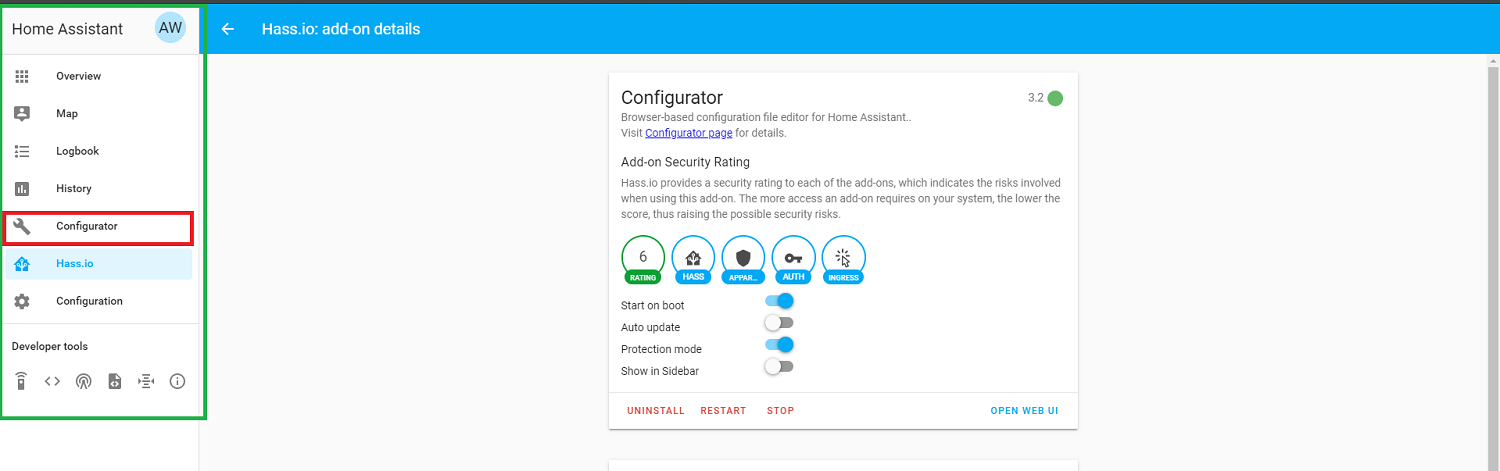
To add the Configurator, click on the Configurator add-on, and click install. After the add-on has been installed, you'll want to click start and enable the "Show in Sidebar" option, and that will add a new option to your left menu bar with the name "Configurator" after you reload the page.
We'll need to use this add-on later after we get more of our hardware setup.
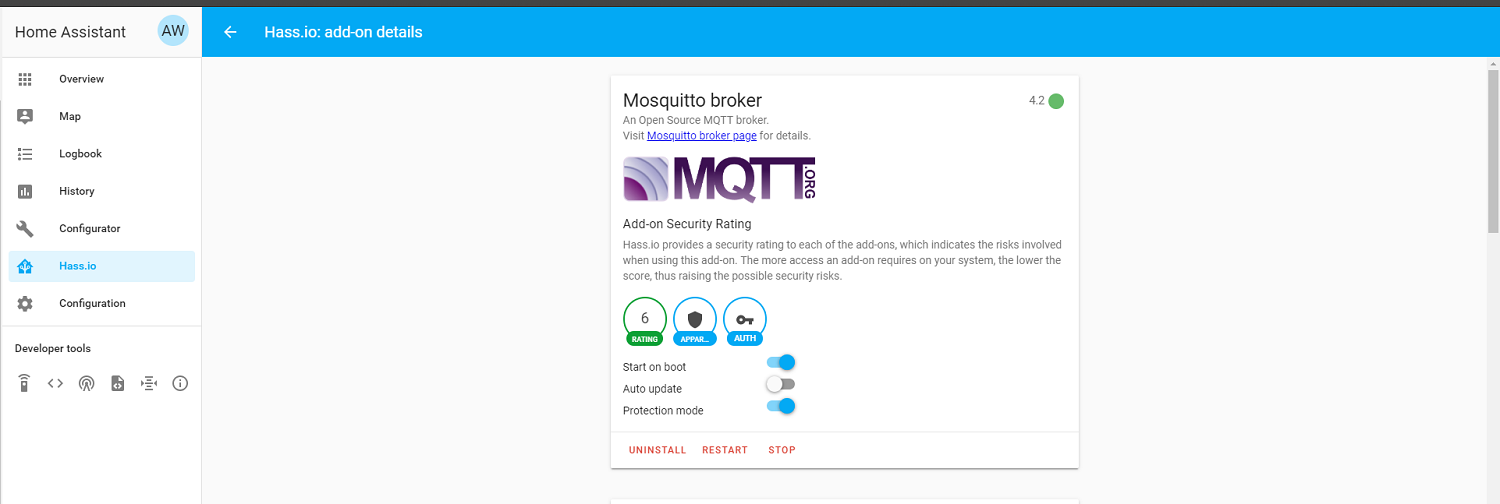
Adding the Mosquitto Broker
Mosquitto is an open source MQTT broker server that receives and distribute messages over the MQTT server. For more information about MQTT, check out the MQTT tutorial. We'll setup the Mosquitto broker the same way we did the Configurator. First click on the Mosquitto broker under the offical add-ons section of the add-on store. Click install, and wait for Home Assistant to download and add Mosquitto. After it's finished downloading, click start to enable the MQTT broker.
Using the Configurator to well... configure
Before we can start using MQTT, we need to configure Home Assistant's MQTT broker. First click on "Configurator" from the left menu bar.

We enabled MQTT from the add-on store, but now we need to configure it. All of your configurations are stored in the appropriately named file called configuration.yaml. YAML files are a human-readable data serialization language, similar to header files in C++, which are commonly used for configuration files. Similar to python, YAML files use indentations to indicate nesting, so be careful with your indents when you modify a YAML file.
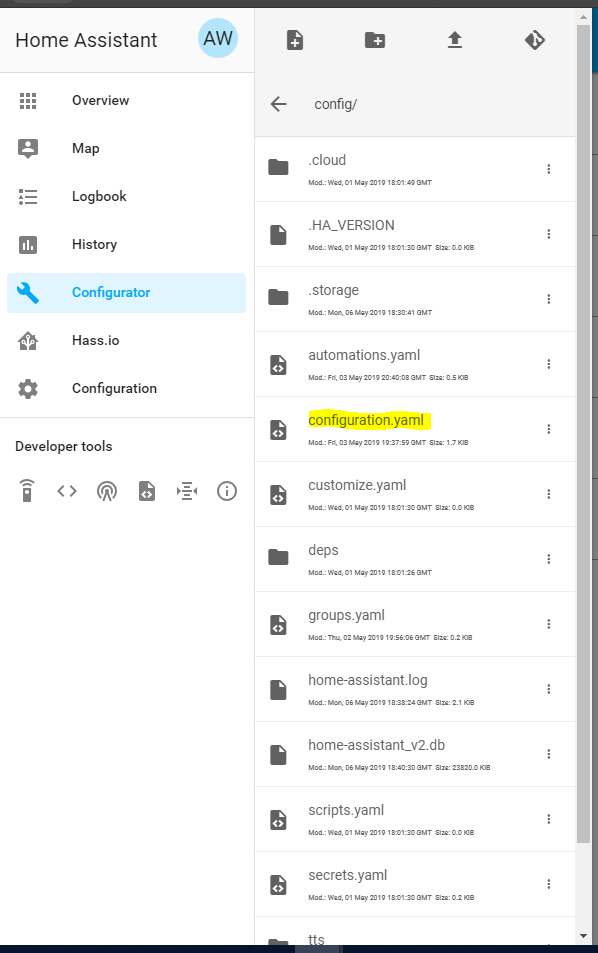
To open the configurations file, first click on the folder icon to browse the file system.
Navigate to the configuration file located at /config/configuration.yaml
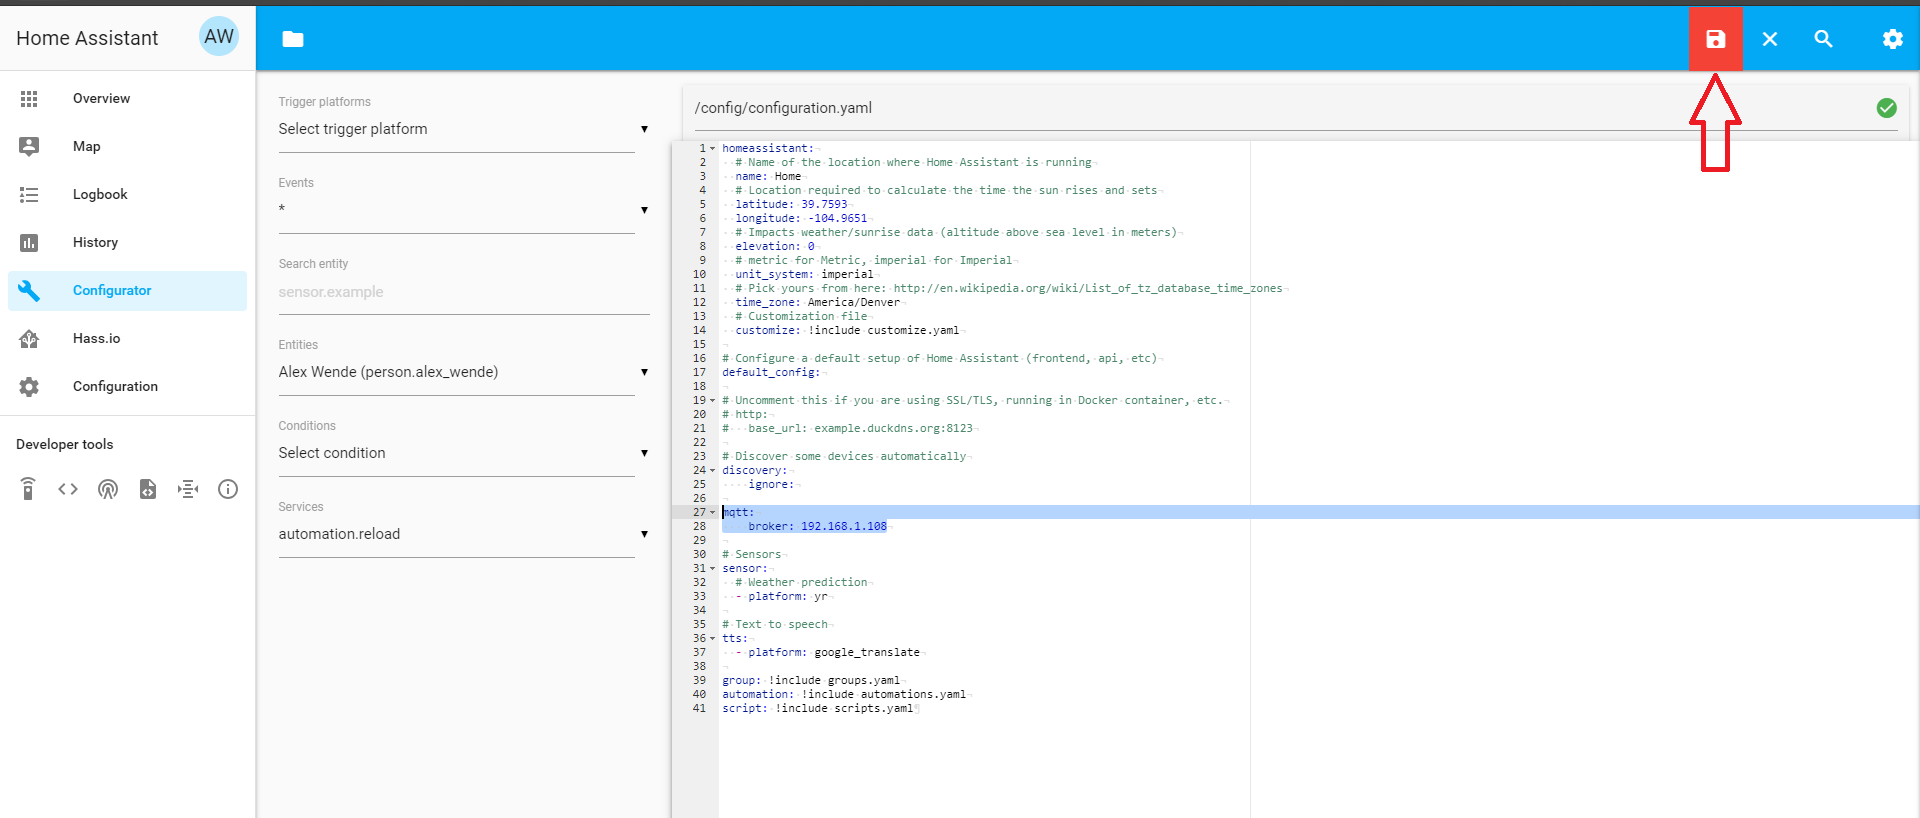
This configuration page is where we'll initialize our MQTT broker and devices. The first thing we'll initialize is the broker. Copy the following lines into the configuration file. It doesn't matter where these lines go in the file, but we'll place it just below the discovery. Make sure to replace the IP address with the IP of your Pi.
mqtt:
    broker: 192.168.1.- # This is the IP address of the Pi, which can be found from your client list of your router
Once that's done we can save changes by pressing save icon.
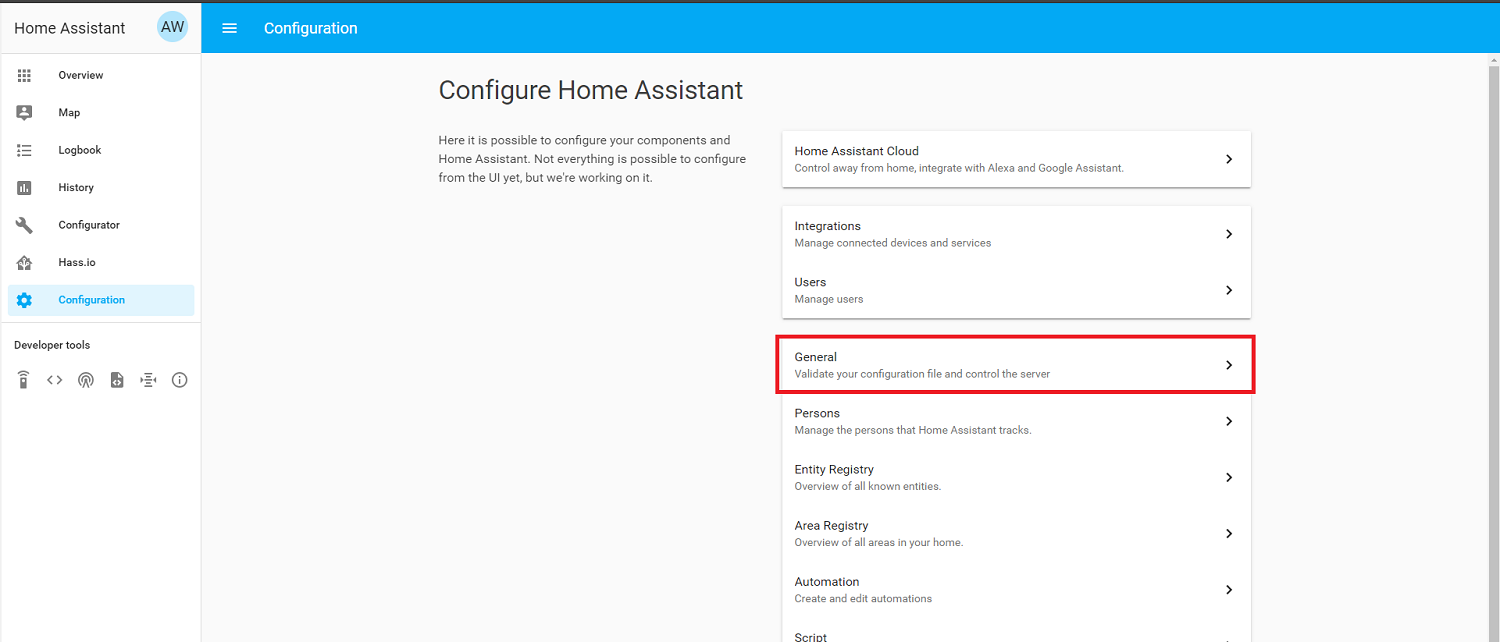
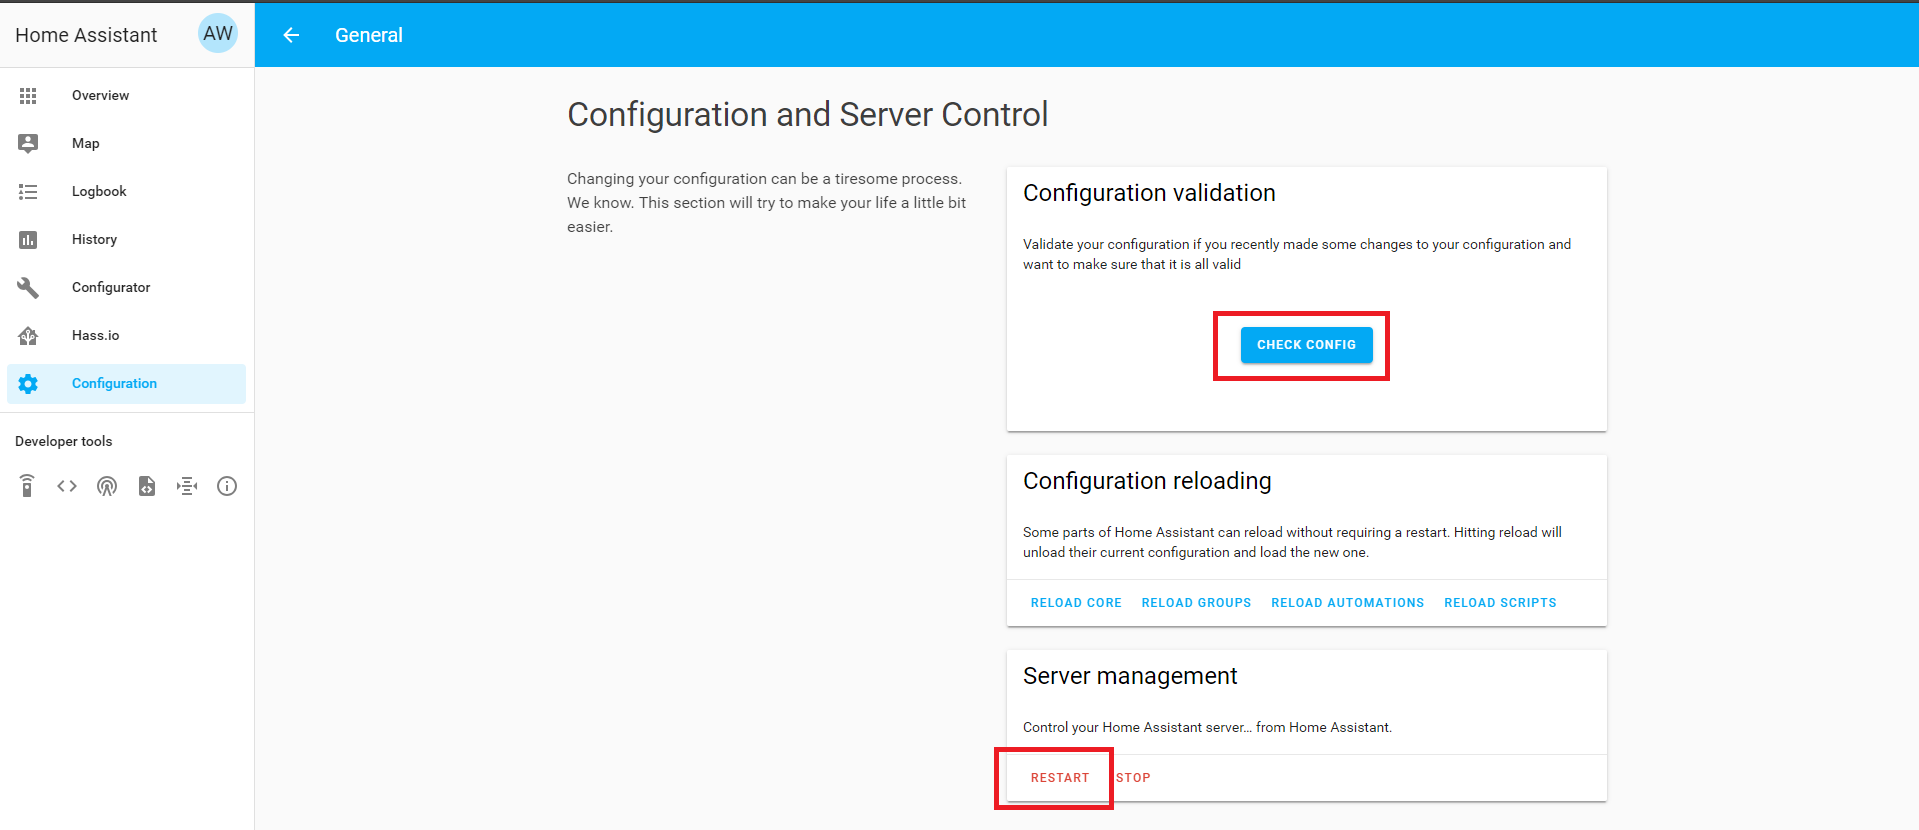
Every time we make a change to any of the files, we'll want to first check that the configuration is valid, and then restart Home Assistant. To check the configuration, go to the tab labeled Configuration NOT Configurator along the left side, and select General, and click "CHECK CONFIG". If the syntax is correct, it will display a message "Configuration Valid". If not it will show you a debug message showing where the error occurred that needs to be fixed. Once the configuration is valid, press "RESTART" under Server Management, and wait a minute for the changes to be applied.