Using Home Assistant to Expand Your Home Automations
 Alex the Giant
Example 1.5: Controlling the ESP32 from Home Assistant
In the first example, we connected two ESP32 Thing Plus boards to Home Assistant's Mosquitto broker. Even though the server is running in the background, Home Assistant doesn't know what topics the Thing Plus boards are subscribing and publishing to. To fix that, we'll need to get Home Assistant to subscribe to those same topics, which is done by adding the components to the configuration file. Go back to the configurator tab and open the configuration.yaml file again.
The first device we'll add is the switch component, just like when we added the MQTT component, it doesn't matter where we add the switch to the configuration file, but to keep things organized, we'll add the following lines below the mqtt initialization.
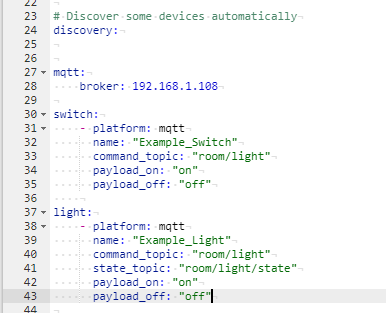
switch:
  - platform: mqtt
    name: "Example_Switch"
    command_topic: "room/light"
    payload_on: "on"
    payload_off: "off"
First we told the Home Assistant that we would like to add a switch component. The switch uses the MQTT platform, and has a name called "Example_Switch". The switch will command (or publish to) a topic called "room/light", this is the same name of the mqtt topic we're publishing to in the ESP32's Switch Arduino sketch. The payload is the message being sent over the command topic to turn the light on and off.
The second device we'll add is the light component just below the switch component with an empty line separating the switch component with the light component.
light:
  - platform: mqtt
    name: "Example_Light"
    command_topic: "room/light"
    state_topic: "room/light/state"
    payload_on: "on"
    payload_off: "off"
Similarly to the switch component, we told Home Assistant that we would like to add a light component. The light uses the MQTT platform, and has a name called "Example_Light". The light will listen for commands from the topic "room/light", which is the same topic we defined in the ESP32's Light Arduino sketch. The payload we're listening for is "on" to turn the light on, and "off" to turn the light off. Once those lines have been added, your configuration file should look like this:
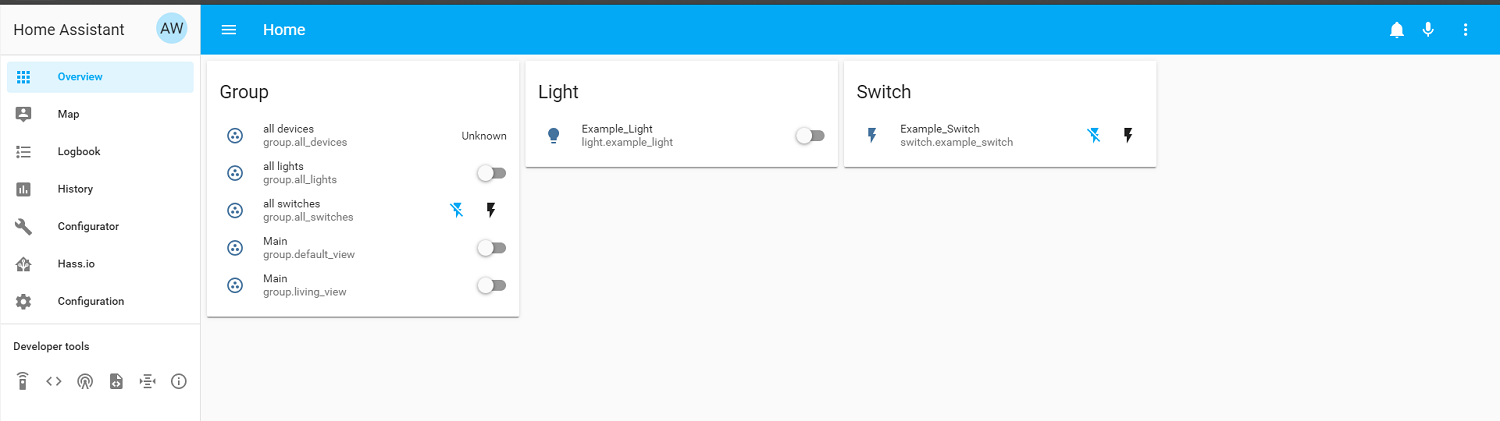
Once the light and switch components have been added, we'll need to save the configuration file again, check that the configuration valid, and restart the server. Once the server has been restarted click Overview from the left menu bar. From the there you should see your light and switch components, if not you may need to troubleshoot.
If you're able to see your components, clicking on the slide switch of the light or the lightning bolt symbol of the switch will turn the ESP32's LED on. You'll also see that from Home Assistant, the light bulb symbol of the light also turned on. Home Assistant is able to know what the state is of the MQTT light by using the state_topic both in the configuration file as well as publishing to the topic from the light's Arduino sketch. If we had removed the state_topic from the light, we would be able to control the light, but we wouldn't be able see from Home Assistant if the light is on or off.
So we can add our own devices, and that's cool I guess, but that was basically working in the MQTT tutorial. So why use Home Assistant? The next example will show that you can not only add your own devices, but devices you can buy and get working out of the box.
Troubleshooting Tips
Unused Entities
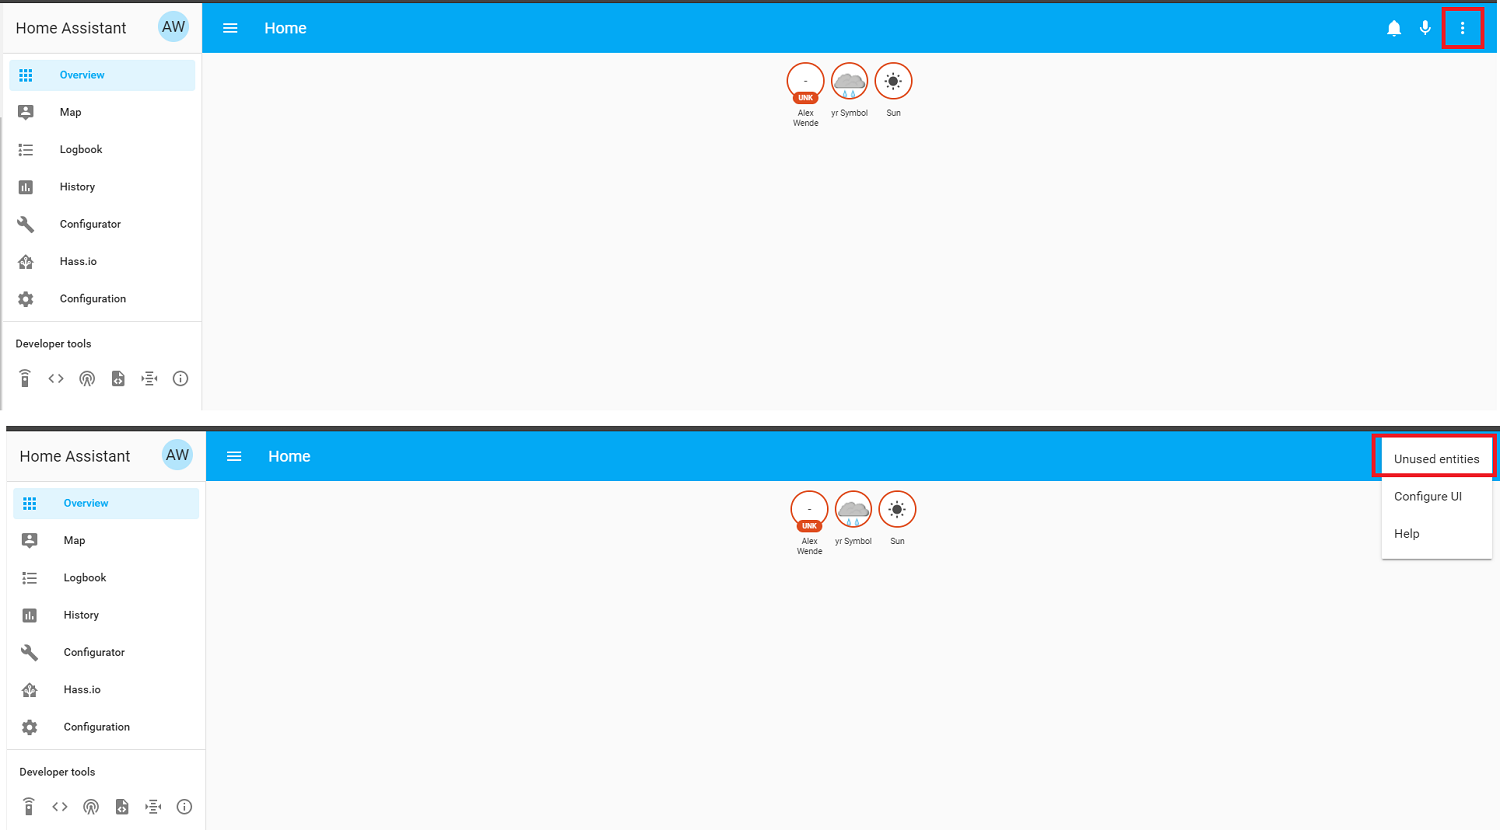
If you're not able to see your light and switch, they may be in your unused entities. To view them, click on the 3 vertical dots along the top right and select Unused entities as shown below. Or click on following link to load your unused entities page (http://hassio.local:8123/lovelace/hass-unused-entities).
From this page you'll see all of your unused entities, including the Example_Light and Example Switch:
Components Not Showing Up in Either
If you still can see all of your components, the issue may be your MQTT broker. To fix this, go into the configurator and open your configuration file. From the configuration file, remove the MQTT component and broker IP address, but leave the light and switch components. When done press save, and restart the server. Once it comes back online, click on configuration on the left menu bar, and click on integrations (http://hassio.local:8123/config/integrations/dashboard).
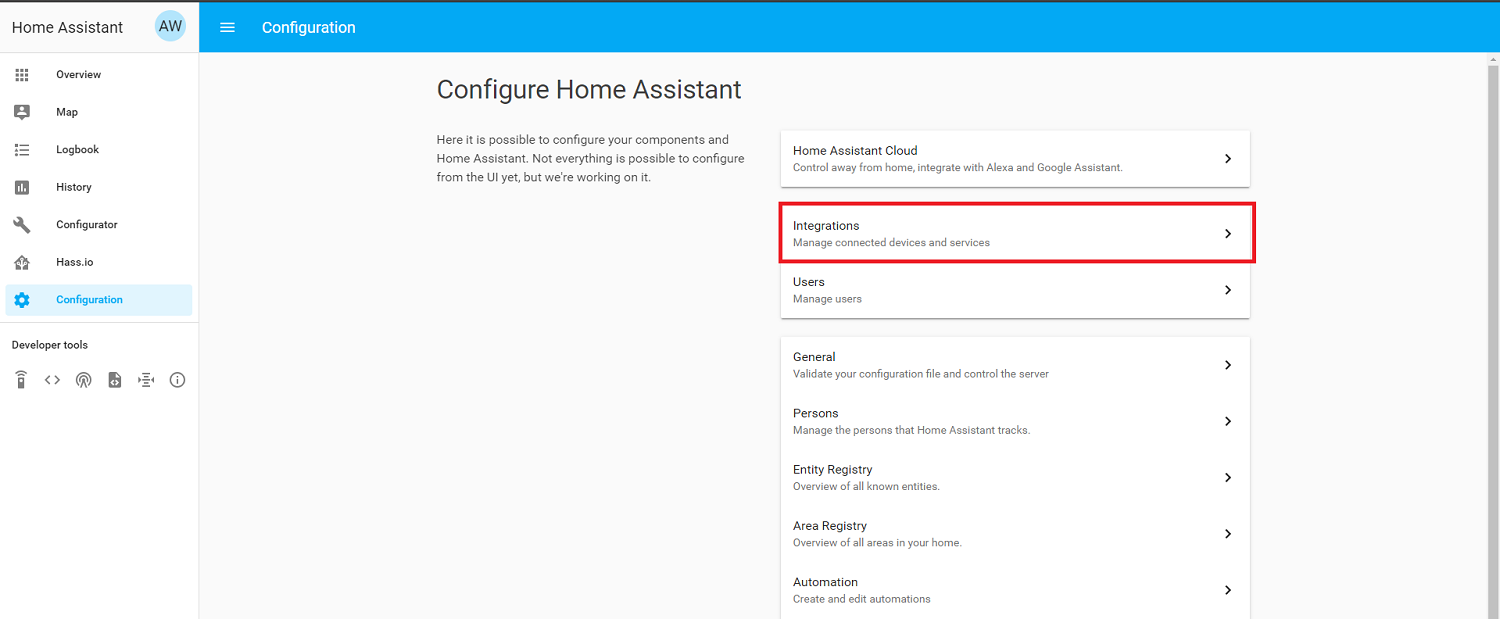
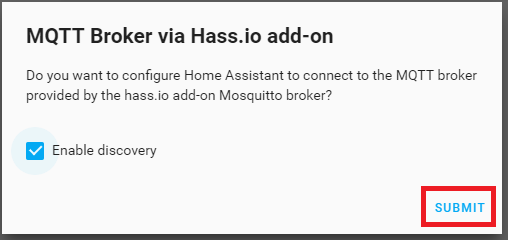
If your Mosquitto broker add-on is enabled and running, you should see a MQTT component in the discovery section; click Configure.
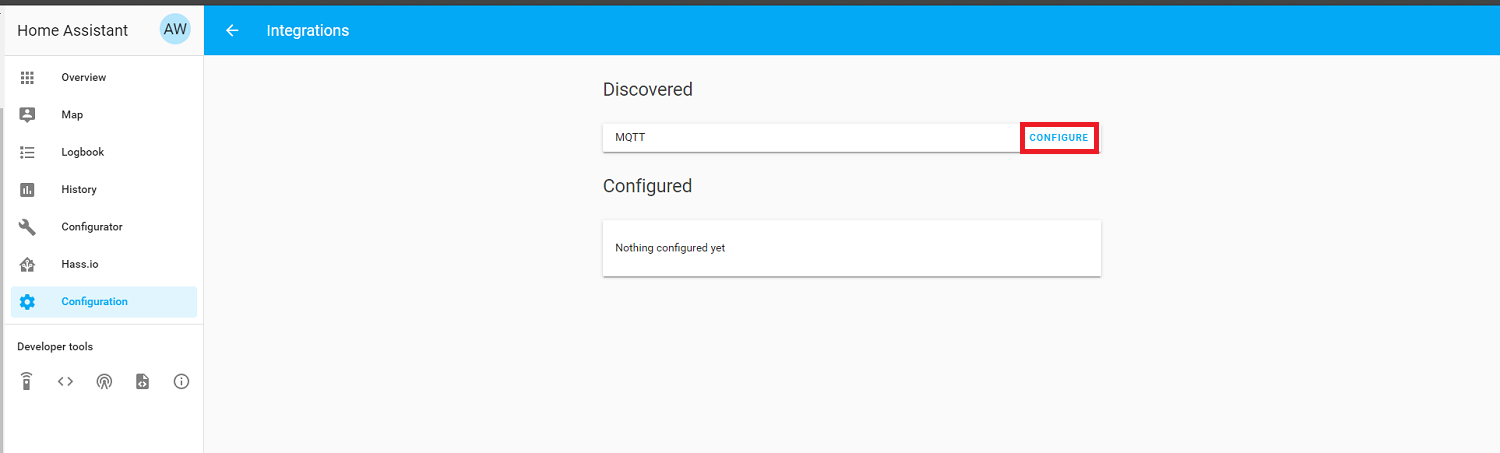
From this page, you can check the enable discovery box and press submit. And your devices should now be visible either from the overview or unused entities pages.