Wireless Arduino Programming with Electric Imp
 Nate
Nate 
Getting Started
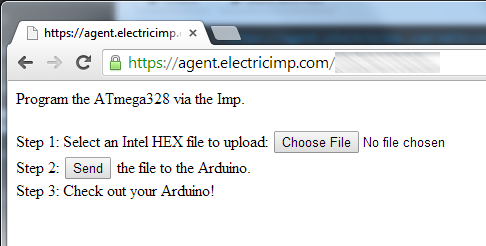
This tutorial will show you how to use an Electric Imp to repogram an Arduino from a webpage. Yep, you read that right. Now you can reprogram an Arduino (and an Imp) from anywhere in the world!
The Electric Imp is a powerful device that allows you to connect to the internet relatively easily. For a lot of my Imp projects, I use an Arduino to handle the interface between the various bits of hardware. While reprogramming the Imp is extremely easy via their web-based IDE, reprogramming an Arduino is much more tedious and requires plugging in a computer and downloading new code. Why not use the Imp's wireless connection to push new Arduino sketches as well?
If you've ever installed an Arduino into a place that required a scissor lift, in a water tight enclosure, on the top of a building, or into a paper-mache piñata, you understand how problematic it can be to fix that bug you never imagined. With a few bits of hardware you can have an Arduino attached firmly to the Internet of things as well as making the Imp+Arduino a heck of a lot easier to reprogram.
What in the world is Tomatoless Boots? Sorry. It's a joke first told by Rob Faludi:
Wireless is a pointless way to describe wireless. It only describes what wireless is not, not what it is.
For example, it also has no tomatoes, so we might as well call it 'tomatoless'.
And since it's a bootloader of sorts, we decided (against good judgement) to call it Tomatoless Boots. Zomg thank you Aron Steg for writing the original Imp code. We took his code and made a few improvements to dramatically improve the bootload time and to get it to work with general Arduinos.
Required Materials
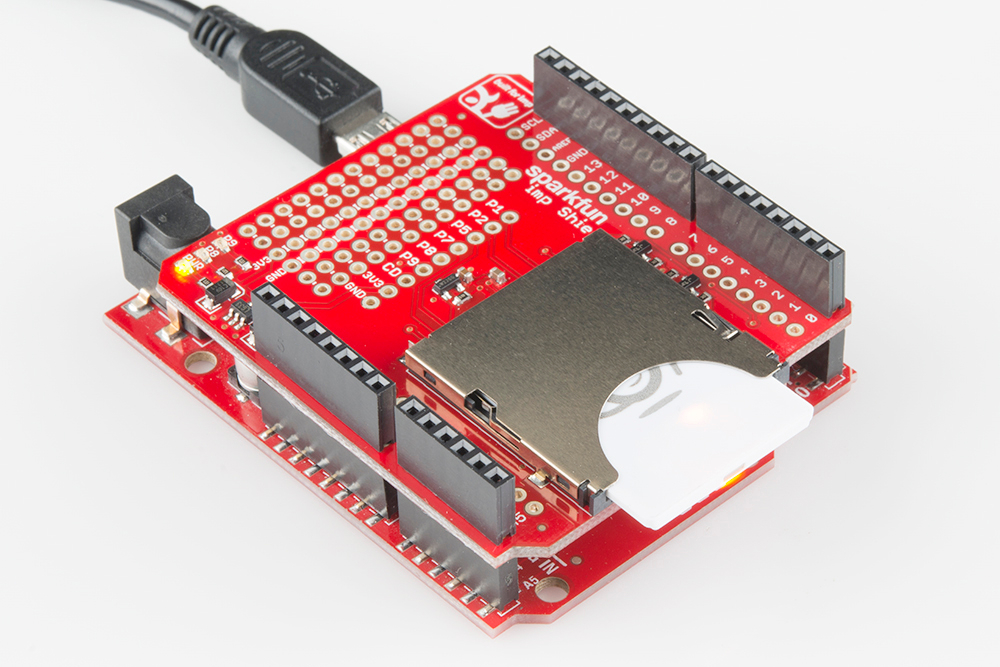
Parts you'll need:
Along with the above parts, you'll need the following tools.
- Exacto Knife
- Soldering iron and a bit of wire
- Local Wifi access
This reprogramming-over-wifi trick only works with ATmega328 based Arduinos with a serial bootloader such as the Arduino Uno, Fio, LilyPad, Pro, Pro Mini, and RedBoard. This tutorial will not work with the Due, Leonardo, Micro, Galileo, or Teensy. There are probably some really good ways of getting these other boards to bootload over wifi but their bootloaders are different enough that this tutorial doesn't attempt to cover them.
Suggested Reading
Other tutorials you may want to brush up on before diving into this one:
- Getting Started with the Electric Imp
- How to use a multimeter
- How to install and solder Arduino Headers