XBee WiFi Hookup Guide
 jimblom
 To the Cloud!
XBee WiFi's are built to enable simple communication with Device Cloud by Etherios (TM). The Device Cloud service allows you to interface your XBee WiFi with the web, where you can control the I/O pins and read its status from the comfy confines of your web browser (anywhere in the world!).
Now, Device Cloud is a paid service, but it's pretty reasonably priced (down to $0.50 per device per month). They also provide a free 30 day trial if you just want to try it out, which is what we'll do here.
Setting up Device Cloud
To begin, we'll need to set up the Device Cloud to communicate with our XBee WiFi. Follow the steps below to set this up:
- Go to the Device Cloud Login Page. Login or make an account if you don't already have one. If you're just looking to try it free, don't worry -- you won't have to enter any payment info.
- In Device Cloud click to the Device Management tab.
- In the Device Management section, click the Add Devices button near the top. This is where we'll point our XBee WiFi module to our Device Cloud ID.
- There are two methods for adding your XBee. We recommend the manual method:
- Make sure you're on the "Manual" half of the Add Device window.
- Find your XBee WiFi's MAC address. This is listed in XCTU under the SL and SH (serial number low and high) entries. You'll need to concatenate the two values to get your MAC address.
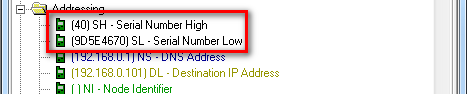 In XCTU, this is where you'll find the MAC address.
 - Set the drop down menu to MAC address. Then type your XBee's address into the text box nearby. You may need to add a couple leading 0's to make it 6-bytes long. Then click Add.
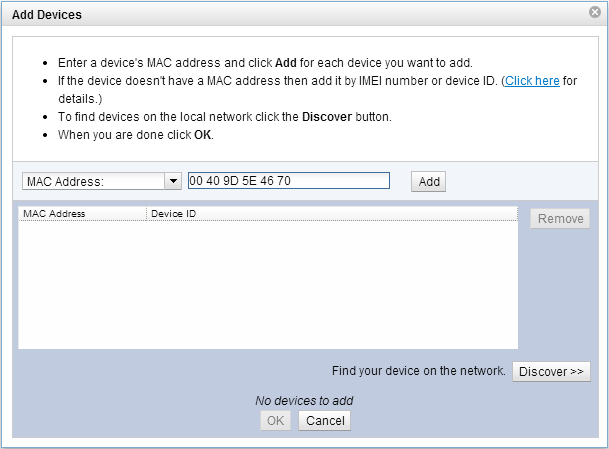
- After some thumb-twiddling your XBee and its MAC address should appear in the list below. Click OK.
- Now you should have an entry for your XBee in Device Cloud now. Right-click on the XBee and select Properties (or select the XBee and click the "Properties" button above).
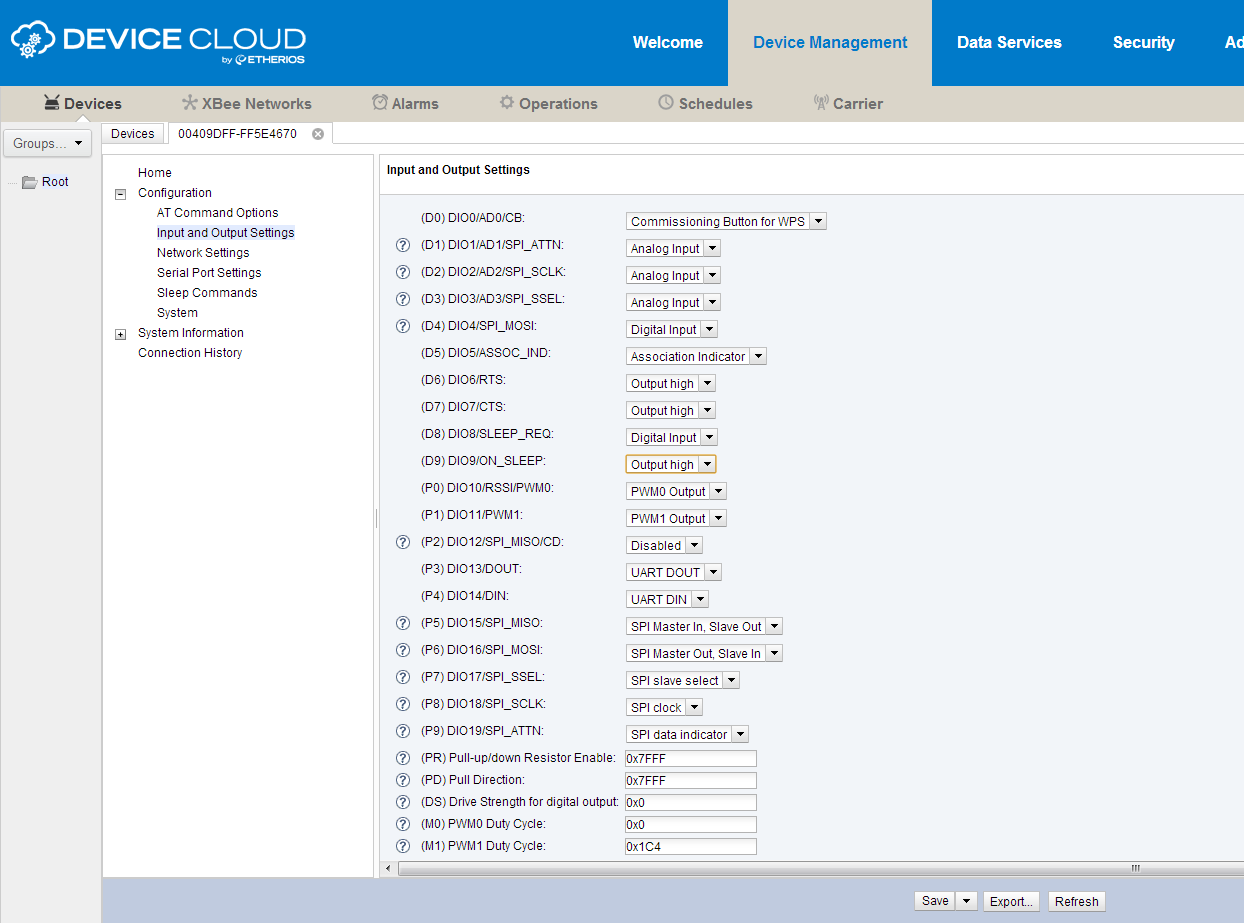
Here you can view and control just about everything as it relates to your XBee. You can set pins direction and value in the Input and Output Settings tab. Try setting a pin to "Output High", then click Save. The pins should have been driven to 3.3V, but how do you know? Time to whip a circuit together!
Take an Circuit Assembly Break!
Here's the circuit we'll use to get the most of XBee's example cloud dashboard. You don't have to hook up every part, but we recommend at least trying the LED connected to pin 13.

You'll still need to power the XBee WiFi module. It can remain in the XBee Explorer, or you can plug it into a separate XBee Breakout Board. Here's an image of our hookup using:
- Half Breadboard
- 10k Trimpot with Knob
- Mini Push Button
- Mini Power Switch
- 5mm Super-Bright Blue LED
- 5V/3.3V Breadboard Power Supply (set to 3.3V!)

Now that we've attached some buttons and LEDs, it's time to take it to the cloud!
Setting Up XBee Dashboard
You can use Digi's Example App to test out your Device Cloud setup. Follow these steps to get up-and-running:
- Log in to the XBee WiFi Cloud Kit. Use the same login as the Device Cloud earlier.
- On the next page, under the "Select a Device" heading, you should see a dropdown menu with your XBee address already selected. Then just click "Yes (recommended)" to configure your XBee for this example.
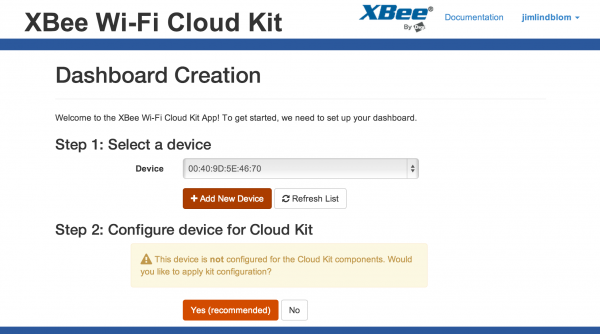
- Choose a layout preset and then Create Dashboard! You should see something like this on the next screen.
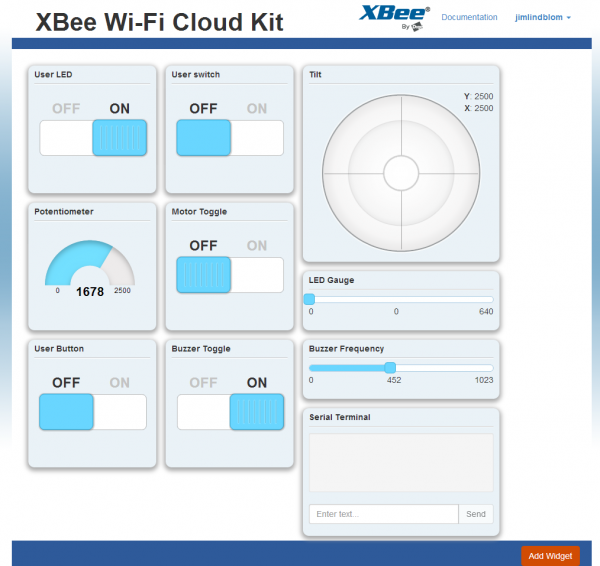

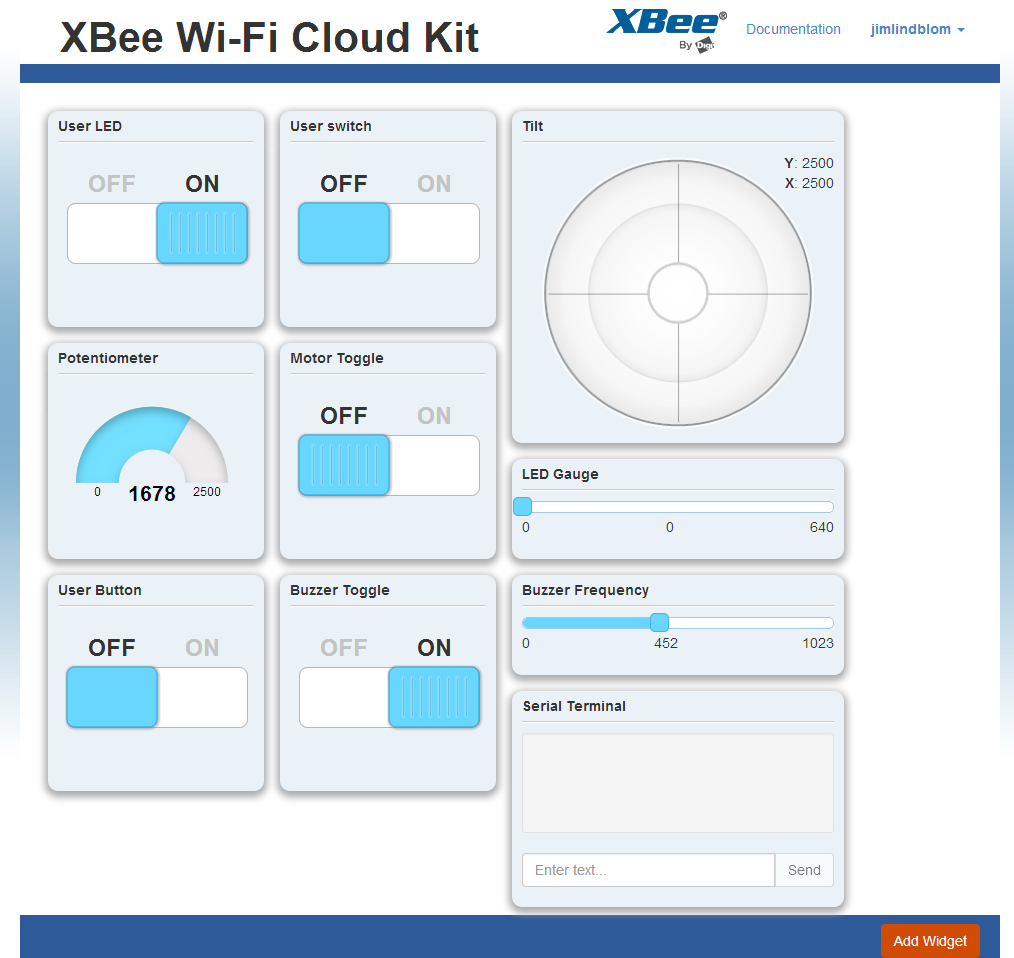
Play around with it! Try turning the LED on remotely. Then read some buttons and potentiometers. Pretty cool! Now ask a friend from across the ocean to do it. Even cooler!
If you want to build out your own app, all of the required code is viewable by clicking the </> button on a widget. It looks like everything's hosted on Digi's GitHub page, which we're huge fans of.