ZX Distance and Gesture Sensor Hookup Guide
This Tutorial is Retired!
This tutorial covers concepts or technologies that are no longer current. It's still here for you to read and enjoy, but may not be as useful as our newest tutorials.
View the updated tutorial: ZX Distance and Gesture Sensor SMD Hookup Guide
 Shawn Hymel
Arduino: ZX Example
Load the ZX Demo
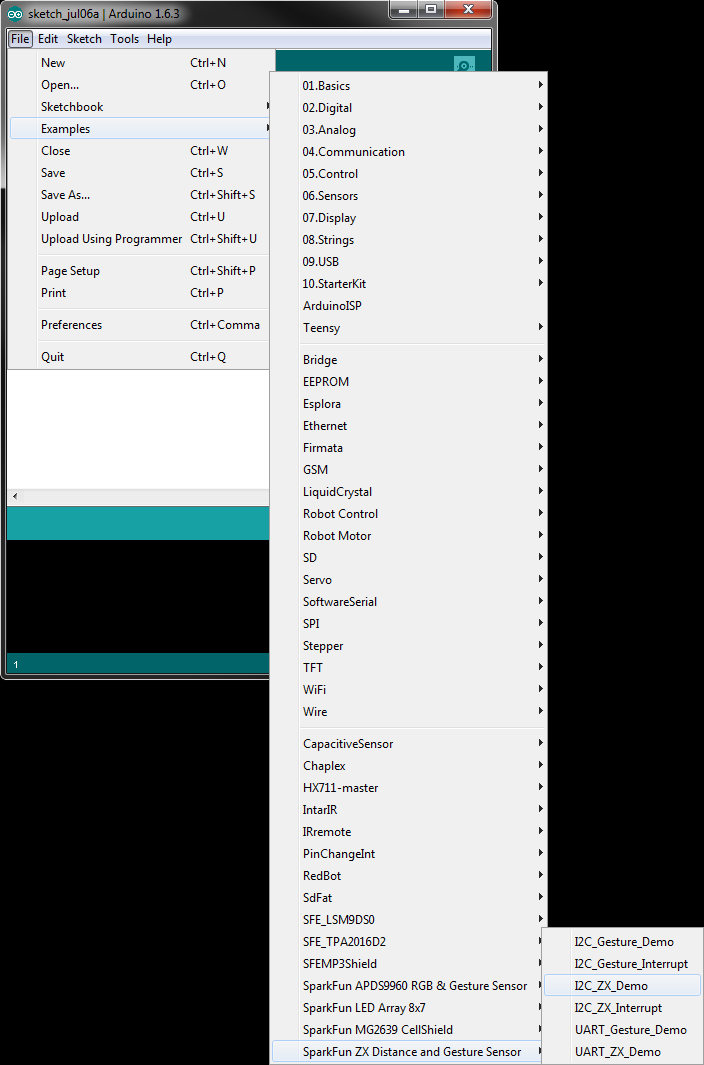
Open up the Arduino program and select File → Examples → SparkFun_ZX_Distance_and_Gesture_Sensor → I2C_ZX_Demo.
Attach a USB mini cable from your computer to the RedBoard. If you have not previously done so, install the FTDI drivers.
For reference, here is the I2C_ZX_Demo.ino sketch.
language:c
    /****************************************************************
I2C_ZX_Demo.ino
XYZ Interactive ZX Sensor
Shawn Hymel @ SparkFun Electronics
May 6, 2015
https://github.com/sparkfun/SparkFun_ZX_Distance_and_Gesture_Sensor_Arduino_Library

Tests the ZX sensor's ability to read ZX data over I2C. This demo
configures the ZX sensor and periodically polls for Z-axis and X-axis data.

Hardware Connections:

 Arduino Pin  ZX Sensor Board  Function
 ---------------------------------------
 5V           VCC              Power
 GND          GND              Ground
 A4           DA               I2C Data
 A5           CL               I2C Clock

Resources:
Include Wire.h and ZX_Sensor.h

Development environment specifics:
Written in Arduino 1.6.3
Tested with a SparkFun RedBoard

This code is beerware; if you see me (or any other SparkFun
employee) at the local, and you've found our code helpful, please
buy us a round!

Distributed as-is; no warranty is given.
****************************************************************/

#include <Wire.h>
#include <ZX_Sensor.h>

// Constants
const int ZX_ADDR = 0x10;  // ZX Sensor I2C address

// Global Variables
ZX_Sensor zx_sensor = ZX_Sensor(ZX_ADDR);
uint8_t x_pos;
uint8_t z_pos;

void setup() {

  uint8_t ver;

  // Initialize Serial port
  Serial.begin(9600);
  Serial.println();
  Serial.println("-----------------------------------");
  Serial.println("SparkFun/GestureSense - I2C ZX Demo");
  Serial.println("-----------------------------------");

  // Initialize ZX Sensor (configure I2C and read model ID)
  if ( zx_sensor.init() ) {
    Serial.println("ZX Sensor initialization complete");
  } else {
    Serial.println("Something went wrong during ZX Sensor init!");
  }

  // Read the model version number and ensure the library will work
  ver = zx_sensor.getModelVersion();
  if ( ver == ZX_ERROR ) {
    Serial.println("Error reading model version number");
  } else {
    Serial.print("Model version: ");
    Serial.println(ver);
  }
  if ( ver != ZX_MODEL_VER ) {
    Serial.print("Model version needs to be ");
    Serial.print(ZX_MODEL_VER);
    Serial.print(" to work with this library. Stopping.");
    while(1);
  }

  // Read the register map version and ensure the library will work
  ver = zx_sensor.getRegMapVersion();
  if ( ver == ZX_ERROR ) {
    Serial.println("Error reading register map version number");
  } else {
    Serial.print("Register Map Version: ");
    Serial.println(ver);
  }
  if ( ver != ZX_REG_MAP_VER ) {
    Serial.print("Register map version needs to be ");
    Serial.print(ZX_REG_MAP_VER);
    Serial.print(" to work with this library. Stopping.");
    while(1);
  }
}

void loop() {

  // If there is position data available, read and print it
  if ( zx_sensor.positionAvailable() ) {
    x_pos = zx_sensor.readX();
    if ( x_pos != ZX_ERROR ) {
      Serial.print("X: ");
      Serial.print(x_pos);
    }
    z_pos = zx_sensor.readZ();
    if ( z_pos != ZX_ERROR ) {
      Serial.print(" Z: ");
      Serial.println(z_pos);
    }
  }
}
Run
Make sure you have the correct serial port selected under Tools → Serial Port and "Arduino Uno" selected under Tools → Board. If you have never used the Arduino IDE before, this turoial should get you started.
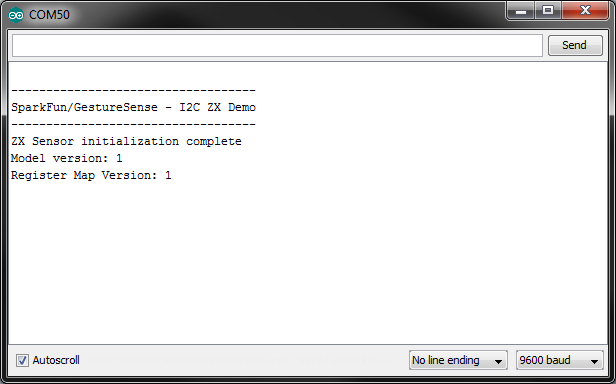
Click the Upload button and wait for the program to finish uploading to the Arduino. Select Tools → Serial Monitor to open up the serial terminal. More info on the Serial Terminal can be found here. Note that the Serial Monitor settings are the default settings (9600, 8, n, 1). You should see a couple of messages noting that "ZX Sensor initialization complete."
Hover your hand 4 to 10 inches (10 to 25 cm) above the sensor.
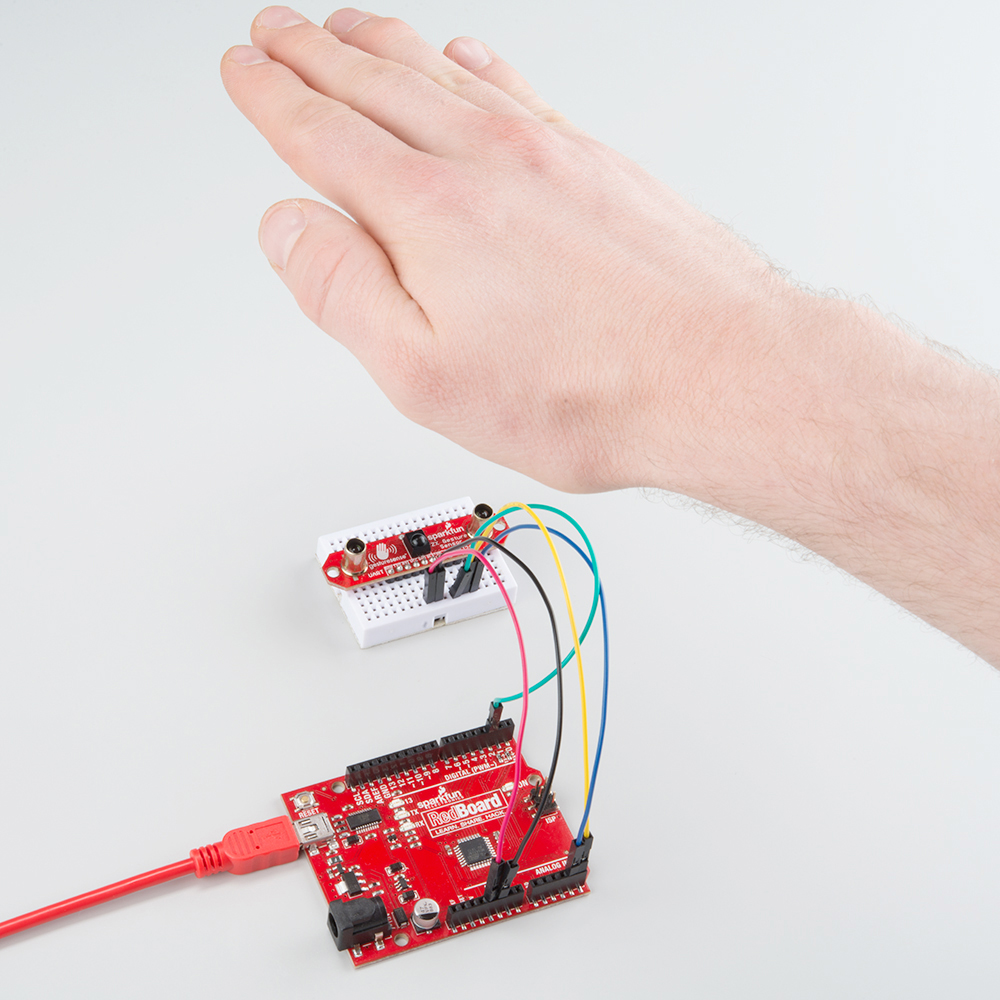
Move your hand around above the sensor, and you should see Z (height above the sensor) and X (position side to side) appear in the serial terminal.
