
Another week, another batch of new products. I'm excited about this one because we have some very cool new robot wheels and I wanted to try them out. Let's jump right in and take a look!
ReplaceMeOpen
ReplaceMeClose
Vimeo version can be found here
Not bad, right? I think the HUB-ee Buggy was actually kind of cute, like an angry little electric rodent - that's cute right?
I didn't talk about out new Papilio wings at all in the video but they are also very cool. They're similar to Arduino shields except that they plug into your Papilio FPGA development board. We have three brand new Papilio wings on offer this week: The VGA Wing, the Audio Wing and the Button/LED Wing.
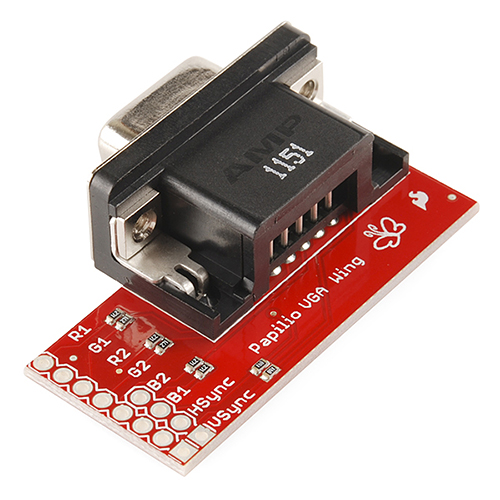
The VGA Wing has all of the hardware you need to add a VGA output to your next Papilio project. Whether you're building your own mini computer or re-writing classic arcade games, VGA output is an easy way to get graphics out to a computer monitor.
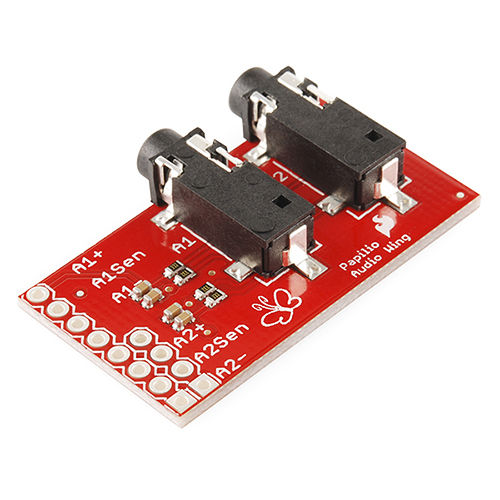
The Papilio Audio Wing is a fast and easy way to snap into audio capability. It adds two stereo channels (with 1/8" audio jacks) so you can jam out with your FPGA... or at least make some noise. The detect pins are also broken out so your Papilio board can tell when you've plugged in!
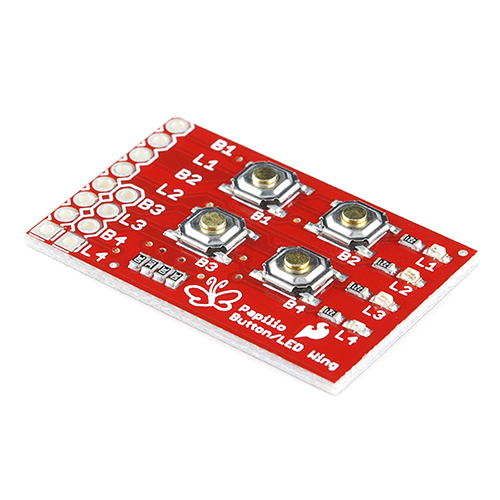
The Button/LED Wing is really awesome for just learning the basics of I/O. It's just 4 LEDs and 4 pushbuttons on a single board that plugs right into the Papilio to give you instant, simple inputs and outputs. There's even a custom core that acts as an interface for your FPGA application.
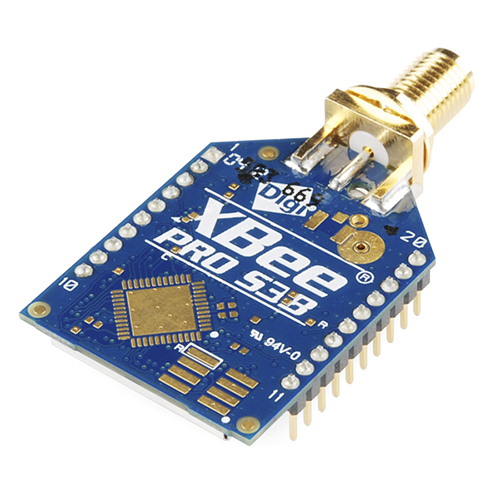
We're continuing to update our XBee lineup! The new S3B version of Digi's XBee-PRO XSC module is in. The S3B hardware features increased range and throughput but it's still compatible with legacy XBee-PRO XSC modules.
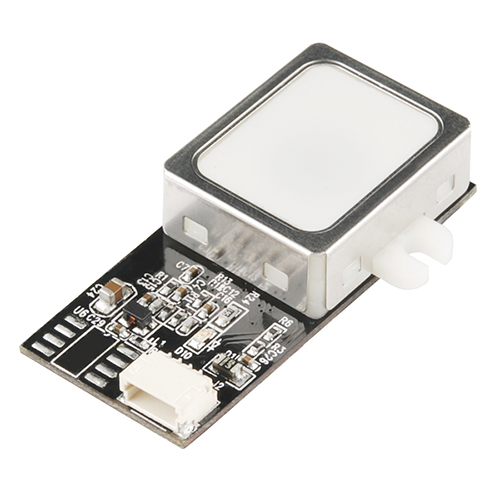
Remember the awesome new Fingerprint Scanner we got a while back? Well they've already upgraded. The new version works the same way as the old but now it can store 10 times the amount of fingerprints, up to 200! It's also capable of 360 degree fingerprint recognition. Definitely check these out for your next top secret lab entrance.
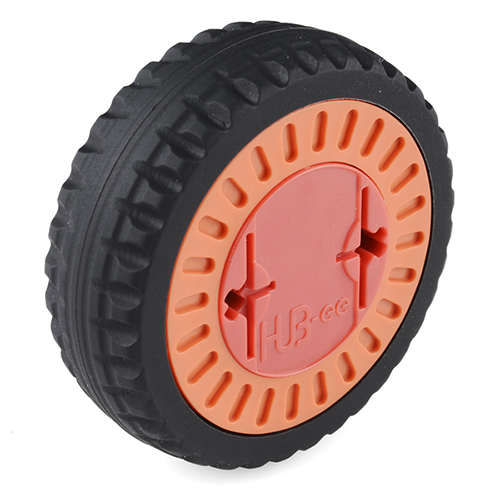
These things are way cool. The new HUB-ee wheels from Creative Robotics combine a wheel, a motor, a motor driver and a quadrature encoder all in one neat little package. Not only does it make putting wheels on anything a breeze but it also has some practical advantages to the finished robot like increased ground clearance! When you don't have to deal with the drive-train hanging off the wheel, it's easy to implement steering mechanisms as well. The mounting holes house threaded inserts for M3 bolts but are also LEGO lug compatible. HUB-ee wheels are available in both 120:1 and 180:1 gear ratios and come with a right-angle mounting bracket. I had a blast playing with these.
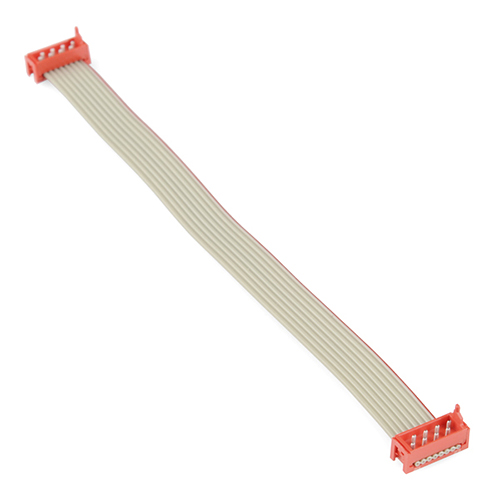
HUB-ee wheels connect together using AMP Micro-MaTch connectors. This ribbon cable has one Micro-MaTch connector on each end so you can plug your HUB-ee into a breakout board. I cut one of these in half and made myself a pair of HUB-ee pigtail connectors for the HUB-ee Buggy robot but on a larger 'bot you may need the full 150mm length.
If 150mm isn't enough, consider making your own cable! These connectors crimp onto an 8-conductor cable so you can daisy-chain your HUB-ee wheels all day long.
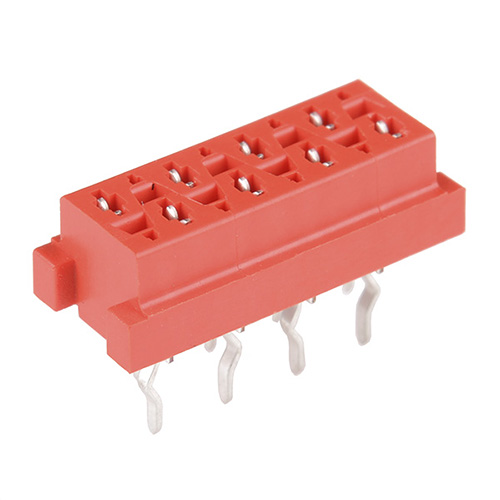
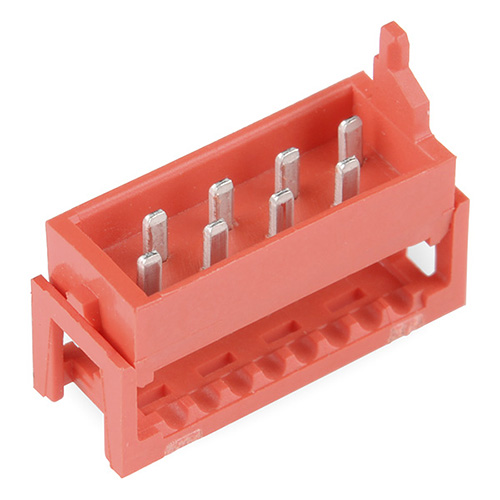
The other end of that ribbon cable has to go somewhere. If you're designing your own robot board for the HUB-ee wheels, why not snag a few of these connectors? They're through-hole mountable and have indented legs to keep them in place during soldering.
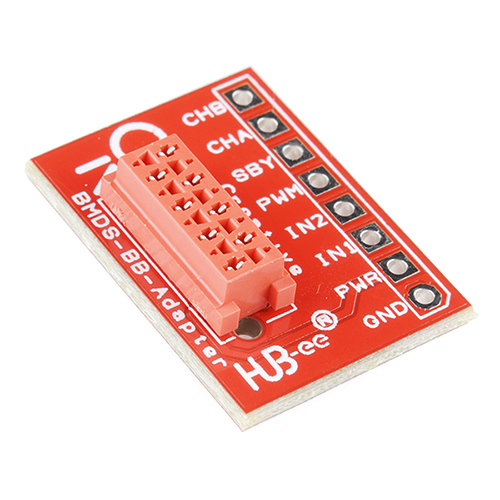
If you just want to plug into a breadboard and go, you might be interested in the HUB-ee Control Breakout Board. It's a simple breakout for the Micro-MaTch connector that gives you a single row of 0.1" spaced headers so you can plug it into a breadboard or perfboard!

Finally, if you're not into daisy-chaining your wheels on one long ribbon, the 4-way Sync Driver Board is a great option for sending synchronous control signals to four HUB-ee wheels at once. It also isolates the quadrature encoder channels of each wheel and routes one set through to the controller whilst making all the quadrature and standby pins for each wheel available on pin headers.
Well that's everything this week, I hope you found something to hack on! Rob returns from his interesting vacation next week (hopefully no worse for wear ) and will return to his rightful place as product post personality, it's been great doing the videos but I don't envy him one bit. See you around and come back next week for more cool new products!


I used a HUB-ee wheel when I made a music box for my wife. The low profile was perfect for fitting in the box, and it made a great turntable.
Not just for robots!
I really like the idea of the Hub-ee wheels. On a more general application though, how about a very S-L-O-W version, something to drive a gear to get high torque? What I have in mind is not running little cars around, but actually controlling the position of something. (i.e. Rack and pinion for linear positioning, or just gear for rotational positioning.) Gearing down may also increasing the resolution, if the encoder is are on the motor shaft. Just some thoughts......
David - The wheels use an off the shelf gear motor so it is possible to change the ratio fairly easily (although it currently requires a slight modification to the gear motor shaft) You can potentially go as high as 1788:1 although I think there would be some issues with the torque being a little too high. The encoder is built into the wheel rim, not the motor shaft, so changing gear ratios will not change encoder resolution. The only way to do this is with a different PCB/code disk design - possible, but not straight forward. If you strip the tyre off you can get the hub to drive tank tracks. SFE don't stock the track system at the moment (which isn't our design) but I hope they won't object if I point you to Solarbotics who do sell them: https://solarbotics.com/product/gmt/
I'm considering using these for my next robotics project - what kind of weight could 4 of these support? More specifically, I'm hoping to be able to strap a battery + controller + webcam onto the bot.
Ok, looks like 5Kg is too much for them to handle - the bot starts to moves but the motors stall out pretty quick (running off 7.2V) - reducing the payload to 4Kg gets the bot moving but even then any attempt at skid steering is going to fail because of the additional loading this involves - I will repeat the experiment with the 180:1 versions and see what happens. I'll put together a video, and write it up for our website.
Thank you so much! I think I can keep it under 4 kg.
Excellent question. My daughter and I are just filling up her cardboard box bot with stones in order to test it out - So far it just manages to move with a 5Kg load (4x 120:1 wheels running from 6xAAA NIMh batteries), but the batteries could do with a charge so I'll report back in a few hours and put a vid of the results on our Youtube Channel
I'm going to guess that your battery, cam and controller are unlikely to be more than 5Kg so they whould work fine.
These wheels are great! I love the fact that they are Lego compatible. But we can't use them directly in a Lego robot. Can you guys make a board that would have a Tiny micro to act as an I2C interface to a Lego NXT brick? The board would need to have a connector for the HUB-ee wheel and a connector for the Lego cables. Better if we could house it in some Lego bricks to give it a more authentic look. Thanks!
You're going to need a dremel like his sooner or later for this kind of inventing, maybe SF can one day stock one of the off brand dremel imitations.
Crazy, I just added the Papilio parts to my cart Friday morning, before you guys posted new products on Friday. Now I'm thinking lotto numbers... anything? Epic pelage, by the way.
Are you going to carry the HUB-ee Arduino shield? I want to get these for my younger brother but without the shield the build will get a little messy. It is available here, for example: http://www.createbots.com/hub-ee-bmd-s-proto-shield-kit/
Great video Nick! The build was a great way to show off the new parts and keep me super entertained.
What did one nerd's wife say to the other?
I need to tell my hubby about these HUBees!
Ha ha. (caption contest was yesterday. No more humor allowed.)
They should combine the HUB-ee concept with Mecanum wheels! (the updated mecanum wheels you just introduced) They need to be faster though.
Funny you should mention that - we are working on some designs for an omni wheel attachment.
This is awesome to hear because we've been saying the same thing here at SparkFun. Omni wheels will be great!
Cool, we will try and post a few videos when we get the prototypes made (along with the Wheg attachement we also have in the works!) Great video by the way!
Sweet!
Thank you very much!
Nick - cool build! It was very maneuverable - did you program it to 'skid-steer', i.e run one wheel backward while the other went forward?
That's correct, good eye! The code was very simple, it ran both wheels the same direction at close to full speed until the IR Sensor threw a value above a certain threshold, then it would run one wheel in reverse for some fraction of a second and check again.