Enginursday: Adventures in Building My Own Workbench Part 2 (Or How I Learned To Love the Triangle)
I share my designs for my new electronics workbench and go over some of the design decisions for it. I also cover what makes triangles more stable than squares.

First off, Happy Thanksgiving! If you need a moment to let the turkey dinner settle, take a seat - it's Enginursday!
Earlier this year, I wrote about building my own electronics workbench. Sadly, the desk had a slight stability problem, which meant that it only worked well when stuck in a corner. There were many great comments, and after pouring over them, talking to SFUptownMaker, and reading some architecture 101, I discovered triangles.
That's right: triangles.
As it turns out, triangles are the most stable polygon. If you make a square (or any other 4+ sided polygon, for that matter) with corners that can pivot, it can easily be bent out of shape. A triangle, on the other hand, cannot change shape as long as the length of the sides do not change.
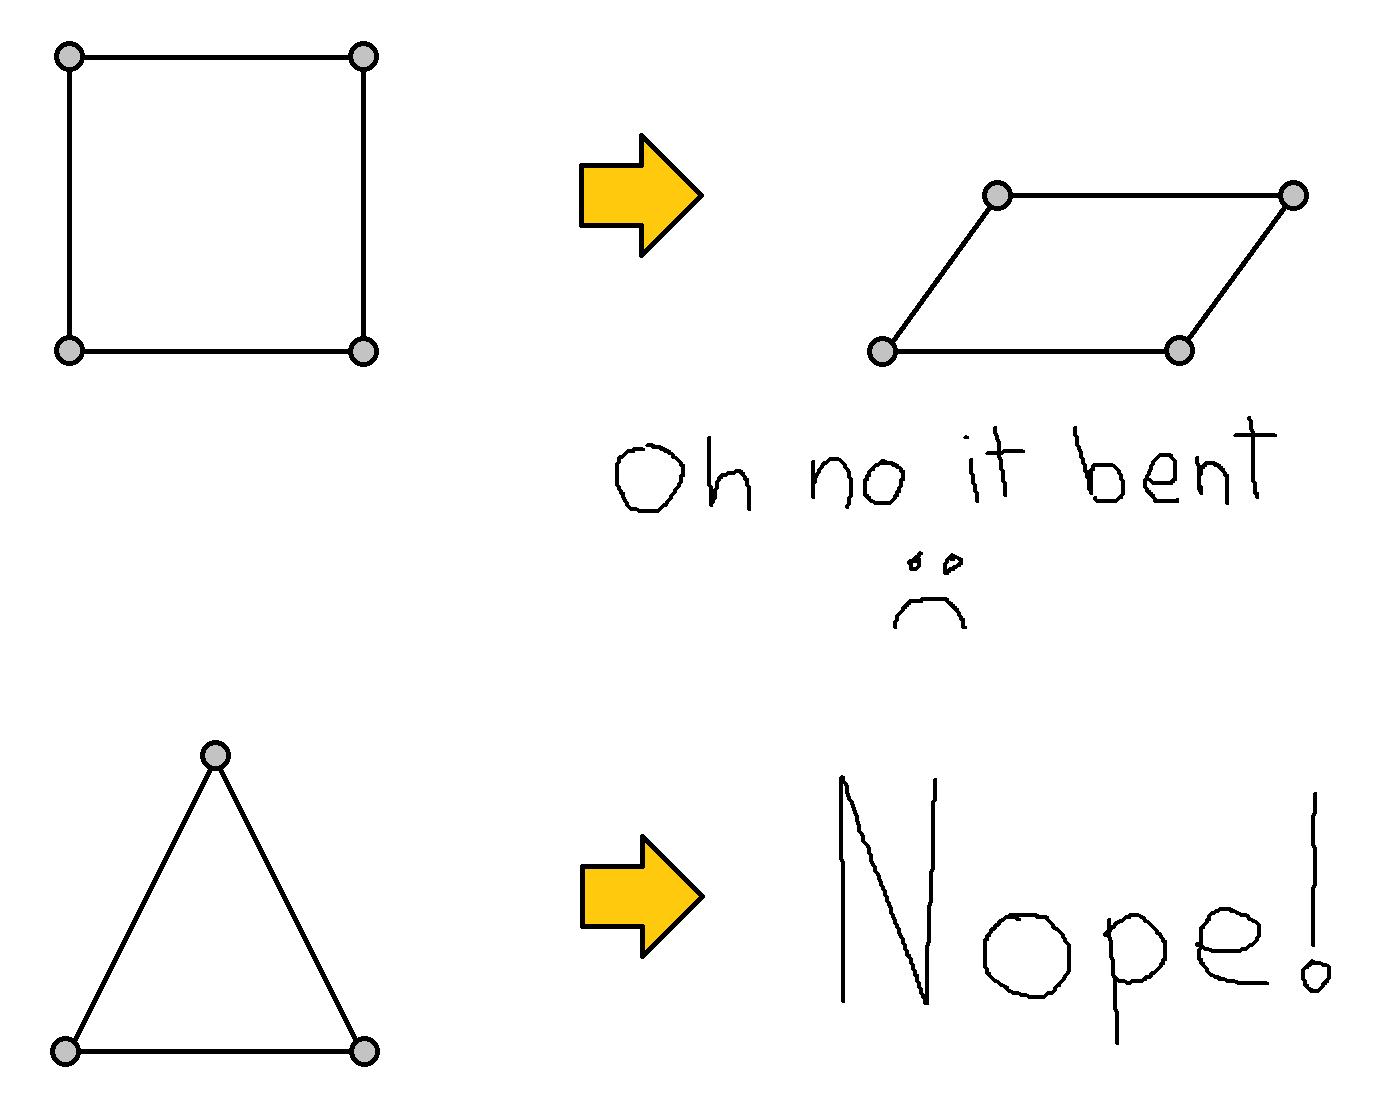
The biggest problem with my first desk was that all of the beams running across the legs made rectangles. Even putting 2 bolts or screws in each joint was not enough to prevent the inevitable wobble. I needed to make the rectangles into triangles.
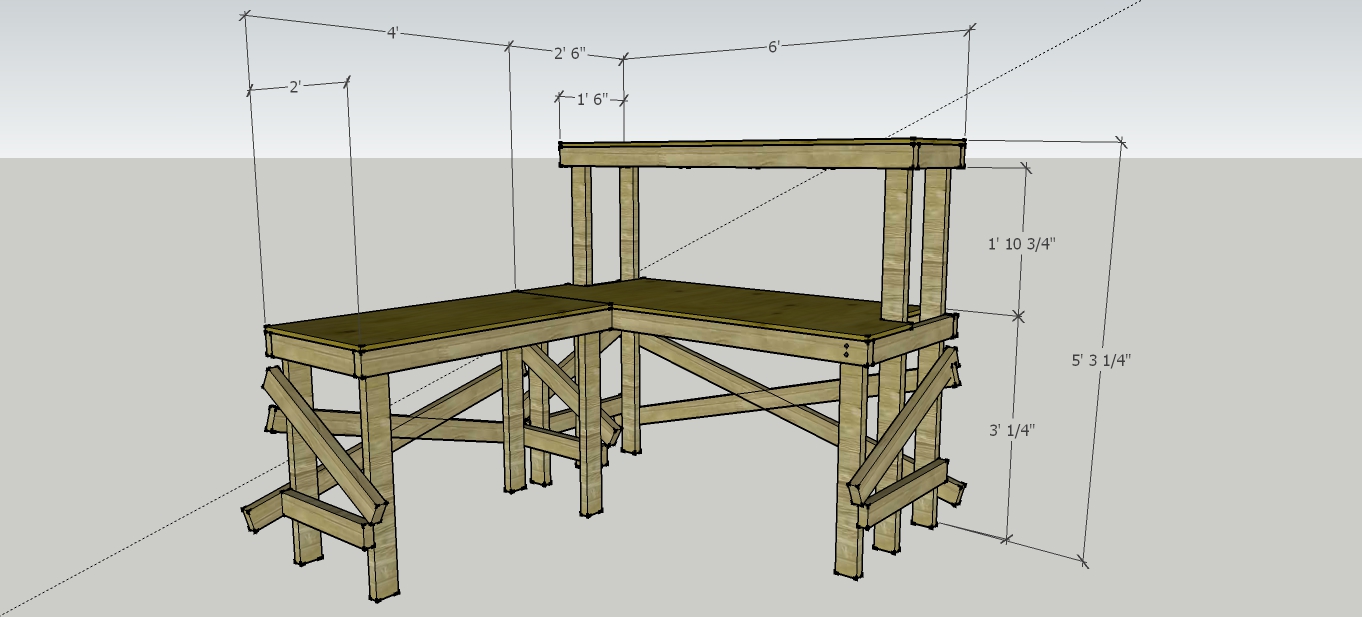
When we moved offices, I got the chance to make another desk. So, I decided to try the triangles theory. The simplest way would have been to make the crossbeams diagonal, but in my quest to learn more about woodworking, I decided to try lap joints. Nothing too serious, just the beams on the back.
SFUptownMaker let me use his radial arm saw and miter saw to construct the second desk (many thanks!). Having the right tools really makes a difference. My poor circular saw would not have cut it (figuratively).
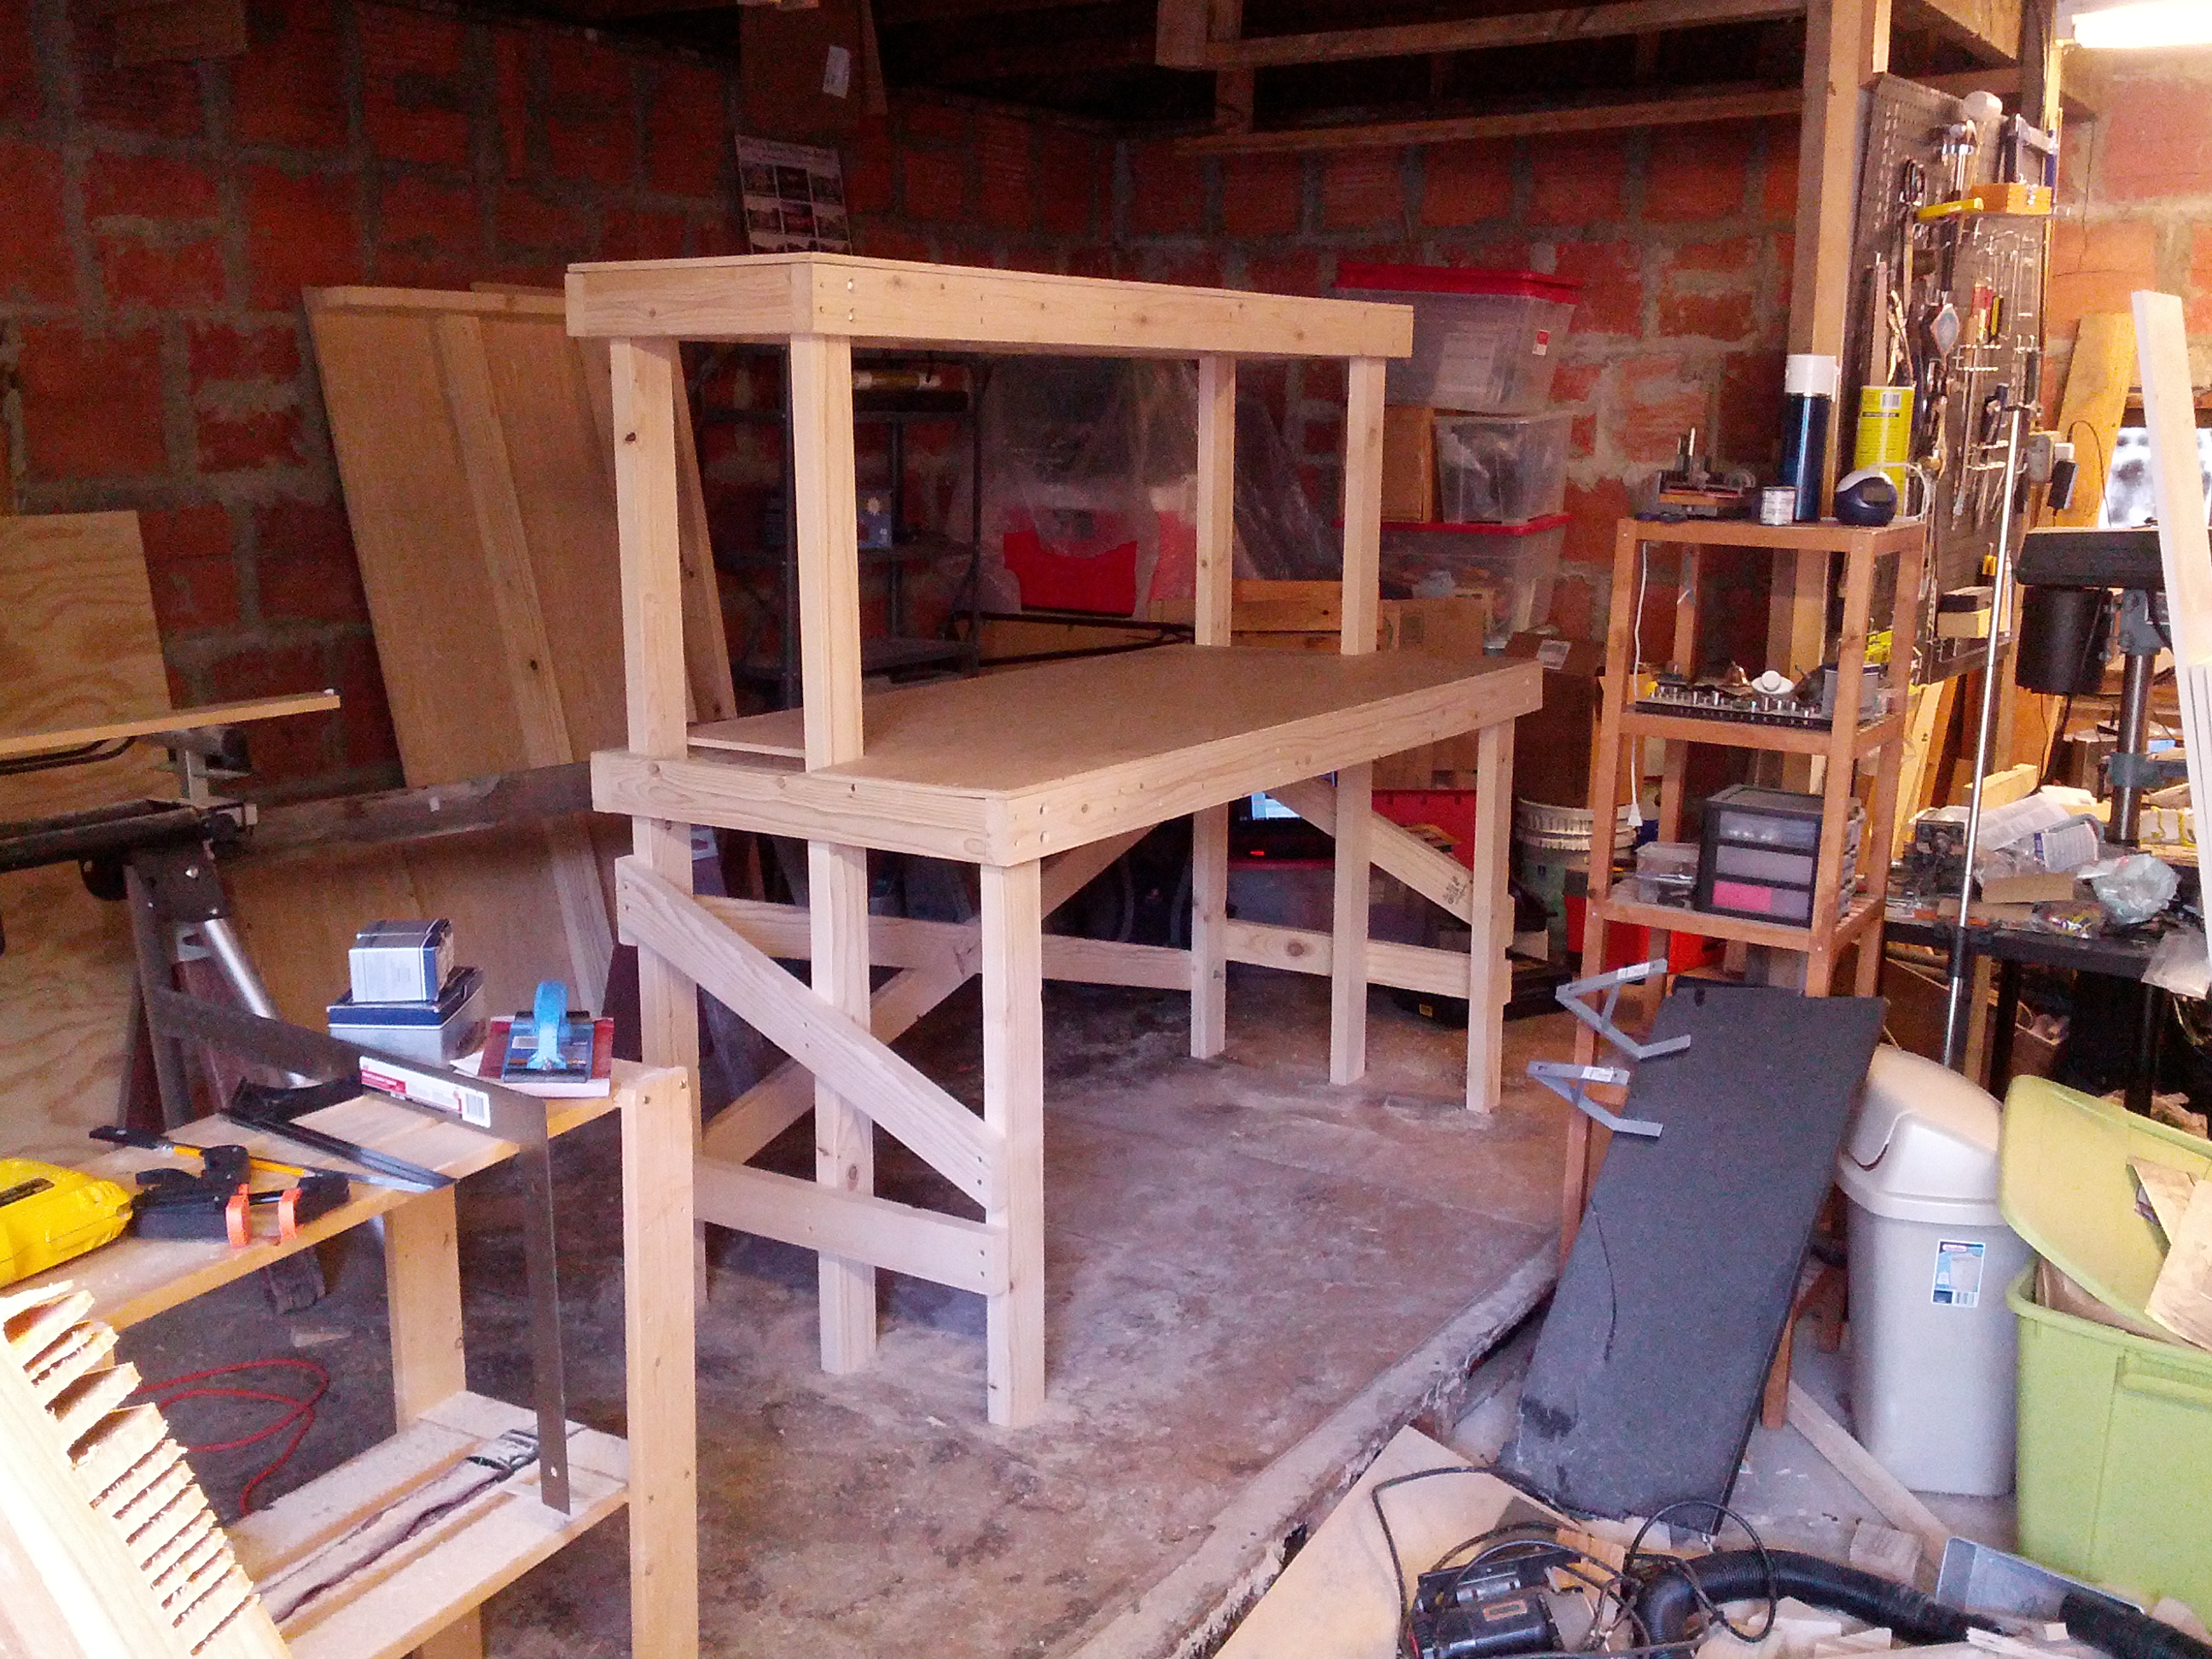
After getting the desk back to my place, I applied a stain and polyurethane just like last time. As an aside, I tried Minwax's "Golden Oak" stain, but I ended up not liking it as much as their "Golden Pecan" that I put on the first desk ("Golden Oak" came out too splotchy on the pine 2x4s). A few days later, I set up the desk in our new office.
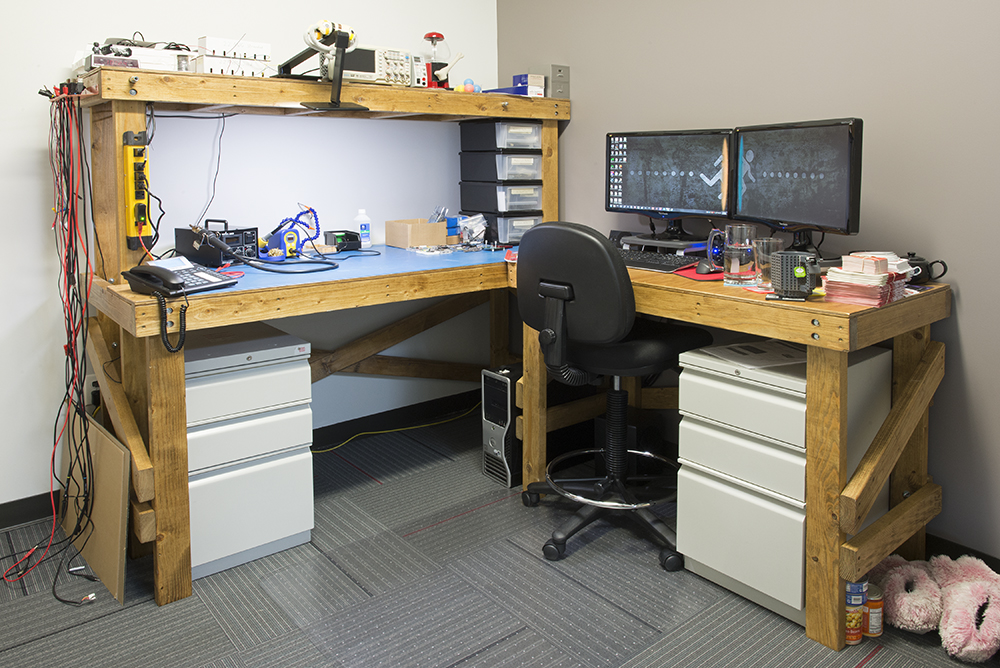
I found Desk 2.0 to be a lot more stable than the first version. If you're interested in the design files, I've uploaded them to GitHub.
Now for the fun part: accessorizing! What should I add to the desk? Mood lighting? Racing stripes?


Looks great! I'm thinking about building my own desk soon... what is the blue work surface to the left covered with?
Thanks! It's ESD mat that I "borrowed" from our production floor. You can find some on Amazon or Techni-Tool. I recommend rubber, as vinyl will melt if you touch it with a soldering iron.
I know everyone dislikes doing mortise & tenon joints, but seriously, you'll use a lot less material, the desk will be lighter, and it won't have all that bulky triangulation. To do them, all you need is a mallet, a mortise chisel, handsaw, and a sharpening stone. It doesn't have to be overly complicated or expensive.
Pocket screws might speed things up but I've never liked having metal potentially hidden inside of a project. At some point you may decide to repurpose the lumber after you build Desk 3.0 and there's nothing more frustrating than chipping a carbide blade on hidden fasteners.
Also, you might be able to get away with using bed hardware instead, but I've never tried that. On the other hand, most beds are fairly stable and they don't have mortise & tenon joints.
Good point about less material. I never considered bed hardware - that's a great idea!
One thing I would add is a white pegboard back panel. You get some more storage for tools you use most, it keeps things from rolling off the back, and the white helps to brighten up the bench. Also, pocket hole screws FTW!
I actually think I'm going to do this in the next month or so. I'll be moving out of my office into an open space, and the pegboard would create a nice divider.
One thing I've learned about working on the PC is the space in front of the keyboard is crucial for convenience when it comes to reading books and testing circuits. I often like to have the book in front of my chest when I need a guide and if the space is too narrow, it's not comfortable with the book poking into my chest. In some cases I use a bookholder to the side of the monitor. Something to keep in mind as you use the bench over the years.
I'm the same way, so I built a monitor stand that sits up high enough for my keyboard to slide underneath and out of the way. Just simple 3/4" plywood with pocket hole screws hidden away on the underside.
Agreed about the space in front of the keyboard. Having an 'L' desk is OK for this, as I can have the book off to the side. I'm looking at ways to raise the monitors more, so the monitor stand is a good idea.
Hey - suggestion, if I may...
The solidity of woodworking projects comes down to the strength of joints. When you put two pieces of wood on top of each other and bolt them together, the strength is the contact friction between the two pieces, and whatever wobble exists between the size of the screw hole and the bolt in it (close to 0 if you use screws). I realize from the desk 1.0 comments you don't want to do mortise & tenon or dovetails/etc, but perhaps I could talk you into this idea:
Try/imagine this: On the lower side cross-members, mark their outline on the legs, then take off the cross member. Now using the outline, cut a 1/2" notch in the legs so the cross member fits snugly (tighter the better!). Now bolt the cross member back into place and get rid of that silly diagonal piece. ;)
Also, somewhere I saw you comment about worrying about the wood loosening up after repeated screwing/unscrewing (I write while seeing "mmmmmbed" at top of screen"). You can get steel/brass nuts that you screw into the receiving wood piece, then disassemble/reassemble to your hearts content. HTH HAND :)
Do you mean that I should do a basic lap joint for the cross beams as well? That sounds like it would add more stability. I've seen the nuts that you are talking about! SFUptownMaker used some, and I realized that's the way to go for bolted design. Good call :)
Nice Job! Just a thought... Remove bracing and replace with ply, mdf or masonite panels. Birch or oak veneered ply is nice for staining.
Drill, counter sink, fill, sand and paint/stain/seal the panels before hand - epoxy paints are extremely durable, and can be very smoothly finished facilitating the addition of inspiring and thought provoking graphics.
Add casters to the underdesk cabs to facilitate cleaning - solid plate beneath the cab or built-up triangles/squares in the corners to mount the casters to if necessary.
Add led light tubes under the top shelf - programmable leds are fun, cool white setting is nice for work...
Add an E-Stop button someplace to trigger effects to keep visitors amused.
It's not that I don't like the braces - they're great! But on the bench top, particularly, a backing panel kills racking while keeping rolly bits from tumbling off the back. On the sides or short ends, racking is also eliminated and you have a large fastenable area to mount lead or tool hangers, parts bins, etc.
Anyways, am redoing my little workroom and these ideas were floating about.
or... darken the stain and add brass and crystal adornments. <-- Who doesn't love darker wood, brass and crystal??!
You did a great job already - thanks for sharing with us!
Thanks! The back board is a good idea, for sure. I might do peg board anyway and leave the cross beams (since they're already there). Now for the crystal adornments....where might I find some of those? Nothing like a little class :)
Love the pink furry slippers in the corner!
They keep my feet so warm in the winter. Office slippers are the best :)
Try 45° angles for maximal stability though.
Really? I'll keep that in mind!
I just wonder how conformable would it be to use the computer for hours on that table.
I have no issue with it. The chair is a drafting/bench top height chair, and the monitors are at eye level.
As to the accessorizing, I recommend lighting under the upper shelf for the desk, and racing stripes! Maybe even an EL-based spectrum analyzer for your music system?
PS. Love the background on your dual screens! The cake is a LIE!
That white LED bar light is perfect! I may have to get one to hook up. The colored lights would be hilarious for "mood" lighting...or racing stripes. Maybe ones that light up in sequence or chase whenever I enter the room? An audio spectrum analyzer would be fun, but possibly distracting for me. What if faced it out of the office to annoy (I mean impress) other people....
Thanks! I searched for a while to find a good dual-screen background. The Portal one jumping across the split made me laugh. :)
I just set up a new electronics bench for my lab out here, and I used one of these with several of these hooked up to it to give this effect.
I spent 10 years as a wood flooring mechanic, for proper stain "soaking" you need an evenly sanded surface. Depending on the wood, 80-100 grit finish sanding is usually what does the trick. The hard and soft grain differences of pine will still mean different colors, but it should not be blotchy like the milled surface will cause. The stain should be wiped on, left to sit for a few minutes (unless it is ebony - sometimes a full day is required), then wiped off. Good choice on Minwax, still my favorite brand of stain. Also, great desk build!
Damn! I didn't know that the milled surface would be so bad for the stain. Thanks for the tips! I'll definitely remember this for next time.
Triangles! How do they work! Even though I know that triangles are very stable, I always forget that little fact when making something.
Lol! Miracles :)
I keep forgetting them, too, which is why my first desk wasn't so great :P
Looks nice. I think I'll build n\my next desk off of this design. Thanks for the info on the stability of the last desk.
Thanks! Let me know if you have any questions about the design! The one thing I might do differently next time would be to use a pocket hole jig to attach the top pieces so you can't see the screws.