T³: Etching your own circuit boards
Today we learn about etching PCBs at home, on the cheap and quick! We even get a little fancy with it!

Yes! It's Tuesday!
Everyone gather 'round and let's talk about etching our own circuit boards at home. It's cheap, it's easy and, while it does have some limitations, it's FAST!
If you've never done it before, hopefully there's enough info here that you'll want to give it a shot. If you're a seasoned veteran, give the rest of us some tips in the comments section!
Adventures in Circuit Etching
Got all that? Okay, so it was a pretty quick overview but the good news is... making your own PCBs at home is super easy and fun! But why would you do it? There are a few reasons. It used to be that PCB manufacturers had no idea that there were hobbyists who might be interested in ordering custom boards. As a result, they weren't prepared to manufacture or sell small quantities. Beyond that, most hobbyists didn't have access to the design tools necessary to draw designs for those manufacturers. These days, if you need a bunch of complex boards with multiple layers or tight tolerances, you can order from companies like OSH Park or Advanced Circuits for modest cash. That doesn't mean, however, that etching your own boards isn't still a totally relevant skill for makers. Here are a few reasons you might make your own circuit board:
Rapid Prototyping - It takes less than an hour to print a PCB yourself, so if you're iterating very quickly through a lot of designs, why wait a week or two for every new prototype?
Simple Designs - If all you need is a rough and ready one-layer board, it might be more trouble than it's worth to order out.
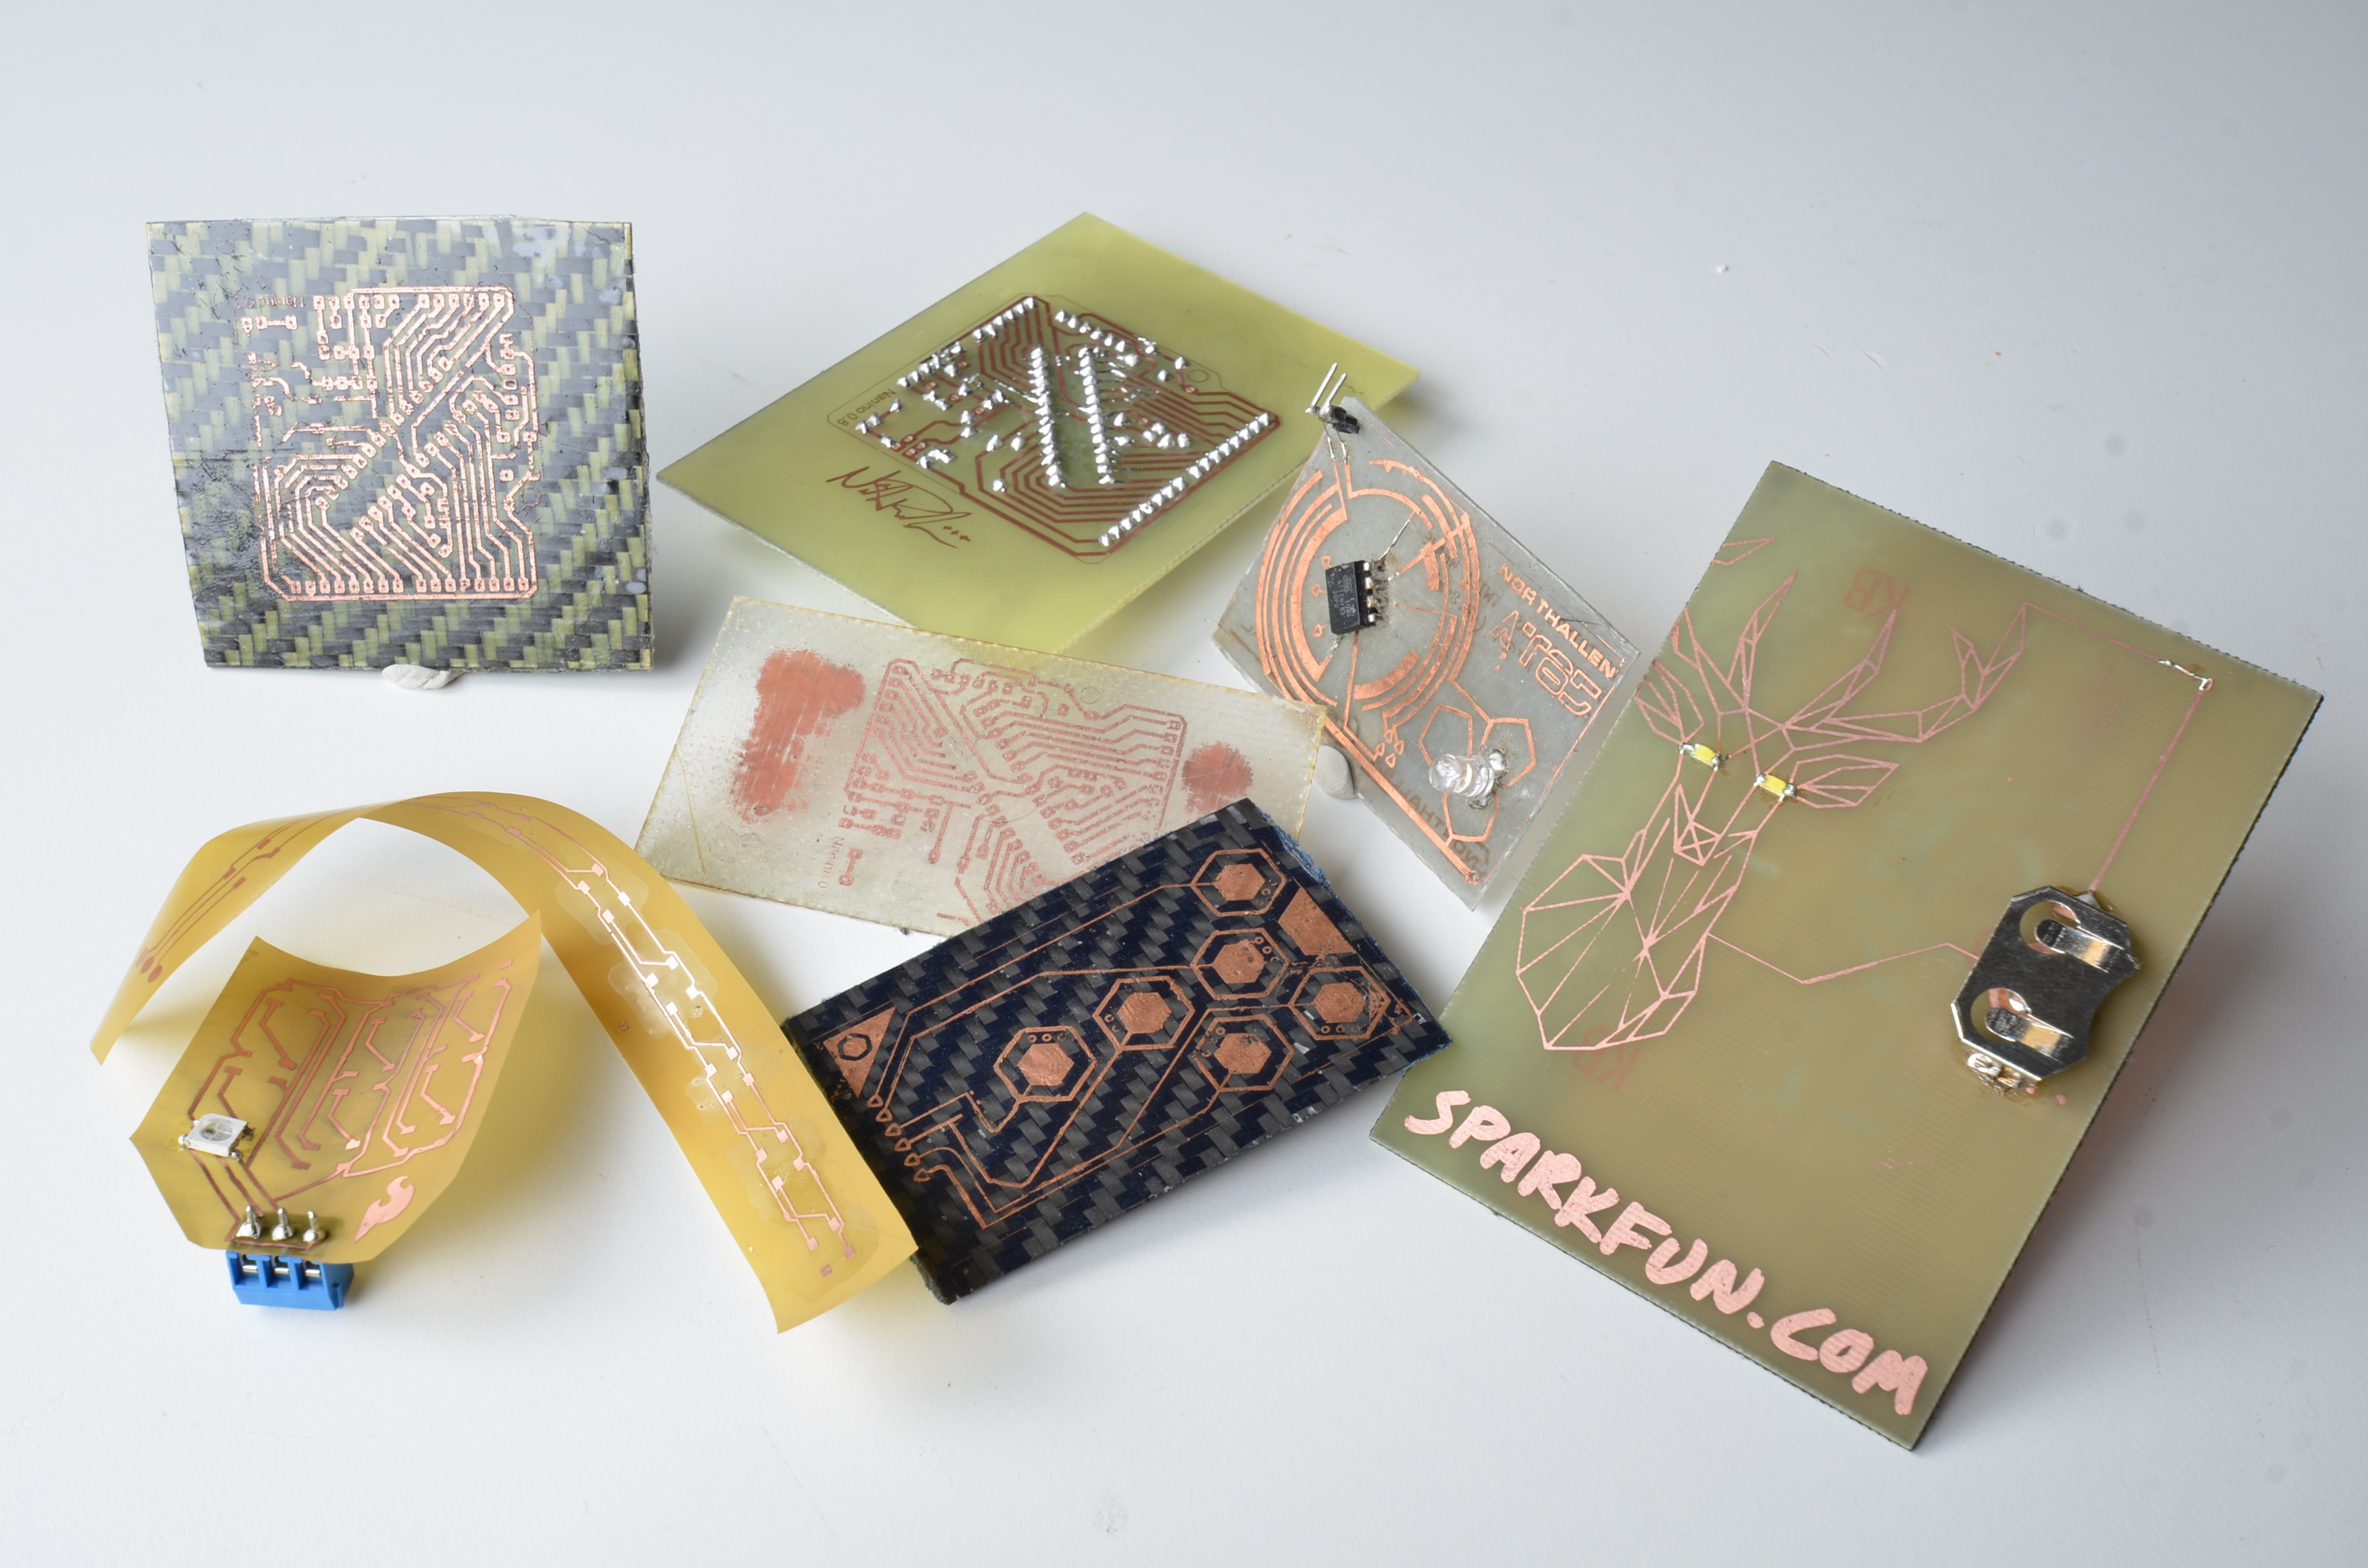
Total Control - Do you want to make a circuit board out of ballistic nylon? Do you need a really thin, rigid PCB? Do you want to embed RFID tags in your PCBs so you can identify them later? Do it yourself!
Doing an Art - Importing arbitrary pictures into a Gerber file can be really tough, and I haven't found a PCB manufacturer that will take a series of SVG drawings as design files. Most fabricators have trouble with weird shapes and cutouts as well. Making your own PCBs opens up a whole world of unique materials and shapes.
It's Fun - It really is rewarding to make your own circuit boards; why not give it a shot?
All that being said, there are definitely limitations. Two-layer boards are pretty hard to make at home for two reasons: It's hard to line up both sides of the board so that your vias are on top of each other, and it's next to impossible to make clean plated through-holes. Another limitation is feature size; if your design includes parts with a really tight pitch or super skinny traces, you might find it hard to avoid over-etching. Finally, while there are ways to print your own solder mask, it's another step, and it's not always consistent. Without a solder mask, it can be hard to solder tightly packed parts without flooding the nearby footprints.
"How it do?"
So you watched the video and now you're interested, but you're still confused. No worries! Let's walk through the process and I'll try to point out some tips and tricks to make it go a little more smoothly.
First though, a few basics:
Most PCBs are made from a material called FR4, which is a glass-reinforced epoxy composite (basically a sheet of fiberglass) with copper traces on one or both sides for carrying signals. While it may look like the copper traces are printed onto a blank sheet of fiberglass, the fact of the matter is that circuit boards usually start as a fully copper-plated sheet. You can buy this stuff online for super cheap, just do an Amazon search for "copper clad board." In order to isolate the traces, all of the excess copper needs to be removed. This can be done with a mill or router like the Shapeoko, but traditionally it's been done chemically. The problem is, your chemical etchant doesn't know where your traces are supposed to be, so you need to mask them off and keep them away from the etchant.
Step 1) Masking the Board
Click the arrows to flip through the gallery.
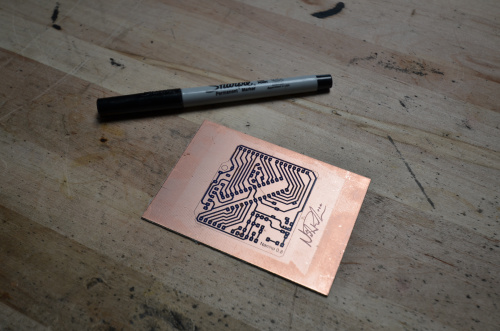
For the sake of this post, I'll assume that you already have a design ready to go. If you want to learn how to design and layout your own circuit, check out our Eagle resources. You can also draw your own circuits in a vector drawing program, or even by hand! For today's example, I'm using the Nanino, a "minimalistic, single-sided Arduino" by Johan von Konow.
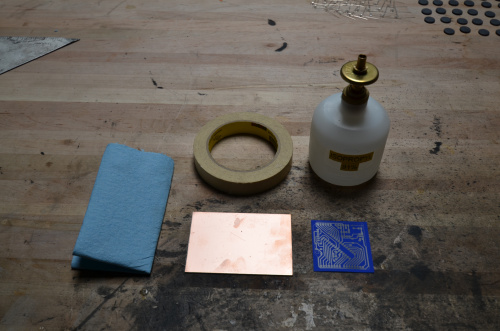
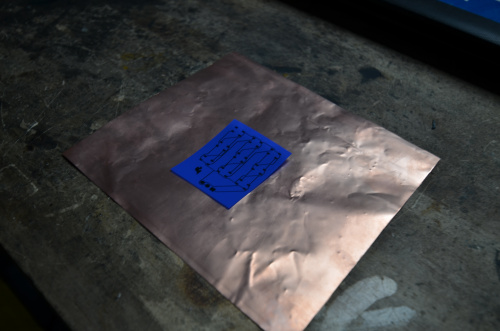
The easiest method for getting your layout onto a piece of copper-clad is a method called "toner transfer," where you print your design onto transfer paper using a laser printer and then transfer that toner using a press or an iron. Transfer paper is basically a plastic substrate coated in a powdery blue finish. You can order just a few sheets from sellers on eBay and Amazon. If you don't have the time and money to order it online, you can substitute a glossy magazine page, and I've gotten some pretty decent results that way. When you're printing your design, be sure that you've mirrored it so that after you transfer it face down, the design is oriented correctly. Also, print on a normal sheet of paper first to check your scaling and position.
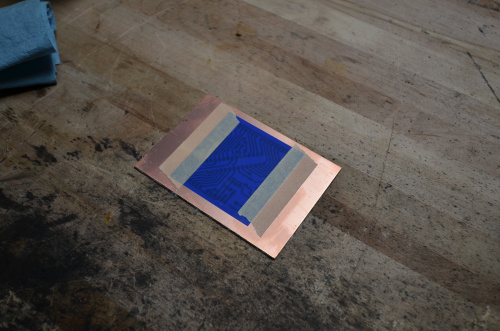
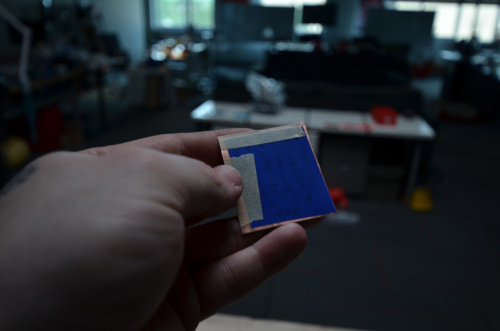
Prepare your piece of copper-clad board by wiping it down with some alcohol. This will help remove oils and gunk that might keep the toner from sticking. If your board has been sitting in a humid environment for a while, it might need a quick shine with a scouring pad. Now cut out your design and place it face down on your freshly cleaned board. You can stick it in place with a few piece of masking tape.
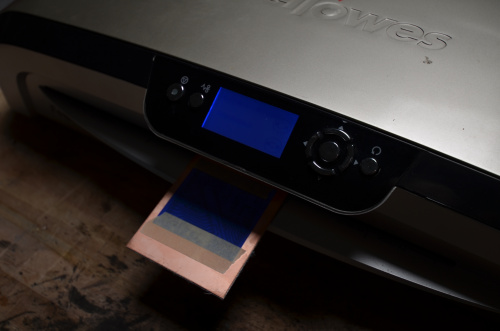
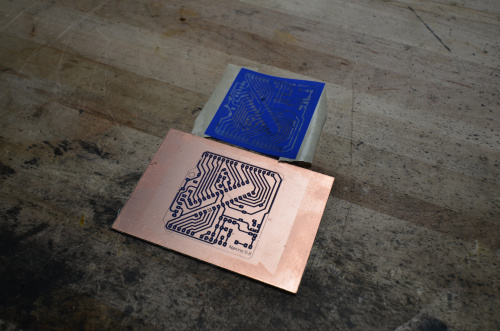
If you have a desktop laminator, this next step is really easy. Just set your laminator to its hottest and slowest setting (usually a preset for 10mil pouches) and run your board with the transfer taped to it through the laminator four or five times. If you don't have access to a laminator, you can use a clothes iron set on high with no steam. Apply even pressure to the board for maybe five minutes and don't allow the transfer paper to move or slip against the board. It helps to put a piece of paper between the iron and the transfer sheet. Once your board has cooled off, peel away the transfer paper to reveal your resist! There way be spots that didn't transfer cleanly; those can be filled in with a permanent marker.
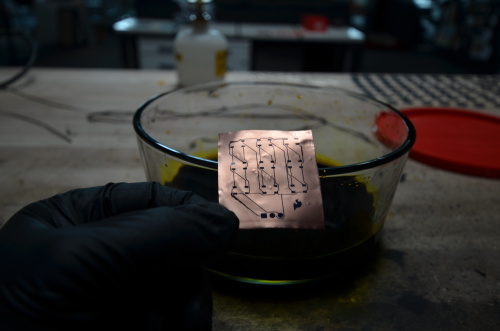
Step 2) Etching the board
Click the arrows to flip through the gallery.
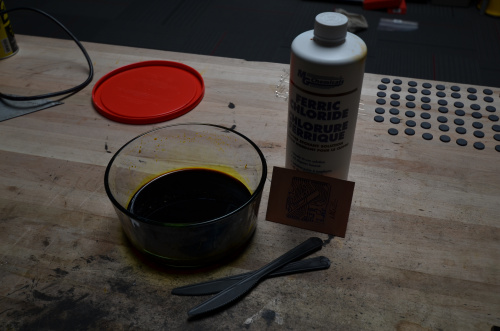
There are a few different etchant solutions you can use to remove copper from a piece of copper-clad board. The most common (old-school) solution is ferric chloride. Ferric chloride is toxic, highly corrosive and acidic, but it's also inexpensive and easy to get your hands on. I prefer to use it because, well... I know how to judge how fast it's going to etch, and I'm familiar with it. Another popular solution is cupric chloride, which can also be toxic, but a lot of people prefer it because its etching strength actually increases as more copper is dissolved into it (to a degree), and it can be regenerated by aeration with an aquarium pump. A solution that's really easy to get your hands on and is rumored to work pretty well is a mixture of muriatic acid (dilute hydrochloric acid from a pool and spa supplier) and hydrogen peroxide. If you're worried about the toxicity of these solutions and want a slightly safer option you can try using a mixture of vinegar, table salt and hydrogen peroxide, although I've tried this in the past (out of curiosity) and it's really slow and uneven.
You don't need to be scared of toxic solutions, just be safe. Wear gloves, wear goggles, don't put the solution into containers you plan to ever use for food – remember high school chemistry lab. That being said, you can get hurt if you do something stupid so be careful. And, by the way, never pour used etchant solutions down the drain no matter which etchant solution you choose. The concentration of dissolved copper is bad for the environment and rough on water processing equipment.
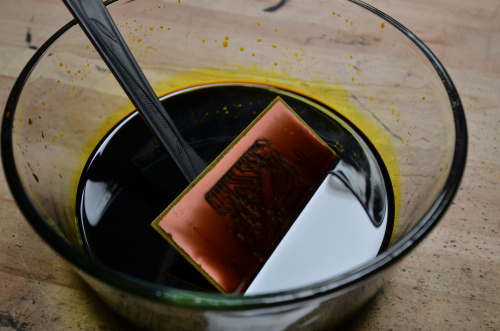
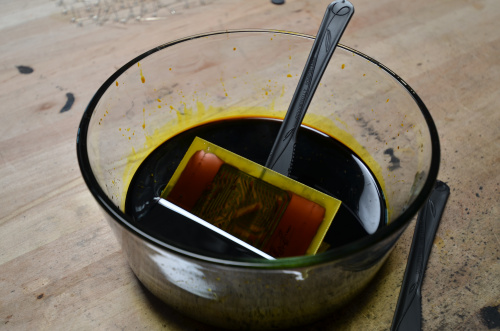
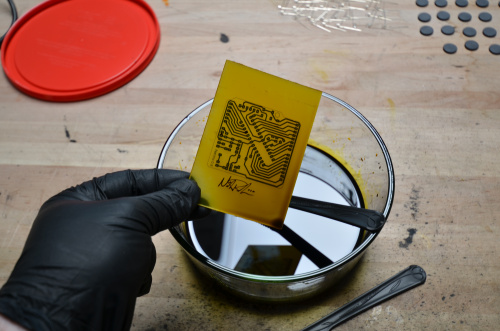
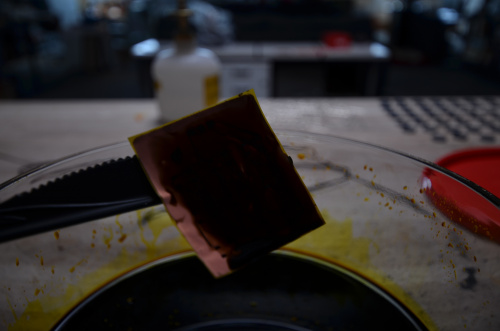
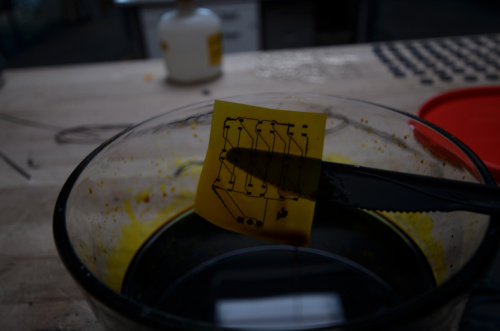
Throw on your personal protective equipment and dunk that masked board in the etch bath. This is gonna take a few minutes. One thing that's important is to keep the board moving in the solution. As the etchant reacts with the copper, it leaves byproducts that inhibit the etching process, and the best way to keep that stuff from settling is to keep the solution moving around. I stir it with a plastic knife. You can also build etching tanks just for this process which either rock your etch bath back and fourth or bubble air up through the solution to agitate it. If you're only making a few boards here and there, I would argue that stirring by hand is better because you're going to be pulling the board out and checking on it pretty regularly anyway.
You can tell when the board is done etching because (surprise) the copper will be gone! As soon as you can't see any copper, pull that board out of the etchant because it will tunnel its way in sideways under your etch resist and thin out the traces. Rinse the board with some water to get rid of all of the excess etchant, and then you can take off those awful, sweaty gloves.
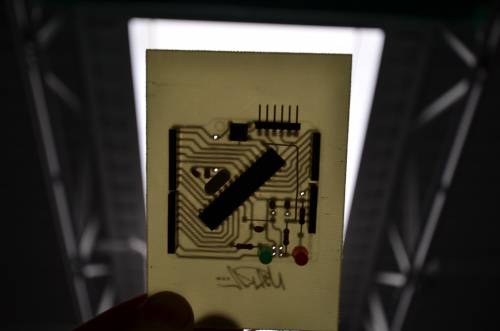
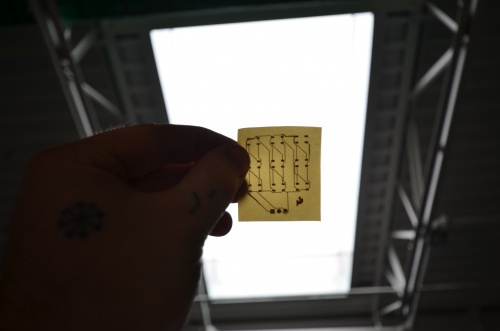
Step 3) Removing the resist
Click the arrows to flip through the gallery.
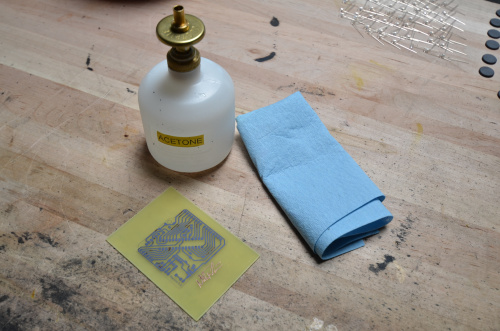
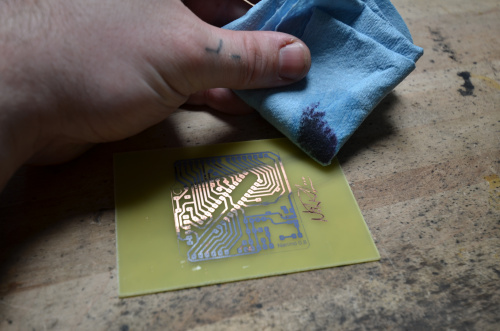
This step only deserves its own section because it's so beautiful and satisfying. Take a paper towel with a little acetone on it (it doesn't have to be concentrated, nail polish remover works fine) and wipe the etch resist away; it will come right off and reveal all those sweet, shiny traces!
Step 4) Finishing Touches
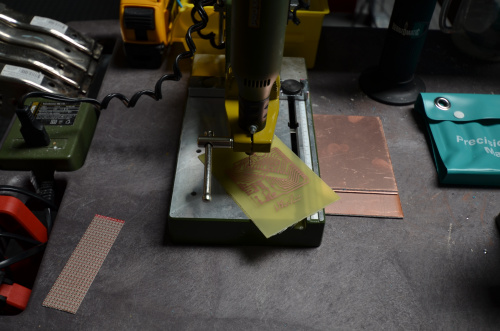

Click the arrows to flip through the gallery.
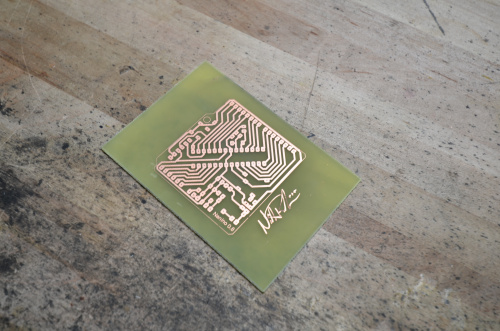
Your board is pretty much done, now all you need to do is populate it. If your design requires through-hole parts, you'll need to drill all of the holes. I used a tiny drill bit on my rotary tool for which I happen to have a fancy drill press. You can also just do this with a hand drill if you're super careful. Then add your parts and solder everything in place!
Getting Fancy
Flexible PCBs
But wait! Copper-clad FR4 is not the only material you can use in home etching. There's a material called "Pyralux," or copper-clad Kapton, which is a flexible circuit board material. It's more expensive than FR4 and it can be a little harder to work with, but the process is essentially the same! Check out the gallery below for a pictorial overview of my own experience with copper Kapton.

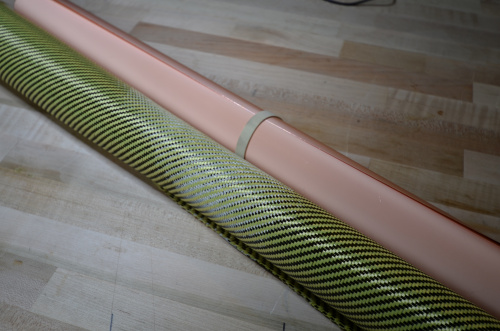
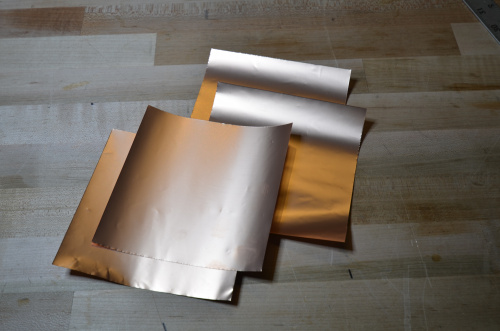
Roll your own substrate
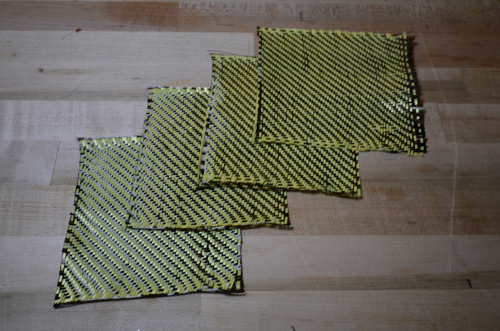
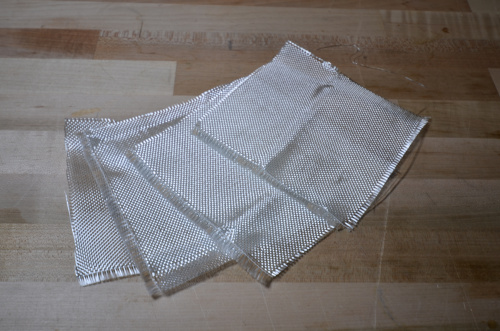
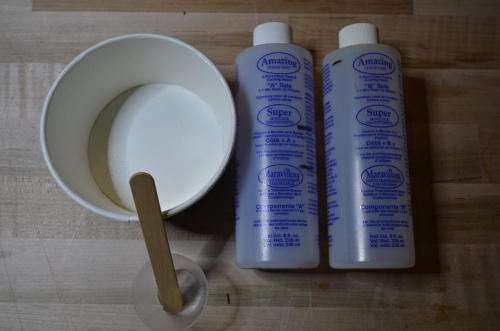
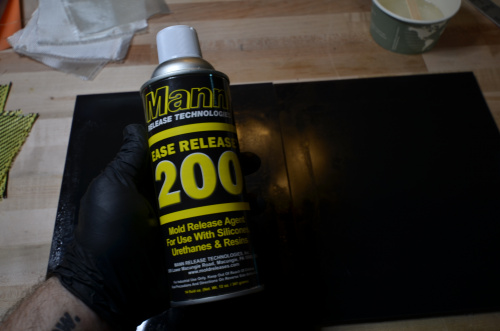
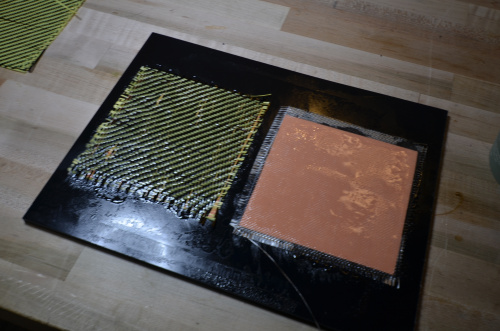
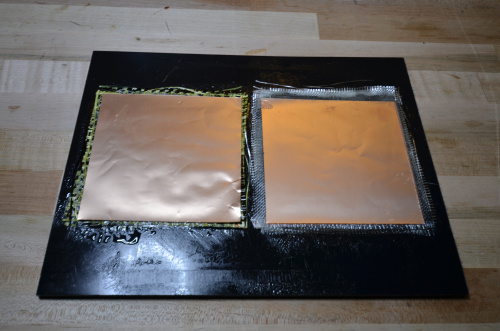
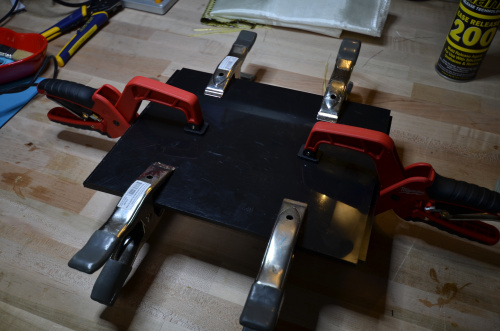
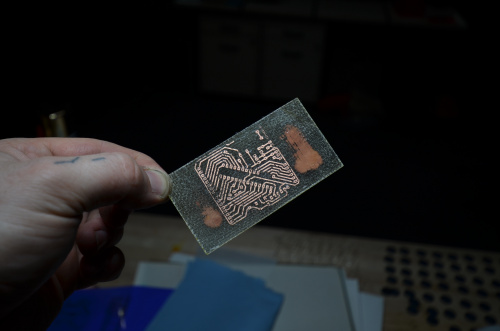
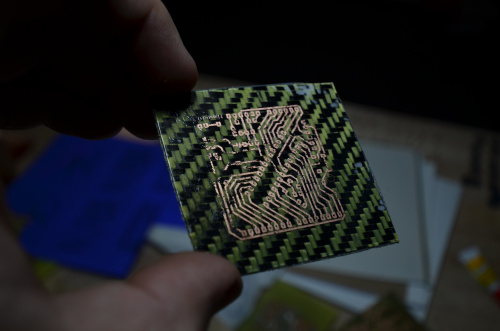
That's fun, what else can we etch? If you want to get weird, and you know that I do, you can roll your own copper clad board from scratch! In the gallery below, you can see the process that I went through to build my own fiberglass and Kevlar circuit boards. Copper foil can be bought in rolls on Amazon, and there are plenty of woven materials that are designed for composite layup. Simply spray two rigid plastic or glass panels with mold release, stack a few layers of woven fiberglass between the copper foil and then clamp the whole thing together until it hardens. From that point on, etch it just like any other PCB material!
Alternate methods of masking
If you happen to have access to a laser engraver (or if you've built your own) you can skip buying toner transfer paper! My preferred method of generating an etch resist is as follows:
Step 1) Wipe down your copper-clad board with some alcohol.
Step 2) Apply an even coat of spray paint to your board. I like to use flat black primer, but any color should work.
Step 3) Invert the color of your design so that you're etching away the parts of the resist you want etched. This will leave spray paint only in the places that you want masked! Fire the lasers!!!
Step 4) Gently wipe the laser-etched board with alcohol. This will remove the burned spray paint but leave the un-etched paint.
Step 5) Etch your board chemically using your favorite solution!
Step 6) Remove the paint using acetone.
This is an awesome method for intricate or unusual designs like this:

It's looking at you!
Go try things!
So that's home circuit board etching: It's fun, easy and cheap to do! If you have any tips or tricks, I'd love to hear them. If you have any questions, please ask away! If you have any ideas, go make something cool and send pics!
Oh! And if there's anything in particular that you all want me to talk about on Tech Talk Tuesday, let me know. Until next time, happy hacking!


The need for protective equipment is well worth paying attention to. I also suggest use in a WELL ventilated area, protect the surface you are working on if indoors. Wear only clothes you do not mind having permanent stains on. Ferric Chloride and Cupric Chloride are both corrosive chemicals treat them with the utmost respect and dispose the used chemistry in a proper manner. Having used both in modestly high volumes and seen the damage they did to commercial grade circuit board processing equipment, I suggest you think safe and work safe.
Thanks for doubling down on this, it is super worth saying again for the people in the back.
I was going to reply exactly this.
This stuff can get nasty, and without these safety measures, you're bound to have problems.
Thanks for the awesome blog post.
Now that I'm convinced it's cheap, I'm going to do this all the time. I wish I knew that back in April. I spent about 3 days soldering tiny wires to build a POV display. I suspect this could have saved me about 2 of those days. Next time.
The offending project: Badger POV
The time and effort required, as well as the tools and the stuff ups that will happen at the start, make it a bit less useful than you would think.
Unless it is a small beginner tutorial type project or some thing that is quick and dirty and you want to transfer from a breadboard, it is better to just get it made for you. There are some really cheap services, sparkfun even had one of their own at one point, so it isn't prohibitivly expensive or anything.
This is actually how i used to make transparent circuit boards. i glue thin copper to cell cast acrylic and then etch. Then you get a transparent board. Sometimes I even over achieve and plate the copper with silver or nickel. These days I cheat though and use my LPFK protomat.
I like to use liquid tin at the end as well. It really helps with oxidation and is fun to watch just dipping your board and it instantly turning silver. Another thing I like to do is scrub the board with a scotch brite pad before soldering or plating.
I've also been extremely spoiled by the LPKF protomat and U3, haha.
This is very useful as i've always been very wary about getting involved with chemicals, so much that can go wrong!
Thank you for the tutorial. I've always not wanted to deal with the chemicals, but you make it look easy.
I've started experimenting with using photo polymer film to create masks for etching. After being cut to size, you peel a transparent, protective layer off the film, and stick it to the cleaned copper board. The film is adhered to the copper using a laminator on low heat, or an iron on very low heat. Too much heat will turn the film dark blue, and the film will be ruined.
After generating the layout using Eagle cad, it is printed with a laser printer on a clear sheet. I make the clear sheet by running a blank laminator pouch through my laminator. The result is a clear plastic sheet that will withstand a pass through the laser printer. The laser printer needs to be set to print dark, just like with toner transfer.
I double stack identical printed patterns, since the printouts aren't totally opaque. Everything gets lined up, and taped in place. Then, the whole thing is placed inside a Handy Vac bag, and the air gets sucked out. That presses everything together nice and flat.
The board is then exposed to UV light for a few minutes. A UV lamp, or the sun can be used. After exposure, the printed mask is removed, as well as a second protective layer from the photo film. The board can be developed using a simple sodium carbonate solution, about 1% by weight in hot tap water. Sodium carbonate is also known as washing soda, available just about anywhere that laundry detergent is sold.
The exposure to UV causes the film to become insoluble in the carbonate solution, but where the film was covered by the mask, the film will dissolve, so the mask needs to be a negative image. Keep agitating the board in the solution until the clear film has dissolved, leaving the now purple traces stuck to the board.
After development in the carbonate solution, the board can be etched like any other board. The purple traces can be removed by putting the board in a dilute solution of sodium hydroxide, or just plain drain cleaner. After a few minutes, the mask will begin to just peel up and fall off the board, leaving shiny copper traces.
I purchased a 5 meters by 30 cm roll of the film from China for less than 10 dollars, and that should last me for good long time. I'm still not sure that this method is better than toner transfer, but my results are getting better with practice.
There are several YouTube videos that show how this process works , and a Google search for dry film polymer will provide more information.
This is a great tutorial. I've etched a few circuit boards at home, and even etched aluminum for another project, using Copper Chloride in Aqueous Hydrochloric Acid Solution. I came across this better etching solution, IMHO on instrucatable.com. You can check it out here, Stop-using-Ferric-Chloride-etchant!.
I actually do a LOT of etching. I started doing it for making jewelry (http://mordent.com), and now I etch my own PCBs for prototyping my electronics projects. I've discovered that sharpie pens don't really hold up well as a mask. I used to use toner transfer, but I've discovered that uv film (I use the one here http://capefearpress.com/puretch.html) is so much better as a mask. No pits, no spots to fix and it takes about the same amount of time. I also learned from someone that using a sponge to wipe the ferric chloride across the board (repeatedly) makes the process go much faster (around 7-8 minutes), or you can set up a ferric spray tank.
I love this article! A solution of 3% Hydrogen Peroxide and 30% Hydrochloric Acid works great, as you mentioned. I generally mix up 1 cup of Hydrogen Peroxide with 1/2 cup of Hydrochloric Acid. Be sure to carefully pour the acid into the hydrogen peroxide. This minimizes splashing of the acid and risk of a naughty exothermic reaction. BE SURE YOU WEAR PROPER PROTECTIVE EQUIPMENT. Also make SURE that your container for etching and mixing these two things is NOT made of metal. The HCl will dig into just about any metal. I use either ceramic, Pyrex, or polypropylene. If it starts losing it's "oomph" just add a bit more Hydrogen Peroxide. This usually etches in much less time than the Ferric Chloride stuff.
Ooooo. Cool. =)
In my intro to electronics class the first board I get the students to etch is using wax. They dip the copper board in wax, scratch away the areas they want to etch. This makes large traces but easy to fix mistakes, drill and see the process with almost 100% success. We make a very simple skill tester game. We then go onto design programs etc and use a aerated tank from the printed sheets. Going to start playing with interesting designs from my work with illustrated-never thought of that.
For extra points, maybe try and get the copper to drop out of solution and reuse it somehow?
Would it be possible to make a liquid that can instantly coat something in copper when another chemical is added? Instant copper-plating would be a cool way to reuse the copper. you could even use it to put copper on the substrate, right?
Drilling after etching? Well...
I think Nixon was president the last time I etched my own PCB, but among my acquaintances that still do it, I thought drilling before etching was S.O.P. because: 1) less chance of the drill munching the tiny isolated pad, 2) much easier to align the art for a double sided board.
Double sided boards are not too big a deal if you do mostly through-hole parts, you just have to remember to solder both the top and bottom side of each pin because the holes are not plated through, and if you are making the pin do double duty as a via, you want the connectivity. Also, if you do have any free-standing via's, save your clipped-off resistor leads to make via shunts.
I've also seen home-made PCB's for SMT parts by simply using an X-acto knife to cut isolation gaps. This actually isn't such a bad option for making something like a quick-n-dirty carrier board for an SO part.
You're completely right about drilling before you etch.
Also, your tips about making pins do double duty as vias and also using clipped leads as shunts are really great. I've found all kinds of uses for clipped leads.
The part about making your own copper clad board interested me greatly, as I work as a lab aide in an advanced composites lab at my local community college. I could lay some up with carbon prepreg and cook it in the autoclave. Definitely going to try this.
Awesome, let me know how that goes! The only thing to worry about when it comes to carbon is that it's conductive. Theoretically, the resin should shield the fiber from conducting directly to your components but I assume it will effect the dielectric of the board, so certain RF or power circuits might really not like it.
The woven Kevlar I used here is actually Kevlar in one direction and carbon in the other and if you push test probes into the board, there is indeed a very conductive layer of carbon fiber (corner-to-corner on a 2" square board I could get as few as 50ohms)
That being said, selectively adding bundles of carbon fiber to a glass or Kevlar layup might be an interesting way of building resistors and variable resistors.
I am interested in doing this with a 3D printer to lay down the mask. I think it should be done minimally like you would with a metal router. So the mask would be different, but in concept it would be the same for etching. I don't think the plastic will be all that difficult to remove either. Probably don't want to use a water soluble plastic though. The etching solution would eat that.
A 3d printer would be a bit over the top and probably not worth trying. The methods listed here would be far better. In saying that, I would be interested to see what would happen purely for curiosity sake. By the way, I would be careful with your acids. I don't assume that you don't know what you are talking about but you should make sure the etchants won't attack the plastic.
Yeah. I'd be real careful with 3D printed resist, because most 3D printer stock is some kind of chlorinated plastic. Chlorine is highly reactive... if released it would probably bind with water to create HCl + O2.... or maybe the free oxygen reacts with something else first??? I'm thinking the soup is nasty enough already.
In an case, one of my friends swears by the toner transfer method using a laser printer. People seem to have good luck with that and it is cheap and simple.
There is no chlorine in any 3D printer plastics that I know of. I have been printing for a while now and everything is pure. I mostly use ABS. Using chlorinated plastics would be highly dangerous to print with.
PVC is not an appropriate plastic to use for 3D printing. I don't know where you got your information, but I make as well as buy filament. I have pellets of various plastics and NONE of them contain chlorine.
This is not my first rodeo. I have used printing to transparency paper printed to by laser printer before for making resist masks. Also, ferric chloride is stored in a plastic container. Most of my previous etching was done in plastic containers. The amount of time spent in the solution will certainly not affect the plastic any.
I've successfully used the vinegar/hydrogen peroxide/table salt solution. If you're going to try this, use fresh hydrogen peroxide and don't skimp on the salt.
Whatever you are doing to make the text jump up and down the page while I'm trying to read it, PLEASE STOP!
NEVER!
I figured it out, our image carousel doesn't gracefully re-size images. I got rid of the offenders.
I have done some of this before and had some fun doing it. Any chance you could sell some of these components? I know the acids can be problematic with shipping, but a small pack (they break easily) of the ity bity drill bits would be nice as well as transfer paper (I used both magazine paper and photo paper). Radio Shack used to carry some of the supplies, but they are in a mess now.
BTW, it is nice to see the changing images in galleries, but the text jumping makes it difficult to read.