T³: Programming Arduino, mbed, and Photon from a Chromebook
Here's how you can use boards with your Chromebooks in makerspaces, libraries and schools

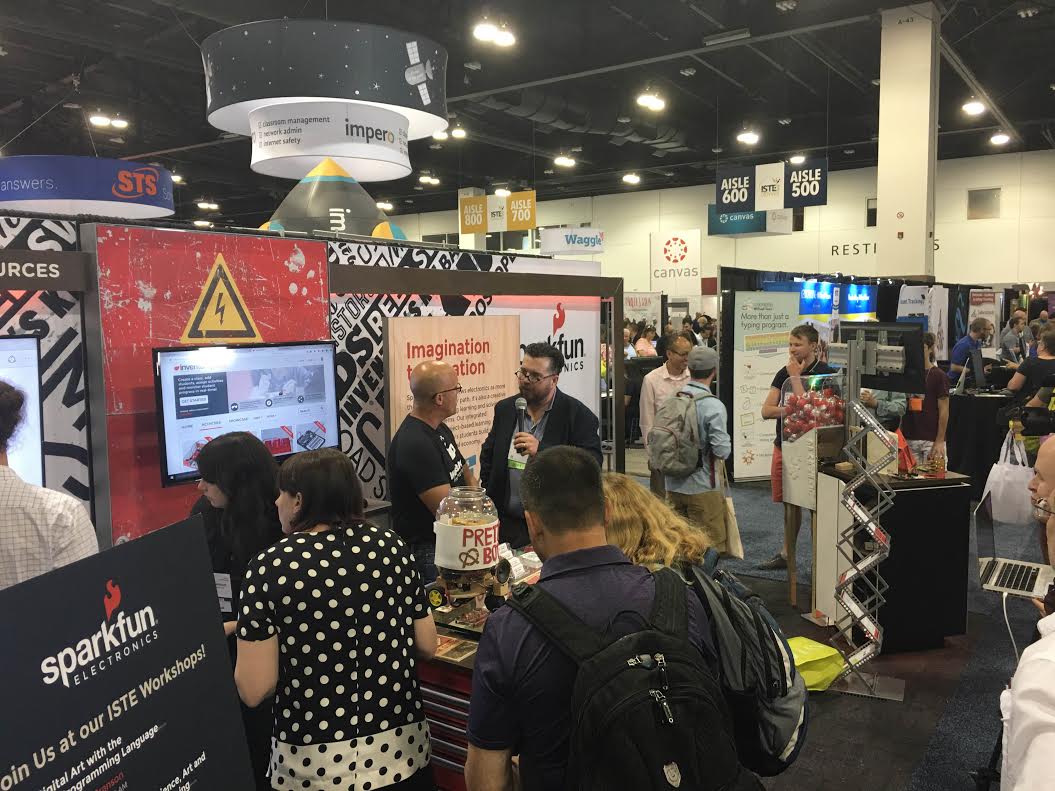
Last week, SparkFun attended the 2016 International Society for Technology in Education (ISTE) conference in Denver. We had the amazing opportunity to talk to educators, administrators and specialists from across the country and learn about tech initiatives in their schools and districts.
Many of the schools had already created or were in the process of creating a makerspace, and some of those were using Chromebooks to offer one-to-one computing resources for their students. Chromebooks have some fantastic features that make them appealing to schools:
- They're cheap. Some can be had for less than $200.
- They're easy to maintain. IT administrators have very little setup work for Chrome OS outside of connecting them to the local WiFi.
- They're built for cloud-based storage. This means students can save their work on a Chromebook and have access to it at home on another computer.
One rather large downside to Chrome OS is the inability to install software outside of Chrome apps. For schools with makerspaces and Chromebooks, this means no Arduino integrated development environment (IDE). Luckily, many newer platforms are relying on web-based IDEs to program their platforms. The rest of this post will examine three popular platforms and how to program them from a Chromebook.
Arduino
Still the powerhouse of the maker-focused microcontroller boards, Arduino, by default, requires separate software to program. In most circumstances, you would have to download the Arduino IDE and install it on your computer. However, Codebender offers a web-based IDE to write Arduino code and upload it to your board.
About a year ago, one of our educators, Brian Huang, wrote a great post on how to program Arduino from Chromebook. I won't repeat his post, but I'll give a refresher here.
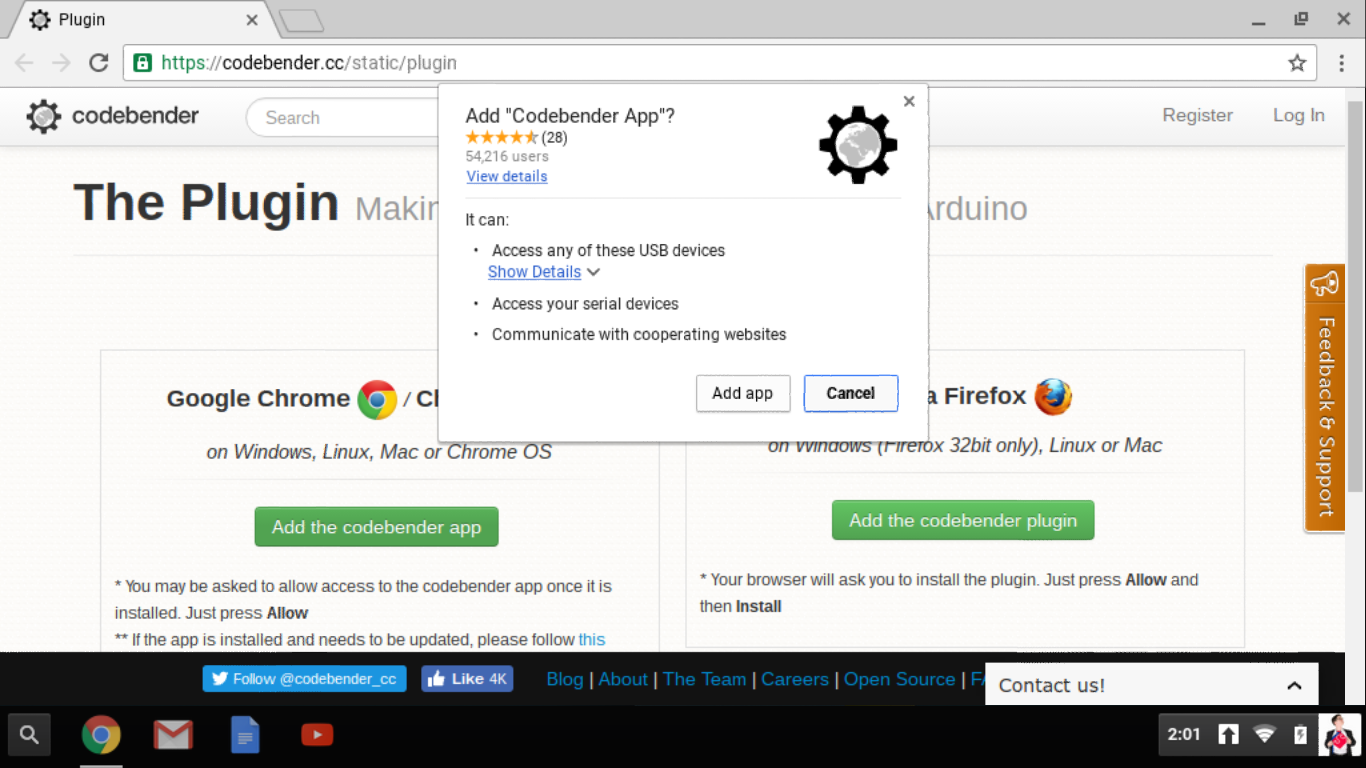
To get started, navigate to Codebender's Plugin page, and click the link to Add the codebender app to Google Chrome. You will be presented with a pop-up that asks if you want to add "Codebender App." Click Add app.
Once the app has been installed, plug in your Arduino and navigate to Codebender's Blink demo. Scroll to the bottom of the sketch, select your Arduino board (I'm using the RedBoard, so I selected "UNO") and select your serial port (likely /dev/ttyUSB0). Click Run on Arduino.
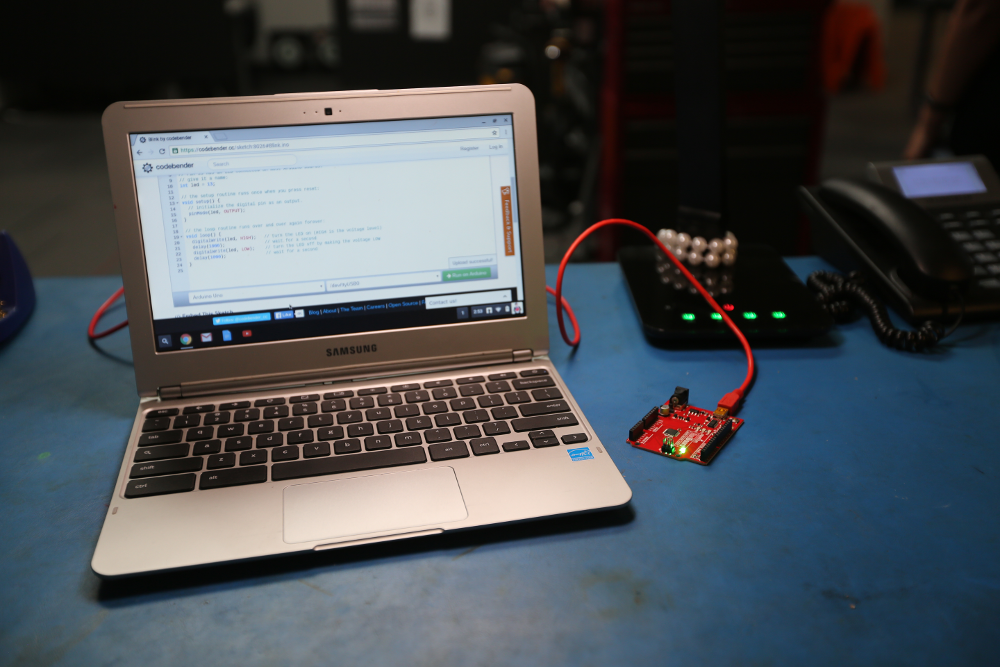
Your Arduino's LED should start flashing after a relatively quick upload process.
Codebender allows you to write and modify code in any of the shared demo sketches, which is great for teaching. You will only need to create an account if you want to save your own sketches and share them.
mbed
ARM's answer to Arduino, mbed, offers an online IDE by default, which is great news for Chromebook users. To use it, navigate to developer.mbed.org and click Log In/Signup. You will need to create an account to use the online editor and compiler.
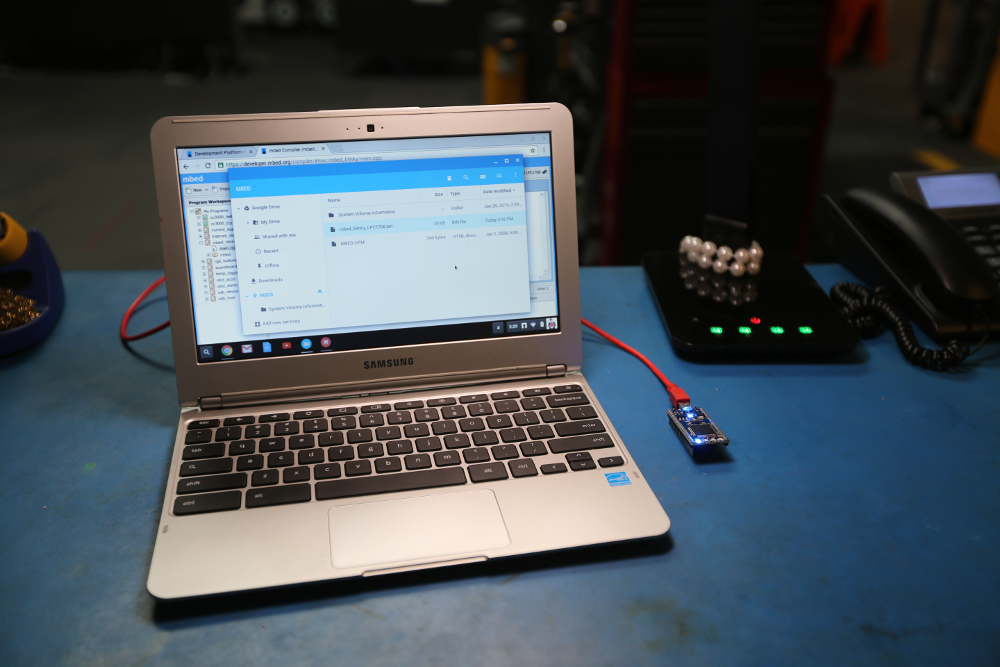
Once you have logged in, click on Compiler in the upper-right corner. You will be brought to mbed's online IDE. Plug in your mbed board (I'm using an LPC1768).
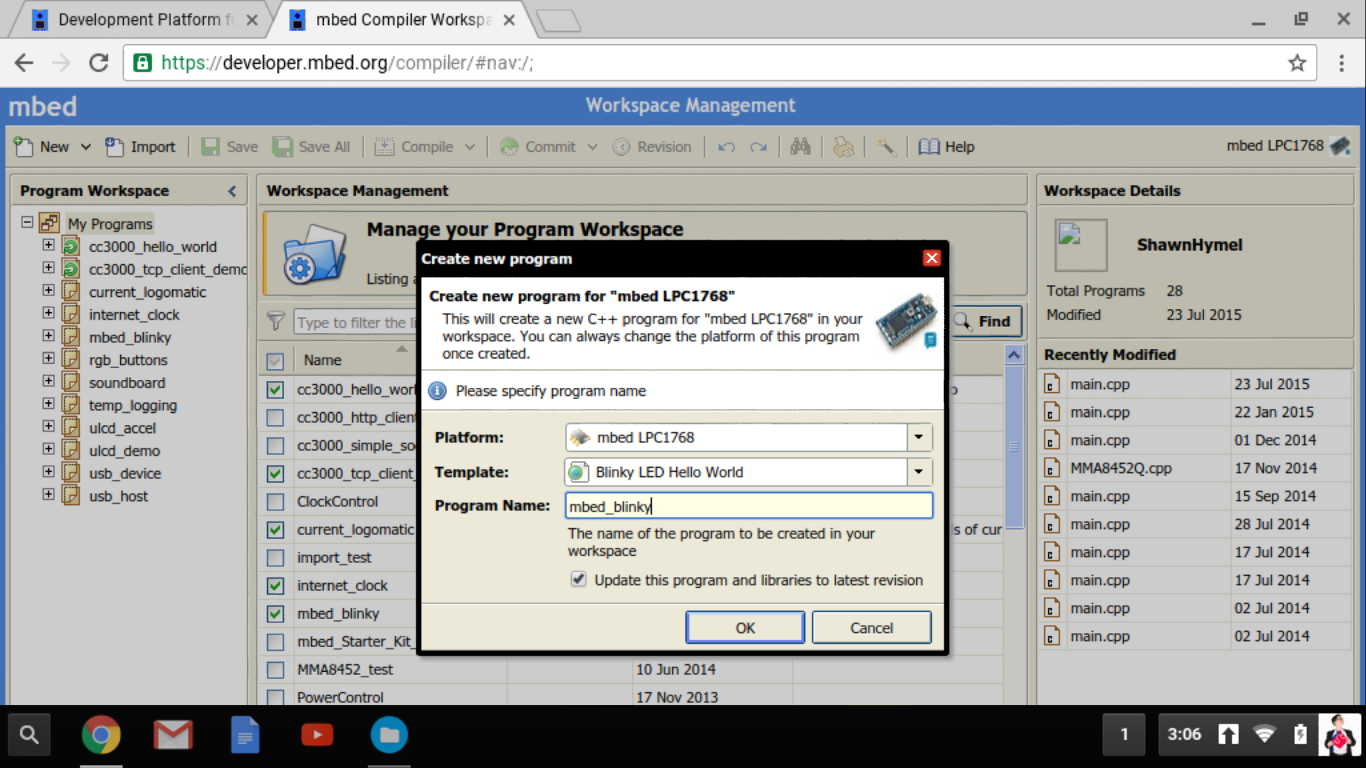
Click New, and select your platform. Make sure that you also have Blinky LED Hello World selected. Rename the project, if you desire (I left mine as "mbed_blinky").
Click OK, and mbed will create a new project for your. Feel free to examine the code in main.cpp. After that, click the Compile button in the upper bar, and mbed will automatically compile your program and download the binary (.bin) file.
Press the Chromebook's Search key and type in "files." Click the Files app, and click on Downloads in the left pane. You should see the downloaded binary file (e.g., "mbed_blinky_LPC1768.bin"). Drag that file to the removable drive named MBED.
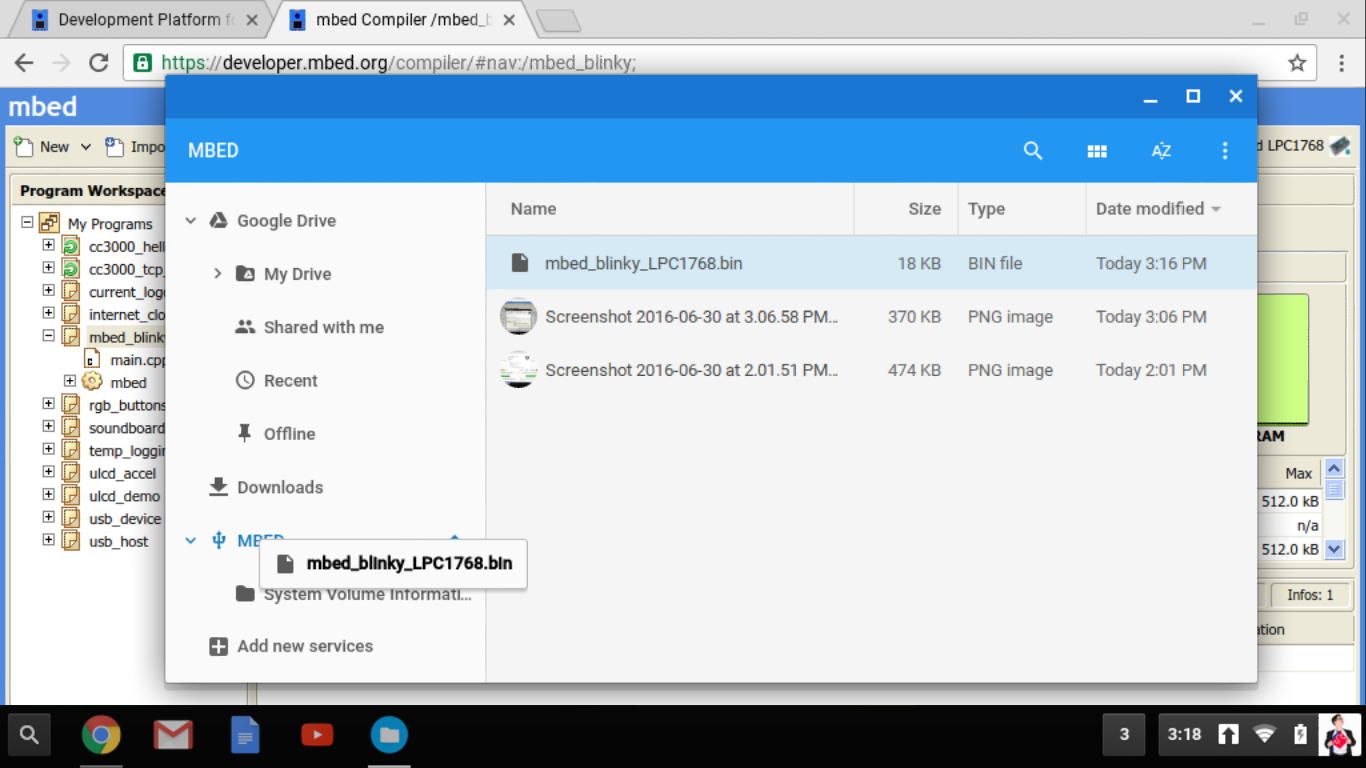
Press the reset button on your mbed platform, and you should see the first LED begin to blink.
Photon
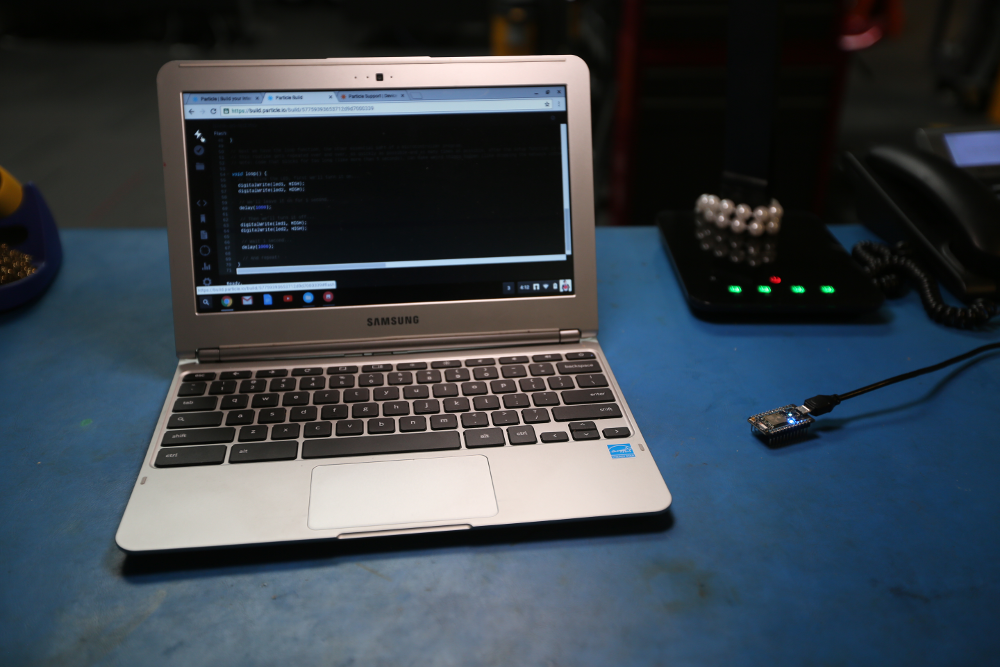
The Particle Photon is a great little board that can be programmed over WiFi. In fact, the default method of programming the Photon is to write code in Particle's online IDE and push code to the device over the internet. That means you don't even need a USB connection to your computer!
Once you have the Photon configured, you can use the online editor to write and upload code.
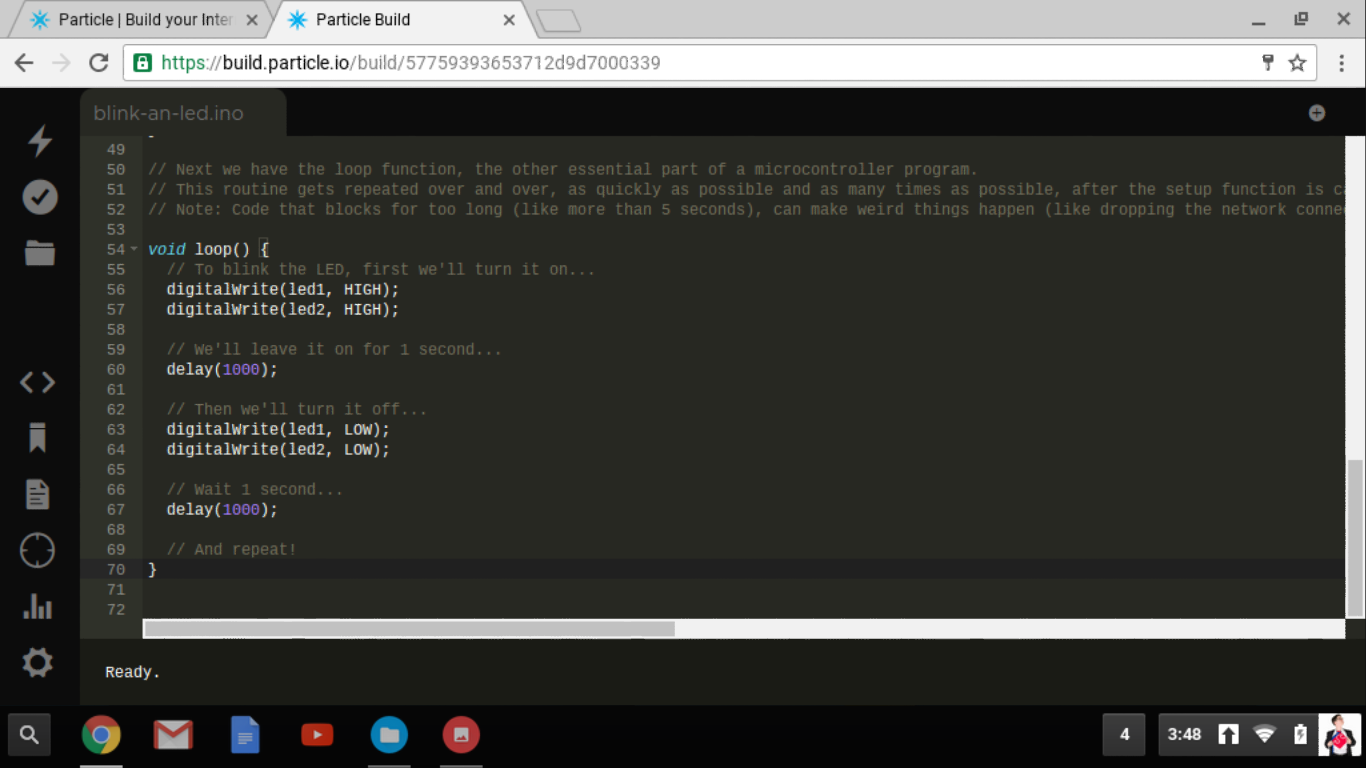
Clicking the "Flash" button in the IDE sends the compiled program to your Photon over the Internet. These are all features of the Photon out of the box. No special instructions are needed when using a Chromebook!
There are a couple of complications when using a Photon in the classroom:
- You need either a smartphone with the Particle app or a full computer with a serial connection to configure the WiFi on the Photon.
- Photons are individually associated with accounts, so you will need to reconfigure the Photon (using the Particle app) every time you wish to hand the device off to another student.
These are just three of the available online editors and their associated microcontroller platforms. What other online editors and CAD programs have you found that work well as a substitute (or near substitute) for their full-fledged computer software brethren?


Another possible negative for the Photon in a school environment is that most schools have their WiFi locked down tight to prevent "issues" involving kids and the internet. It can be difficult to get a bunch of Photon devices "blessed" onto the school's WiFi.
This is also true. I didn't even think about the enterprise networks!
I have used Codebender and must say I recommend it.
glad you like it!