Hardware Hump Day: One-Day Lightsaber Build
Celebrate the 4th, Jedi style, with a "spectacular" lightsaber build!

Tomorrow is May the fourth! Once a year, Star Wars fans around the world have set aside a pun day to celebrate their favorite galaxy far, far away, and although I was always more of a Trekkie myself, their enthusiasm is infectious! Besides, these movies are gorgeous in a very particular (and somewhat cheesy) way that makes their universe irresistible to a lot of makers, myself included. It was for this reason that I undertook the sacred task of building my own lightsaber, in the tradition of the Jedi. I gave myself just one day to put this project together, more than enough time (I thought) for a glorified flashlight, and although I managed to pull it off, I have to admit that it was no easy task. So without further delay, here's how I built my lightsaber in one day:
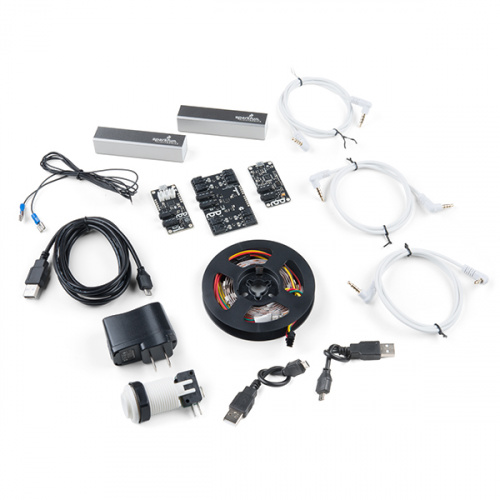
Step 1: Spectacle Light Kit
Spectacle provides an easy way to incorporate light into any prop. In this case I utilized the Spectacle Light Kit. The string of LEDs is controlled by a Spectacle Director Board so you can choose which side of the Force you want to represent. For this instance I chose a classic blue because I'm not down with the Sithness. However if you have a change of side — or want a crazy Mace Windu purple — it's super easy to change your lightsaber color with the Spectacle app.
Step 2: A Suitable Handle
Day to day, in the modern world, we encounter a lot of cylinders. At least that's what you think, until you go looking for something to make your lightsaber handle out of. A lightsaber handle should feel substantial in the hand, but skinny enough to provide a secure grip. It should be strong, but not so formidable that it's a pain to cut, sand and paint. Eventually, my search for the perfect tube led me to the plumbing section of my local hardware store where I acquired this handsome specimen:
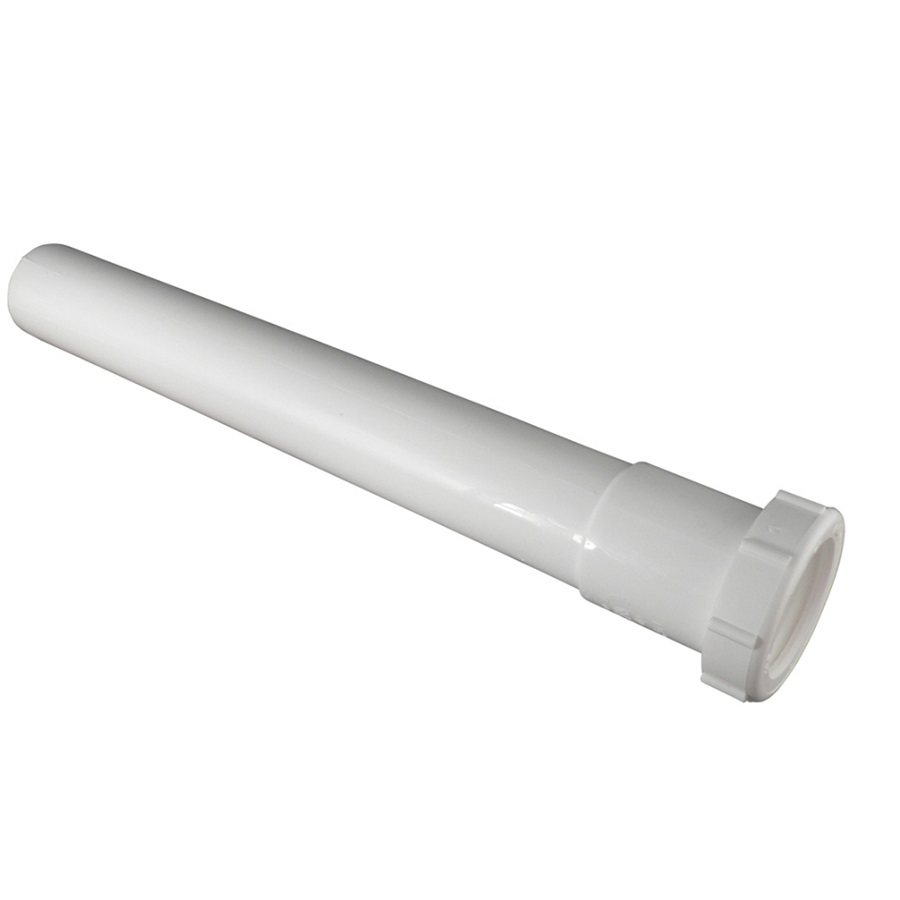
Image Credit: Lowes.com
A plastic slip-joint extension for a sink drain, just like the Jedi masters used probably! By cutting a few slots in the sides of the pipe, I was able to fit my electronics inside without resorting to building a 2.5"-diameter lightsaber handle. The bits of electronics that hung out of the sides of the handle could be easily covered up with greeblies later on. With the base of my project in hand, I was ready to move on to the most important bit...
Step 3: The Blade
Of course we all know that plasma blades are essentially Kyber crystal-based directed energy weapons. Unfortunately, Kyber crystals of a suitable size are few and far between in our universe, and I couldn't risk reversing the emitter matrix... so my lightsaber blade is made from a piece of acrylic tubing. I bought a 3-foot length of rigid acrylic tube from my local hardware store and set about turning it into a plasma blade. I rounded the end of the hollow tube by filling the last inch of the tube with clear resin and then rounding it off with a band saw. Filling the end of the tube was as easy as filling a small mixing cup with casting resin, sinking the end of the tube into the cup, and allowing it to harden.
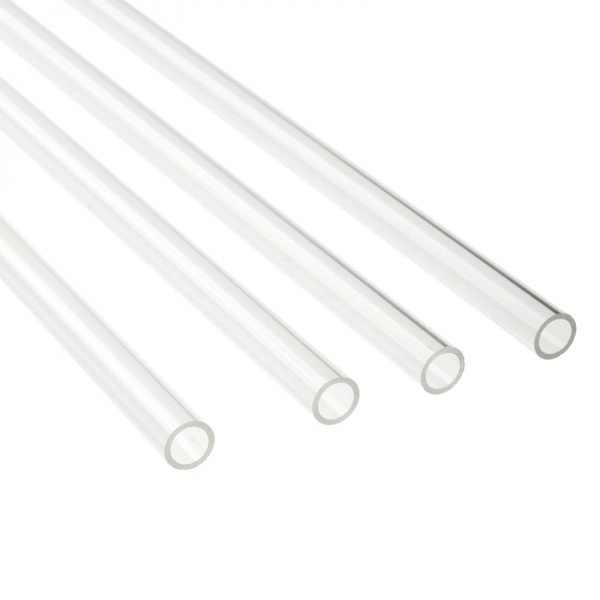
Image from www.watercoolinguk.co.uk
To get the lighting effects that I was after, I decided to make a triangular tube of addressable light strips by placing three strips face down and covering the backsides with tape to form a sort of hinge which then allowed me to roll them into a triangular prism and bind them together with shrink tube. This stick of LEDs would sit in the center of my acrylic tubing, but it required diffusion.
First, I rolled the LED strips up in some tissue paper, which helped both to diffuse the light and to protect the LEDs from rattling around in the tubing. Then, I coated the entire "blade" in a specialty spray-paint meant to mimic the look of frosted glass. In the end, I still wasn't able to fully diffuse the individual "dots" of light at full brightness, but I was left with a satisfactory effect for a one day build.
Step 4: Greebling
After my blade and handle were attached with plastic epoxy, it was time to start pulling the whole look together. My first order of business was covering the protruding dev boards, which I did by building small boxes around them out of polystyrene sheet from the hobby shop. For processes like this, it helps to use CA glue and a glue accelerator so you're not stuck holding a lot of finicky bits in place while they dry. After everything was enclosed, I had a sense of the overall shape of the thing. Luckily, lightsabers are built by their respective Jedi and, as such, are unique to their owner.
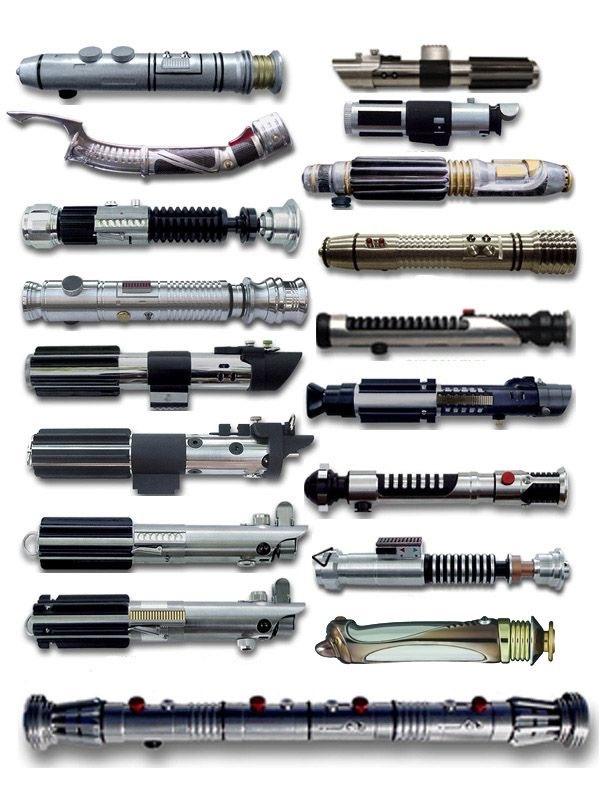
An assortment of lightsaber hilts (image from: www.quora.com)
This gave me a lot of leeway in the visual styling of my lightsaber, but it helps to stick to the overall feel of the Star Wars universe, which, it turns out, is largely comprised of fins, grids and rings. I cut a few shapes out of acrylic sheet on the laser cutter and artfully super-glued them in place on the plastic pipe. I used black acrylic sheet so that after I painted everything, I could sand through the paint to reveal shiny black underneath on some parts.
Step 5: Paint
Because of the nature of this build, I didn't get too fancy with the paint. The whole paint job was accomplished using rattle-cans and sandpaper. I can give you a few tips for quick and dirty spray-paint jobs though! First, use a filler primer to hide some of the imperfections in your model. Filler primer, as the name suggests, is a thicker primer that helps fill in scratches and gaps in your model. Next, special effects paints like mirror chrome and gold are your friends, but they won't do miracles on their own, so be sure to properly sand and prep your model after priming. Finally, you can shine up a dull paint job by sanding it with super-fine wet-dry sandpaper. It won't remove much paint but it will buff the surface smooth.
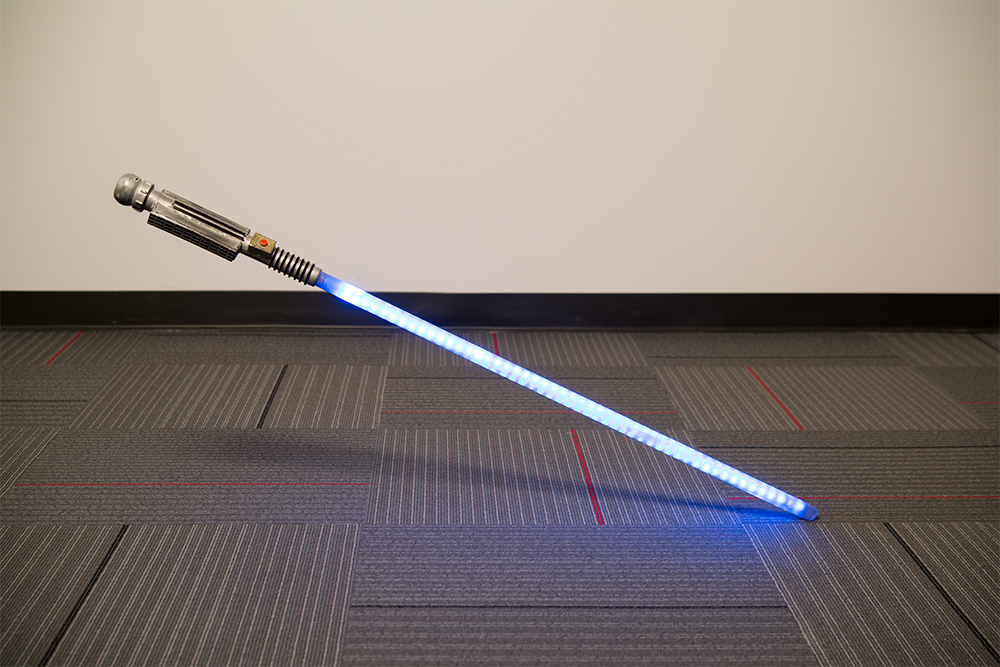
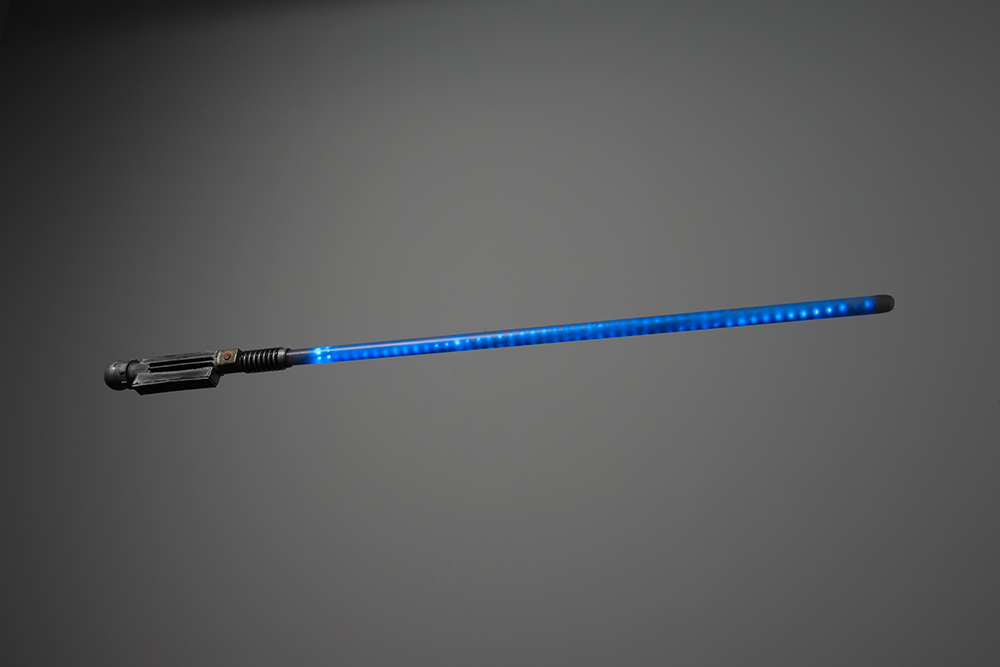
Final Results
It's at this point that I suggest you sit down (possibly for the first time in 10 hours) and admire your work... from a distance if it looks better that way. You've finally done it; your very own lightsaber. I gave mine a quick wipe-down with a rag to remove any errant shop-dirt and placed it in a makeshift stand of iron pipe. Is it perfect? Of course not, and there are a lot of things I would do differently on my second build. It won't compete with the better pieces at a serious sci-fi convention, but it's better quality than you might see in a seasonal Halloween shop.
...I wonder if most Jedi have a drawer somewhere full of old, junk lightsabers that they built over the years. Probably not, but even Jedi can't get it right on the first try, can they? Anyway, thanks for reading! If you have any questions, I'll be watching the comments section. May the fourth be with you!
Interested in learning more about LEDs?
See our LED page for everything you need to know to start using these components in your project.


it is cool you can use high density led,as 144led sk6812 mini led strips or more, will be better color effect also can be smaller leds as sk6812 3535 led strips will be better
OK. Tomorrow has come and gone and become the day after.....So where is the links to the Mystery Magic Electronics?? Excellent project. Hope to take it to the next level with your help.
I'll be updating this post as soon as I can with details on the electronics!
Why not use EL panel?
The really boring answer to this question is that the hardware platform that this project will eventually become a demo for has a board specifically designed for driving WS2812s and no board for driving EL yet. lol.
"yet"
It is all clear now!