Hardware Hump Day: Blade Runner Parasol
Adding some cyberpunk dystopia style to a costume shop parasol

I'm a longtime fan of the cyberpunk genre: I know the Ghost in the Shell universe inside and out, I've run out of William Gibson to read (fiction and nonfiction), and I even have RFID chips embedded in my hands --- which I think is pretty cyberpunk.
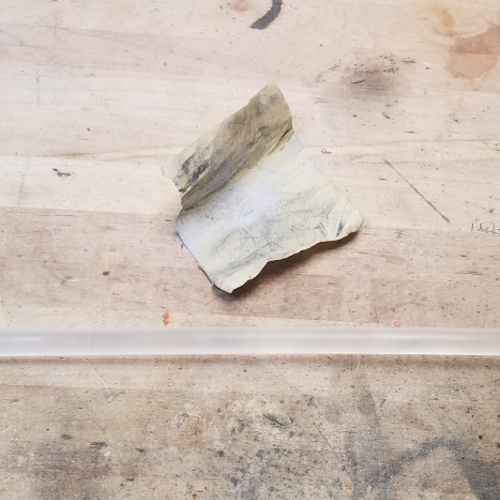
I also enjoy costumes and performing, so whenever I find an inspiring object I pick it, especially if it's damaged and therefore deeply discounted. Such was the case with an unfortunate bamboo parasol at my local costume shop. The paper top was torn in a few places pretty badly, bringing the price down by half. Personally, I liked the holes; they gave it kind of a post-apocalypse feel. I took the parasol home, hung it with my costume stuff and just kinda stared at it for a while until I happened upon some inspiration looking at "Blade Runner" screenshots. Look at this:
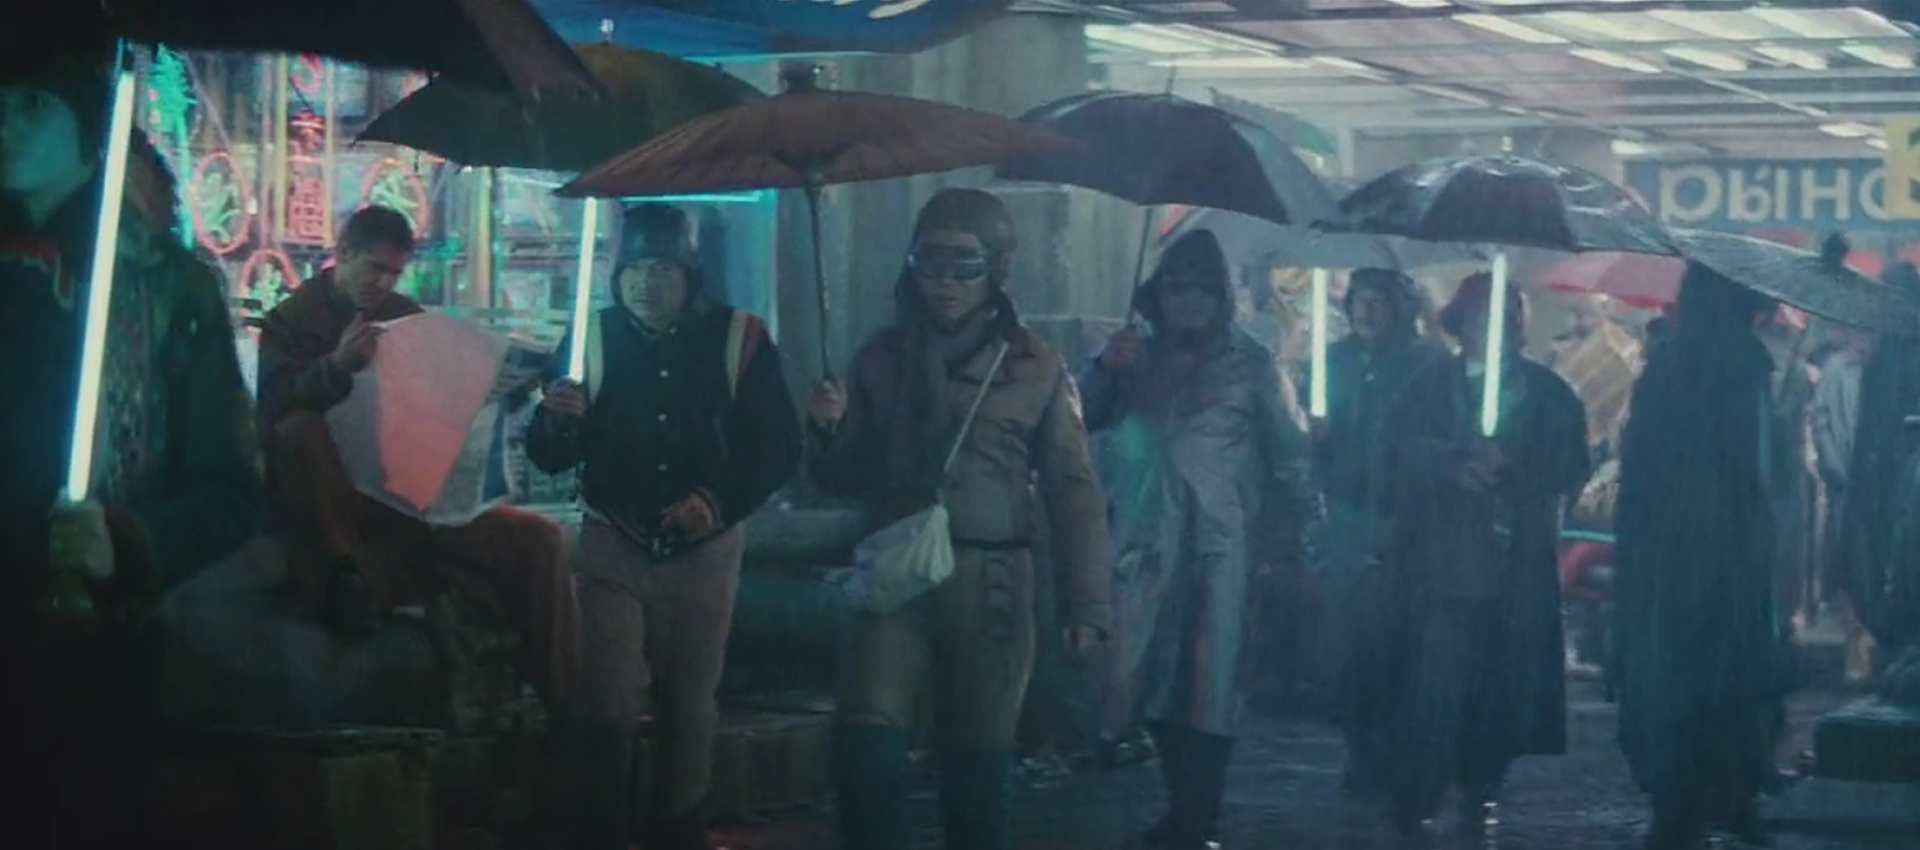
Blade Runner is property of Warner Bros. Entertainment Inc. All rights reserved.
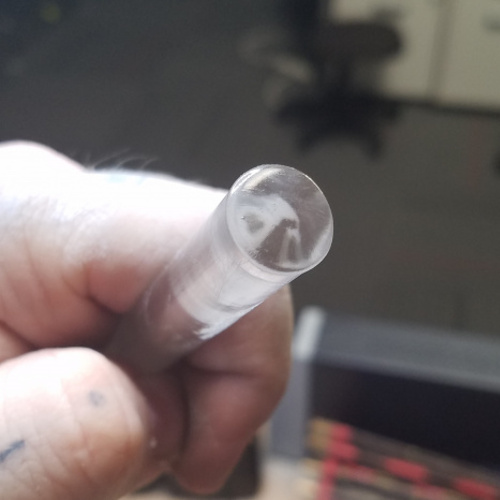
What's interesting is that in this iconic shot you can see lit umbrellas, but also unlit bamboo parasols. It's easy to imagine in this universe that lit parasols also exist. So I set out to make one myself. The first step was finding a piece of acrylic rod that would stand in for the original bamboo shaft of the parasol. I eyeballed the size and picked up a 3-foot-long piece at my local hobby shop where it cost me about $6. You can also find acrylic rod inexpensively online.

Parasol Deconstruction
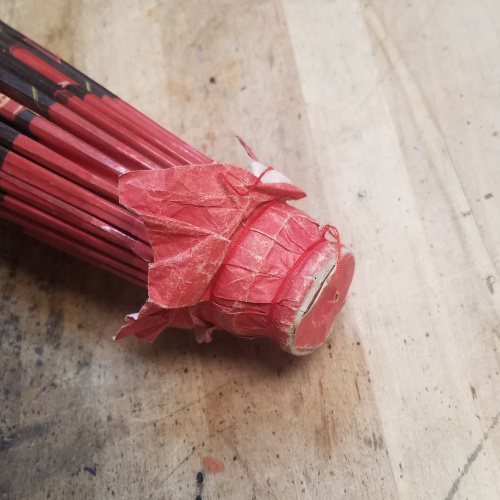
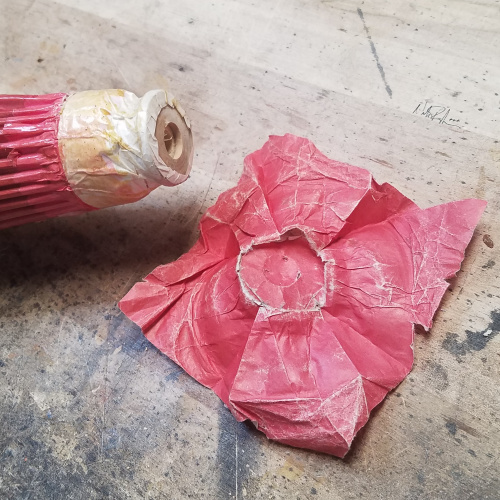
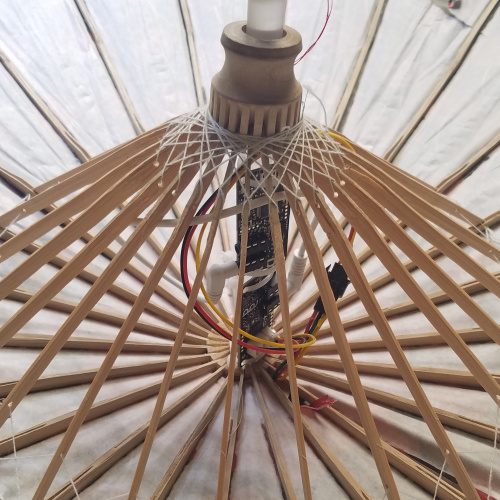
After trying initially to simply pry the original bamboo shaft loose from the parasol like some kind of incensed ape, I elected to inspect the parasol less violently for a way to disassemble it. After unwrapping the paper cover at the top, I found a wooden pin driven through the assembly to keep it in one piece. I was able to remove the pin with a pair of needle-nose pliers, and after that the shaft slid right out. I also needed to remove the pin that keeps you from opening the parasol too wide and damaging it.
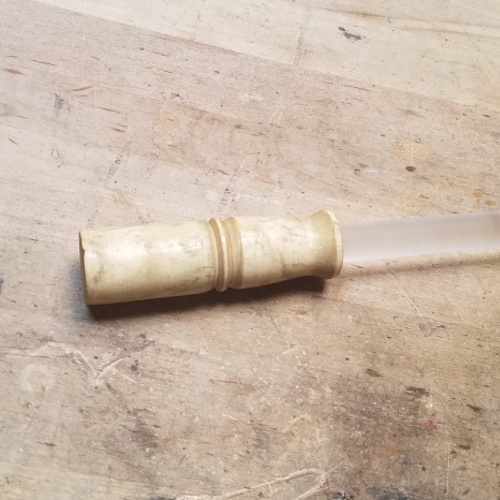
An Acrylic Transplant
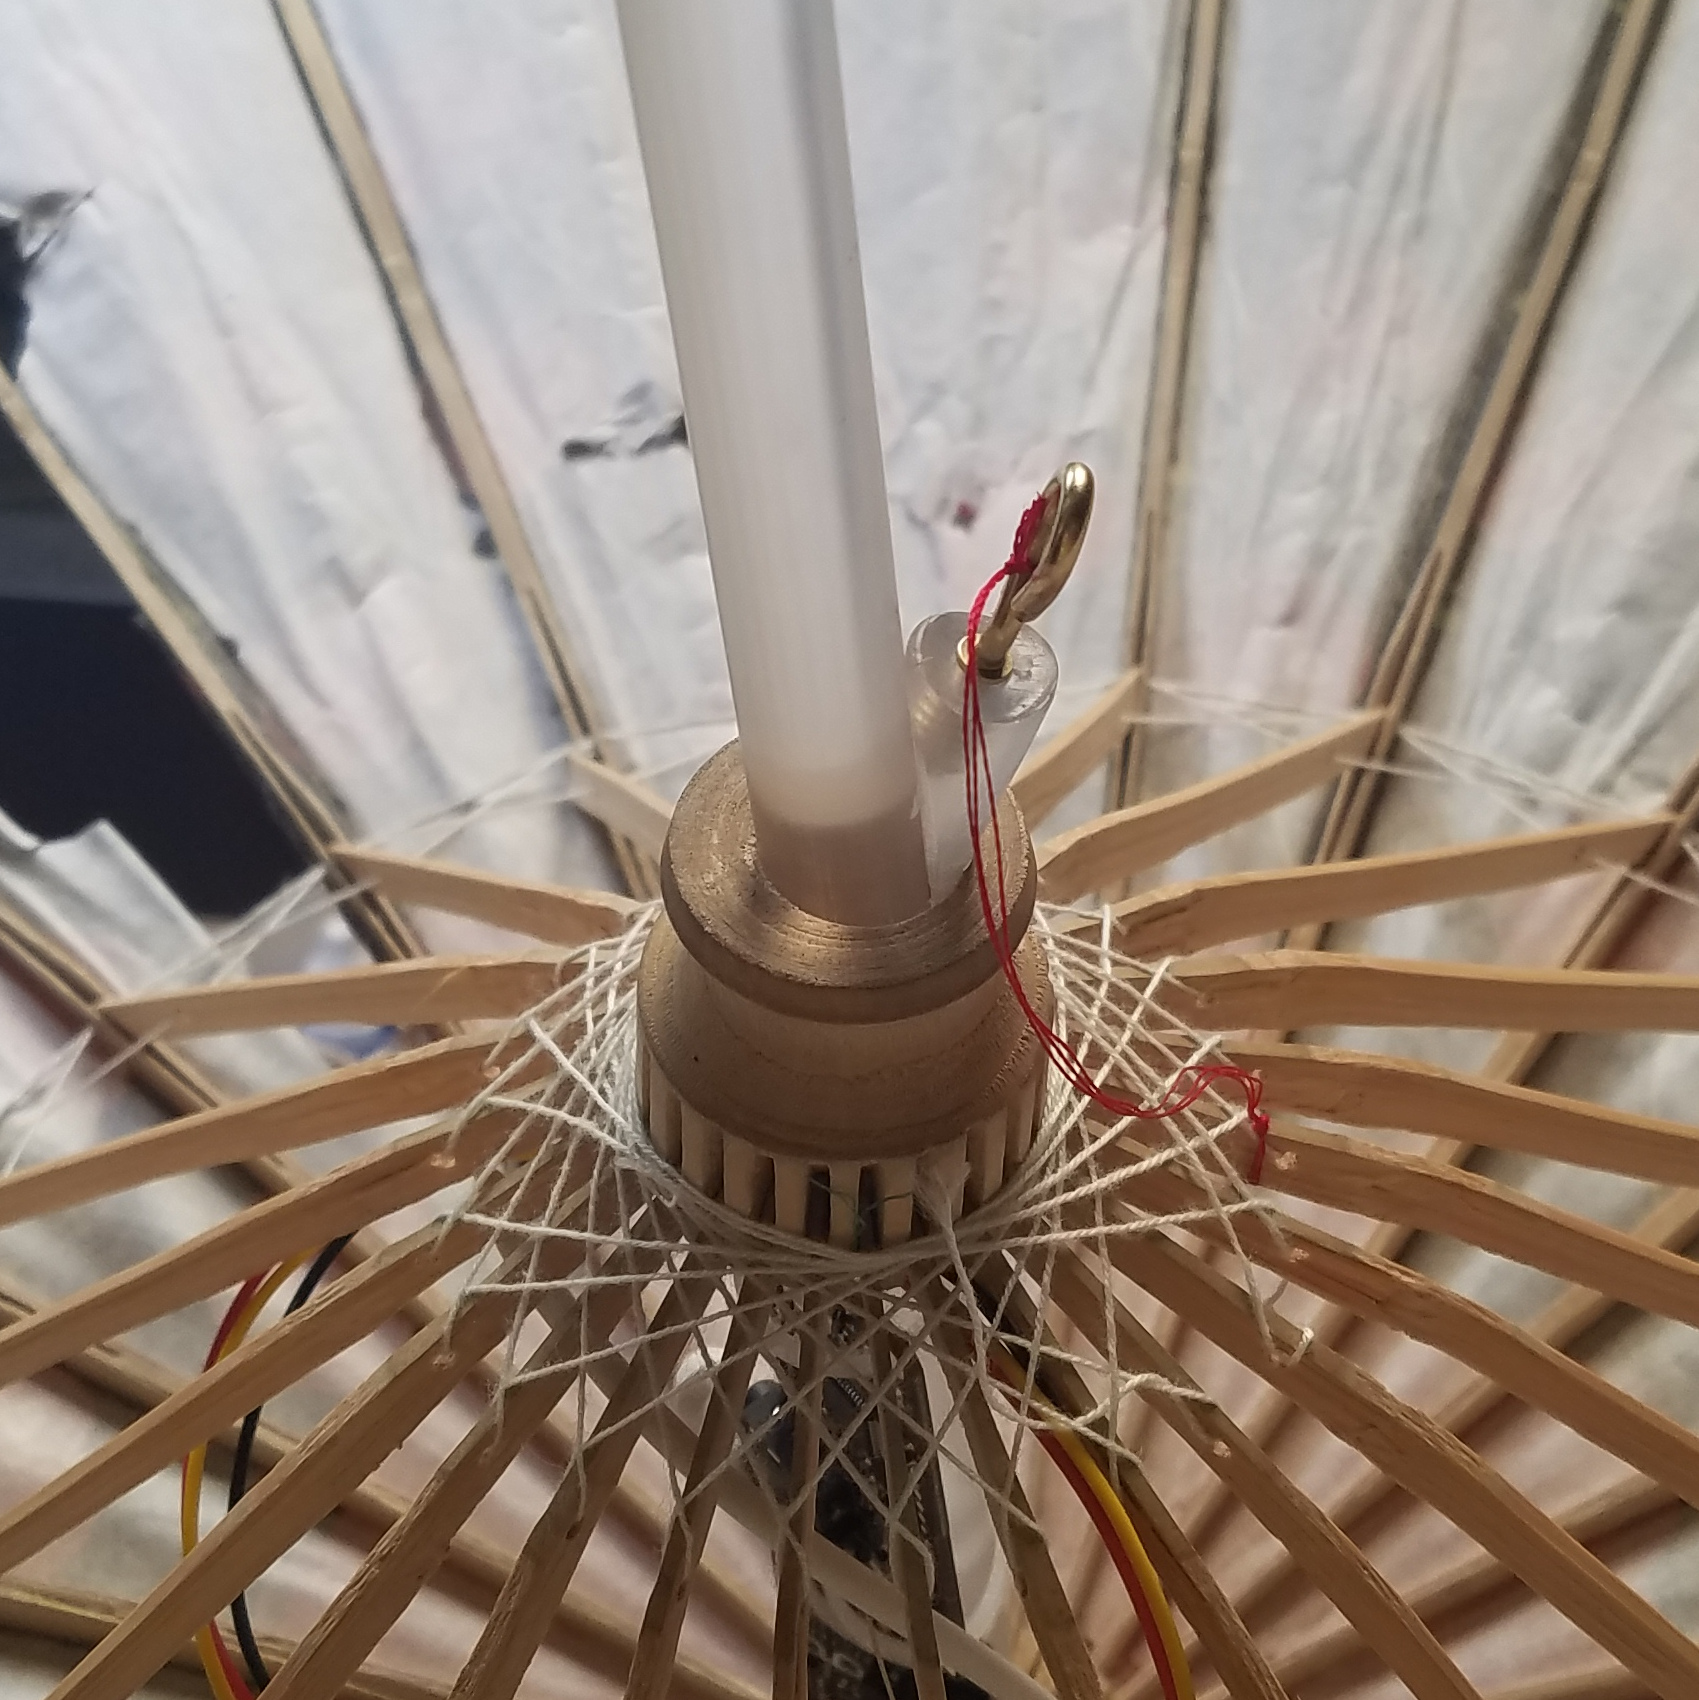
My first step was to lightly sand the acrylic rod with some fine grit paper to give it a little bit of opacity. This will help diffuse the light once we end-light the piece of acrylic. Speaking of end-lighting, the ends of the rod need to be as clear as possible for light to get in, so I sanded them with fine grit paper and then flame-polished them with a small torch. Basically, if you carefully wave the acrylic over a flame, you can melt the surface enough to fill in the tiny surface scratches that make it cloudy.
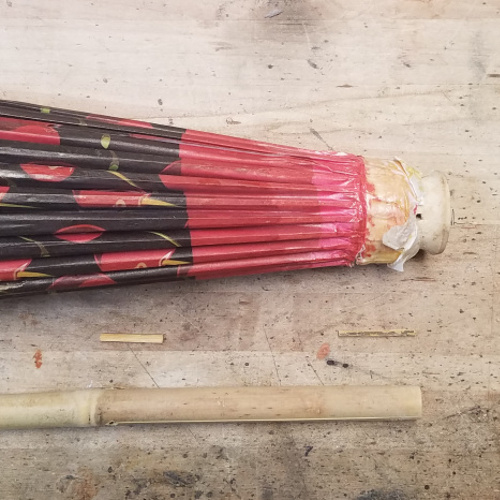
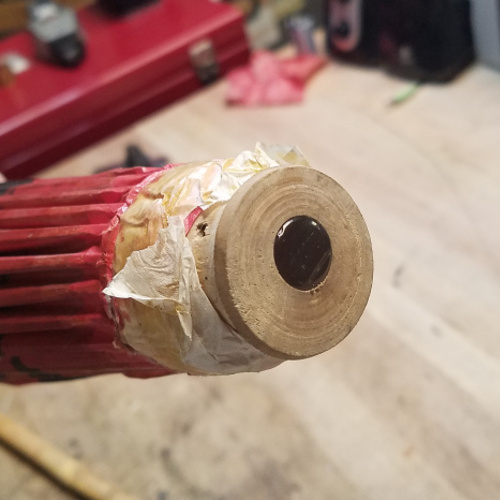
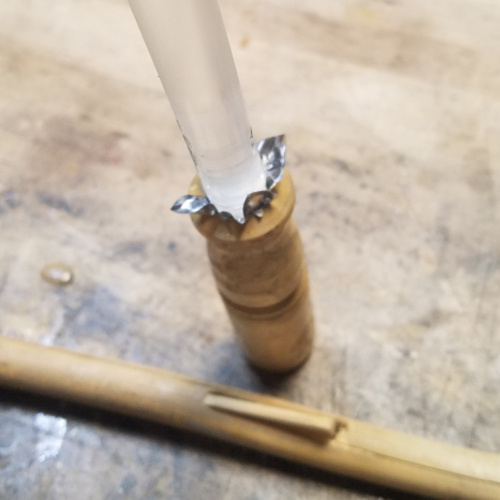
Next, I fit the acrylic rod into the top portion of the parasol where the bamboo was previously. I must have gotten really lucky because it press-fit perfectly into place. If you want to replicate this project and you only have the option of going too big or too small, I recommend using a smaller diameter acrylic shaft and then wrapping tape around it until it's the right size. I was even able to pull the original bamboo handle off of the parasol and fit it directly onto the new acrylic rod. To keep from losing light from the acrylic, I cut a piece of mylar and pressed it down into the handle with the rod.

Light It Up!
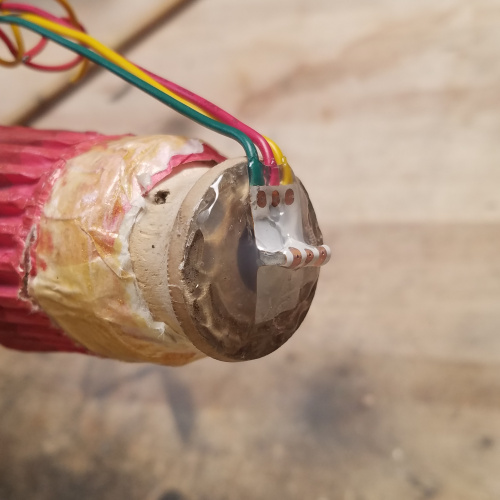
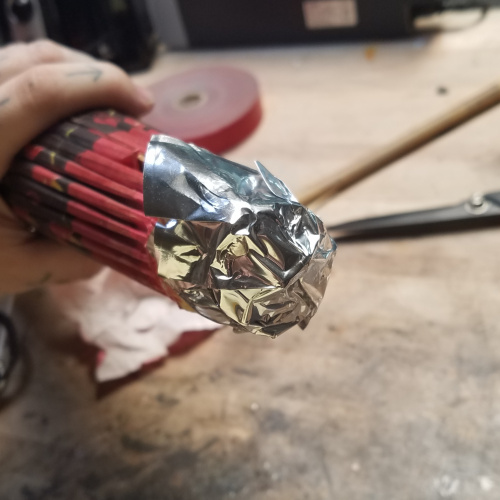
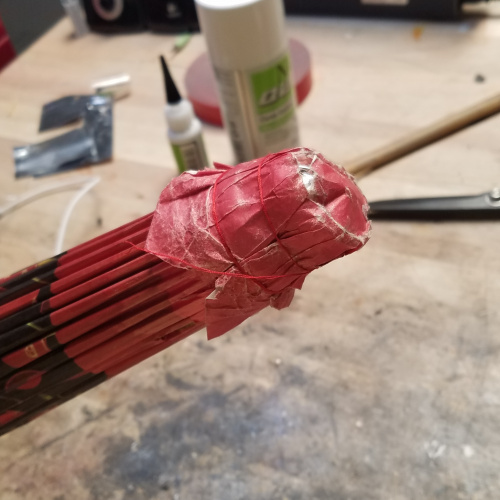
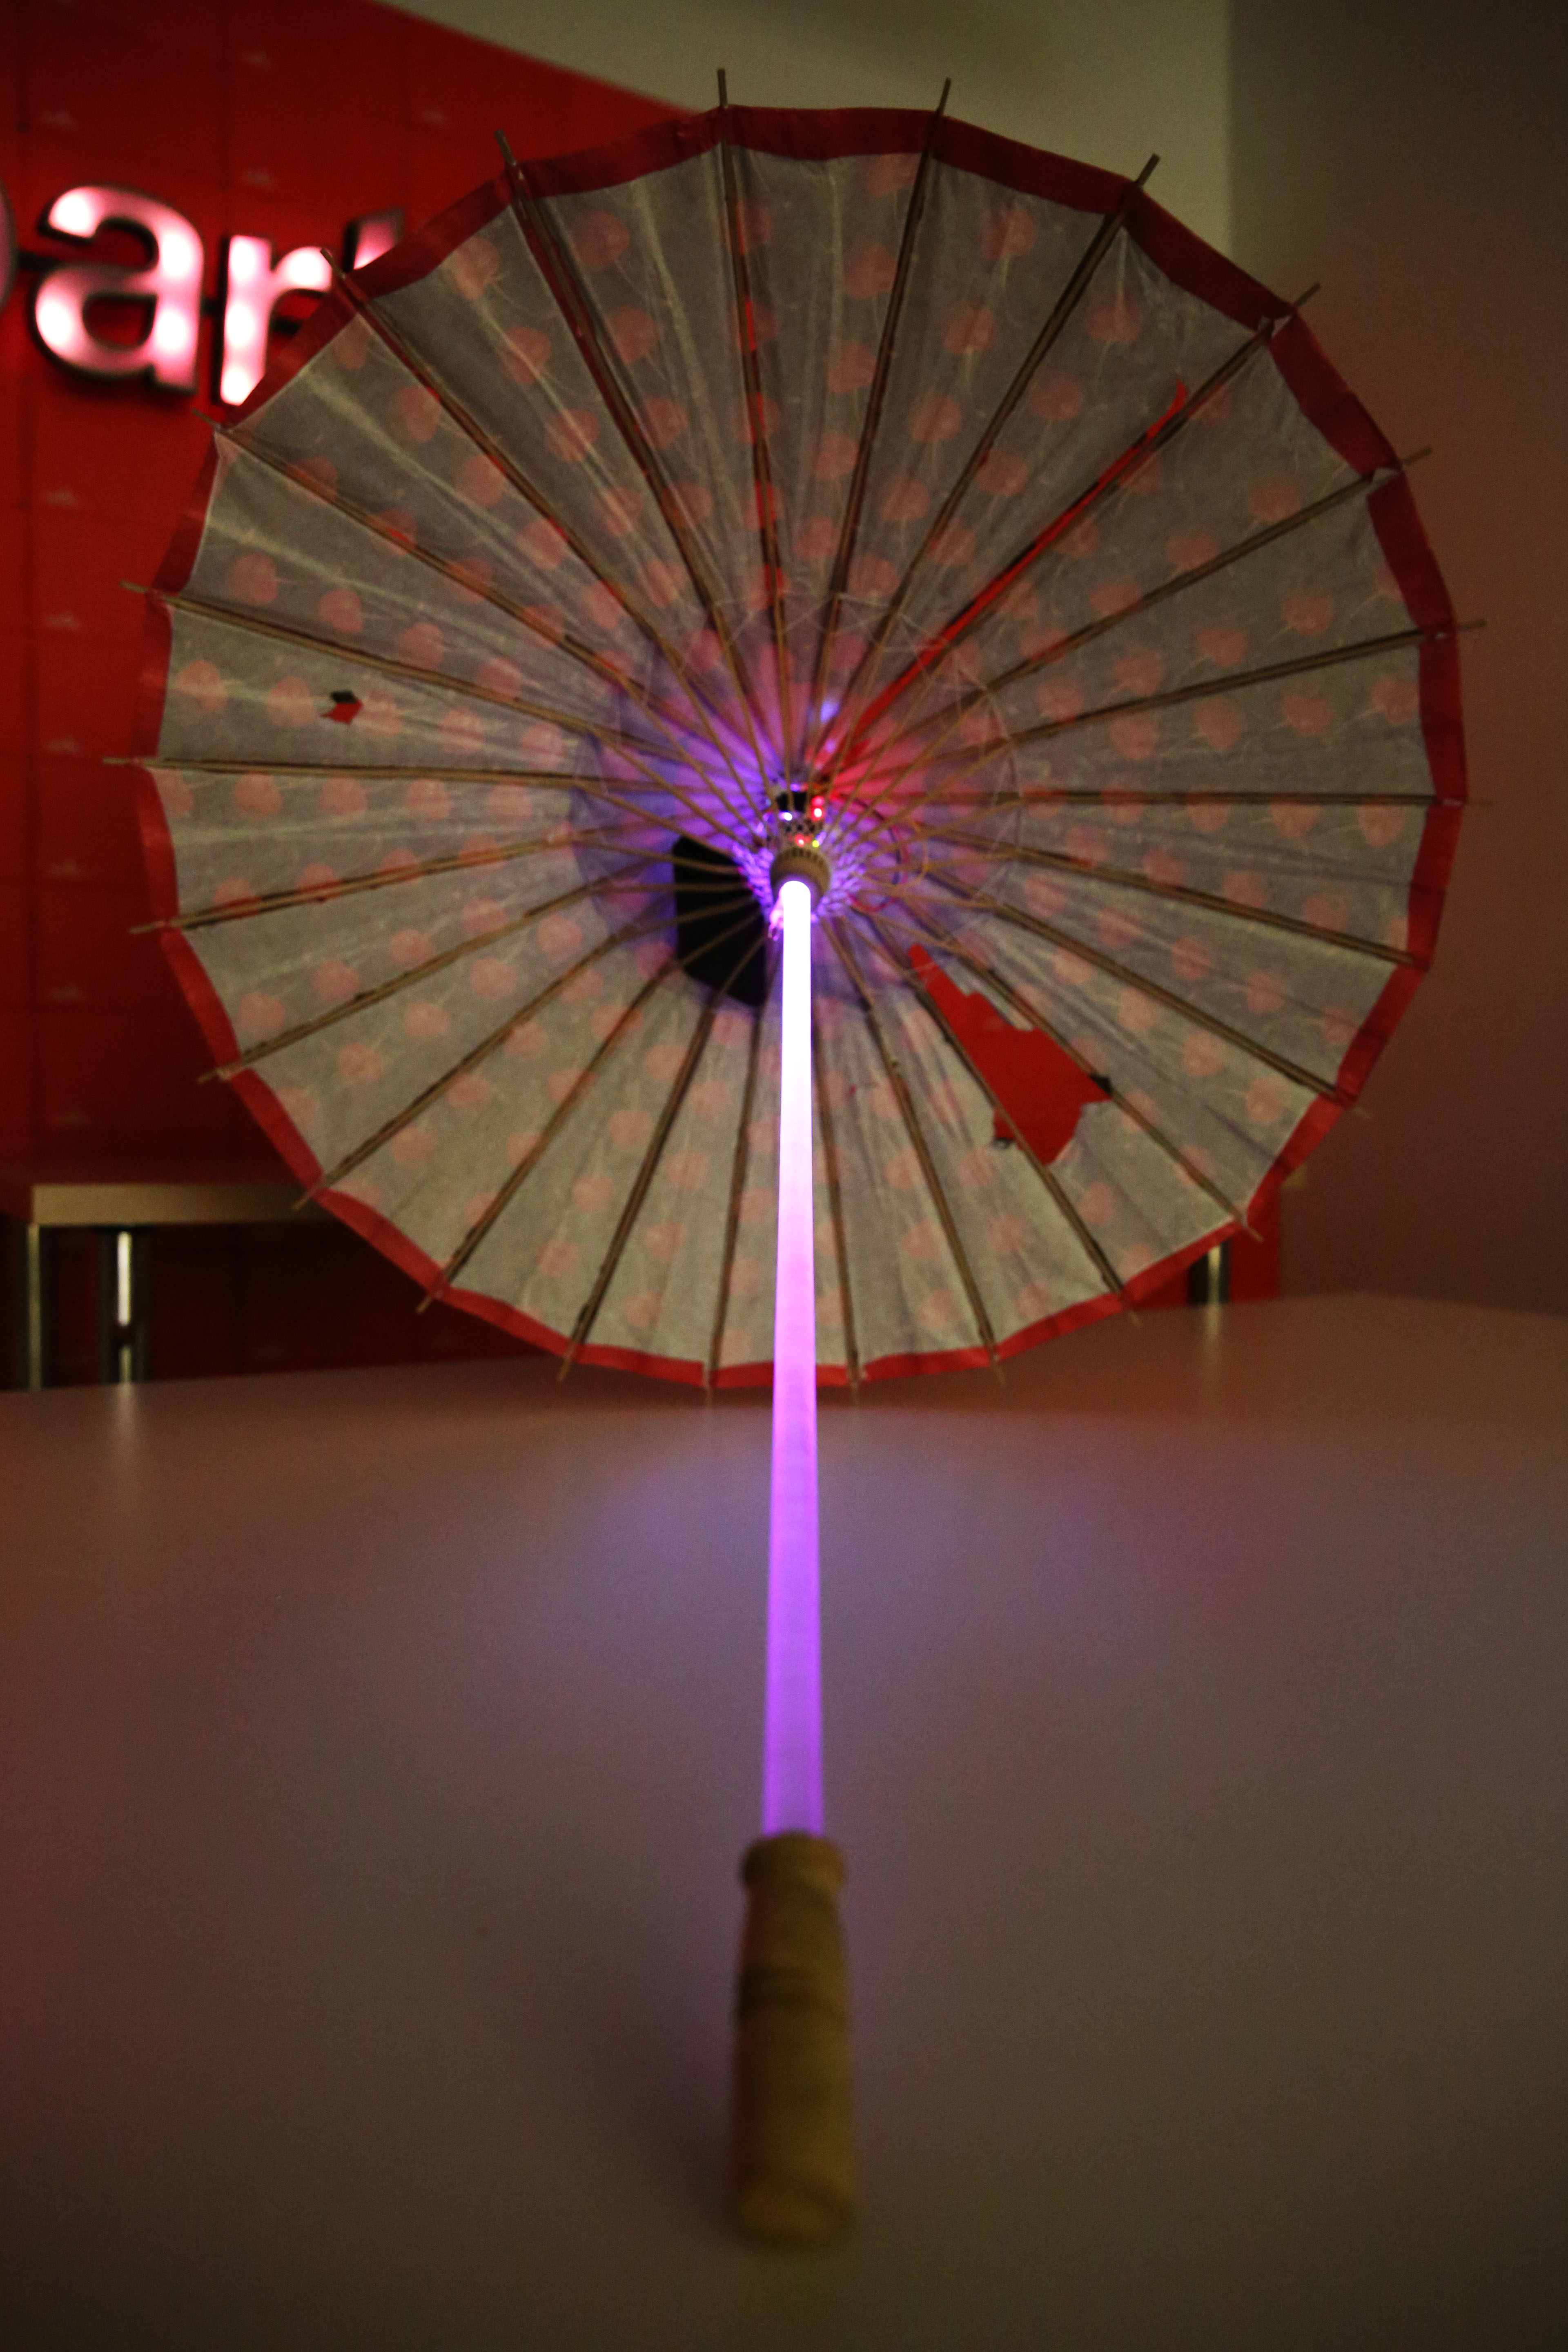
Because I anticipate that I'll want to change the light pattern on this project from time to time, I decided to use the Spectacle Light Kit to control the lighting effects. I started by cutting a strip of addressable LEDs down to just two because that's the most I could fit at the end of the rod. I hot-glued these in place at the top of the parasol and cut a small hole in the canopy to thread the wires down through. Again, to trap as much light as I could manage, I covered the whole thing in reflective mylar and then wrapped it in the original red paper to hide the wires. The Spectacle Light Board and Director Board fit just under the canopy where I attached them to the acrylic rod with zip-ties.
One Last Bit
The one thing that was still missing was a mechanism to keep the canopy open. The original bamboo shaft had a little bamboo top-spring that kept the runner in place when it was at full extension. This wouldn't be possible with the acrylic rod because you don't want to drill into it and interrupt the transmission of light from the top to the bottom. I decided to solve this problem by making a little wedge to jam into the runner, like a doorstop. I carved a hot-melt glue stick into shape, which was the perfect material because it's a little bit "grippy" and soft. I screwed a brass hook into the back of my improvised stopper and hung it from the runner with a piece of string so it can't get lost.
Ready to Hit the Streets
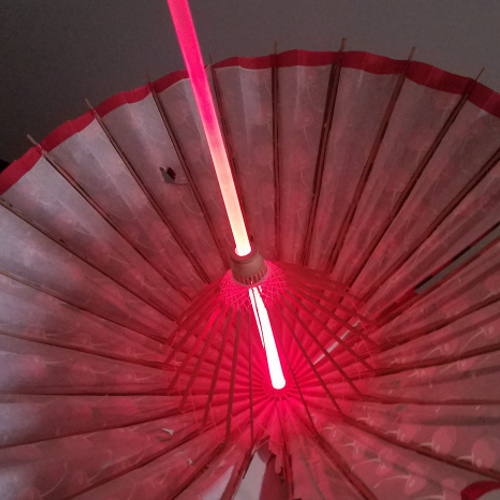
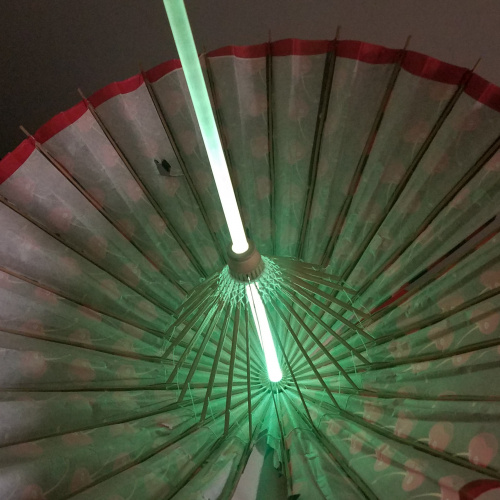
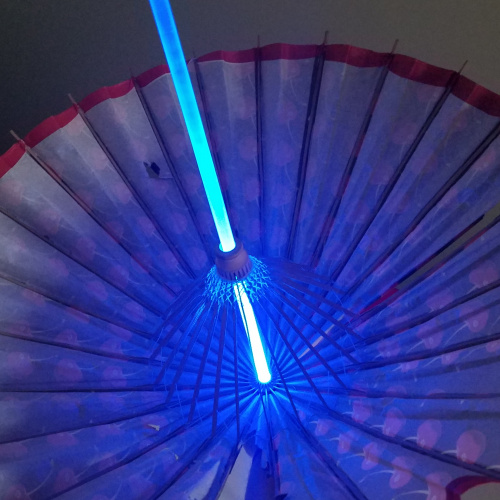
I attached a battery pack to the Spectacle boards, and the whole thing was ready to go! You can't see the lighting effects in broad daylight, but in a dim room it becomes very pronounced. At night, it looks amazing! Check it out:
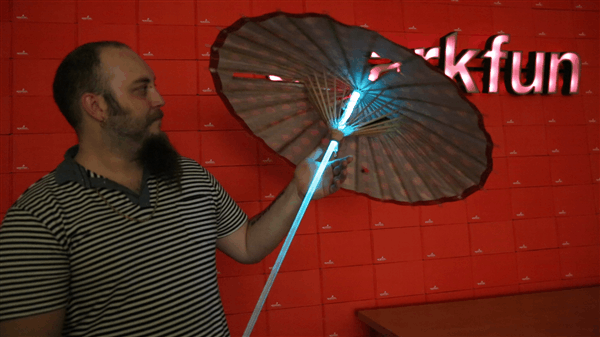
I think it's ready for a night out in Future Los Angeles, or The Sprawl, or maybe Chiba City. Let me know what you think in the comments!
Interested in learning more about LEDs?
See our LED page for everything you need to know to start using these components in your project.


That musta been the Mother of All Mai Tais
This looks great! Not a bad start for a homemade light saber either.
In all your pics it looks like both LEDs are set to the same color. Did you ever try setting them to different colors? Do the colors blend or does the rod light up in two different sections? I built a lamp out of a quartz crystal for my brother and now I'm fascinated with how things light up :-p
My bad, ya'll, the page should stop jumping around now. I forgot the image carousels were very helpfully dynamically sized.
Great work, nice build info and so on but PLEASE don't use whatever is that makes pics jump up and down my screen. It makes the article very difficult to read. And adds NOTHING.
It's that damned image carousel (and apparently my sloppy work resizing the images) It should be fixed now, sorry bout that
Hey Nick, did you get your call sign yet? What class of Amateur Radio Operator are you? Did you go all the way?
I did! KE0MKA! I'm at Technician because I didn't know you could take them all on the same day. I'm gonna go back for General and Extra soon.
Nice work Nick, but what's that cell phone looking thing in the last picture? Is that the battery pack?
Also the webpage is jumping around and difficult to read. Once of the pics in the animations is a different size and makes everything below it move up and down as the pictures cycle.
Yeah, that's the battery pack. Obviously you could use something much smaller but that's the only one I had on me that was charged up. Any 5V supply would work.
I’m a big Williams Gibson fan as well and I think cyberpunk is the only thing I read in graduate school. This looks like a fun way to bring some of that universe to reality.