Hardware Hump Day: The Great Ceramic 3D Printer Experiment
Follow along as Feldi attempts to build a Ceramic 3D Printer using OS plans she found online.

For the past few months I have been taking pottery classes at a local ceramics studio in Boulder. When I first started, I had a hunch I would end up marrying clay with tech in some way because, well, it’s what I do. But I wasn’t quite sure how. Then I stumbled upon this DIY ceramic 3D printer designed by Jonathan Keep. I immediately knew I wanted to build one of these bad boys for two reasons. First, while it’s been done a whole bunch and there are tons of DIY 3D printer plans online, building a 3D printer is a great way to practice mechanical and electrical engineering skills. I’ve always learned best through practice, so this a great way to wrap my head around the mechanics of 3D printing. Second, by building a ceramics printer I can print clay pots with interesting angles and planes that would be either extremely difficult or impossible to build by hand. 3D printing opens up a lot of possibilities for my ceramics output that I am very excited to explore. I saw both educational and practical value in this project, so I decided to pursue it. It’s a bigger build and slightly expensive, so I will be building it out over a few weeks.
While Keep included on his website all the files and documents one needs to build this printer, his documentation is not particularly explicit. I spent the majority of the past two weeks going through the files and making sense of them. Keep is a U.K.-based maker and ceramicist, so his files and parts are all oriented for the metric system. The bill of parts was predominantly printed for makers in the United Kingdom. It took some time to translate the files to imperial values and find similarly sized hardware available in the United States.
Before I dive in, I'd like to mention that I have been looking to our in-house mechanical engineer, Evan, for advice and guidance as I pursue this build. He has graciously offered tons of feedback and has patiently answered all of my questions. I’m cautiously optimistic that with his help this thing might actually work.
Resources
The first thing I discovered is that the provided files are a bit redundant. Mr. Keep designed PDF files that work well with Adobe Illustrator. Some PDF files repeat parts that have been included in others. CAD files are also provided, thanks to John Nicholson, a DIY 3D printer community member, in both DXF and DWG formats. I am most comfortable working in Illustrator and with a laser cutter, so I chose to use the PDF files.
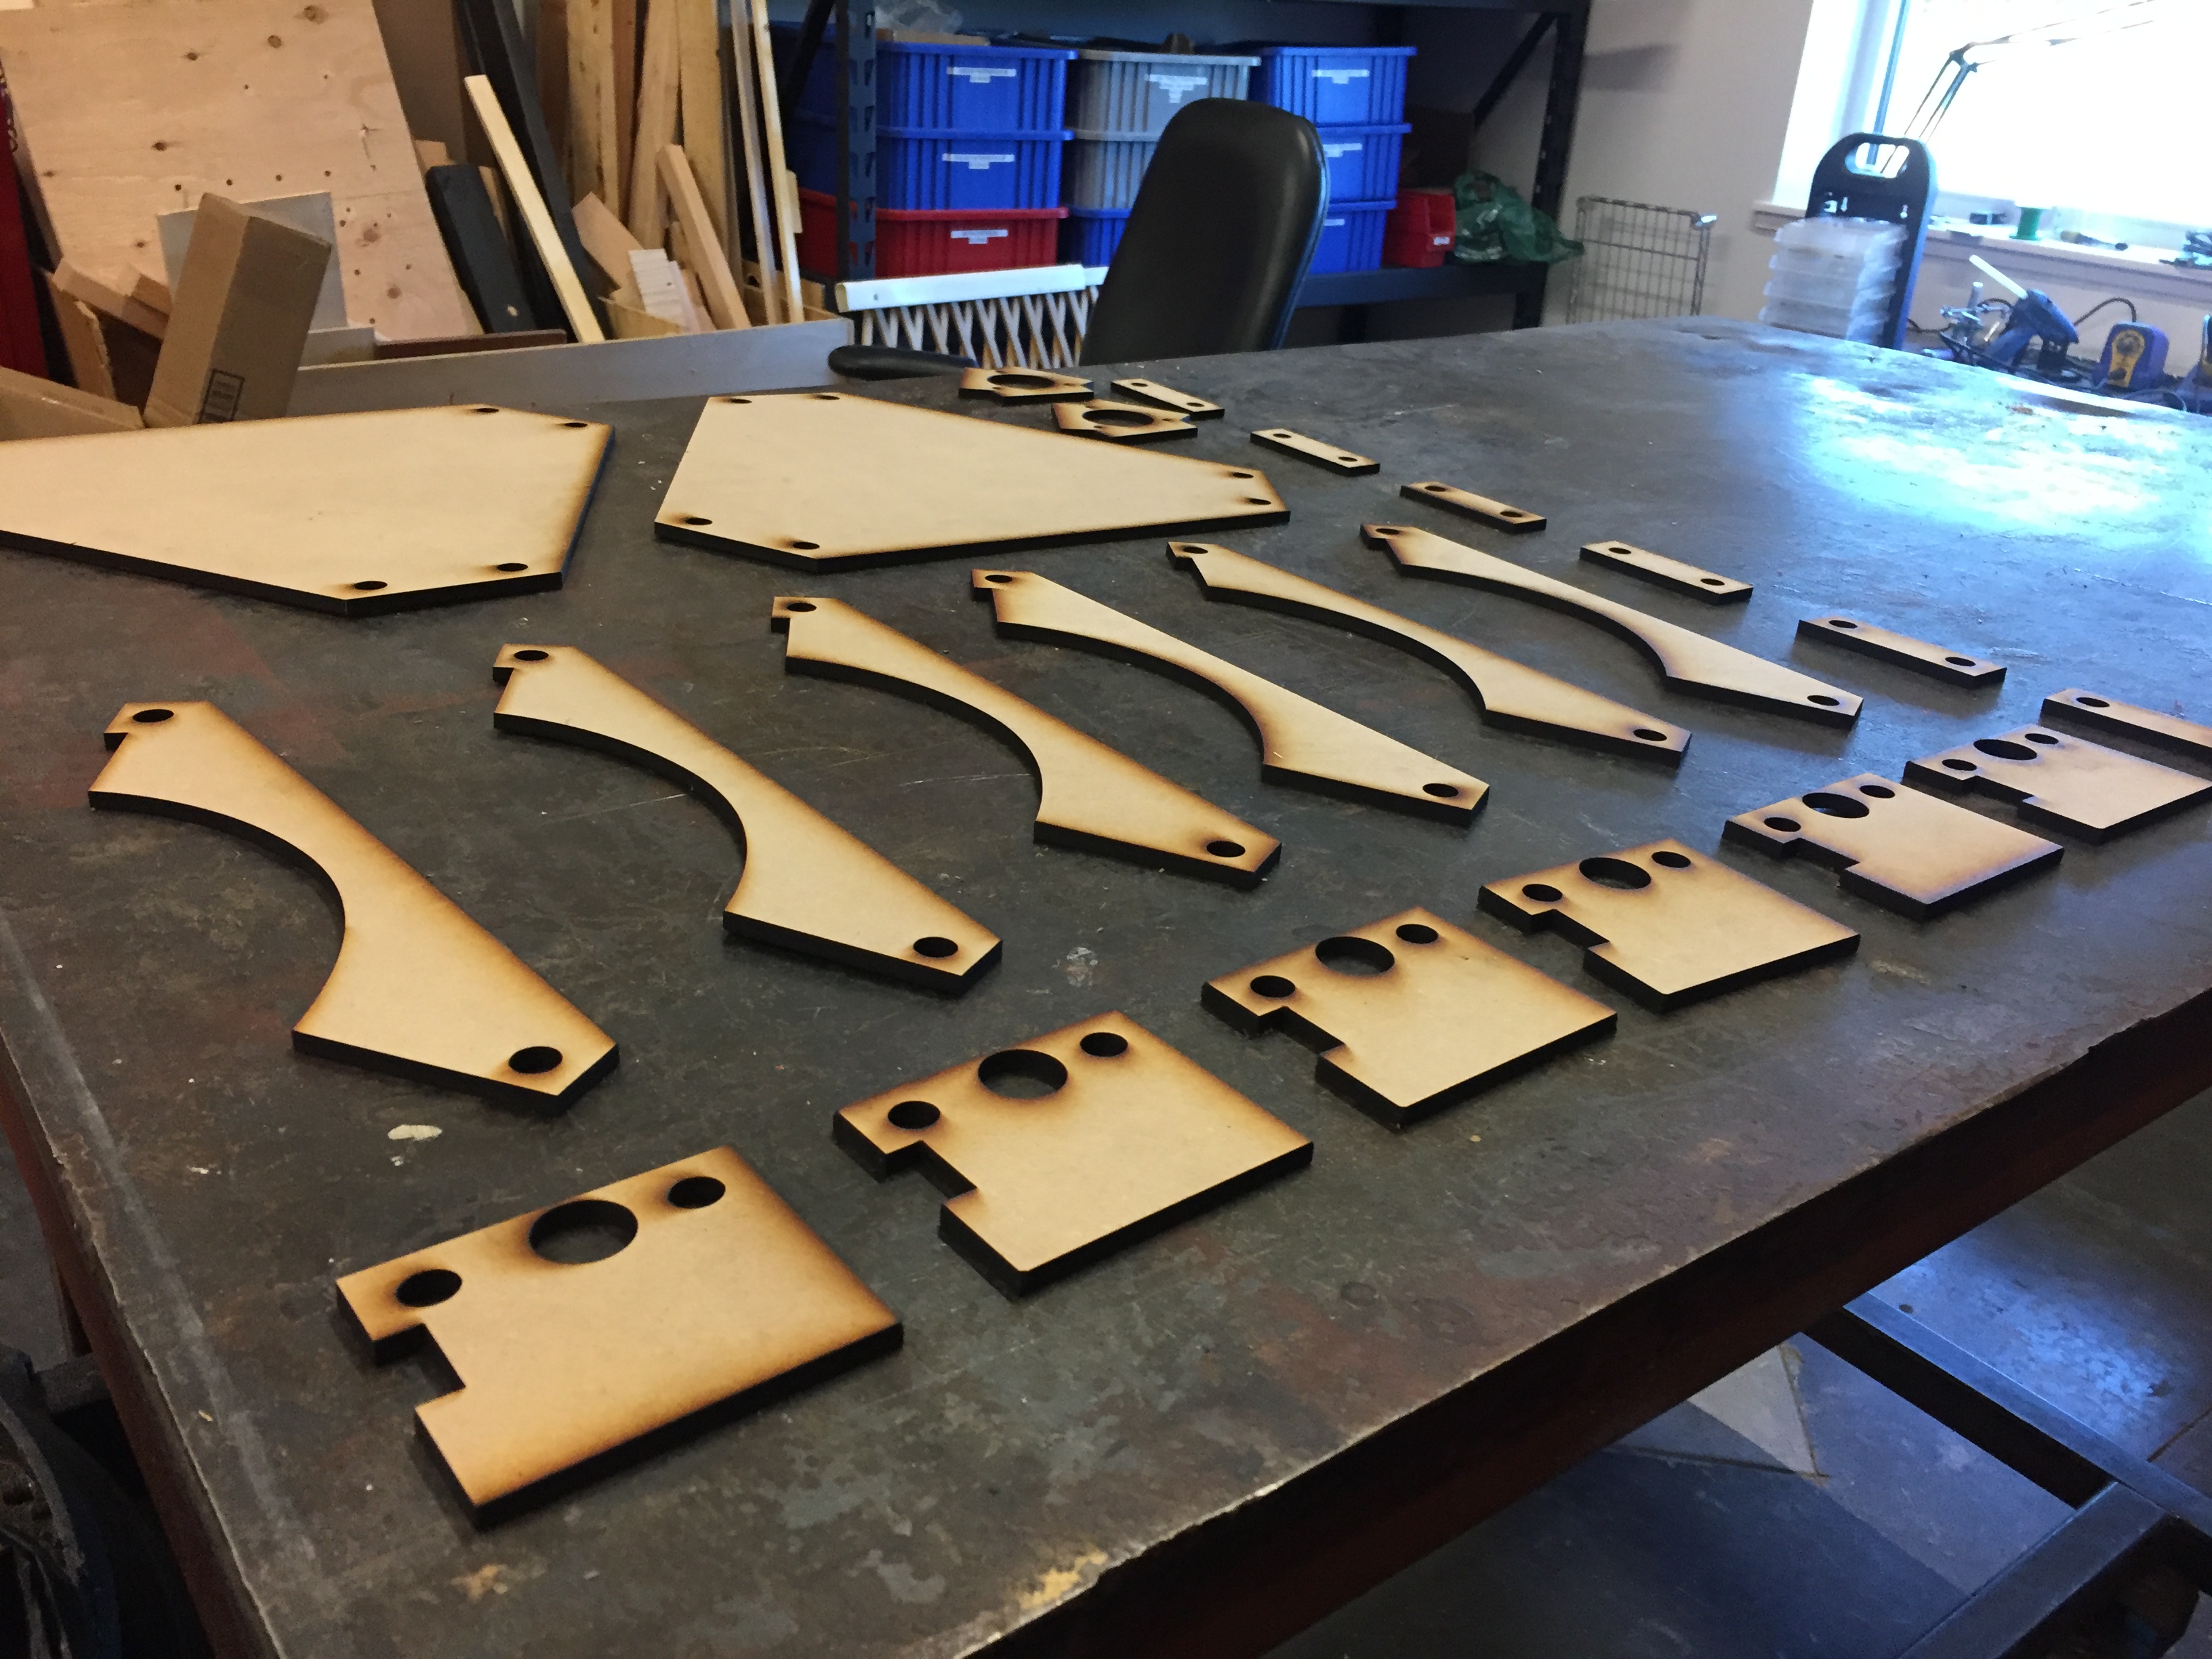
The 'All Parts' PDF offers a layered version of MDF parts aligned as they would be in the actual build. Each part is given its own color, so it’s pretty clear where one part ends and another begins. I grouped each part together and then pasted them into a new file for laser cutting.
The A4 PDFs (Base, Frame Parts and Moving Parts) are fantastic resources for anyone without access to a laser cutter. Using any regular printer, you can print these files on paper and then use that as a template to cut your MDF. This definitely makes building this printer more accessible, but if you have a laser cutter I recommend using it to save time!
The Components PDF offers designs for the acrylic parts as well as any moving parts to be cut in MDF. This PDF is not to scale, but Keep has provided detailed information on how big each component should be, making it easy to scale in Illustrator. Since he is based in the United Kingdom, this is provided in millimeters as opposed to inches, so ensure that you are using metric measurements as opposed to imperial.
The last two remaining PDFs (Base and Top Assembly) also provide detailed designs for the base and top that are not to scale. The measurements are again provided in millimeters. These parts are also included in the 'All Parts' PDF and therefore should not be needed as cut files, but are available more as assembly reference.
As mentioned earlier, all required files are included on Keep's website, but for those who are not terribly comfortable with this format, there is sparse explicit documentation describing the build otherwise. Keep offers a video of himself assembling a printer that has been of immense help to me in my understanding of how to approach this project. If you are thinking about making one too, I would highly recommend watching this more than a few times.
I also found a Google group with ~2,500 members who are currently building --- or have built --- a version of this ceramic printer. This is an amazing resource, especially for those of you who do not have someone like Evan at your disposal. This community is fairly active so you can expect that someone will respond to your inquiries with valuable feedback.
Parts
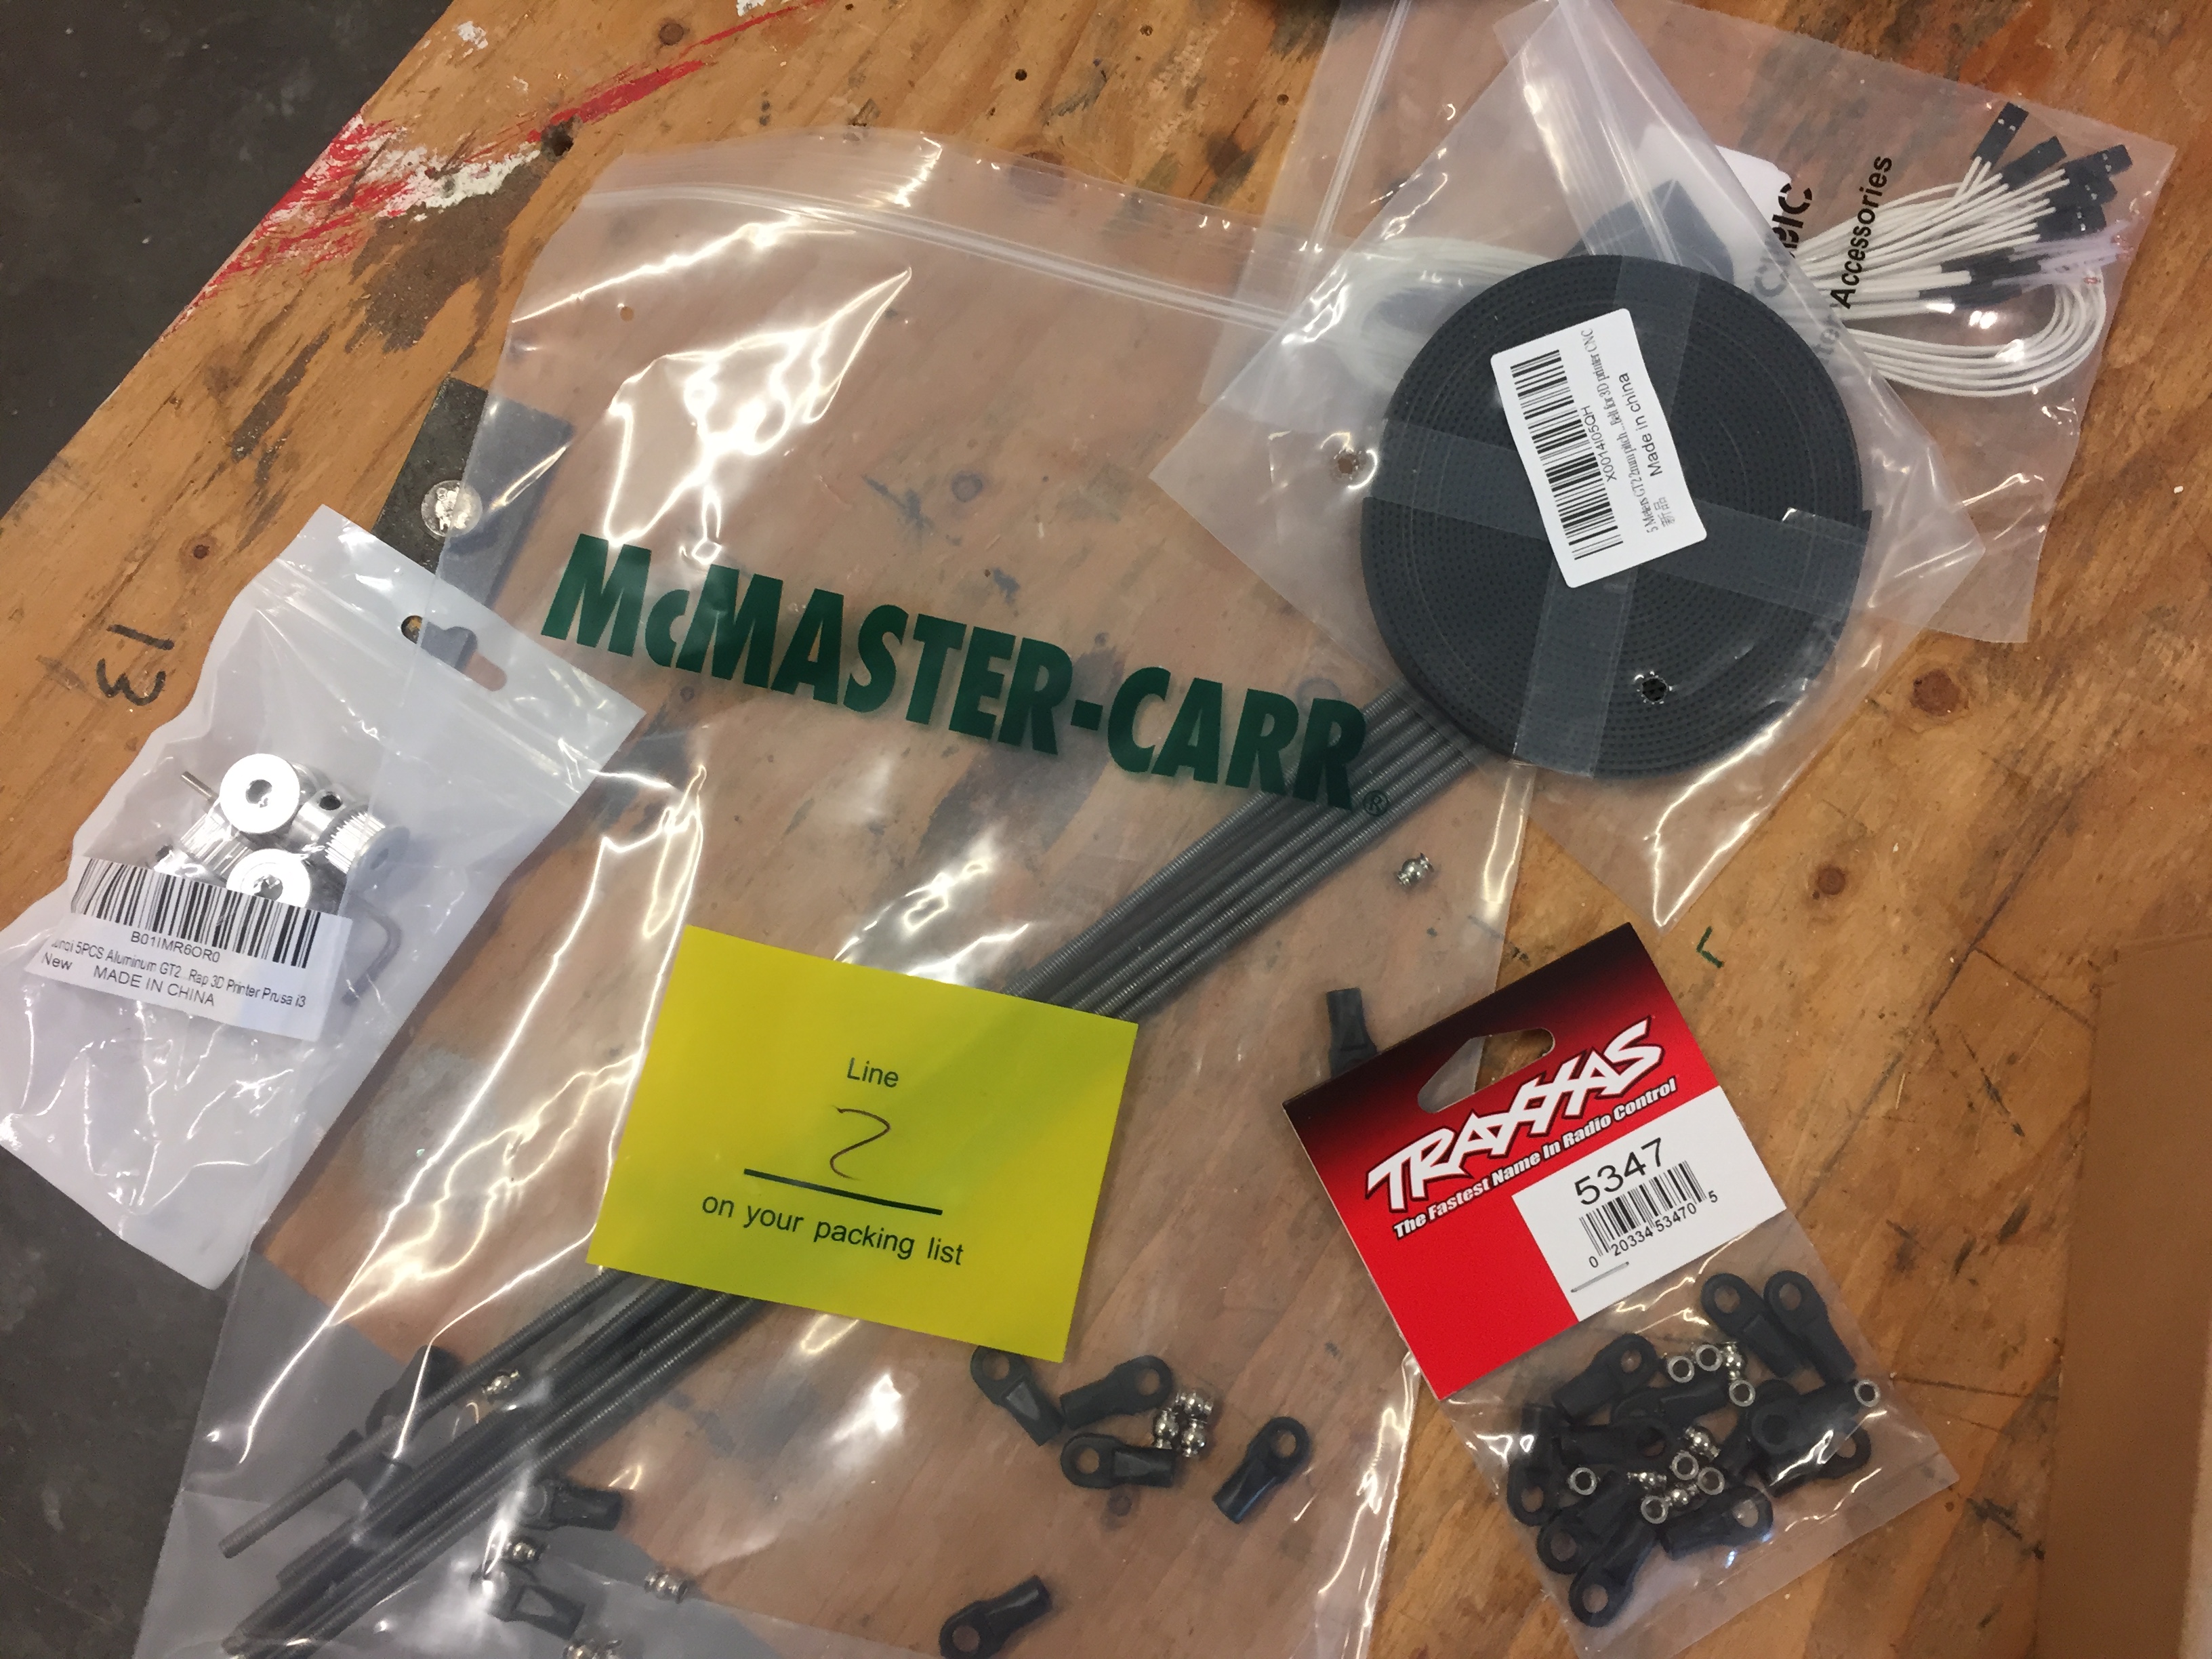
I spent many hours over the past two weeks scouring the internet for my parts. I mostly relied on Amazon, Digi-Key, and McMaster Carr. In order to simplify this process for other U.S.-based makers, I am planning on creating my own bill of materials with links to the parts I have ordered. I have yet to assemble the printer in its entirety, so I have yet to test that these are indeed the correct parts for the build. Please stay tuned for this information!
Laser Cutting
Keep recommends using 12mm MDF, which is roughly 0.5 inches. I initially tried cutting 0.5 inch MDF on the laser cutter, but it was ultimately too thick for our machine to handle. Instead, I bought 0.25 inch MDF and cut two of each part so I could sandwich them with wood glue, creating 0.5 inch thick parts.
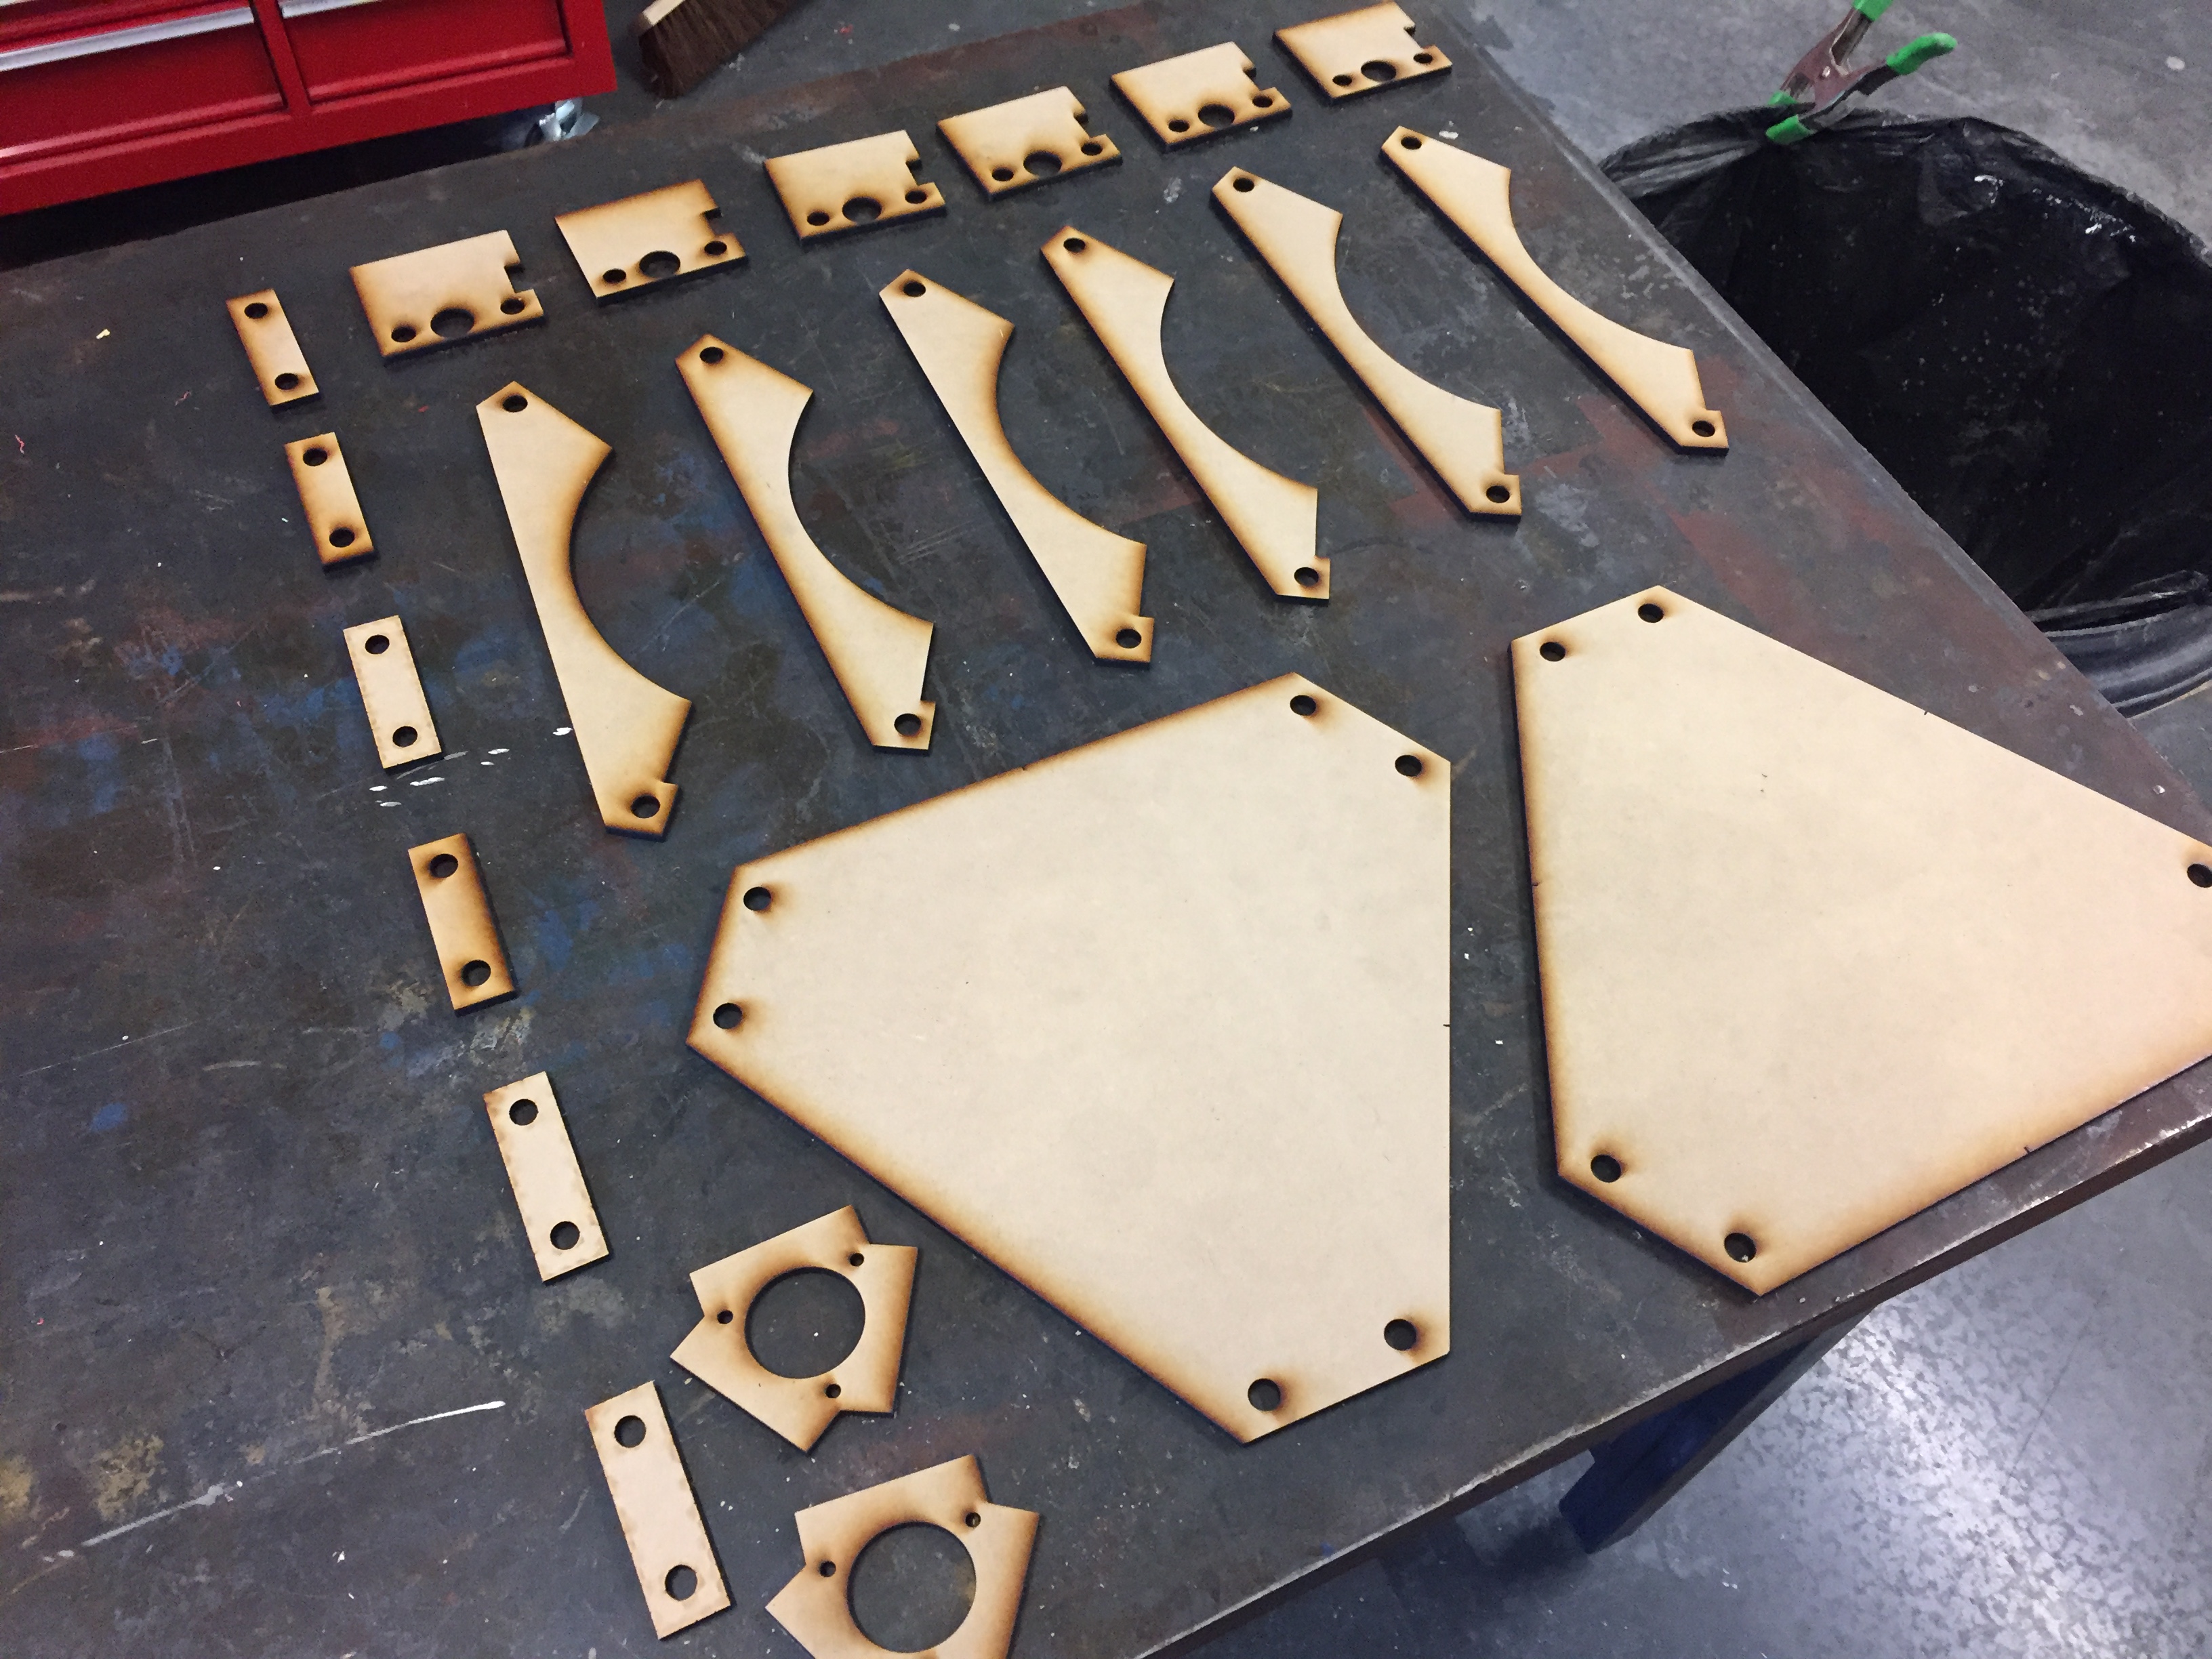
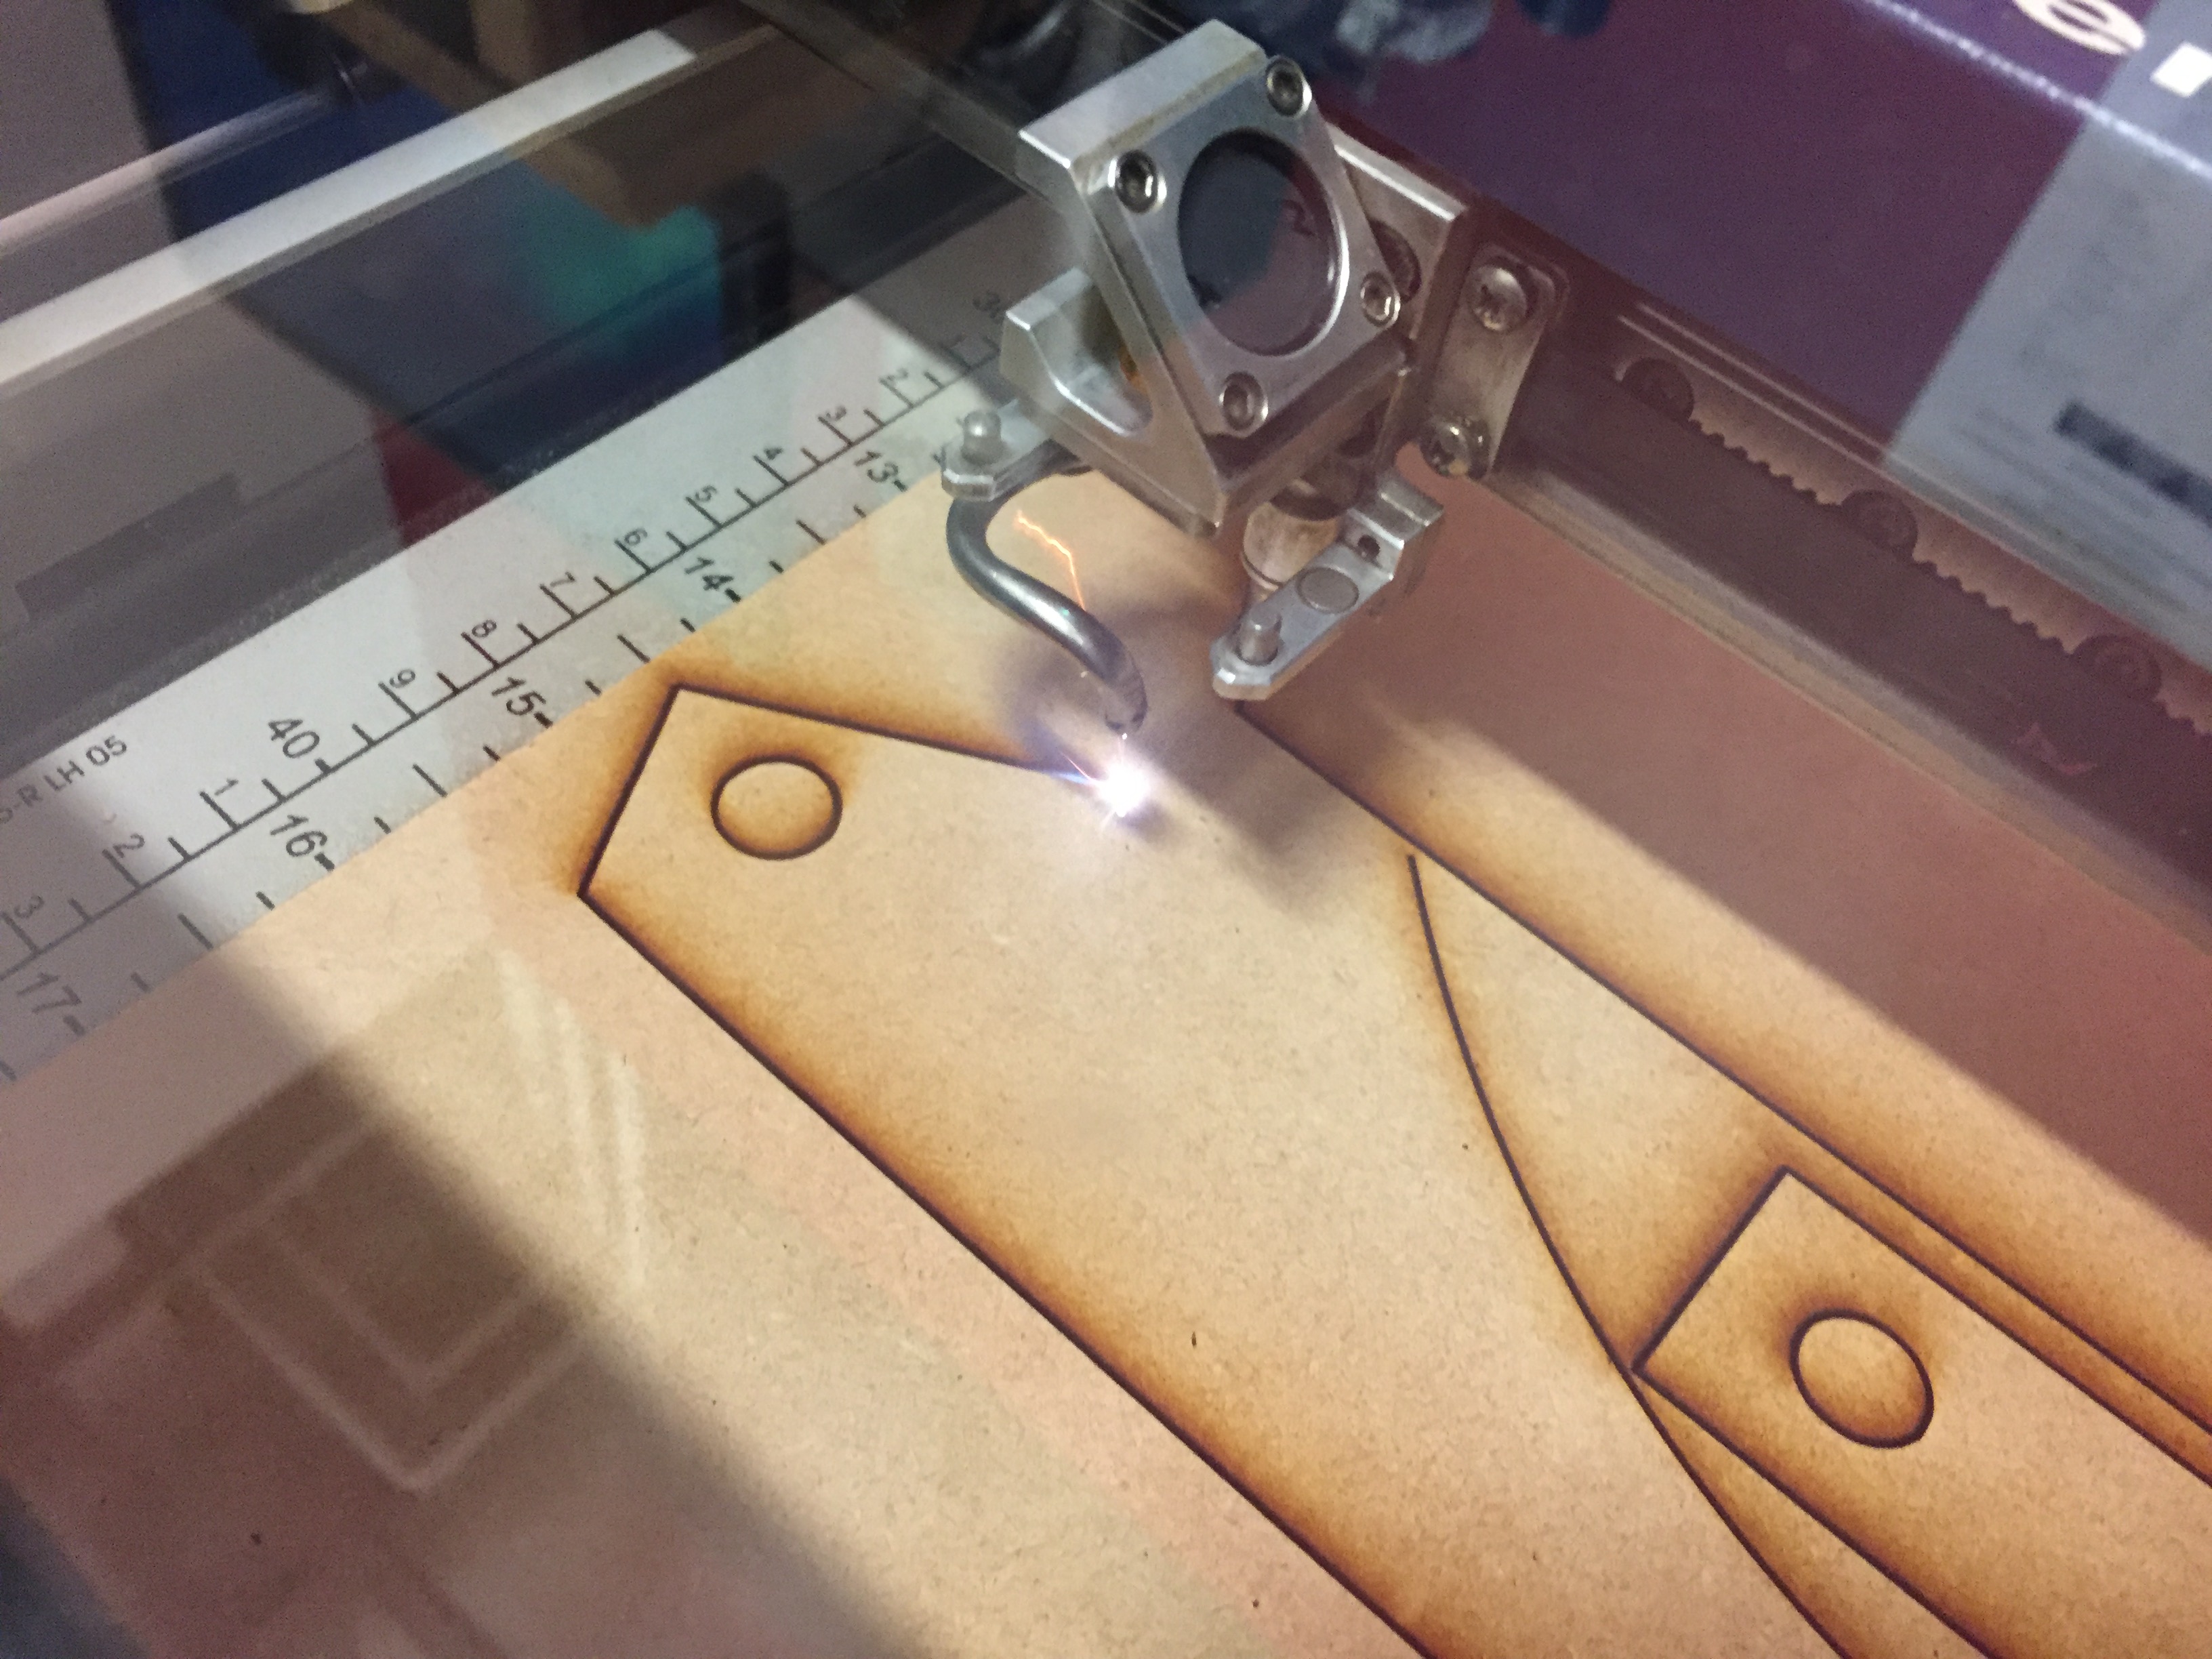
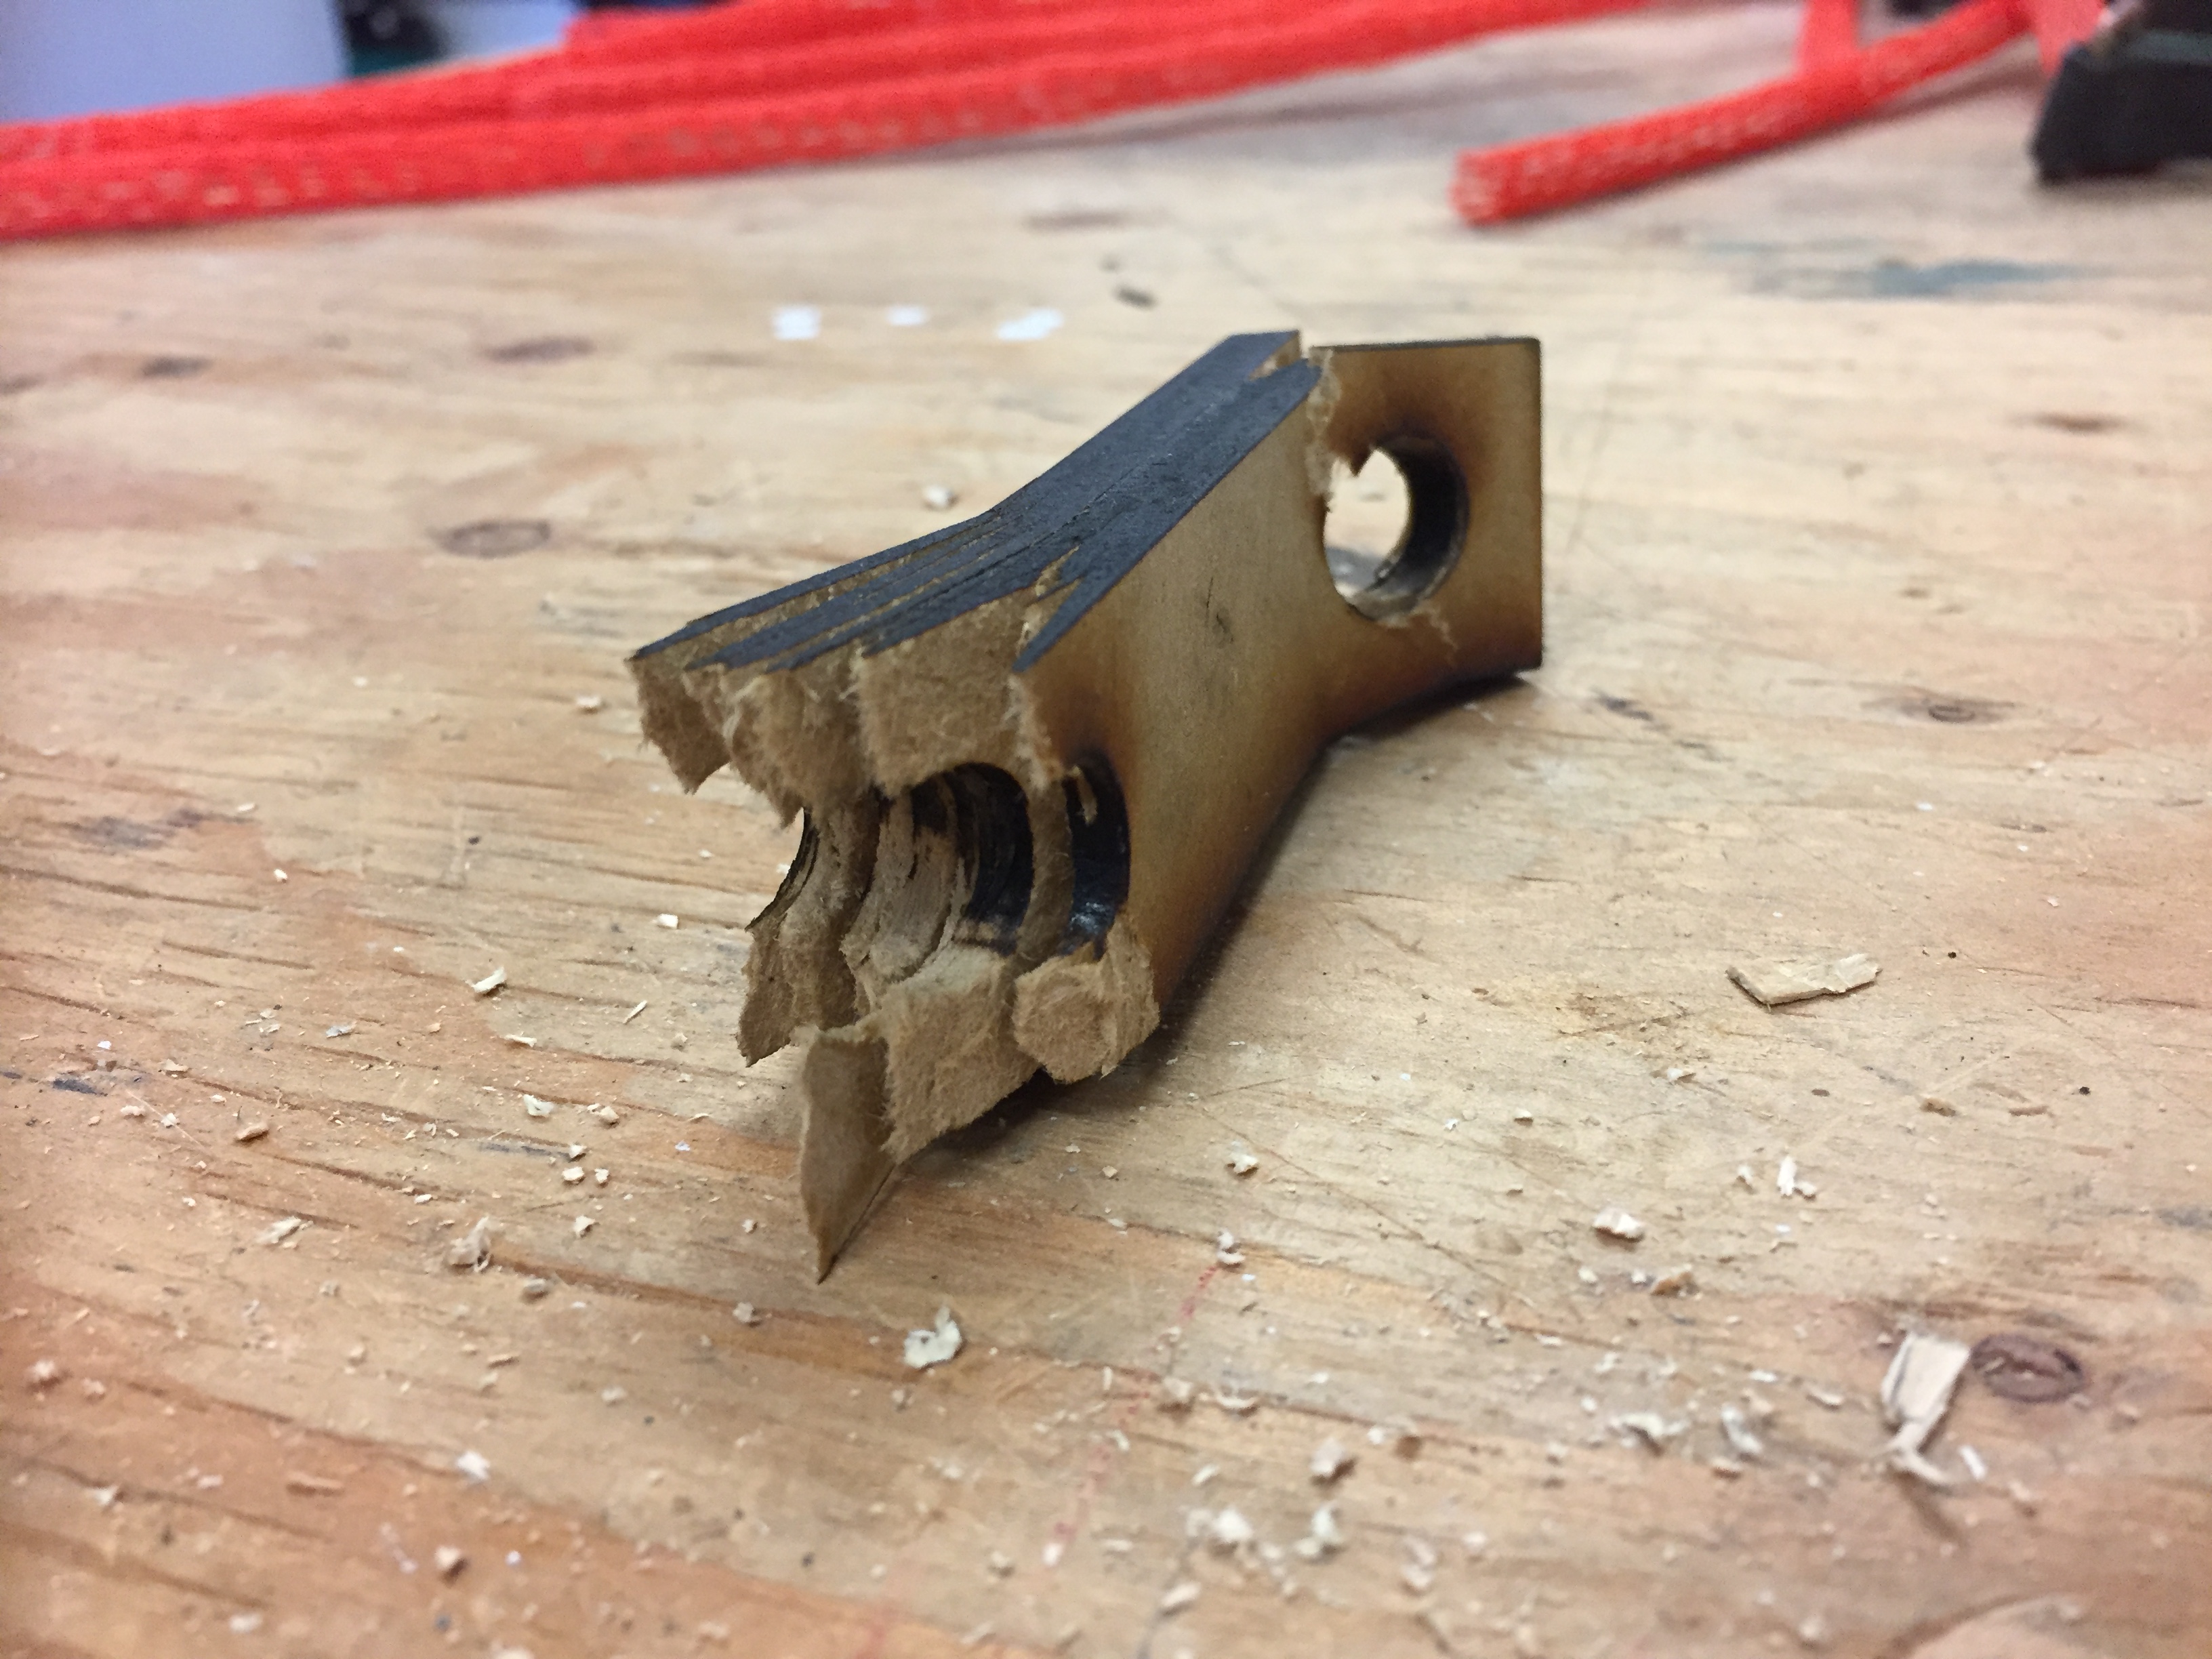
Keep designed these files in Microsoft Word, so they are not pixel perfect. Before I realized this, I went straight to the laser cutter with his files and later found that the holes for the metal rods were not really round, but more oval shaped. I couldn't get the rods through, and I broke some of my cut parts. I updated my files with 12mm circles in place of the slight ovals and recut everything. Learn from my mistakes --- it’s always a good idea to double check these files to make sure they are as you need them.
Assembly
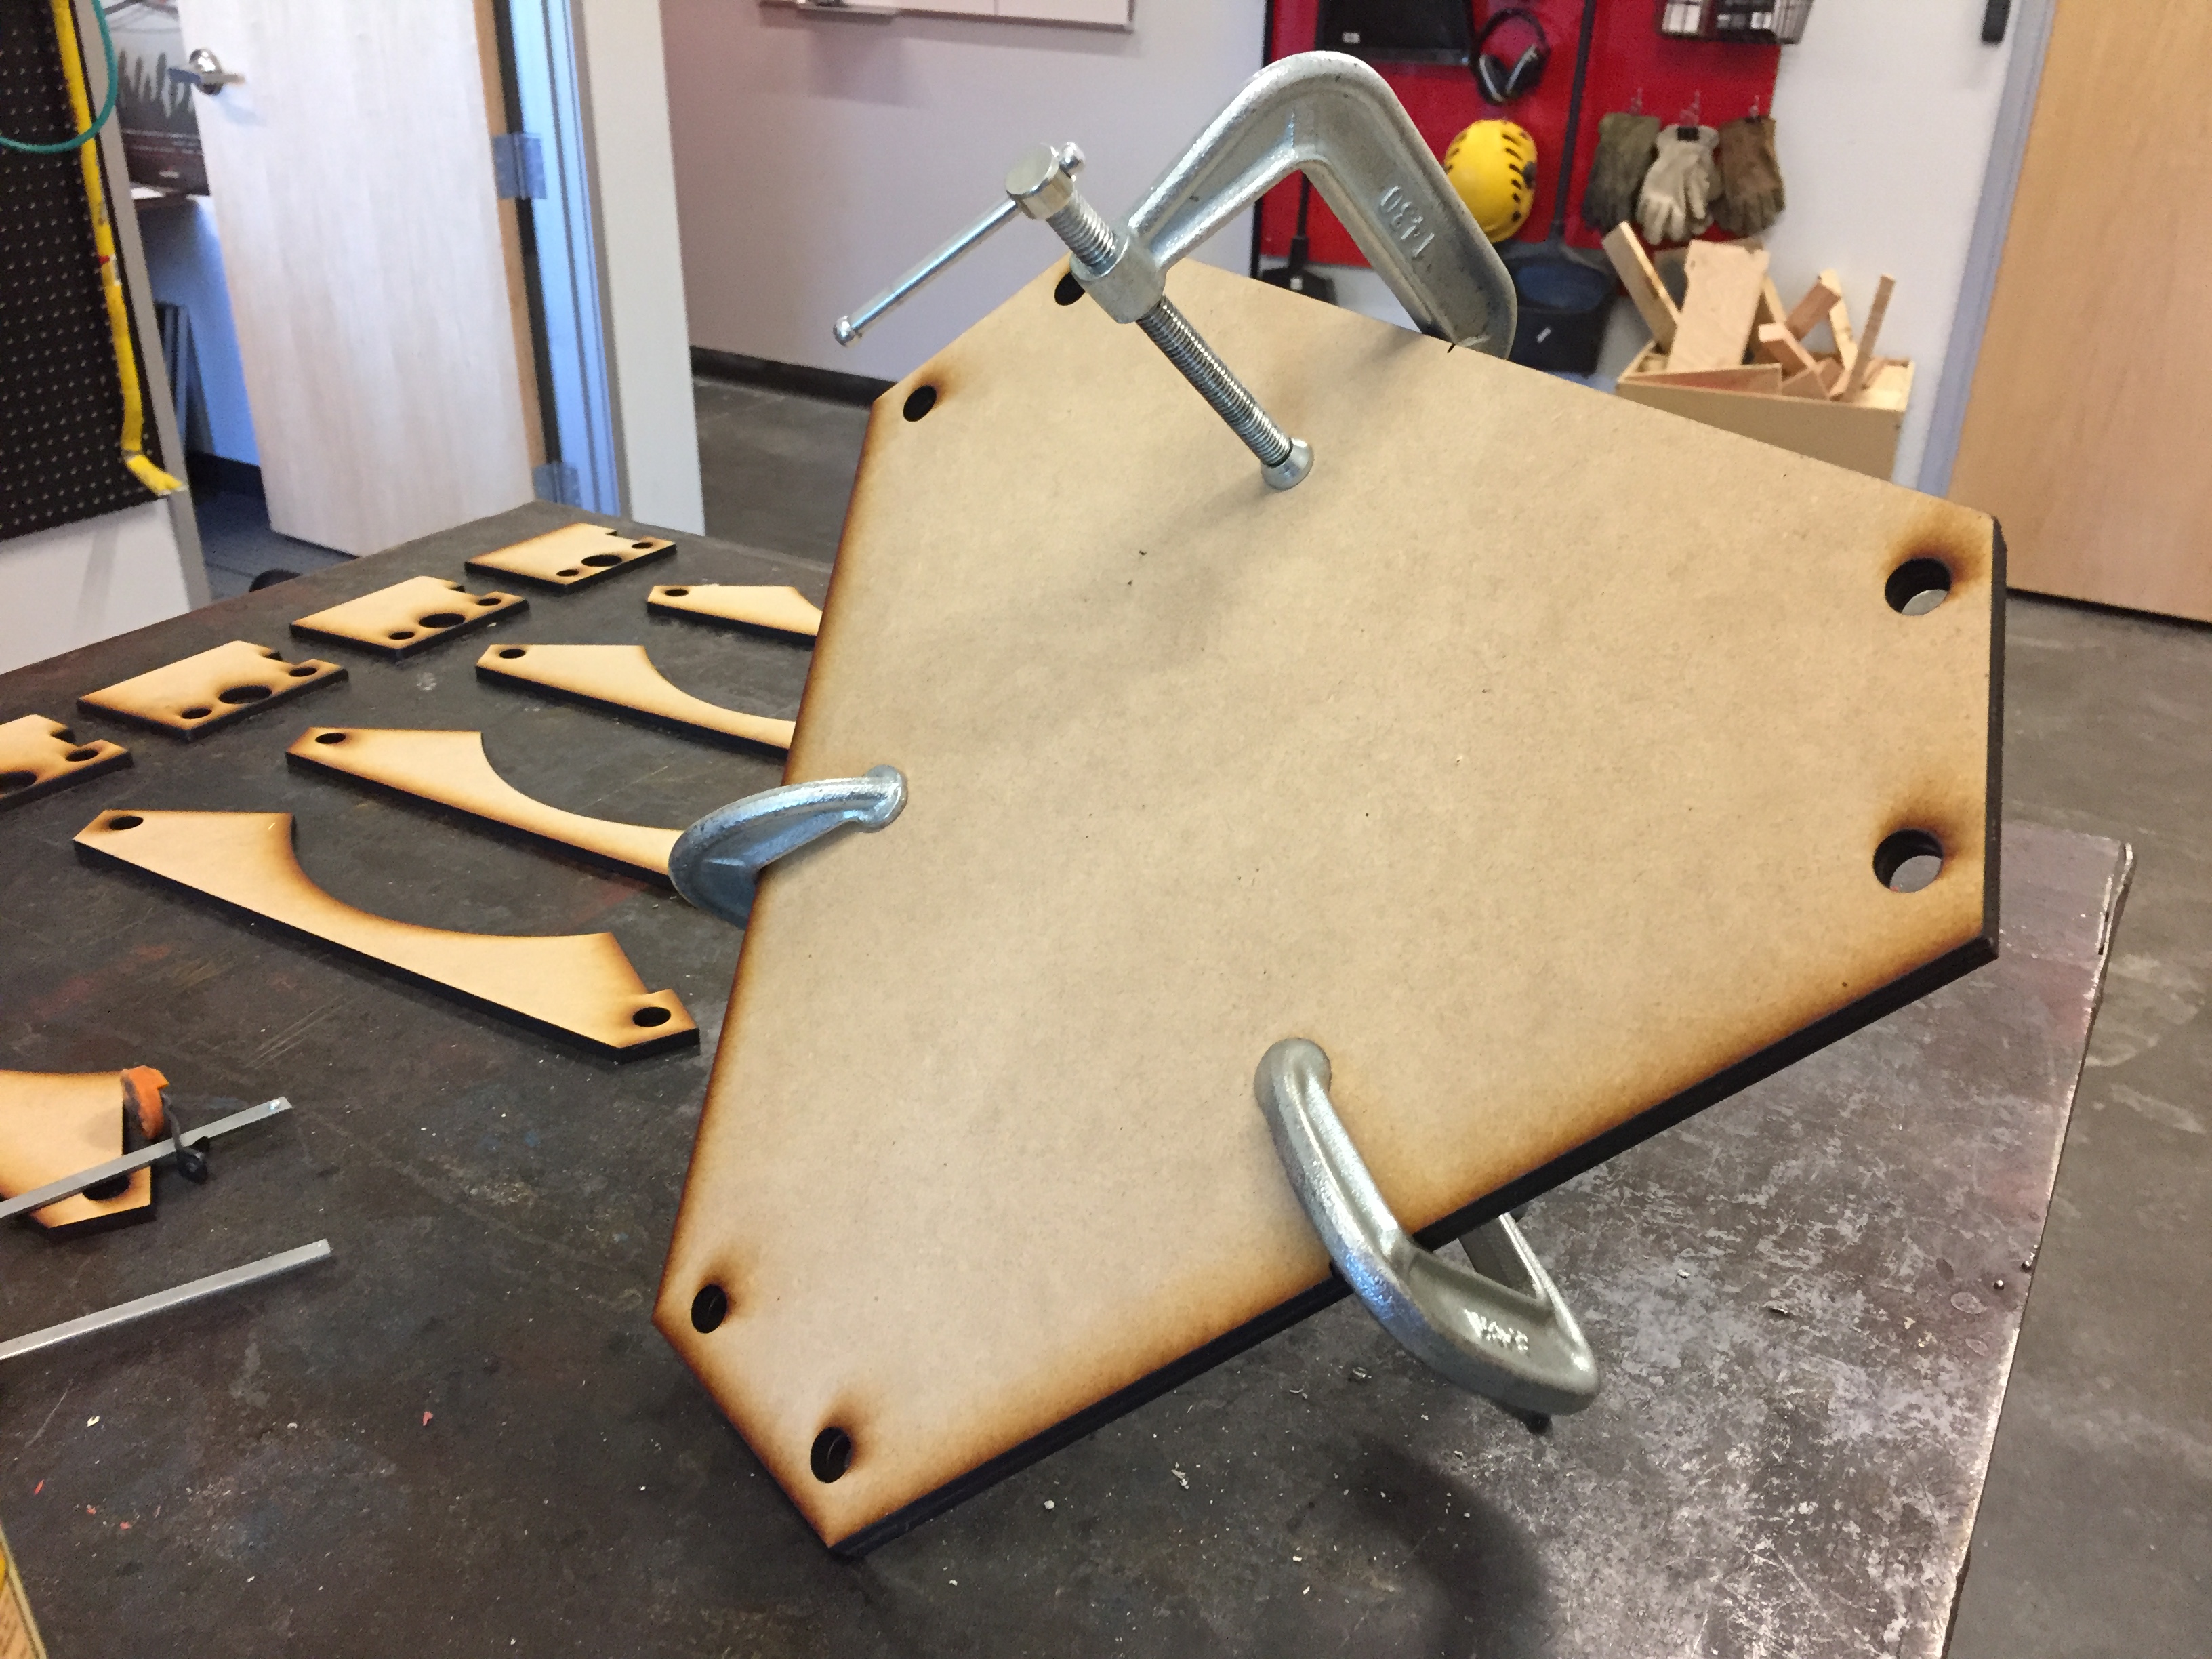
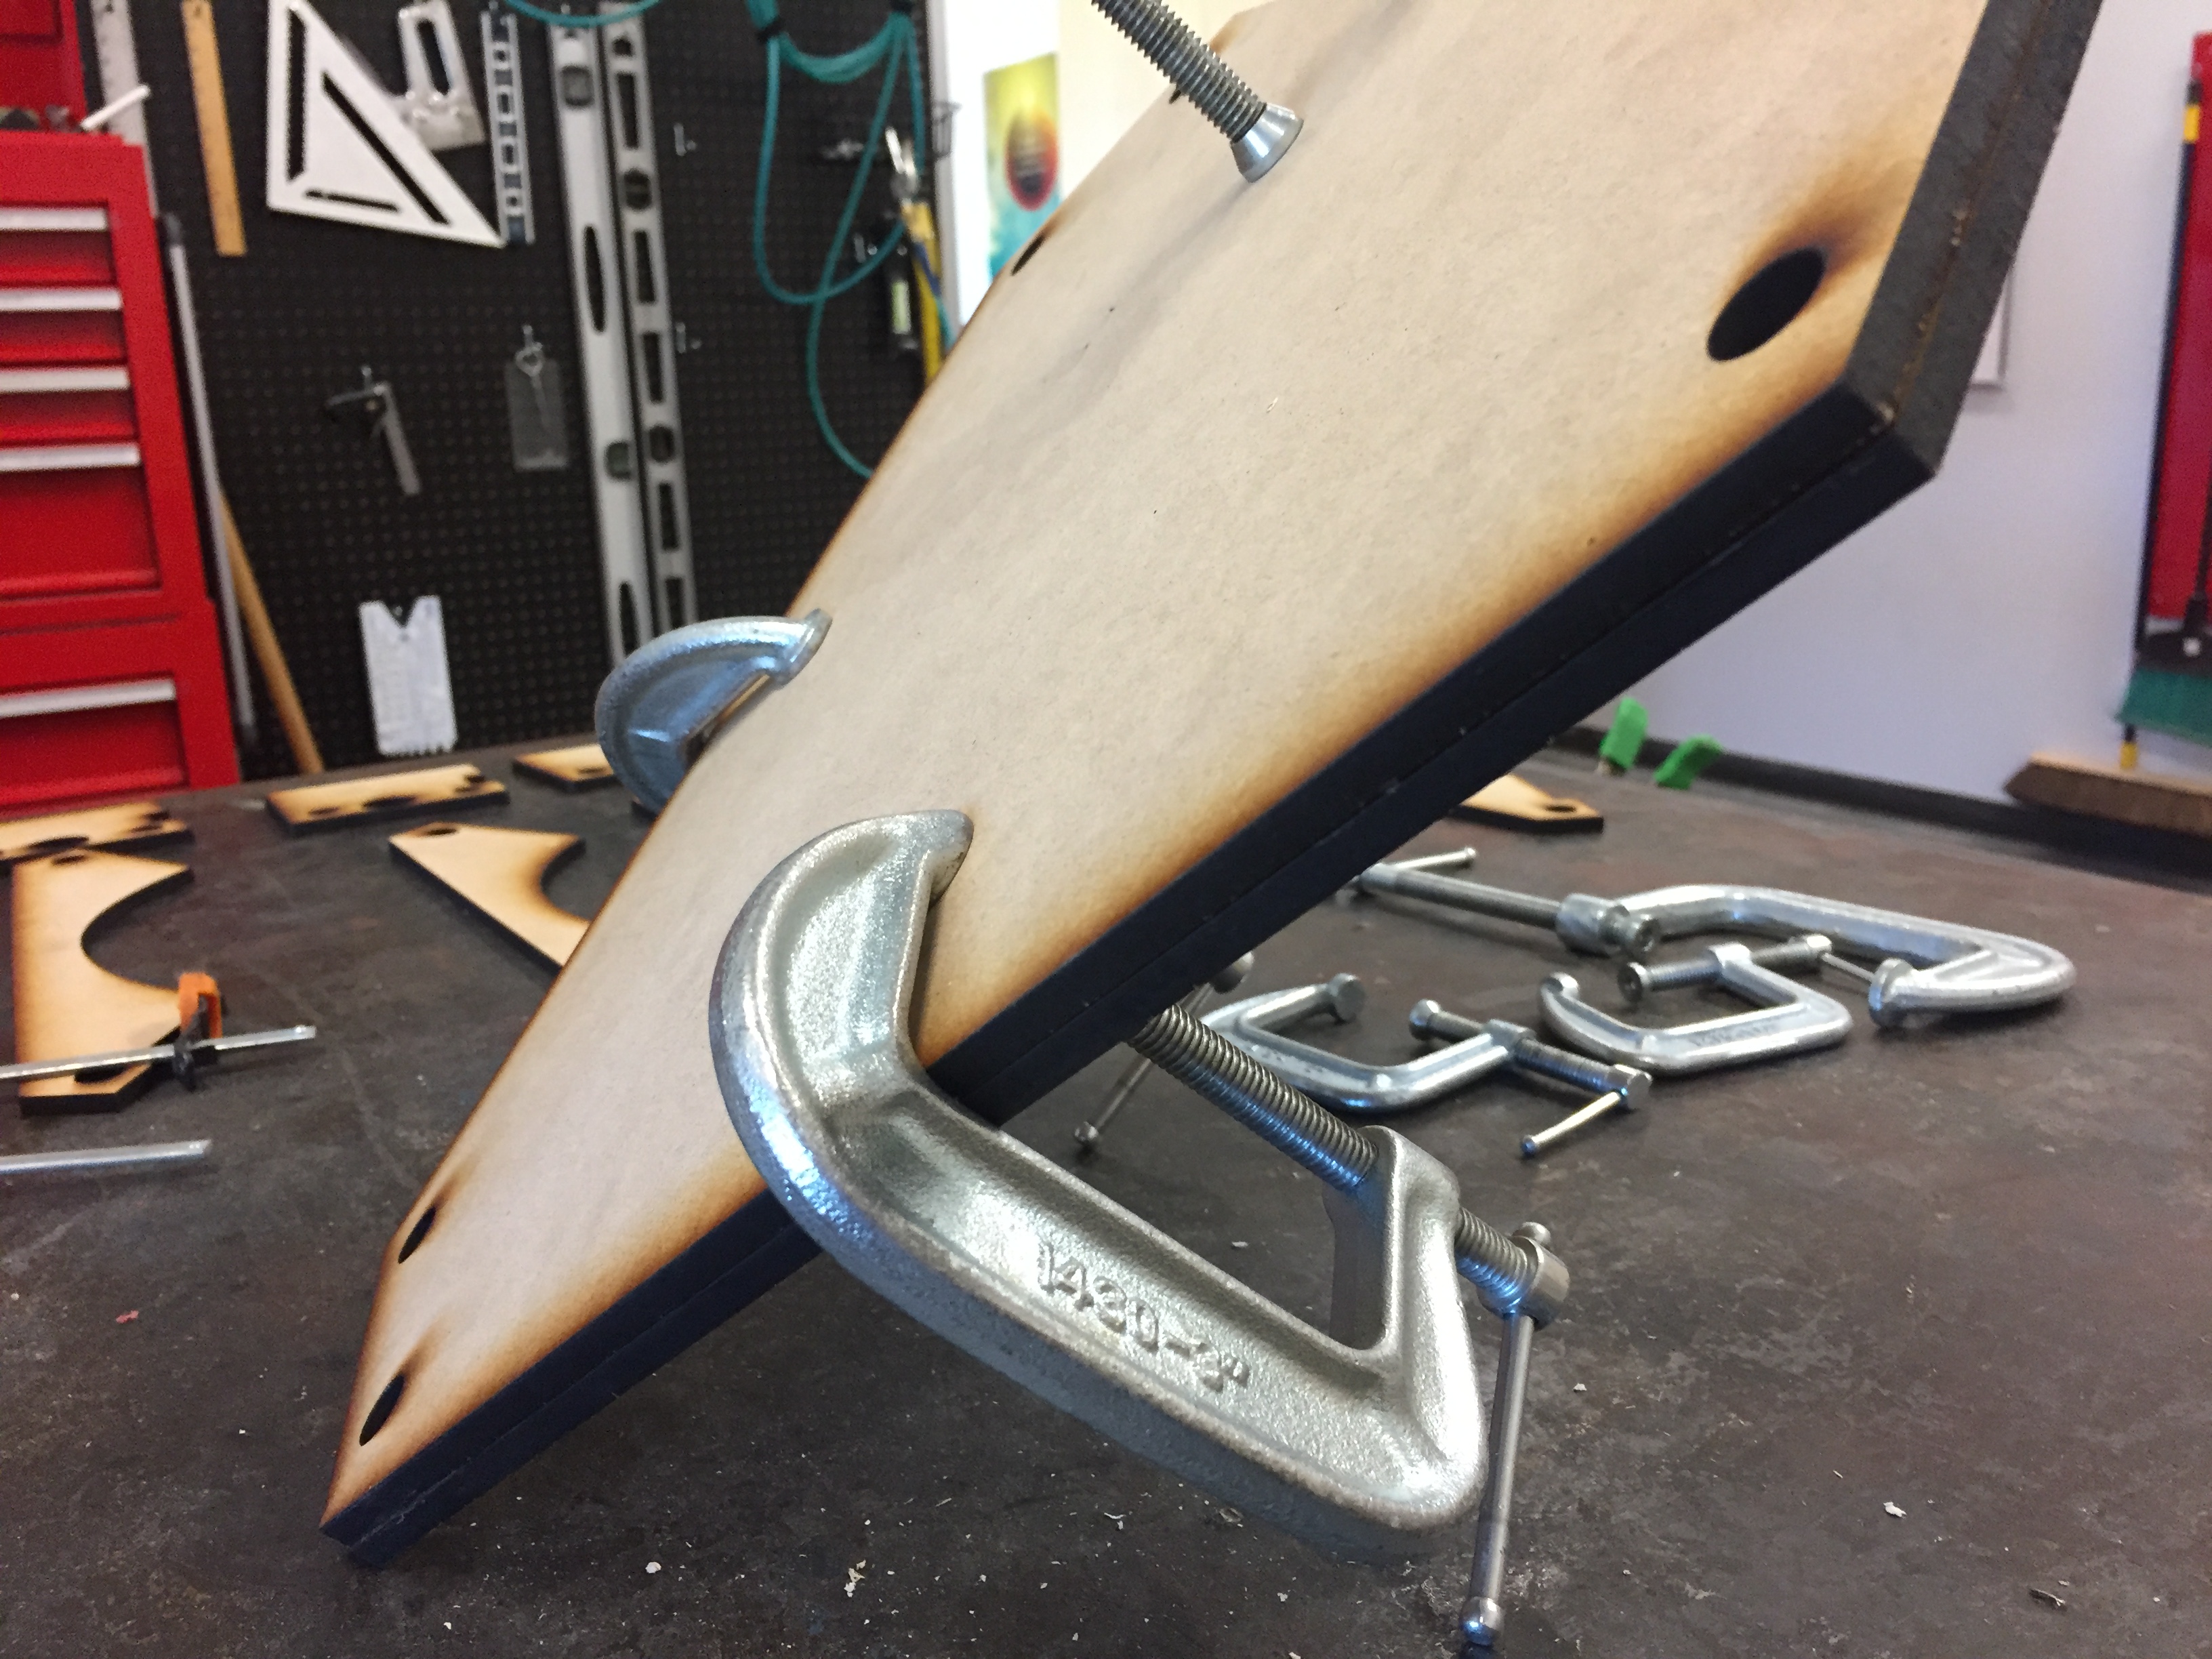
At this point, I am still waiting on many of my parts to come in the mail. However, I already had some items, so I was able to begin the initial assembly.

As you can see, I basically have the skeleton started. Over the next week, I plan to continue the assembly and add the electronics. Stay tuned to follow along with the build!


Having a close friend who is into ceramics and having an interest myself in 3D printers, I wondered how the thing could do ceramic printing. A quick view of the device showed how: the usual 3D mover with an extruder for the clay.
As it turns out, the extruder method is well known to ceramic artists. My wife had the fortune to study under Bill Shinn, a master of the technique. A search of his work will inspire further new avenues of experimentation. Here are some of his efforts: https://duckduckgo.com/?q=bill+shinn+ceramic+sculpture&t=hq&atb=v67-5b_&iax=1&ia=images
He never, to my knowledge, got into 3D printer work but his techniques combined with what is possible in this area opens up an immense opportunity for creative expression. Thank you, Feldi, for the introduction to this.
Keep having fun!
thank you for the information this may help me how to use my newly bought 3d printer.
Neat idea; I see from the Google group that several folks have already done what I was going to suggest; use a screw extruder in place of the compressed-air clay dispenser, for improved consistency of dispensing.
I'll have to try this out on my NC router once the build is complete...
This is awesome! Good luck!