Android Development with Xamarin
Find out what it was like building the Skimmer Scanner app and distributing it through the Google Play store.

In case you missed it, Nate recently had the opportunity to help local law enforcement with credit card skimmers. Apparently, they've been popping up in the region, so the police brought us a few that they had removed from gas pumps. If you want to read all about that, you should check out Nate's excellent write-up. At that same link, you can also read about the Skimmer Scanner Android app that we developed to help detect and avoid them. This was my first foray into mobile development so I thought I would share my experiences, and maybe convince you that it's really not that hard!
We've written about mobile development on the blog before. In fact, we've already released a great app for working with voltage regulators! Brent used a platform called Xamarin to develop the app, so I thought that might be a good place to start.
What is Xamarin?
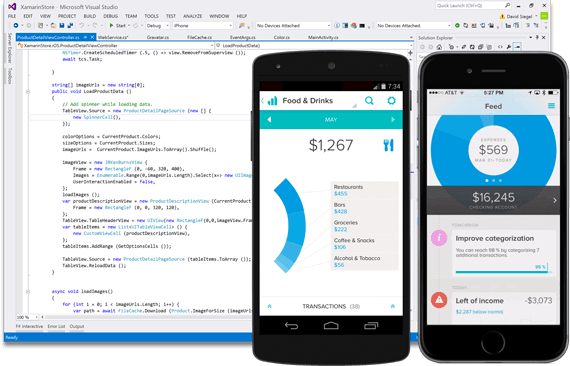
Image courtesy of www.xamarin.com
Xamarin is actually a whole company (owned by Microsoft) that provides a number of products and platforms, but generally speaking, when people refer to Xamarin they're talking about the Xamarin Platform. The Xamarin Platform is a mobile development platform based on something called "Mono," an implementation of Microsoft .NET that makes it easy to port software between Android and iOS. If none of that makes sense to you, don't worry because we'll break it down.
Whenever you write an app for mobile operating systems, there is a lot of code required just to do simple things like writing text to the screen or finding out if your app has been minimized. To make matters worse, that code changes between devices and operating systems, so if you're trying to write an app that a lot of people will be able to use, you need to write your application, like, five times. That's where Mono comes in. The Mono framework executes code written in a Common Intermediate Language (developed by Microsoft) by translating it into native commands for whatever device it's running on. Now all you need to do is to write your app in the Common Intermediate Language and it can run on any platform. The Xamarin platform makes this easy by extending Visual Studio and allowing you to write everything in C#. It also includes tools for visually designing your UI layouts (or Activities) without having to type them out in a markup language (like AXML).
"That doesn't sound super open source..."
Actually, I was surprised by how open this product is. Microsoft actually has a pretty decent track record for open source releases, considering their position in the industry. Until recently, Mono contained implementations of the .NET framework, which are patented by Microsoft and not all of those were covered by Microsoft's Open Specification Promise. However, both Mono and the Xamarin platform were recently re-released free under the MIT license, and Microsoft issued an updated Patent Promise for Mono. In fact, according to Wikipedia, Microsoft has released significant parts of its own .NET framework code under FOSS licenses. That's pretty cool.
Now... because Xamarin extends Visual Studio (and Xamarin Studio is no longer supported) you will need to use Visual Studio, which is a proprietary tool. You can download it and use it for free in most cases, but be sure to check out the EULA. While Linux isn't an officially supported development platform, there are instructions on the web for building C# applications on Debian and including the Mono and Xamarin binaries. If you're interested in contributing your applications to an open source software package, you may need to look into that. I'm currently working on the build process for the Skimmer Scanner so that it can be folded into F-Droid. Tell me in the comments if you're interested in hearing more about that and I may be able to write a follow-up!
So... C# huh?
C# is an object-oriented language, like C or C++. In fact, technically speaking, C# originated when Microsoft didn't think C++ was "++" enough and ++'d it again until it was "#". That's about as in-depth as you need to get into the history of C#; it differs very little from its predecessors in terms of syntax. If you've written Arduino, you're probably familiar with most of the syntax, and the structure and event-driven nature of the language will be familiar to anyone with Javascript experience. I promise, it's not so bad. There are, however, some things specific to Android development that you'll need to learn if you've never written a mobile app.
Android App Basics
Mobile platforms are different from desktop platforms in a number of ways, due both to their limitations and their advantages:
- Mobile devices have limited screen space that needs to be carefully managed
- Mobile devices have to manage memory efficiently
- Elements such as navigation bars, menus and push notifications may pass commands to your application or attempt to run concurrently
- Most mobile platforms have access to hardware that's missing from desktop environments, such as GPS, accelerometers and mobile data
- Application permissions are much more granular because apps are [sandboxed](https://en.wikipedia.org/wiki/Sandbox_(computer_security) for security
The first thing that you should understand about Android is the Android Manifest. Like any software project, a mobile app may contain dozens of documents and assets that it relies on. These assets might include UI layouts, images, libraries, sound files or databases that need to be somehow "owned" by the application. The Android Manifest is an XML document that tells Android to associate these assets with your application. It also contains information like the name and version number of your app.
So, specifically what kinds of files might you find in an Android project? First and foremost, there will be C# files that contain the logic for your application. There will also be at least one AXML file that describes the user interface. There may also be image files (or drawables), application icons and XML store-files.
Applications are basically organized into Activities. An Activity comprises an AXML layout and the C# logic that makes it work; it's basically one "screen" that the user interacts with. A simple application may have only one Activity, but most of the time you'll have several that the user will navigate between. The Skimmer Scanner app, for instance, has five Activities: the main activity, an activity for each "Alert" screen (showing the results of a scan), and the "About page" activity. The Android Activity life cycle describes how Activities start and stop. Each stage of the life cycle is handled by a corresponding method in the Activity's C# source.
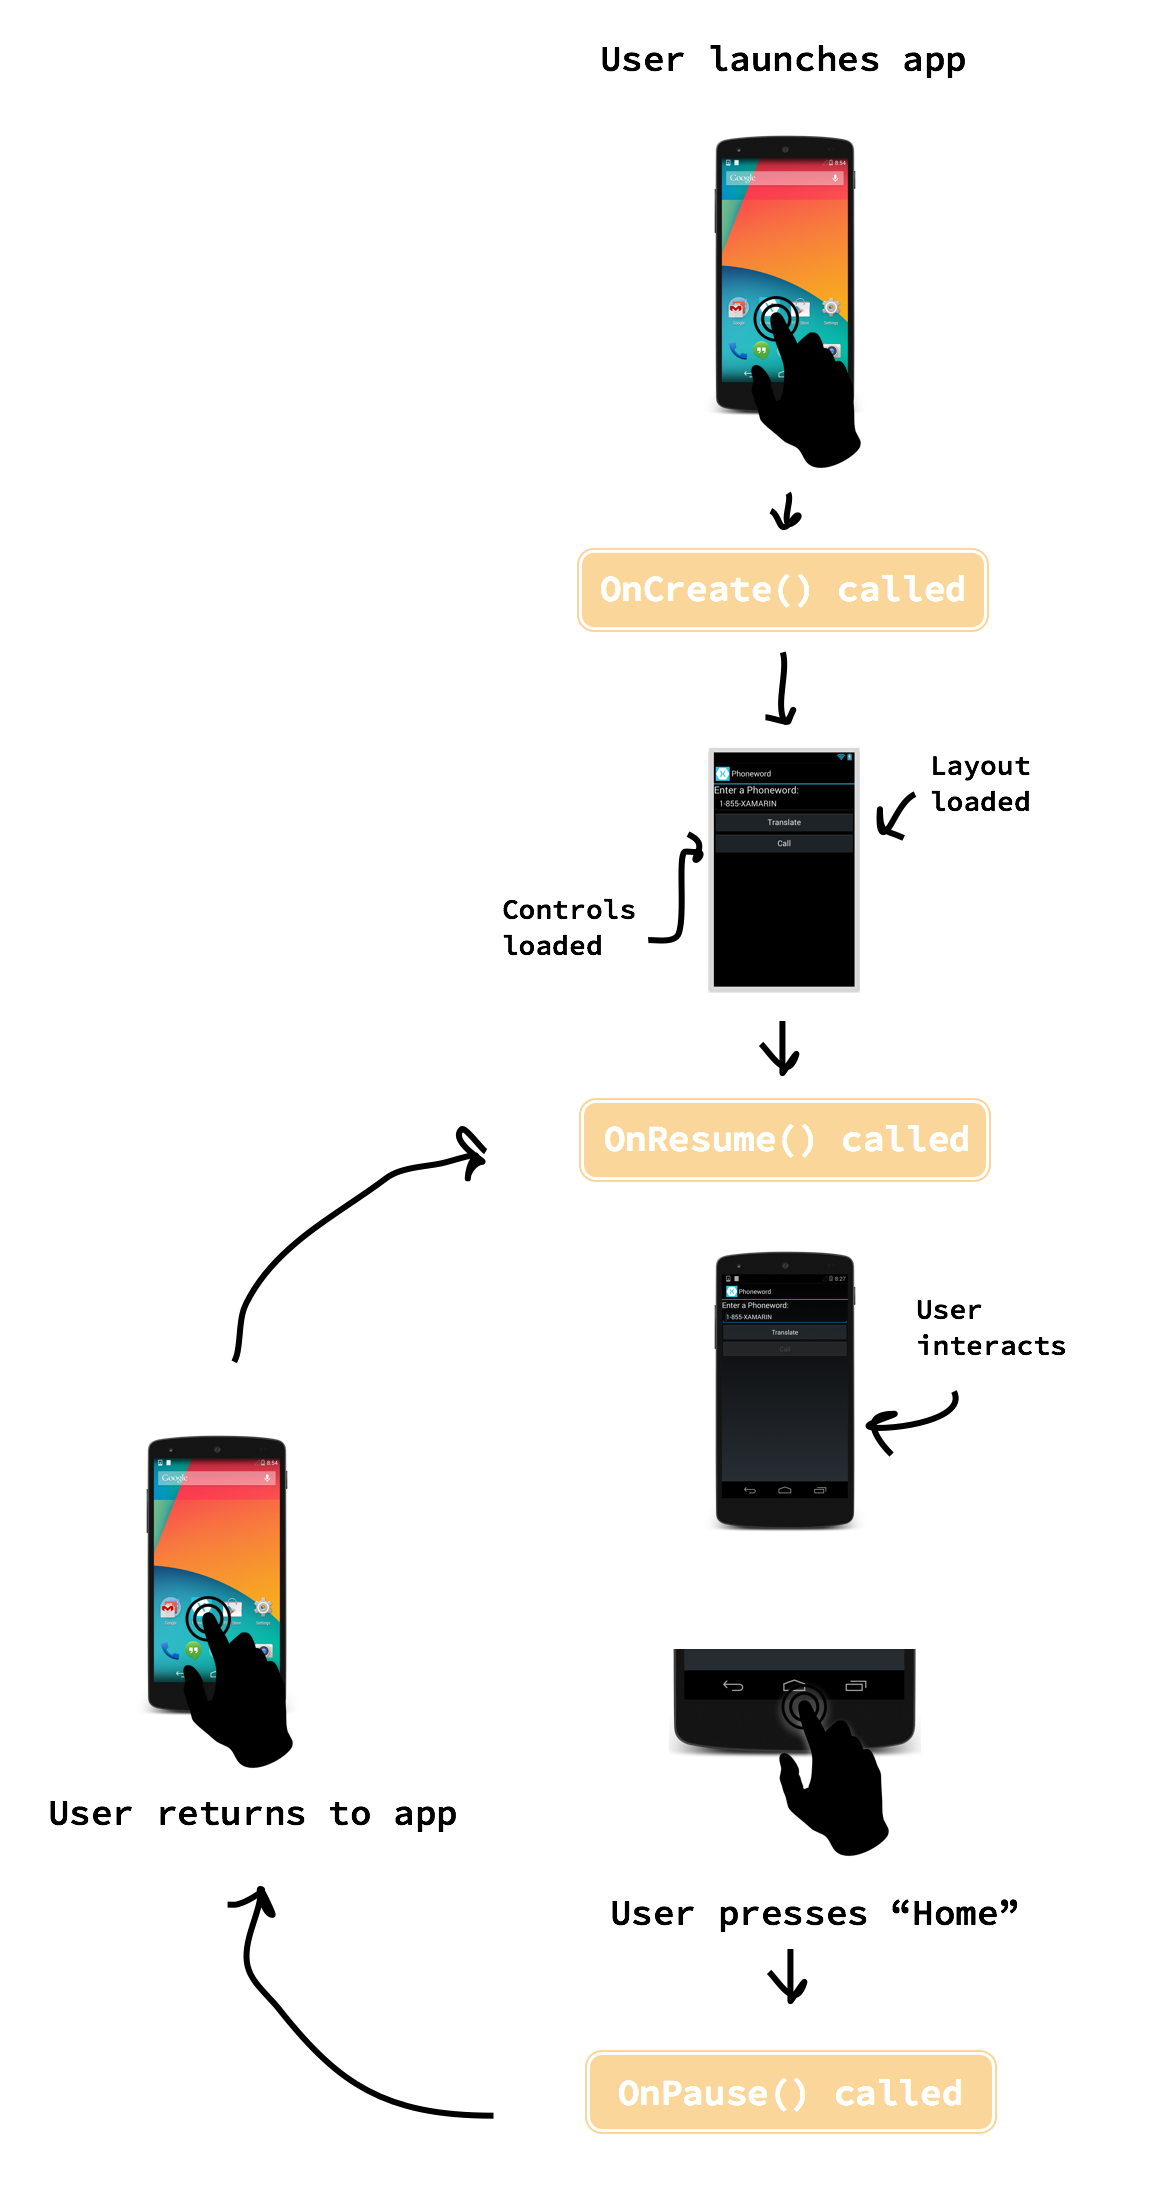
Image courtesy of developer.xamarin.com
The three most basic life cycle methods are onCreate, onResume and onPause. Every Activity has an onCreate method that gets called whenever an Activity starts. It pulls in the layout file for the UI and performs any setup that needs to occur. The onPause method is called whenever an Activity leaves the screen. There is a method that gets called when an Activity is closed, but it turns out that Android doesn't generally close apps at all, unless you explicitly close all apps or it decides that it needs the resources. More often than not, if an app is "closed," it's actually just "Unfocused."
The relationship between an Activity's layout and its C# logic will be familiar to anyone who's built a modern website. The AXML file is similar to the HTML file for a web page; it describes the layout of the UI and names some of the objects that a user might interact with. The C# file is like the Javascript on a web page; it contains functions for dealing with these objects once the user has interacted with them. For instance, you might have a button in your layout called "button2" like this:

...and then a piece of code in the C# file that describes what to do when that button is clicked, like this:

In this case, when the button is pressed I call a function called About() and pass this — a keyword that contains the Context of the app. The Context is an instance of the Activity class that is required whenever you want to issue an Intent — we'll get to those in a moment — and since my function will issue an Intent, it will need this passed into its scope. Failure to pass the application context correctly actually caused a lot of crashes in version one of the Skimmer Scanner app.
If your application has multiple Activities, you will need a way to switch between them. This is achieved through the use of Intents. Intents are messages that are sent between application blocks. This is one of the features of mobile platforms designed to sandbox these separate blocks of code from each other, even when they're part of the same application. Activities can receive and issue Intents, and not just Intents generated by the application itself. For instance, the Skimmer Scanner app intercepts an Intent generated by Android when it asks for a user to enter the Bluetooth PIN. Since I know the Bluetooth PIN of the device that I want to connect to, I don't need to ask the user, so my app simply receives the Intent to ask the user, blocks the prompt and answers instead. Switching Activities works in a similar way: One Activity issues an Intent to launch the other, pausing the current activity and calling the onCreate method of the new Activity.
"I think I understand, how do I get started?"
Absolutely fantastic image courtesy of @ThePracticalDev
The best place to start is at the Xamarin.Android Getting Started Guide, which will take you through setting up Visual Studio with Xamarin.Android and launching the "Hello Android" application in an emulator. If you have an Android device, I find it easier (and more fun) to test my code live on my device. Simply turn on "USB Debugging" in the Developer Options menu. You may need to un-hide this menu by opening the "About" screen and tapping your Build Number a bunch of times. The coolest part about deploying your code in USB Debug mode is that you can very quickly launch your code on your device and debug it in real-time as it runs, including the ability to peek at variables and set breakpoints.
If you're having trouble with USB Debugging, try enabling "Fast Deployment" in the build options. I found that certain devices will not run your app in debug mode without it.
Besides that, the best advice I can give is to launch the "Hello Android" and "Hello Android Multiscreen" examples, deploy them (either on your device or in Visual Studio's Android emulator) and then start changing stuff and see what happens.
So you wrote an app and now you want to share it...
That's awesome! There are a couple of ways to do it. You can package your app as an Android Package Kit (an APK file) and ask users to "side-load" it, or you can upload it to the Google Play store. There are reasons that some people may not want to host their content on the Play store (or may not be able to) but for most applications, the Play store is a great distribution route. Also, if you put it on the Google Play store, you get access to a lot of useful features like crash reports and release management. Getting your app on the Play store is fairly quick and easy, you'll just need a few things:
A Google Play Developer Account
Getting a developer account at the Play store is as easy as visiting this page, providing some information and forking over a $25 enrollment fee.
Screenshots and an App Description
In order to list your application on the store, you'll need some screenshots that accurately portray the functionality of your app, as well as a description of what it does.
A Content Rating
Content ratings help Google organize the Play store and enforce parental controls. Luckily, there is an automated questionnaire in the Google Play console that will help you apply an accurate content rating.
A Signed APK
Play store applications are signed to guarantee their origin. App signing is built into Visual Studio, just generate a key and use it to sign the app when you "archive" it (package it into an APK).
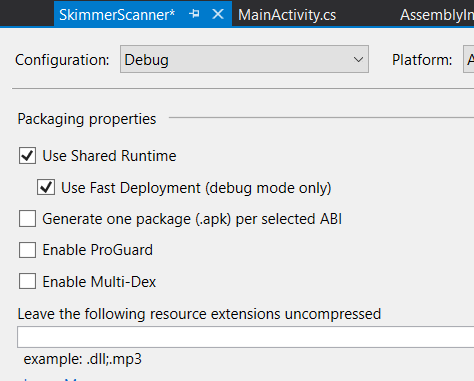
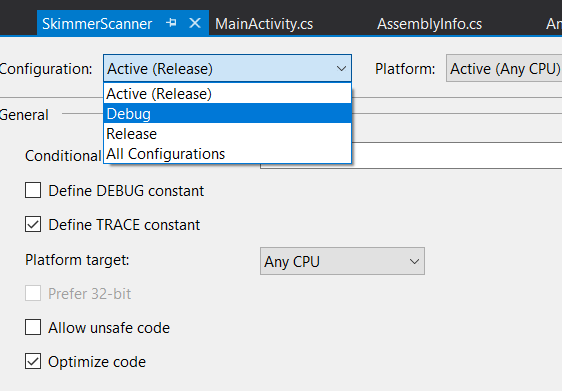
Once you have a Google Play Developer account you'll have access to the Play console, which will guide you through listing your first application. You can configure Visual Studio to publish directly to the Play store using your developer account, but I find it's easy enough just to upload the APK from the Play console. To do this, you first have to "Build" your project by selecting "Build [your project]" under the... well, the Build menu. If you get weird errors, double check that you've set your build configuration to "Release" as opposed to "Debug."
Also check that you've disabled "Use Shared Runtime" and "Fast Deploy" if you had those enabled during testing. After you successfully run "Build" you will have an APK, but it won't be signed or organized the way that the Play store expects. To make your package Play store-ready, you'll need to go to "Archive" under the Build menu, select your built project, and click "Distribute."
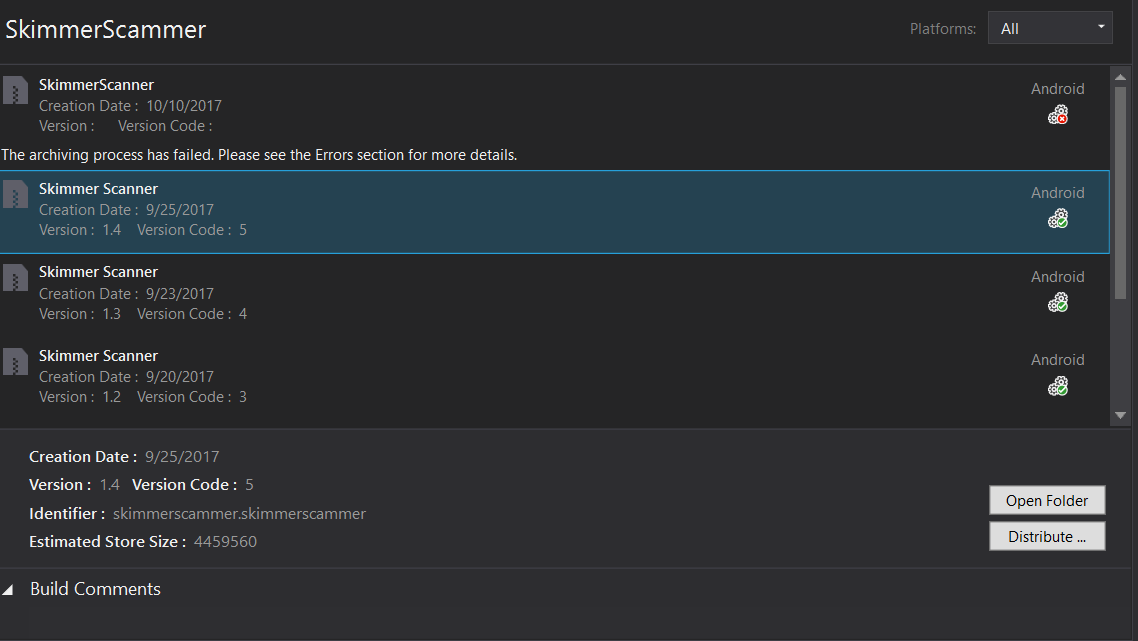
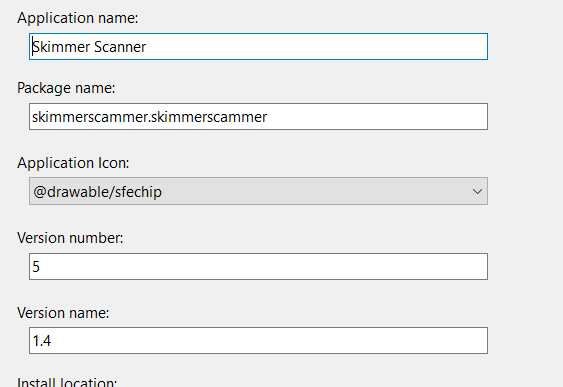
One thing to watch out for is that if you're releasing an update for an existing app, it will need to have the same package name and a different version number than the last release. You can edit these properties in the Android Manifest under Project Properties.
With your APK signed and uploaded to the Play store, all that's left is to publish your release. Your app will appear in the Play store and be accessible from both the mobile app and the desktop site. Updates to your application work exactly the same way and are handled by the Play console. Simply start a new release, upload your updated APK and begin your rollout though the Play console. Users will be prompted to upgrade, just like any other application.
After I published version one of the Skimmer Scanner application, I started getting crash reports through the Play console that helped me track down the bug. I borrowed an affected device to test my bug fix, uploaded my fix with a new version number and pushed the update. You can see the crash reports plummet immediately after the update was pushed.
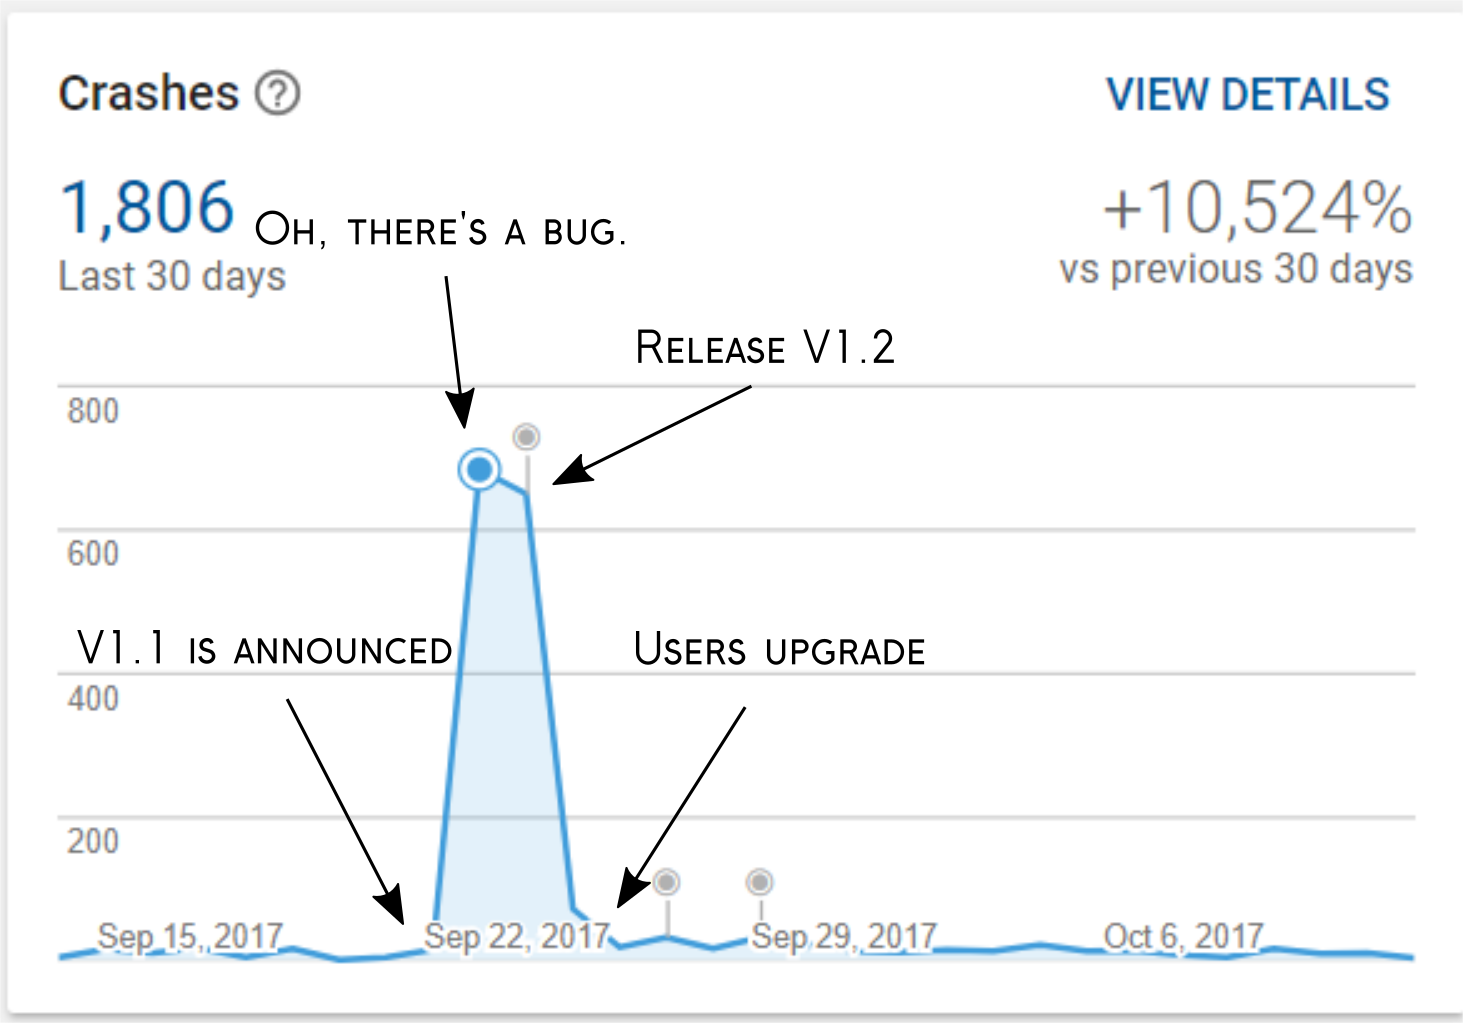
It feels really nice to roll out a good bug fix
The Google Play store also allows you to manage ad revenue, in-app purchases, web services and other aspects of monetized app development. I haven't played with any of those features yet but I expect it's not too difficult to figure out.
Go and do a FlappyBird
That's all there is to it! If you have any programming experience at all, I promise you can learn app development within a week. The process is very similar for iOS devices as well. Because Xamarin is a cross-platform framework, you transport most of your code straight over to the iOS version. You will need access to an OSX machine to run the actual build and an iOS device to test on, but at least you won't need to write it all over from scratch!
Hopefully, this was a useful introduction to Xamarin.Android development. I'd love to hear your experiences with Xamarin/Android/Mono/Google Play, and I'll be hanging out in the comments section to answer any questions.
Happy Hacking!


Why did you all choose to use Xamarin, rather than writing the application in Java?
My company has outsourced a couple of apps that been built with Xamarin. As a web developer, I've never taken the time to really understand how the Xamarin apps work, and that's always bugged me. This was a very helpful overview, thank you! Hopefully I will find some time to fire up Visual Studio and try running the code myself.
I started out using Xamarin and I like the idea of being able to write code once and use it on iOS and Android and if you like Xamarin for that reason too then you should check out B4X they support iOS, Android, Desktop (Windows, OSX, Linux) and Arduino obviously not everything converts perfectly to all platforms but in most cases at least 90% does. Best part is with their hosted builder option you don't even need to own a Mac to compile iOS apps from a Windows machine.
I'm basically a one man shop, and when I need to prototype ideas quickly for mobile platforms, C#, Xamarin, and VS is a dream. MS has definitely come along way since Ballmer's departure.