A Look Back: What Were You Working On?
We reached out to some longtime customers and fans of SparkFun to see what they were working on 10-15 years ago.

We got a great look at the history of SparkFun from Nate's point of view (in case you missed it), but what about you: all of the people who have learned, built and tinkered with SparkFun electronics over the years. What were you working on in the early days of SparkFun? We reached out to a few of our original customers who are still active today and asked them to share what they were working on 10--15 years ago.
SparkFun has been a part of my engineering life ever since my first order. I even had a robot made out of SparkFun parts as the ring bearer at my wedding in 2016. I have to say I was honored to talk about my first project with SparkFun parts. I want to say thanks for the opportunities to build new things with your kits!
My first SparkFun-related project started mid-2006. I had taken an assembly class in college and was amazed at how easy and precise I could time data coming out of the parallel port of a PC. Being that I was a Mac guy, I was trying to figure out a way to do something similar on my Macs at home. I had an old Mac lying around and decided to control my Christmas lights that year using my Mac. A lot of searching online and a few forums later, I found Arduino. It was cheap and a lot easier to use then the Motorola 68HC11 that I was using and programming in class.
I came across this company called SparkFun. I’d never heard of them, but they sold Arduinos in the United States. At the time, I think they were the only people that did, so I placed an order for a 9V wall wart and an Arduino USB. A few hours after getting it and a dozen LEDs hooked up, I wrote a little C code to control the LEDs from my Mac. It was really basic code at that time. I tied an ASCII key to the ON value of an LED, and another ASCII key to the off value of an LED. I even wrote up a little Xcode example on my personal website to talk to the Arduino over serial. I got a lot of great feedback, and people using my code (at least I think they were, as I got a lot of emails and PMs on the Arduino forums saying my code helped). Someone even donated money to my PayPal as a thanks for the source code. No clue what I did with it now, but it was simple.
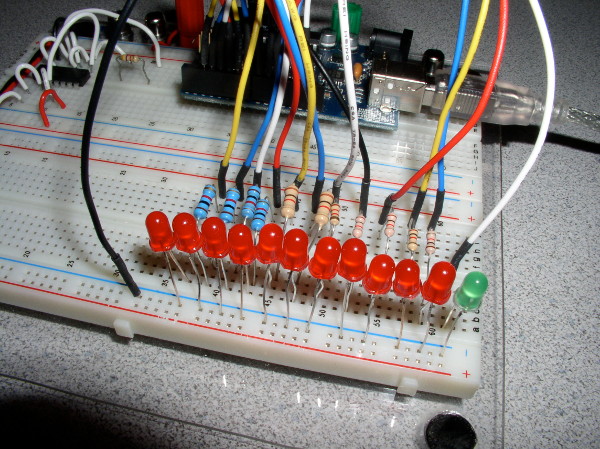
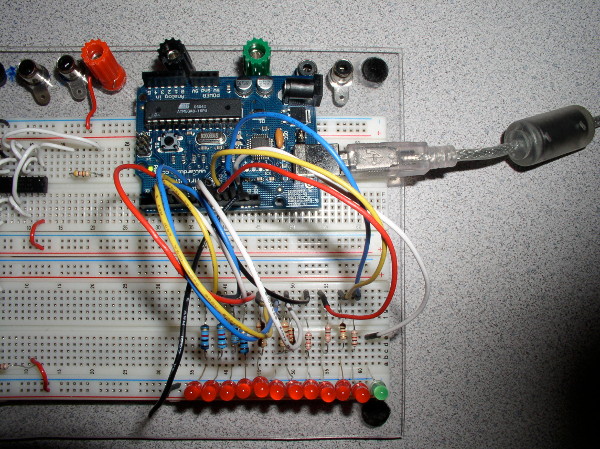
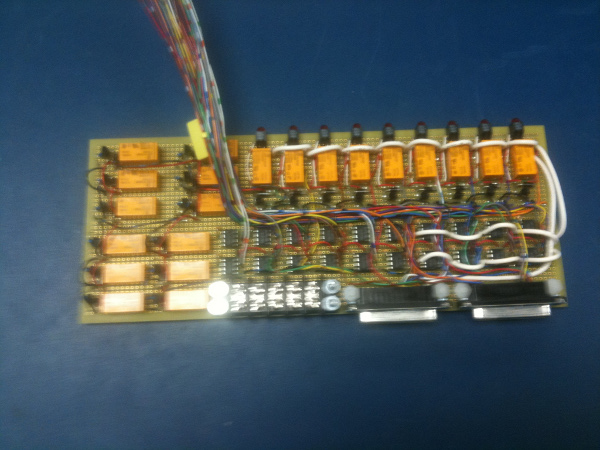
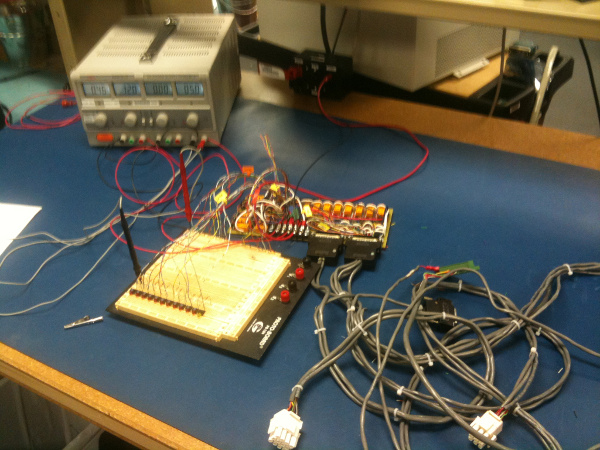
After testing the Arduino and Xcode, I wrote a simple program, put it on an old Mac laptop and had it blinking the lights. I then designed an opto-isolated relay board and mux to attach to the Arduino to control a bunch of lights. Unfortunately, it was before the iPhone so I don’t have many pics, but it was a fun project and made a lot of people call me a dork or nerd. I was able to find some pics of my first tests on the day I got the Arduino, and of me troubleshooting one of the relay boards I made a few years later. My Arduino-controlled Christmas lights have evolved considerably from the initial design to today.
Since then I’ve been buying or getting SparkFun boards every year. The wishlists are great. My family knows right away that if they want to buy me a fun Christmas or birthday gift they should just get it off my SparkFun wishlist! Thanks for the past 12 years of being my go-to vendor for hobby and breakout boards!
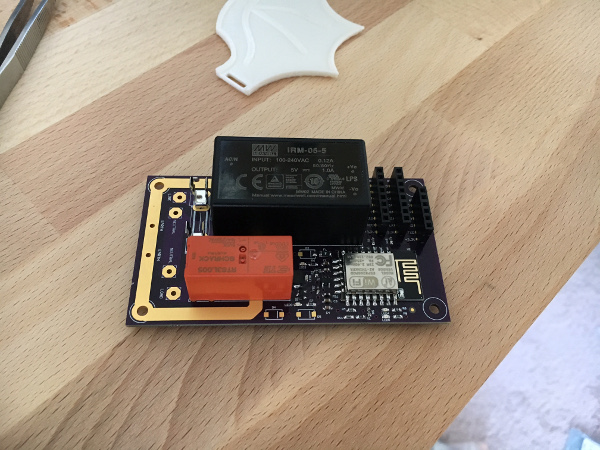
miked13's current relay board for controlling Christmas lights
Hmm...what was I working on in 2006?
Let me look at the actual order: PIC microcontroller, I2C EEPROM and a set of digital calipers, which I still have and use. I don't really care if the calipers get munged (the Mitutoyo does the careful work; I can afford better tools now --- wow, this is getting Lispy!)
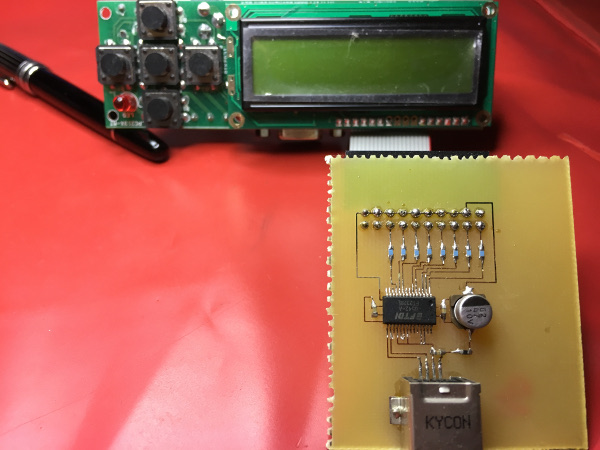
PIC 12F683 and RGB LEDs: Ah yeah, that blinky! Wonder if I still have it. Four of those RGB LEDs, I think, in a square, running patterns, and did I do something with the ADC? It's been awhile. Must have charlieplexed them. Yeah, 12 total LEDS, so four lines, and a pretty fast clock on the PIC. I don't remember having a latch on there, which would be the other way to work it...
Ah, not so much the ADC, but the built-in oscillator was what probably drove that choice.
That's about all I can remember; I do remember that project being what drove me to SMD, because I could make it much smaller. Now I'm getting into modern microcontrollers (Whomp on a shield and get stepper drivers? Kids have it easy these days. We had to walk uphill both ways to drive a stepper motor! IN THE SNOW!)
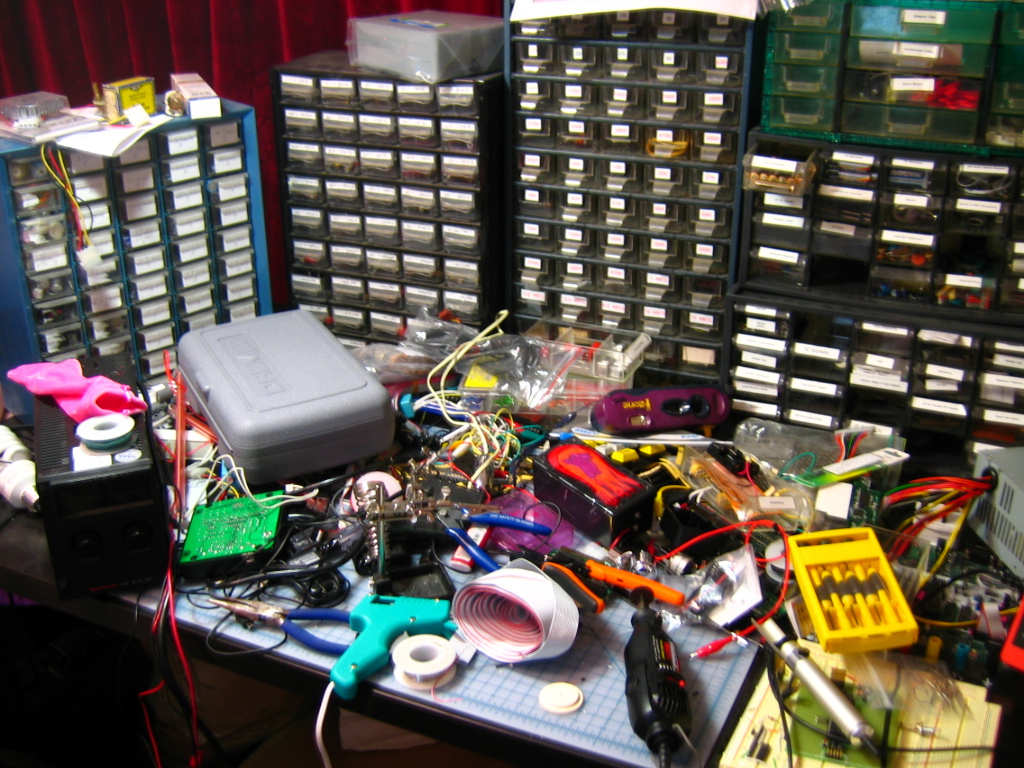
Background: Electronics is a hobby to me; it's IT operations/system administration that pays the bills, but every so often I just need to build something, and living in the city, a machine shop is hard to deal with!
It looks like my first SparkFun order was in March 2009. I think my first electronics parts order was from Pololu in late 2008. At the time, I was a student at Colorado School of Mines, and I had started developing an interest in robotics and taking robotics-related classes. While in college, I built a walker and a wheeled robot on my own to learn more.
I was sort of part of a team for the first AVC competition, and used the wheeled robot as a competitor for the second and third AVC competitions. My team name was Death by Di Hydrogen Monoxide.
Sometime in 2012 (I think), I modified a Cozy Coupe car for my nephew (he was between 2 and 4 at the time) by adding lights and a horn. In 2013 I got married, and in early 2014 I bought a house, so I didn't do much with electronics for a few years. In early 2017, I started picking up electronics as a hobby again, and built a beehive data logger very loosely based on the one that Nate did a few years earlier. As of about a week ago, my data-logging system is still working, and my hive is still alive.
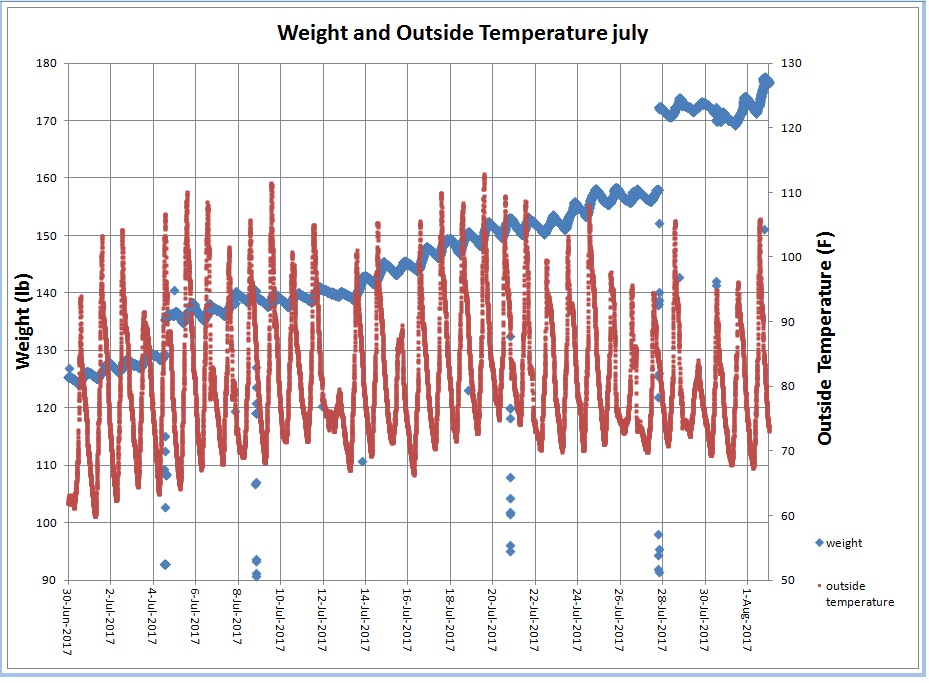
elmer_fud's beehive weight and temperature
I seem to remember that I was searching for a breakout board for a CompactFlash or an SD card. I worked with a lot of small firewalls in those days.
My main memory is that I could see that the SparkFun website seemed to be concentrating on breakout boards for small, interesting MPUs and other bits and pieces one really needs for prototyping --- the stuff you really wanted to try out in a form where you could actually hook them up.
Having worked in research support roles over many years, I thought, "yes, these people really get it!" I knew instantly that the site would be a success, and I bent the ears of many friends, saying, "You've got to check this out." It was the right place and the right time, but it was also very much the right product model. The pricing fit the customer base, and the sales and delivery fit the emerging web marketplace. It really set a new standard that so many other vendors have seen fit to follow.
My first order was an Olimex breakout board for 40-pin AVR chips.
At the time (late 2005), I had been learning about USB and other low-level protocols, and was starting work on learning microcontrollers and electronics so I could build my own boards. At that point, it was mostly just "learn how to make an LED blink" type projects, that an Arduino would happily fill in for these days. In the 13 years since then, I've worked my way up to doing reverse engineering on hardware/firmware/line protocols. I still have fond memories of learning on those early prototyping boards, even though I'm pretty sure they all ended up suffering "Viking Funeral" endings --- catching fire at one point or another, as many good electronics education products do when you run way too much power through them while learning about driving motors.
A picture of my desk from a little while after that order. The Olimex board is on the bottom right, under the solder sucker.
That board also ran a lighting project I built later:
Gesture-based light control using HandVu
From my blog (no mention of actual projects from that time, unfortunately), it was right when I was getting back into electronics seriously --- a lot of random experimenting, learning and reading. Ah, how learning was different back then, pre-maker movement. At the time, SparkFun was a goldmine of otherwise unsourcable components, and targeted what was at the time considered the electronics hobbyist --- those designing PCBs. Good times.
In the time since SparkFun started, I've transitioned from a software developer into a hardware developer and entrepreneur.
When I first discovered Nathan Seidle (and SparkFun), he was selling parts on eBay, probably in 2001 or 2002. The SparkFun website didn't exist yet. I first bought an AVR programmer from him. Then, over the next year or so, I purchased various other parts from him on eBay. I first ordered from the SparkFun website on January 3, 2006. Here is a link to one of the projects I used some early SparkFun parts for --- notice the PCB was made before the SparkFun flame logo.
I thought of one simple project from the old days, although I don't have any pictures.
My wife worked in an office where IT set up the computers, and they would log you out after 15 minutes of inaction. Her job required her to be away from her computer for around 10--15 minutes several times a day. So, I got an Arduino Mini and a small motor. I attached a disk with a paper drawing like a pizza to the motor shaft. The Arduino app simply pulsed the motor for a quarter turn every five minutes. I mounted the assembly in a small box about the size of a mouse, cutting a hole in the box to expose the pizza paper. The setup was powered by a USB cable. Whenever my wife left her station, she placed her optical mouse atop the box, and the mouse would detect movement every five minutes when the motor turned. She no longer had to log in several times a day.
I first learned about SparkFun when I met Nathan at a Seattle Robotics Society Robothon event back in 2004.
My friend received an Olimex LPC2138 Terminal Development Board for Christmas in 2005, and that got us talking about what it would take to build our own JTAG debugging solution for it. On December 28, I placed my first order with SparkFun for my own 2138 board to launch the development of a custom FTDI FT232R-based JTAG debugging solution for ARM7TDMI targets. This Olimex LPC2138 board was the first introduction to ARM CPUs for either of us.
As the photo shows, the results of this debugger project --- one of my first PCBs --- were pretty crude, but it did enable us to perform assembly language level debugging on various fun LPC21xx projects, and got me hooked on building debugging tools for ARM microcontrollers. I have continued to work on various debugging tools since that initial SparkFun-enabled project, and one of my latest is the MRI debug monitor, which allows GDB to connect to an ARMv7-M based microcontroller via a UART connection and use breakpoints, watchpoints, single stepping, etc. without the need for JTAG/SWD hardware. I initially developed MRI to enable debugging on an mbed-LPC1768 development board that I also purchased from SparkFun (in 2011).
There you have it: a few of the OGs and what they were making back in the day! We couldn't get to everyone, so I'd like to give you the opportunity to share. What you working on 10--15 years ago in SparkFun's early days? Let us know in the comments!


Well, I don't have a project from 15 years ago that I used a Sparkfun product on, but while we are looking back at the past I have a contrast between projects done 30 years in between. I contrasted an all wire wrap board with a PCB board I built using knowledge I gained on the Sparkfun website that enabled me to design my own board and do the surface mount soldering. When I saw how easy Nate made it look to do surface mount soldering I decided to take the plunge and haven't looked back. Here is a photo of 1985 versus 2015.
I found this 30+ year old gem in my garage while doing some rearranging. I just couldn't throw it out every time I would think back about all the work that went into that wire wrapping. Here is a link to the full article.
Whew! That's some crazy wire wrapping going on there! I love the side-by-side comparison.
Before starting this wire wrap job, I bought one of those fancy wrappers that held the spool of wire and stripped as it wrapped so I could just move pin to pin for the bus connections. Imagine the fun I had finding a loose wire in there.
Nate and Sparkfun! Some awesome projects you helped make possible over the years! Can't wait for the next 15 years!
Sparkfun was crucial in getting my Puzzlemation project off the ground, with key components like the LED matrix displays. Even though they were officially "out of stock", one of your tech support folks managed to scrounge up a few extra LED matrices so I could build extra tiles for my exhibit at the Bay Area Maker faire that year.
I also appreciate letting me sneak into the IoT class at the SF Hackaday conference a couple years ago. Since you wouldn't accept payment for the parts you gave me, I donated $50 to the EEF.
It's wonderful to see a company grow and prosper on the basis of education, experimentation and curiosity.