Interactive Valentine's Day Mailbox Counter
Stand out at work or at school with an electronically embedded box for valentines.

Remember when you were a kid and every Valentine's Day at school you would decorate shoe boxes to receive cards from your classmates? We do too, which is why we took this simple idea and stuffed it with electronics. It's what we do. This is a fun e-crafting project that will make you stand out at work or at school!
This box is special because it keeps track of how many valentines you have received and displays that number on the box. It also celebrates each time you get a new valentine with animated LEDs.
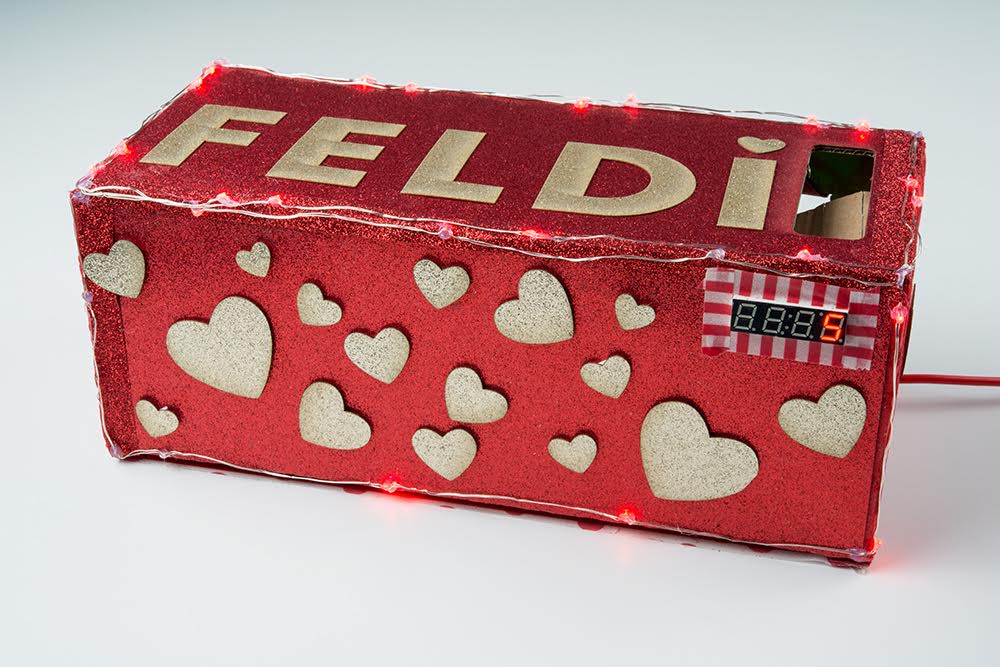
This is possible by placing an IR transmitter and receiver on either side of the slot in your box. I made a ramp inside to guide my valentines past the IR transmitter and receiver, ensuring every note or candy is accounted for.

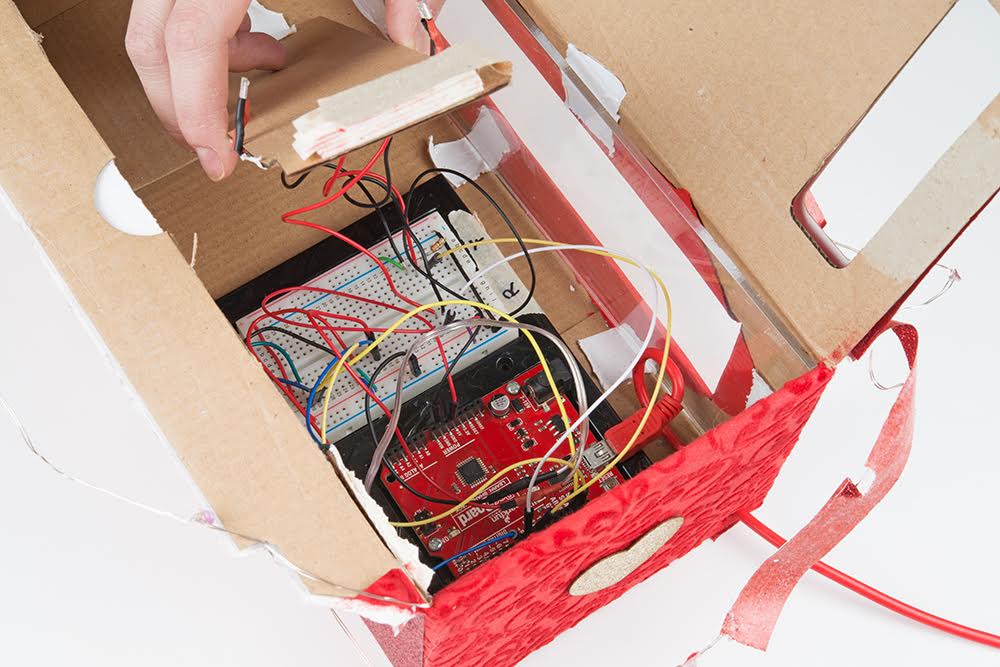
If you are interested in making your own Valentine's Mailbox Counter, use the following circuit diagram to build your circuit.
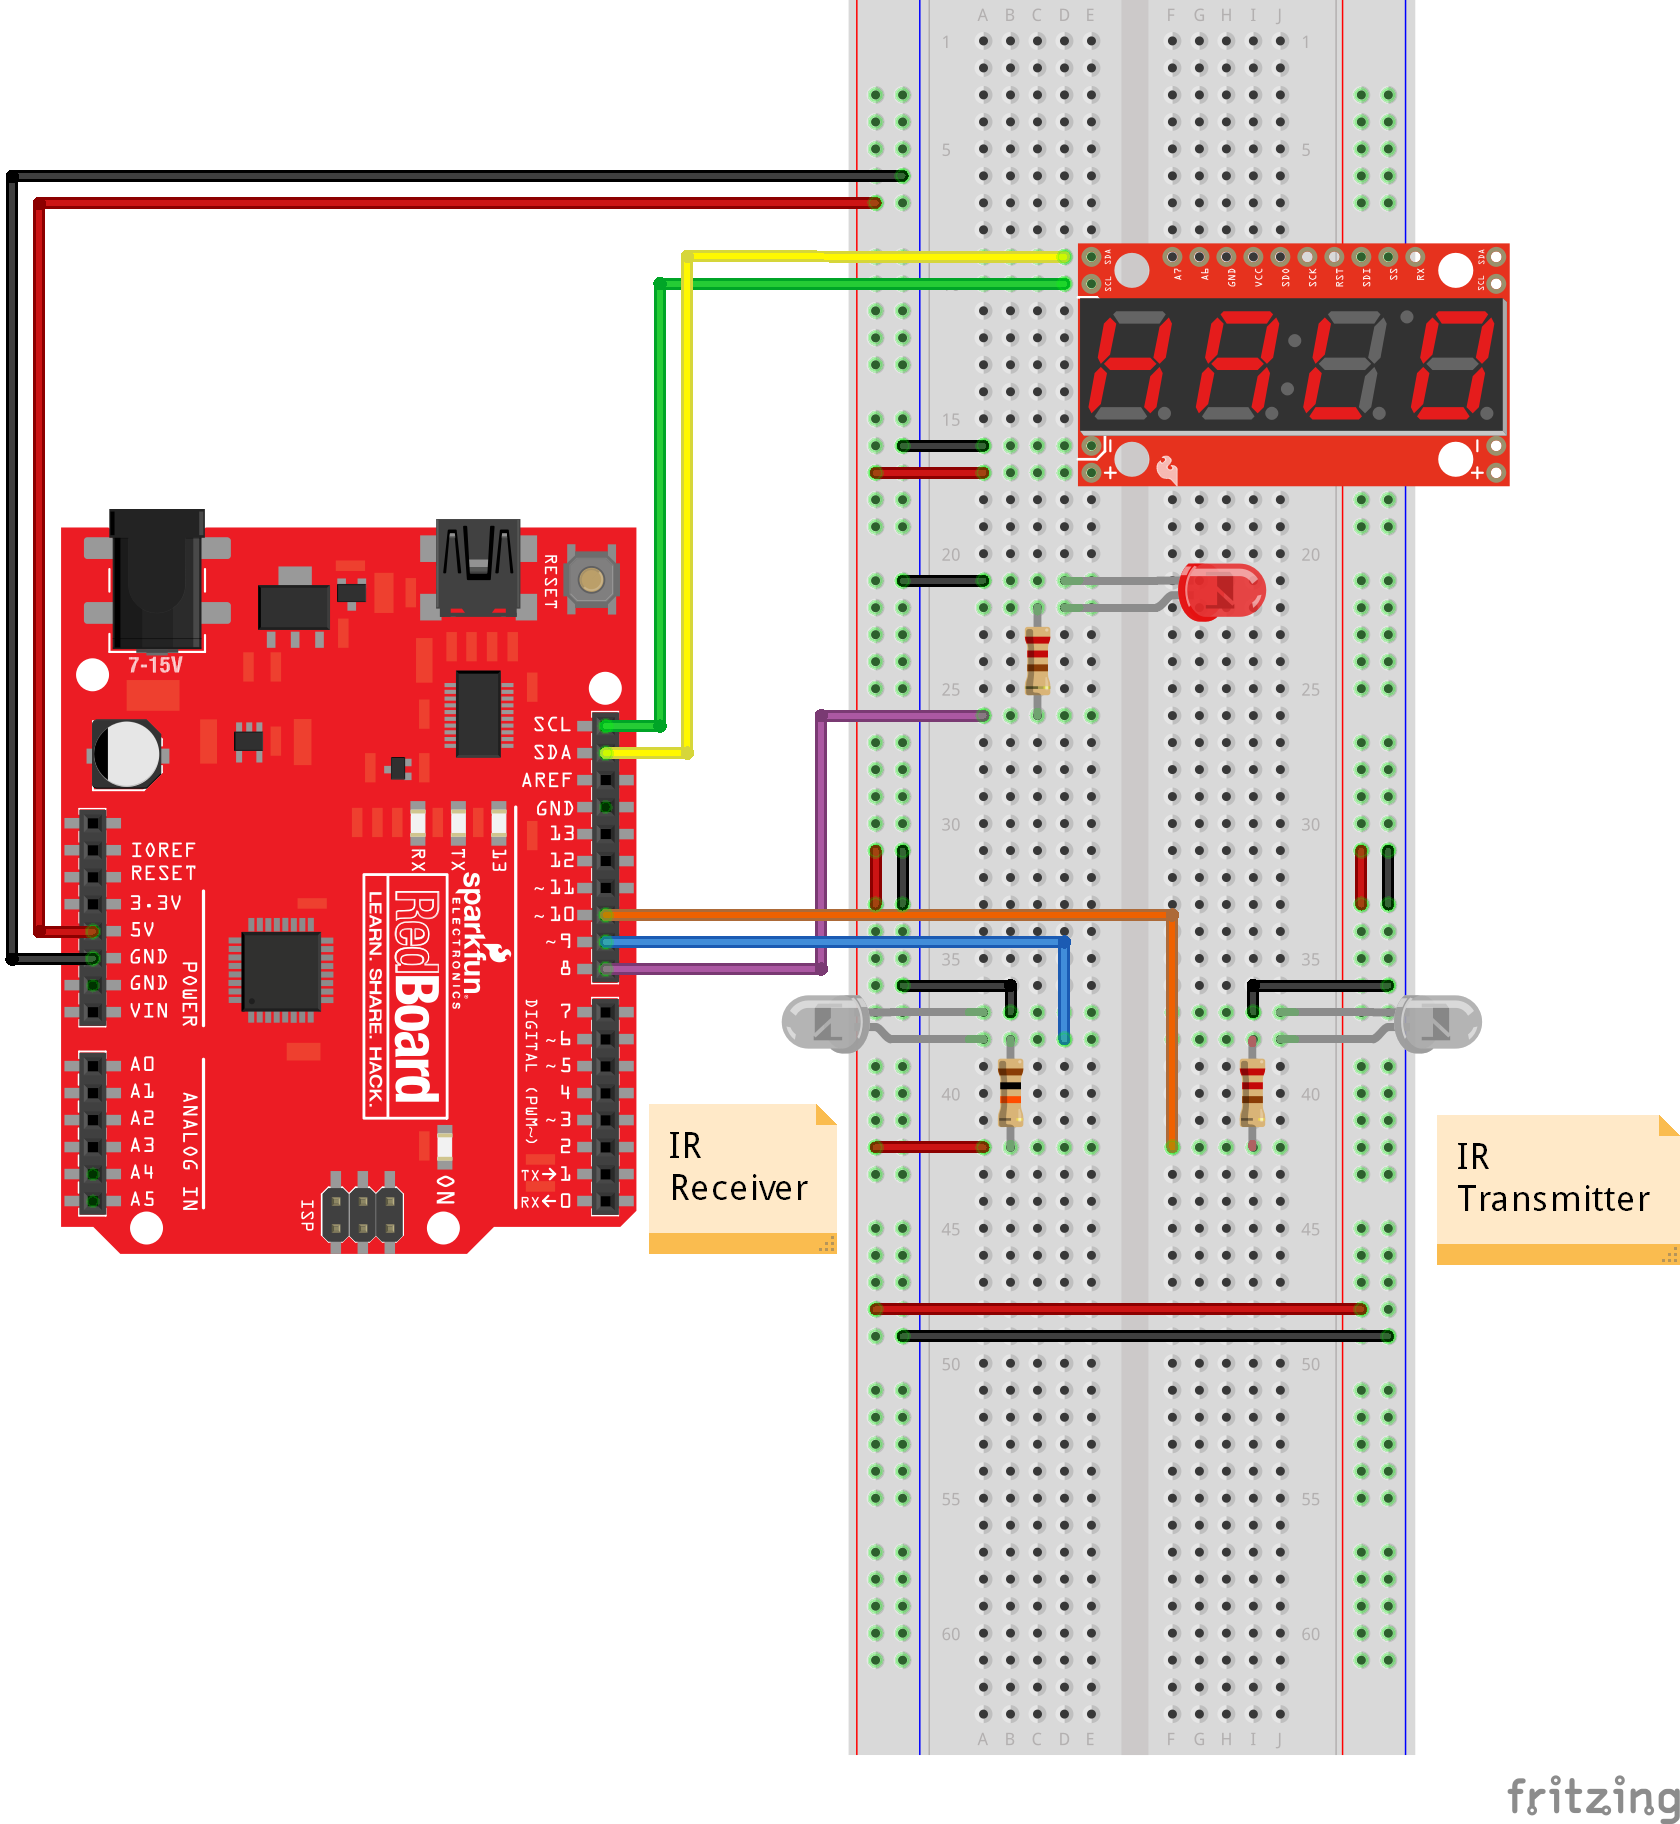
Having a hard time seeing the circuit? Click on the image for a closer look.
Parts included in the Valentine's Day Mailbox Counter
Upload the code below to your Arduino Uno once the circuit has been built.
//Melissa Felderman for SparkFun Electronics
//January 31, 2018
//This program leverages code from Serial 7-Segment Display Example Code
//   I2C Mode Stopwatch
//   by: Jim Lindblom for SparkFun Electronics

#include <Wire.h> // Include the Arduino SPI library

const byte s7sAddress = 0x71;
//unsigned int counter = 9900;
char tempString[10];  // Will be used with sprintf to create strings

int LED = 8;
int detect = 9;
int emit = 10;

int counter = 1;
int startMillis = 0;

void setup() {
  Wire.begin();
  clearDisplayI2C();
  setBrightnessI2C(255);

  Serial.begin(9600);
  pinMode(detect, INPUT_PULLUP);
  pinMode(LED, OUTPUT);
  pinMode(emit, OUTPUT);
  digitalWrite(LED, LOW);
  digitalWrite(emit, HIGH);
}

void loop() {
  int motion = digitalRead(detect);
  sprintf(tempString, "%4d", counter);

  if (motion == HIGH) {
    counter = counter + 1;
    s7sSendStringI2C(tempString);
    for (int i = 0; i < 10; i++ ) {
      digitalWrite(LED, HIGH);
      delay(100);
      digitalWrite(LED, LOW);
      delay(100);
    }

    Serial.println(counter);
    delay(1000);
  }
  else {
    digitalWrite(LED, LOW);
  }
  //˜Serial.println(digitalRead(motionPin));
}

void s7sSendStringI2C(String toSend) {
  Wire.beginTransmission(s7sAddress);
  for (int i = 0; i < 4; i++)
  {
    Wire.write(toSend[i]);
  }
  Wire.endTransmission();
}

// Send the clear display command (0x76)
//  This will clear the display and reset the cursor
void clearDisplayI2C() {
  Wire.beginTransmission(s7sAddress);
  Wire.write(0x76);  // Clear display command
  Wire.endTransmission();
}

// Set the displays brightness. Should receive byte with the value
//  to set the brightness to
//  dimmest------------->brightest
//     0--------127--------255
void setBrightnessI2C(byte value) {
  Wire.beginTransmission(s7sAddress);
  Wire.write(0x7A);  // Set brightness command byte
  Wire.write(value);  // brightness data byte
  Wire.endTransmission();
}

// Turn on any, none, or all of the decimals.
//  The six lowest bits in the decimals parameter sets a decimal
//  (or colon, or apostrophe) on or off. A 1 indicates on, 0 off.
//  [MSB] (X)(X)(Apos)(Colon)(Digit 4)(Digit 3)(Digit2)(Digit1)
void setDecimalsI2C(byte decimals) {
  Wire.beginTransmission(s7sAddress);
  Wire.write(0x77);
  Wire.write(decimals);
  Wire.endTransmission();
}
Interested in learning more about LEDs?
See our LED page for everything you need to know to start using these components in your project.


amazing!!!
Thats a great project! It would have made a great sparkfun live build. Will those ever come back? I really enjoyed making the cheesy pickup lines one a few years ago.
-
A parts list would be fantastic. Thinking about making one with my niece and nephews.
https://www.sparkfun.com/wish_lists/144039 :)