6 Easy DIY Soft Components
Check out these techniques for making your very own soft electronic components!

Let’s talk about soft and sewable hardware, or at least why I find it so exciting. Traditional hardware (like a button for example) is, well... materially hard, making it an awkward component in the context of wearables. At the risk of overgeneralizing (I see you, Iron Man), clothing tends to be materially soft by nature. This makes the relatively recent availability of materials like conductive thread and conductive fabric very compelling for DIY e-textile designers. Conductive thread and fabric can be integrated seamlessly (jk, by nature there will be a seam, but figuratively) to fabrics used for clothing. It infinitely expands the possibilities for wearable electronics. Today we are going to look at six easy DIY soft and sewable component techniques using these materials. In all of the examples below, the circuit is connected using conductive thread and includes a sewable LED that demonstrates the functionality of the component.
Before we get started, I have to mention that a few of these ideas were inspired by the work of Mika Satomi and Hannah Perner-Wilson on KobaKant: A site for DIY Wearable Technology Documentation. This website is an incredible resource for DIY soft and sewable electronics.
Momentary Pushbutton V1
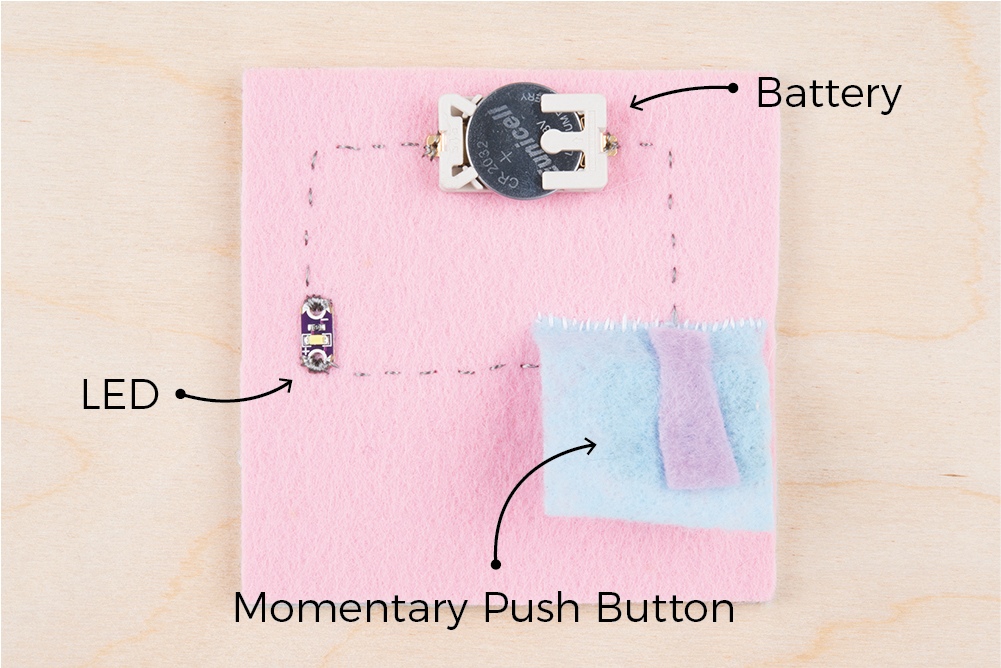
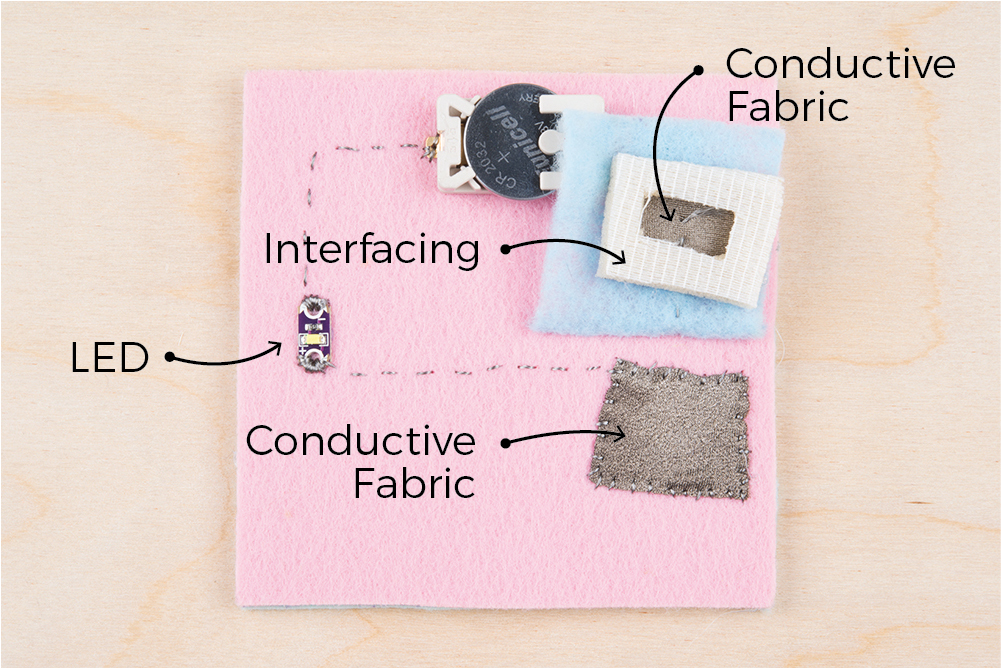
This is an example of a DIY soft momentary pushbutton. It is made of two small patches of conductive fabric and a similarly sized patch of interfacing. A small hole is cut into the center of interfacing, which is then sandwiched between the two pieces of conductive fabric, keeping them apart. The space between the two patches of conductive fabric break the circuit, meaning there is no electrical connection, and the circuit is open. When pushed, the two pieces of conductive fabric are pressed together, making an electrical connection that closes the circuit and illuminates the LED. This behavior imitates a momentary pushbutton and is a good solution for making soft buttons.
Momentary Pushbutton V2
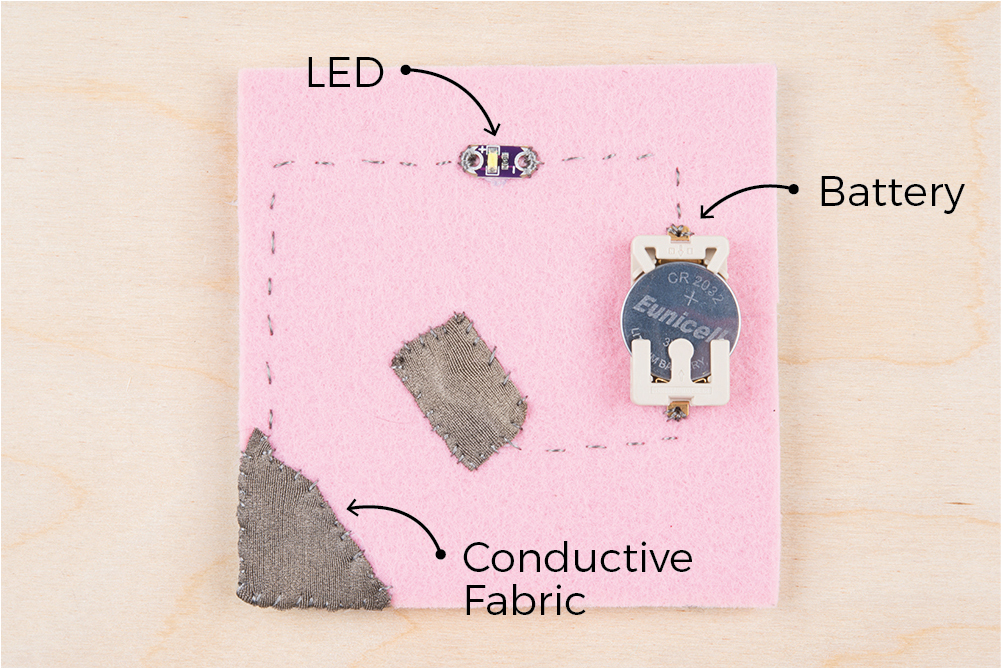
This is a second example of a soft momentary pushbutton. Here, there are two patches of exposed conductive fabric between which there is a break in the circuit, or no electrical connection. To close the circuit, the conductive fabric edge must be bent over to touch the other conductive fabric patch, creating an electrical connection and closing the circuit. When you let go, the connection breaks again, which simulates the behavior of a momentary pushbutton.
Switch
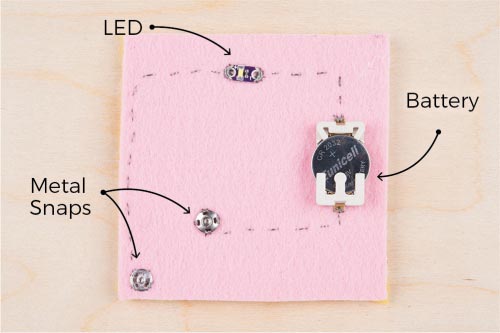
I love the switch example because it uses a very nontraditional piece of electronic hardware that happens to be a very traditional piece of fashion hardware: the metal snap. The snap is conductive, making it perfect for soft circuitry wearable applications. In this example, I have one half of my snap connected to my circuit via conductive thread on the corner of my felt swatch. The second half of the snap is also connected to the circuit an inch or two above and to the right. The space between the two snap halves breaks the circuit. When they are closed, they make an electrical connection and close the circuit. Because the snaps either stay closed or stay open, this technique simulates the behavior of a switch!
Pressure
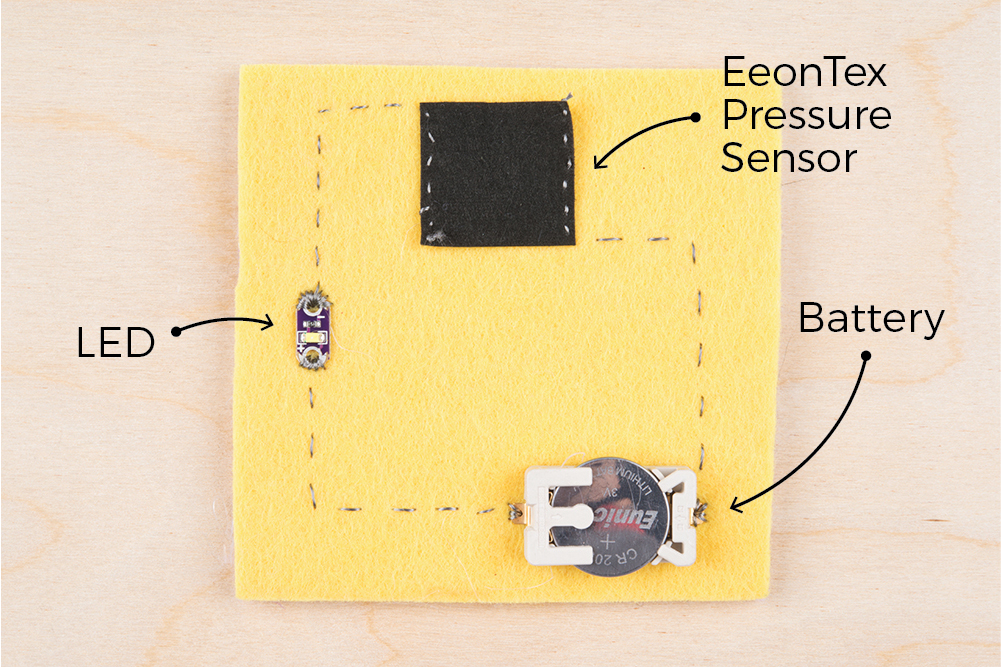
The pressure sensor uses a special material called EeonTex, which is a conductive, nonwoven fabric with Piezo-resistive functionality. It is used for dynamic sensors to map and measure pressure, bend, angle stretch and torsion. In this example, the circuit breaks across the EeonTex patch. Conductive thread connected to the circuit is sewn to either side of the EeonTex patch, which acts as a variable resistor. When pressure is applied or the fabric is bent, the resistance decreases, which increases the brightness of the LED.
Tilt
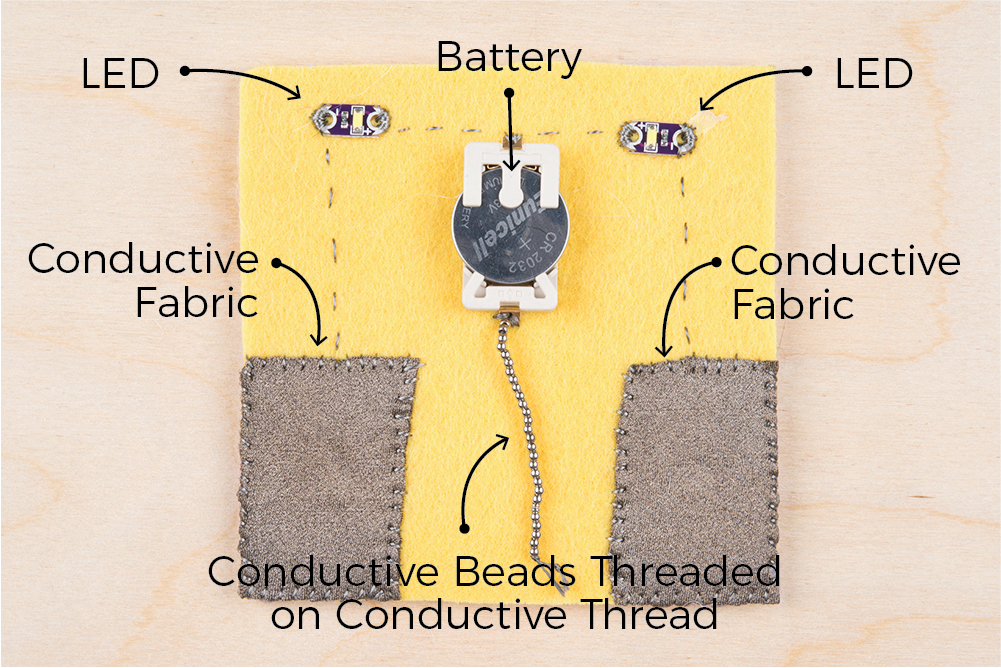
This is my favorite one because it’s a simple low-tech solution for a more complex sensor. On either bottom corner is a patch of conducive fabric, each connected to the cathode of an LED. (There are two LEDs in this circuit.) The LED anodes are connected directly to the positive terminal of the battery holder. Conductive beads are beaded on conductive thread that is connected to the negative battery terminal. When the circuit is tilted, the beaded thread falls to one side or the other. When the connection is made between the conductive fabric patch and the beaded thread, the circuit closes and the LED on the side of the tilt turns on, indicating the direction of the tilt.
Battery Holder
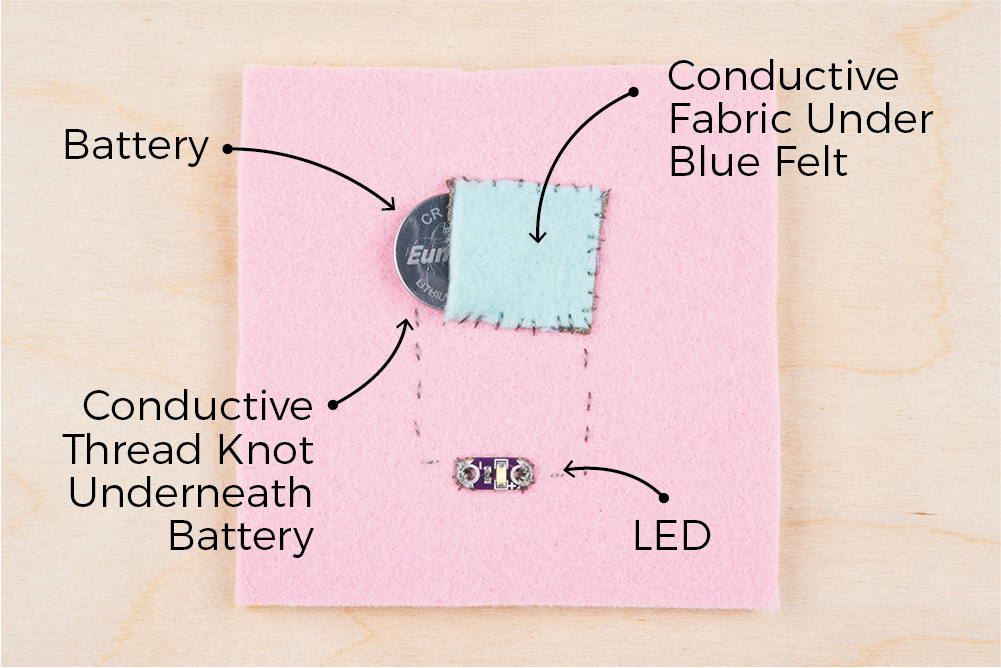
This technique is fantastic because you never need to worry about running out of sewable battery holders ever again, and all you need is conductive thread and conductive fabric. The negative terminal of the battery connects to the circuit using ONLY conductive thread. Once the needle is threaded, a double knot is tied at the end of the thread. By threading from the top of the fabric down, the knot will sit atop the fabric. A small square of conductive fabric that is slightly larger than the battery is sewn down on three sides directly on top of the knot. (I covered mine with felt to insulate.) When the battery is placed inside the pocket, the bottom (or negative) terminal touches the knot, which is sewn over to the LED cathode. The top of the battery, or positive terminal, touches the conductive fabric pocket, which is connected to the LED anode via conductive thread.
Shop supplies for your own DIY soft sensors here, be sure to visit our EDU blog post for more DIY soft components, and let us know about the soft sensors you have made in the comments below!


I was just surfing Thingiverse, and spotted this and the thought came to my mind of incorporating either conductive plastic or some conductive threads... just as a possible idea to tinker with. (Unfortunately, my 3D printer is having to be stored in a box and not on the table where I can use it...)
Ohhh interesting idea! I'm into it. Seems like a good reason to pull the printer off the shelf. I might give this technique a try myself in the not so distant future...
Great blog, Feldi! As an Engineer with 50+ years of doing electronics, I do have one safety-related comment about the tilt sensor: Please arrange it so that the chain is attached to the more-exposed terminal of the battery, in this case the positive side, so that if the chain bounces around (e.g., while the wearer is dancing) and the chain touches the battery, it doesn't cause either a short circuit or sparking, which in this case would be not fun (pun intended).
Constructive comment based on 30+ years of doing things for publication: In the future, please try to have the text after the video be in the same order as in the video. Not a really big deal, but it (a) is less confusing to the reader and (b) makes the author look better.
The Ham Radio guy in me looked at the "just squeeze it" momentary switch and wanted to put a decorative circle so that it looks like a Morse code key, and replace the LED with a buzzer... ;-) ... "dah-di-dah-dit dah-dah-di-dah" ... ["CQ", meaning "anyone want to talk to me?"]
That's a great point about the tilt sensor, thanks for all the input! :)
One option for protecting the battery is covering with felt. Feldi left the battery holder exposed for demonstration, but in use it is best to protect any exposed components from shorts as you pointed out. You can see a demonstration of this in my tilt sensor project. The conductive thread is also insulated with flexible fabric glue for added protection.