
My adventures in 3D printing have taken me from DIY cookie cutters to the next logical place: DIY 3D-Printed Stamps. As an avid crafter, I am beyond excited about my newfound ability to make customized crafting tools using the 3D printer.
Making 3D-printed stamps is not as simple as designing a model and hitting "print." In order to imitate the rubbery material of a stamp itself, as well as the wooden handle, I needed to use two kinds of filament. For the handle, I used regular ABS, which is a hard plastic and common 3D-printing material. For the stamp, I used a special flexible filament called NinjaFlex. This rubbery material is perfect for printing flexible or softer objects. Given the inherent qualities of the material, it requires a specific extruder for your printer. Here at SparkFun we use LulzBot 3D printers, so I picked up their special FlexyStruder Tool Head. If you are thinking about buying a new tool head for your LulzBot printer to interface with flexible materials, I would actually recommend the Aerostruder Tool Head as it can print both felxible materials, like NinjaFlex, and normal hard plastics like ABS/PLA.
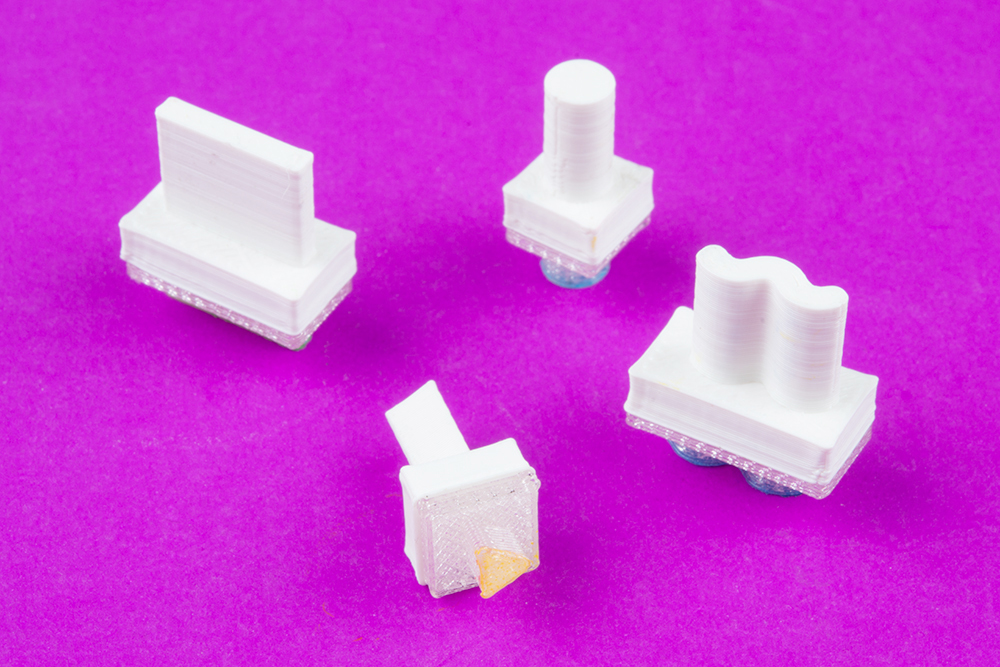
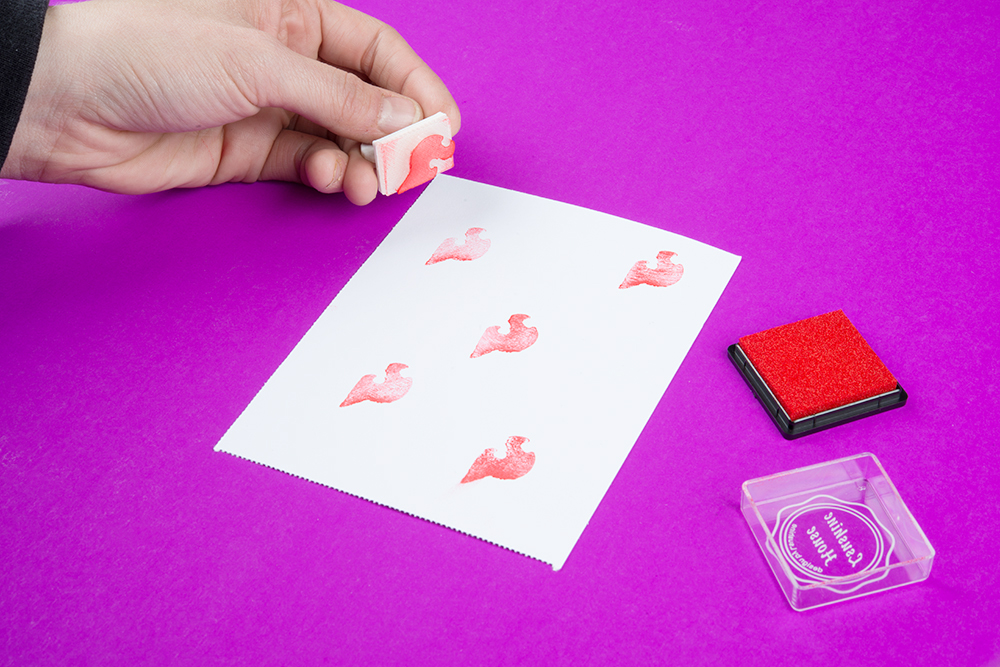
I had to work through a few small challenges in this project. The first issue I encountered was the natural texture of the 3D print on the stamp face. The grooves between the fine lines held on to the ink, and when I would press the stamp to paper, the texture came through clear as day. In order to combat this, I came up with a surface melting technique. I put my clothing iron on high, covered it with a piece of parchment paper, and pressed the face of my stamp against the iron face through the parchment paper. This effectively removed the linear texture from the stamp and offered a smooth surface. I lightly sanded the surface to give it a bit of tooth to hold onto the ink.

I also found that using a 100 percent infill for the rubbery part of the stamp gave it a stronger structure that was easier to work with when using it in practice. With a 20 - 50 percent infill, the stamp was kind of wobbly when I pressed it against paper, and I was getting results that were not as sharp as I hoped. With the higher infill, the stamp was more rigid and stable against the paper and the results were crisp.
I have so many ideas for different stamps I can barely pick which one to make next. Let us know what you think about this project in the comments below!
Interested in learning more about at-home 3D printing? Check out SparkFun's 3D printers and supplies.


The surface texture has always been a problem with these 3D printed parts. I've made a lot of props for cosplayers and that texture has been a problem. I wonder if your heating technique would work on PLA or other filaments. Time to experiment!
I use a automotive spray body filler on PLA and then lightly sand them with a 600 grit wet sand paper. The printed parts look like they were professionally made. Since the Body filler is a primmer as well a light coat of paint and they look like a professionally made part not a 3d printed one.