How to Model and 3D Print a Project Box
In this tutorial, we show you how to design a project enclosure with Tinkercad and then make it on a 3D printer.

Getting started with 3D modeling and 3D printing can seem like a daunting task, but it doesn't have to be. The easiest place to start is with a simple shape, like a box. Additionally, it can help to create something useful (or at least marginally useful) to act as motivation.
Downloading a part from Thingiverse and printing it is a good place to start, especially if you want to test your printer or want something awesome that someone else has made. But what if you're ready to start designing your own models? Where do you go? There are scores of 3D modeling programs out there, and some of them work better with 3D printing than others. Here are some of the ones I've had experience with:
- Tinkercad - Free, web-based modeling software from Autodesk that's great for beginners. Great for making models for 3D printing, but is limited in features.
- SketchUp - There is a free (now web-based) and a paid (Pro) version. Easy to learn and use, but has trouble producing 3D printer-friendly models.
- Fusion 360 - Full-featured modeling software also from Autodesk that's free for students and hobbyists. Favored by many hobbyists.
- SolidWorks - Full-featured CAD software that has a large professional following. Expensive.
- Blender - Free and open-source modeling program with a steep learning curve.
If you are just getting started with modeling and printing, I highly recommend giving Tinkercad a shot. You can whip up simple designs in a matter of minutes. Do note that it is lacking some advanced features, like being able to add chamfers or fillets (you can technically subtract a round shape out of another shape and then use that to create a fillet on your design's corners, but it's a pain).
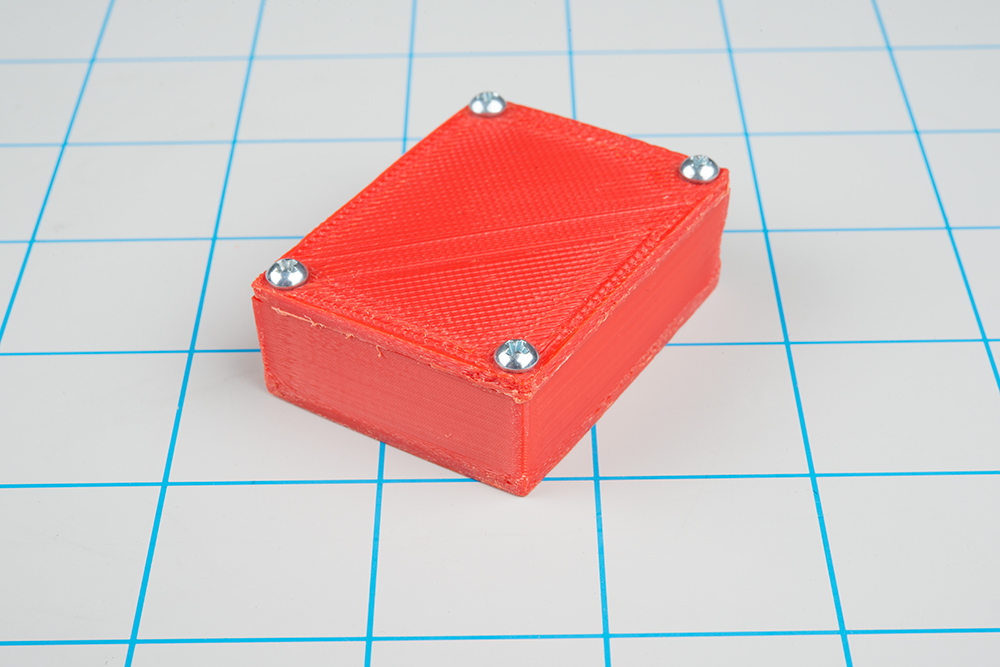
I've created a quick guide on getting started with Tinkercad. In it, I show how to design a box, import it into a slicer, and then print it. It's a great starting place, especially if you're looking to create custom enclosures for your electronics projects. That being said, it's meant as a starting point; putting just a Pro Mini is box is a fairly useless exercise. Feel free to modify the dimensions to fit your own project!
Getting Started with 3D Printing Using Tinkercad
April 30, 2018
Tinkercad is a great, easy-to-use online modeling software that can have you 3D printing quickly. This tutorial will walk you through designing a simple project enclosure.
Also, the instructions for printing were written for a LulzBot TAZ 5 printer (now retired in favor of the TAZ 6), mostly because that's what I had access to. Most of the LulzBot printers should work similarly, but if you have a different printer, you'll want to follow that manufacturer's guidelines for which Slicer program to use and how to print.
For those of you out there with more 3D printing experience, what other modeling or troubleshooting tips can you recommend?


I've always used OpenSCAD for modelling. I don't do much with organic shapes, as I'm typically creating boxes, columns, and other things that have a defined shape. I find OpenSCAD good for this as you're building things with basic shapes, either intersecting or carving shapes with other shapes (cubes, cylinders, spheres, etc.) to get the item you want. You're writing code to build these items, and it gives you very precise control of the item's dimensions and shape for 3D printing, so you can design based on the limitations of your printer (mine is pretty old). It has more complex features as well if you need them, and you can build items as modules, allowing you to re-use the items instead of repeating code.
Awesome! I've heard good things about OpenSCAD. I'll have to give it a shot.
I, too, use OpenSCAD. I certainly agree that it's good for doing things that you need precise control of the dimensions and shapes. Although I've done a chess set in OpenSCAD (it was "fun" working out how to do the knight -- I did waste some filament there...), I recognize that OpenSCAD isn't for folks trying to do "artistic" things, like a sculpture. It does have a fairly steep "learning curve", and it helps if you've had some experience with programming (even just simple Arduino "sketches").
What are those, machine screws in raw plastic? You do know Sparkfun sells the heat set inserts, right? Or just use sheet metal screws.
For 3D CAD there's also Cubify Invent, about $50, it has no limits and works well enough but it's not well supported.
My go-to method was to print off one of these and then use it to find the optimal hole size (with no drilling or tapping needed) for whatever screws I happen to already have on hand. Machine screws have been working quite well for me.
https://www.thingiverse.com/thing:2221050
Pay special attention to how the .scad file produces holes of a given size.
Cool plates, thank you! I've found that machine screws also work decently enough, even though they're not ideal for the application. Most of the time, it's what I have on hand, as well :)
I find running a 6-32 or larger tap and I have no problem using machine screws in raw plastic when I print with a 0.2mm nozzle. Design a standard tapped hole, run a drill bit though it to clean it out and then run a tap though it. Make a very nice clean tapped hole.
Yup, and if you read the tutorial, you'll see that I talk about heat set inserts :) I wanted to make the simplest box possible.
They also make thread-forming screws for plastic. I would definitely use those instead of machine threads. There are design guides to tell you what diameter pilot hole to use, but it's typically about 80% of the major diameter of the fastener. I would recommend running a drill in the hole ahead of time to clean it out. With the thread forming screws you can get away with more thread engagement without worrying about cracking bosses.
https://www.mcmaster.com/#thread-forming-screws/=1cniabq
http://www.stanleyind.com/Downloads/DELTA_PT_Brochure.pdf
Just to join the line of "Hey, you didn't show the CAD program I use", here's an example of a print I put together with FreeCAD. Free, open source, a bit quirky but it works.
Looks good to me. I'll have to give FreeCAD a shot. Is that a Raspberry Pi case?
Yep, good eye.It's part of my modular Pi case system. There's also a snap-on lid and a snap-on base. The base is common to all versions of the case, while the lid has different features to accommodate different configurations (various displays, switches, even a ZIF socket for a chip burner). There's also a version of the case that has a gap on the top right side to allow a ribbon cable to pass through to the GPIO header.
That's really slick. Are you planning to share the design files once you're done (e.g. on Thingiverse)?
I hadn't planned on it, it didn't seem like something others would want, but if you think there'd be demand for it, sure. Guess I need to look into how to do that.
Awesome tutorial Shawn! Shawn also has a great video series on Udemy on Arduino fundamentals. Buy the video you won't be disappointed. :-)
Thank you! I appreciate the recommendation!