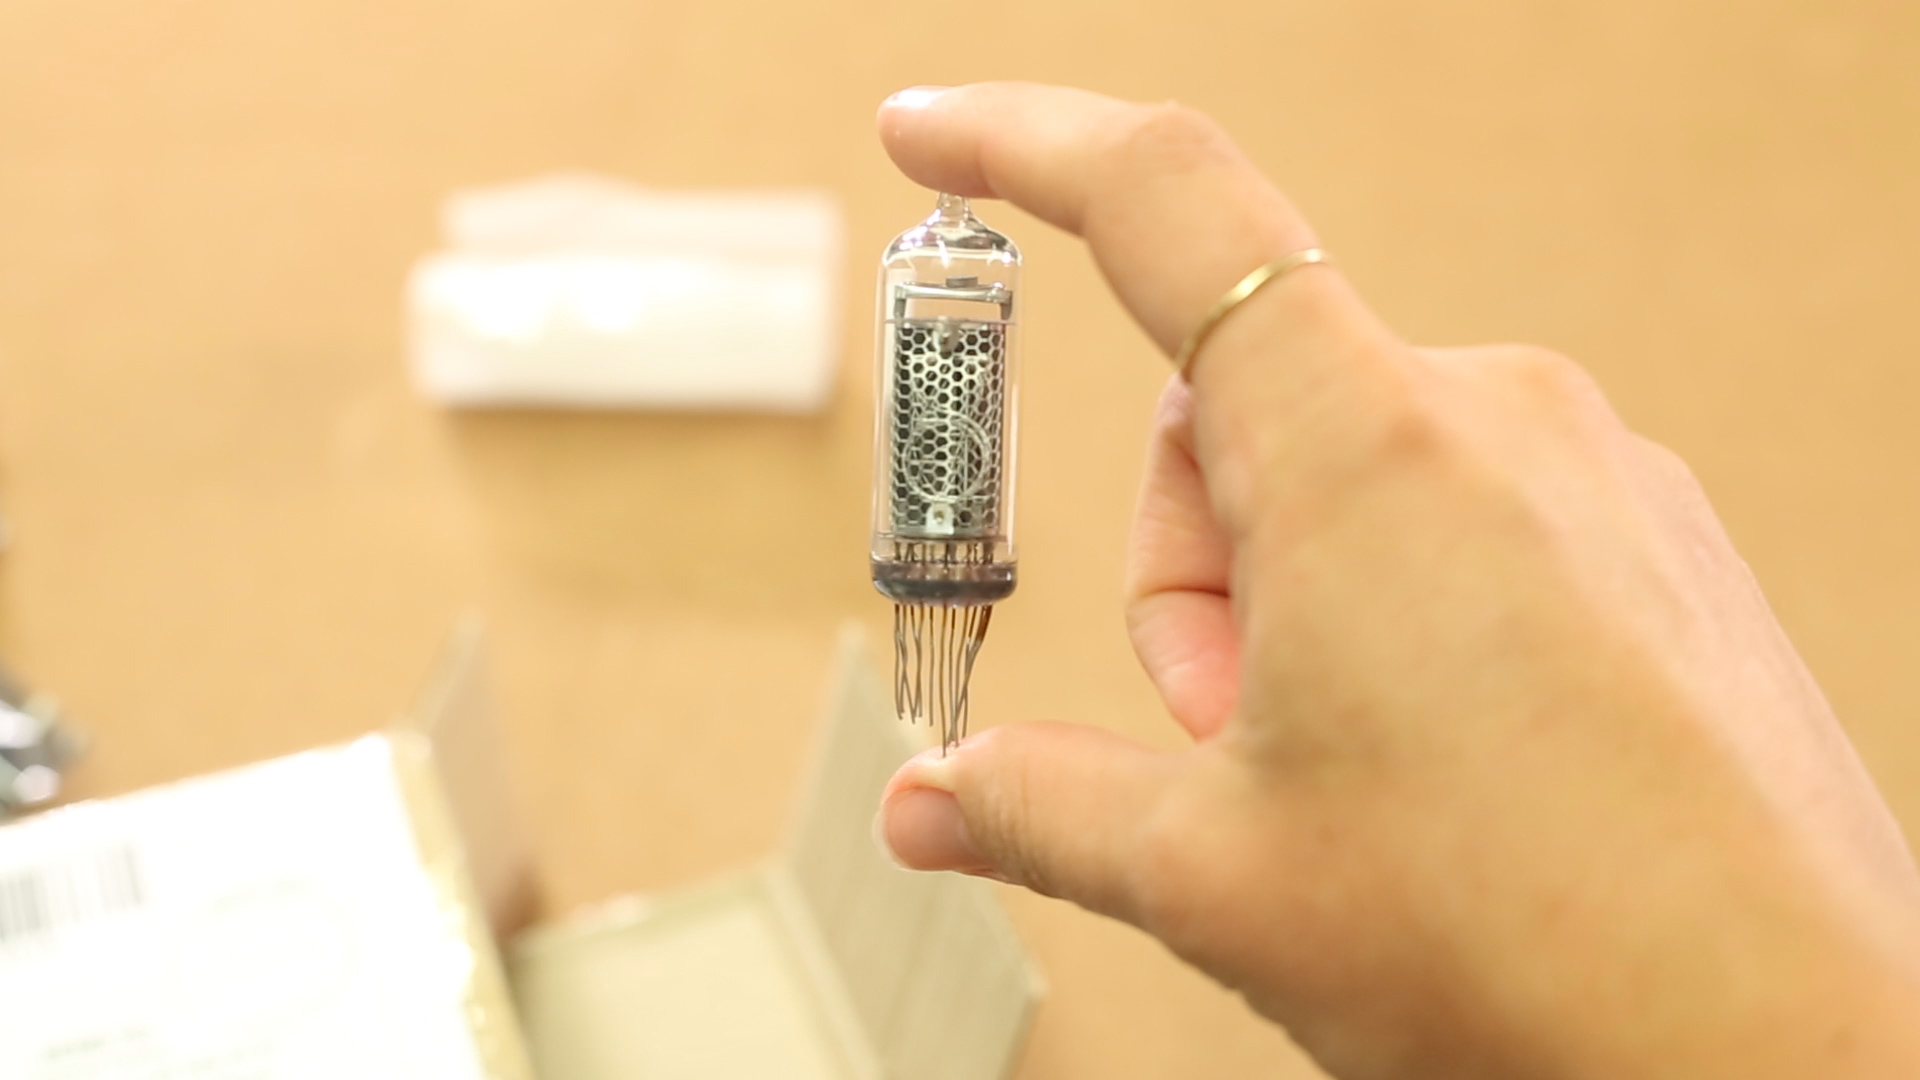
I’ve always liked the look of a Nixie Tube Clock. They are Cold War-era clocks (now seen as steampunk) with metal coils in glass casings. I decided I wanted to build one, but the pieces were harder to find than I anticipated. SparkFun doesn’t carry the boards or kits and it seems they’re only found in Eastern Europe on eBay. The glass tubes themselves are not being produced anywhere that I could find, so the only ones available were used from a seller in the Ukraine also off eBay.
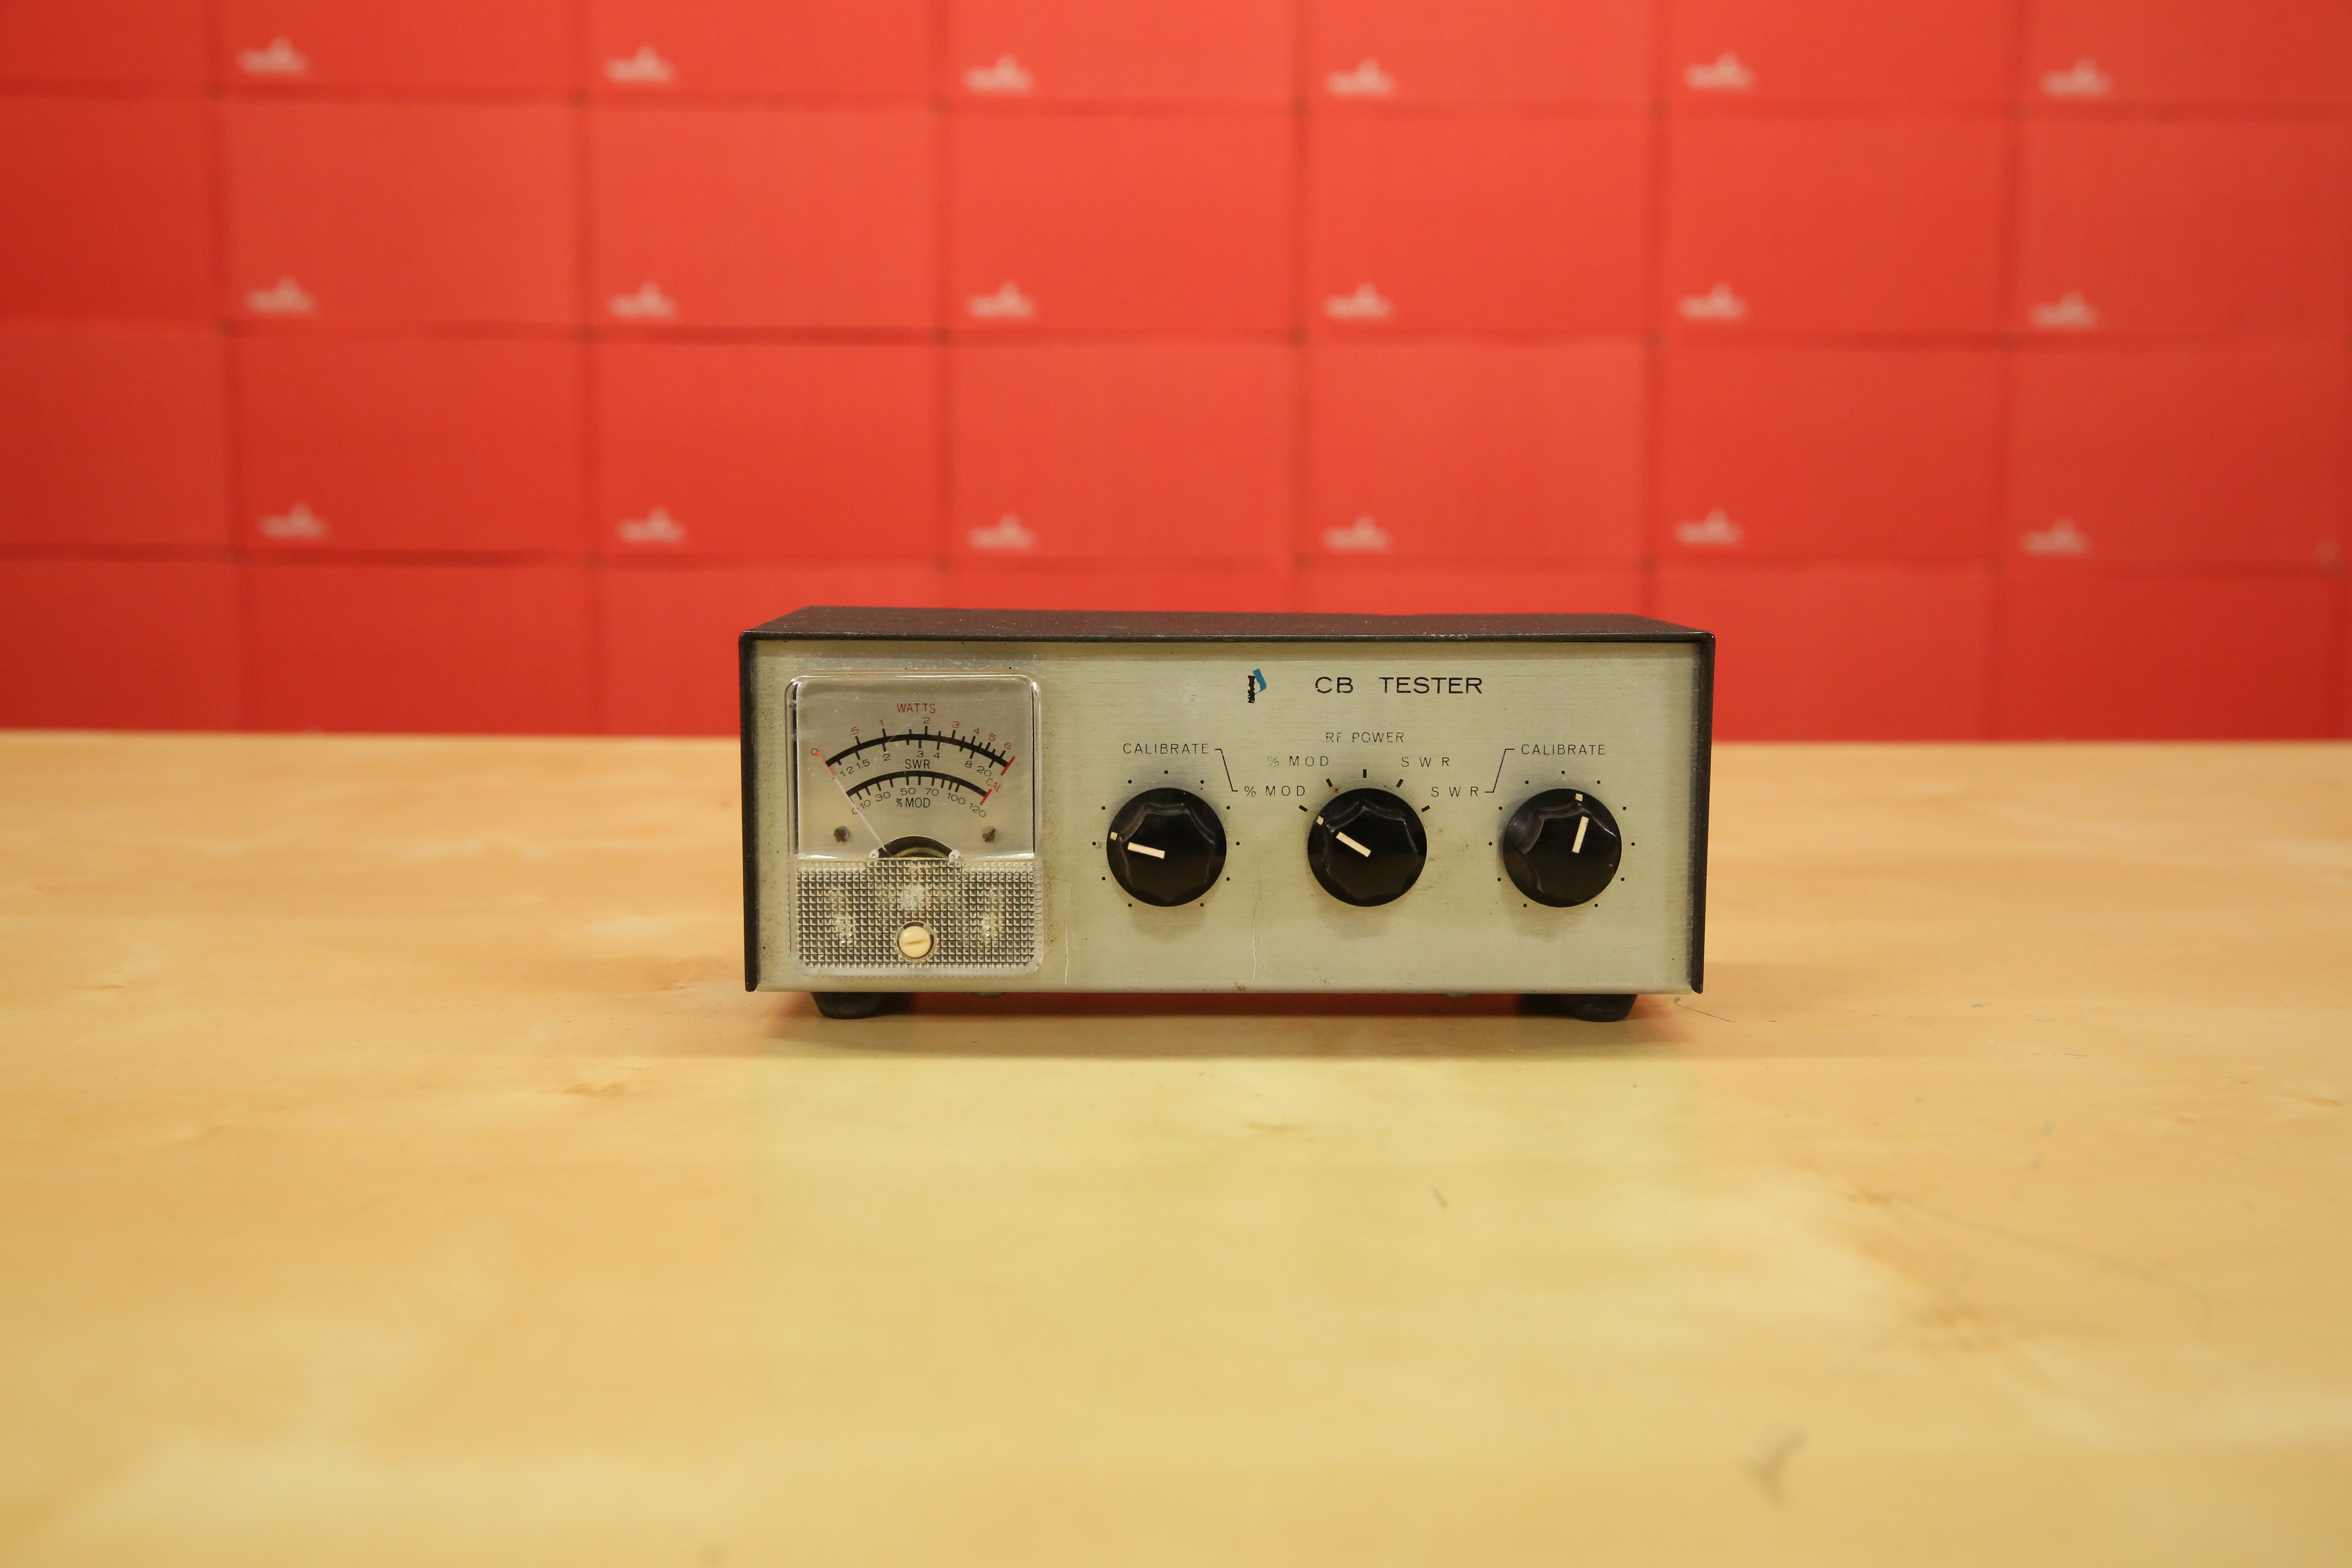
I wanted the base of my clock to be different, not a wooden or 3D-printed box, but something with gauges and knobs. I continued my eBay search and found an old CB radio tester from JCPenny for pretty cheap. I can’t find a date anywhere on this thing or on the internet, so if you happen to know, I am curious.
I made my eBay purchases and all the pieces made it to Colorado without any problems. The board fit quite nicely to the CB Radio Tester so we were off to a great start. I didn’t realize how many pieces really were involved, so this quick soldering job became a three-day build since I never had the time to do it all in one sitting and ran into a few problems.
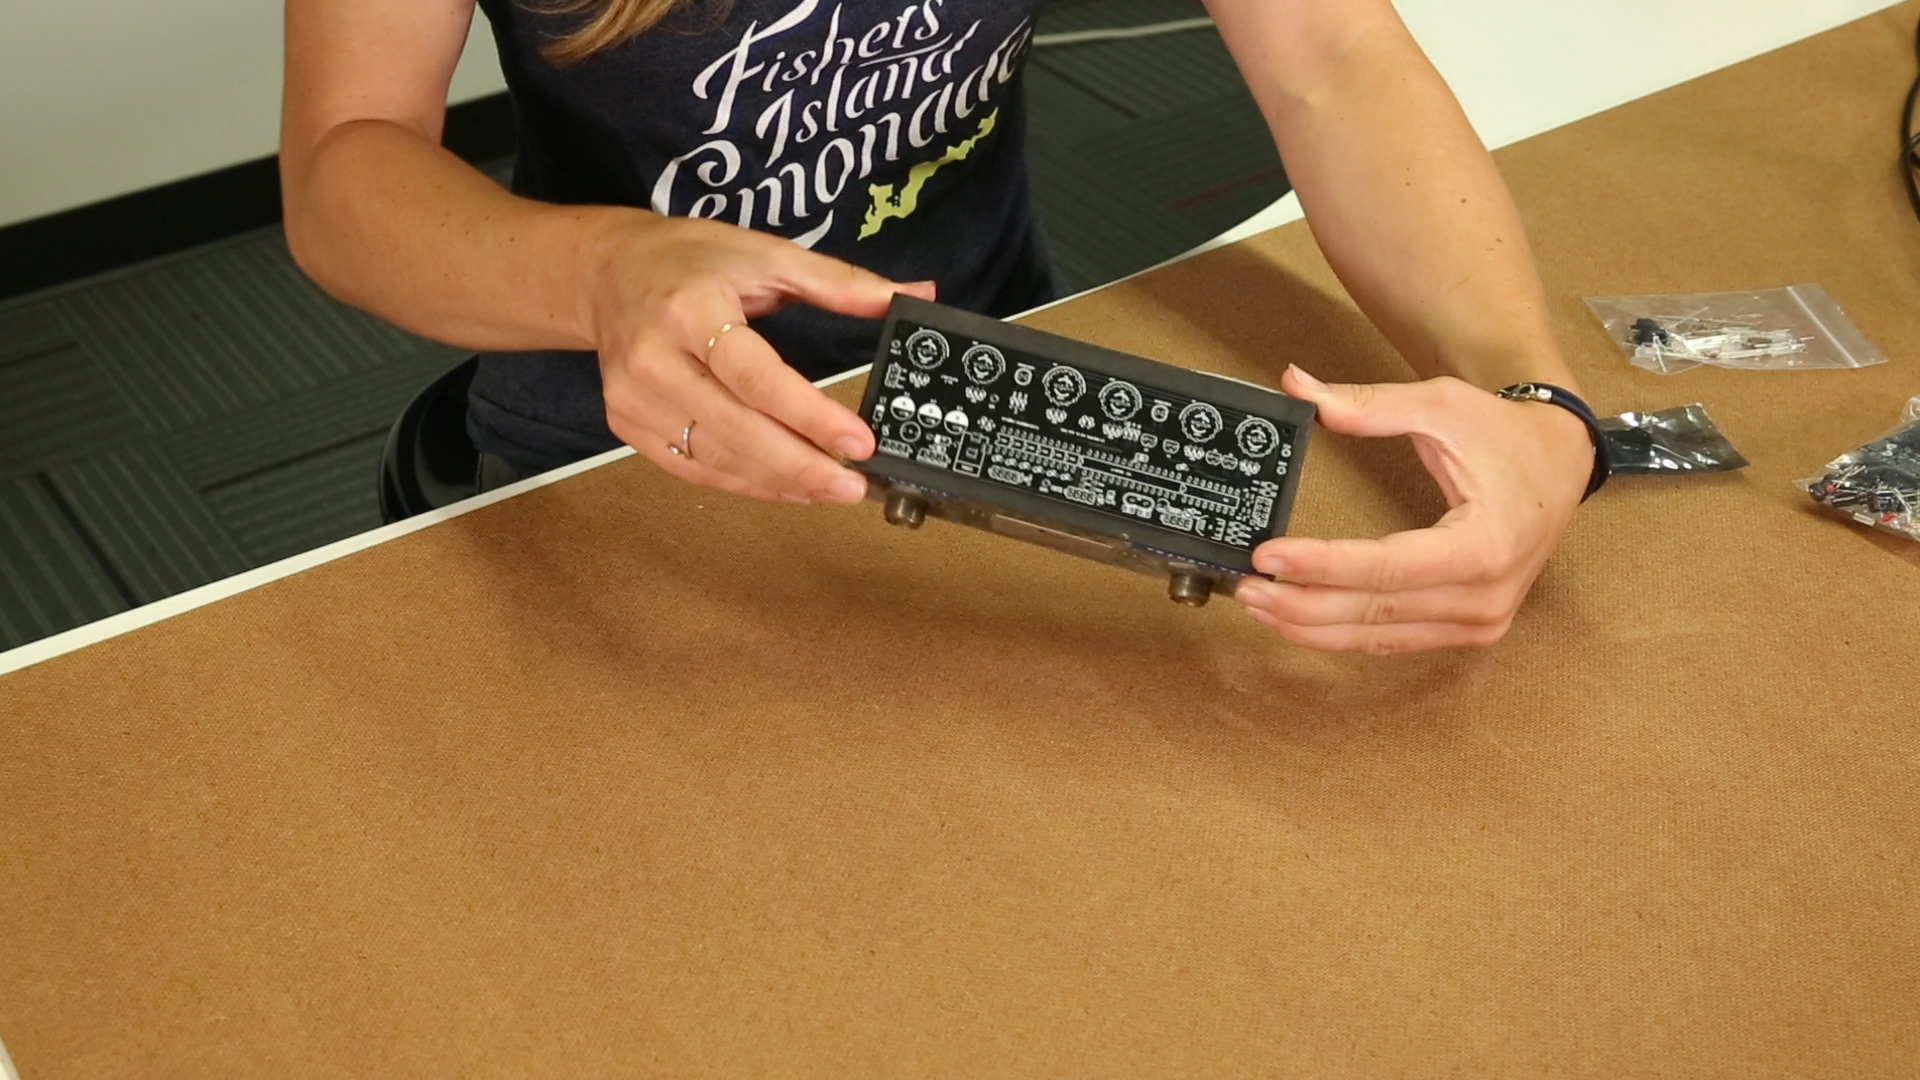
In the video, you can see that I ran into more than one problem. I am SparkFun’s video producer, so I have no engineering experience and this was really the first board I had ever soldered. A lot of this project was blindly following along with the hookup guide, with poorly lit pictures, and just hoping things would work out.
Generally, they did. I put a few resistors in the wrong place, but luckily Feldi caught that before I powered it up, so I learned the excruciating process of desoldering resistors and fixed the problem.
Next was soldering the actual nixie tubes to the board. This process made me want to throw it at a wall because the wires were never long enough to comfortably attach each tube. I spent so much time meticulously placing each wire from each tube in to solder with tweezers. I am not the most patient individual, so this process was more of a learning experience for me than anything in the build. If you choose to build one, I’d recommend getting some extra hands to hold them in place to solder. Six were soldered, but one is a little crooked and it will forever annoy me.
I got some help from a few other employees to teach me how to dremel out a rectangle in the metal base of the CB Radio Tester. No surprise – I messed that up the first time and didn’t make it large enough to fit the tubes, so it was back to the machine shop for more dremeling and filing, and finally everything fit together. I literally did a backflip in celebration (check the bloopers at the end of the video).
It’s not perfect, but I like to think it looks original and I am just happy I was able to build it. The hookup guide says it works on a 5V power supply, however the tubes don’t light up with their demo code unless it’s powered by a 9V. So I am constantly afraid it will explode at any moment when it is powered. To people who know how electronics work, I understand that this might be an irrational fear, but you should see my soldering job. Yeah, that thing will explode eventually.
This is where I am at in this build. Four of six tubes will cycle through the demo code; I'm unsure if that is intentional, and will find out once I upload the code to actually connect to the WiFi and work like a real clock. Four out of six is a win in my book, for someone who has never built a kit with Cold War-era parts.

Nixie Tube Clocks are known to not last very long when powered, so I might just keep it as a novelty on my desk and turn it on if someone asks about it during a tour or something. It was strange filming myself for this and trying to build something from scratch, but everyone was happy to help when I needed it and that was really cool to have during this process.
For now, check out the video, watch more videos on our YouTube channel so it looks like I am doing my job, and forever hope this clock won’t blow up and burn down SparkFun.


+1 Geek Cred!
https://www.daliborfarny.com/r-z568m-nixie-tube/ - $145 is a lot for a nixie tube - but check out the size: 50mm digits in a 125mm package. That's a big tube! Looks like he has a 6 month order backlog.....
Congratulations on completing your first kit. You picked a challenging one and the result looks great. I built Heathkit Nixie (actually neon Panaplex) clocks back in the 1970s. They too looked great. I was never able to do a backflip like you when the kits worked however.
Your CB Tester packaging is brilliant. I can't tell, but it looks like that opening for the Nixie tubes in the top of the CB Tester is uninsulated. Those Nixies need a couple of hundred volts to run, so I'd recommend some insulation to line the metal slot in the top of the box. Ideally, Sparkfun has some ribbed nylon edge trim specifically designed for this. Sometimes the stuff is called grommet edging. In a pinch, you could use electrical tape but the edging would be better I think.
Many people still love the retro look of Nixie tubes. Your base with the knobs and analog meters adds nicely to the retro look. I have an old HP counter with Nixies and an oven-stabilized frequency reference, which goes all the way to... wait for it... 1.1 MHz. Wow. You have inspired me to get it out of storage and see if it still works. Here is a good Nixie historical summary: https://en.wikipedia.org/wiki/Nixie_tube. The tubes are still being made, at least one place in the Czech Republic by Dalibor Farny. You can get a set of 6 -- for $870 or $145 each. They are a work of art: https://www.daliborfarny.com/r-z568m-nixie-tube/. Here's a clock kit on Tindie for only $50 including the Nixies: https://www.tindie.com/products/RobG/msp430-nixie-clock-kit/. Sadly the "arduino compatible" Nixie digits, long on my wish list, sold by dfrobot, are now discontinued. They looked cool: https://www.dfrobot.com/product-738.html.
Hi Cassy!
Great project, and as I'd expect from you, great video!
I remember using instruments in the mid-1970s (when I was working in an electronics factory) that had Nixie tube readouts. IIRC, the very earliest digital instruments used vertical columns of neon bulbs to indicate the value read, but these were fairly quickly replaced by using Nixie tube readouts (they were much more compact, and easier for a human to read, than the columns of neon bulbs). By the mid-1970s seven-segment LED readouts had completely replaced Nixie tubes in (then) "current production" digital instruments, but there were still places where the old Nixie tube readouts were preferred, mainly because you could easily see "jitter" in the readings (for instace, if the reading is 8, but for a few mSec is either 7 or 9, you'll never see this on a seven-segment readout but unless you happen to be in full sunlight, it's pretty obvious on a Nixie tube that there's a slight glow on the 7 and/or 9 element).
Again, IIRC, U.S. made Nixie tubes were mostly designed to plug into sockets (as were virtually all tubes) for easy replacement, but being fairly simple devices (glorified neon bulbs), andj not being dependant upon a "hard vacuum" or a heater element, were very reliable. (I don't recall one ever going out.). Like most technology of the time, Soviet-block nations "reverse engineered" U.S. designs, but for many reasons tended to not have the quality of U.S. made parts. (This is probably part of why folks see such high failure rates with "legacy" stuff coming from eastern European countries today.). (To give Soviet engineers due credit, though, they did develop vacuum tubes far more compact than anything we had at the time, including ones about the size of the eraser on a wooden pencil.)
I've been "doing" electronics for more than 50 years, and am still nervous about any "unproven" design. There's actually a term to describe powering up for the first time -- it's called smoke testing, and for good reason! ;-)
Anyway, thanks again for sharing, and I sincerely hope you'll do many more projects over the years! I'm hoping, too, that you'll be an inspiration to other young ladies to try their hand at something electronic. ("Young" being defined as anyone who doesn't have first-hand memories of the U.S. Civil War!)
Oh, by the way, I'd guess that the CB tester comes from the mid-1970s. CB radios were very popular during that time period, thanks to the gas shortages and the 55 MPH speed limits.
I love the head bang when you realized the tubes wouldn't fit through the case lid. :-)
Great job!