What the Python Sees
Let's face it, as much as we love Arduino, there are some things it just can't do. To branch out, let's take a look at a little bit of Python.

There are many things for which microcontrollers, like the Arduino, are perfect. Sensing, blinking, automation - all of these can be done with a reasonably simple sketch and return perfect results. As someone with a strong background in mechanical engineering, microcontrollers were perfect for many of my builds that needed motion, lights or a way to sense when an object got too close. But I knew there was a whole new world out there I hadn’t even touched. If I wanted to branch out, I was going to need to delve into the world of Python.
Where to begin…
There are myriad options out there for dipping your toes into the wonderful world of Python programming. I opted for Rice University’s Introduction to Interactive Programming in Python, through Coursera.org. It’s a great online course (although it’s now been split into two separate courses), and it certainly helped get my brain out of its C+ only programming mode. The professors keep it interesting by making every project a game of increasing complexity, so even the peer reviews you do are interesting and fun. All of the programming is done through an online Python programmer called Codeskulptor, so there is a bit of work involved if you wish to port your projects to a stand-alone Python build, but I believe that issue is now covered in the course.
Okay, now what?
So what can I do programming in Python (and in my case, on a Raspberry Pi running Raspian GNU/Linux 9) that I couldn’t do on an Arduino? The first thing that came to my mind was that I could see things! Yes, I know, you can use sensors with your Arduino to detect objects, or temperature changes, or even different gases. But I’m talking about vision here! Hook up a camera to your Raspberry Pi, run a short, simple Python script, and voila! You’re seeing what the camera is seeing! You can use the Pi Camera, or you can use any USB webcam. So let’s start there.
If you’re using the Pi Camera, you’ll simply plug its ribbon cable into the camera port on your Raspberry Pi.
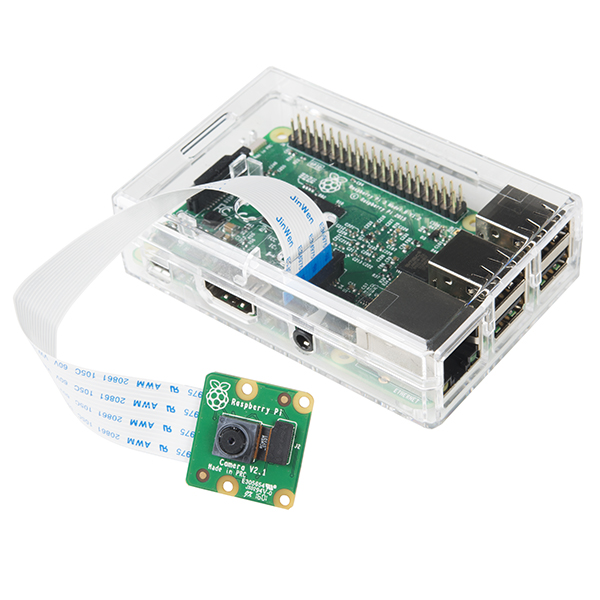
Pi Camera ribbon in the RPi 3, with optional case. Note the orientation of the ribbon cable when installing it.
Then, boot up your Raspberry Pi. From the terminal window, run:
$ sudo apt-get update
and:
$ sudo apt-get upgrade
Finally, run:
$ sudo raspi-config
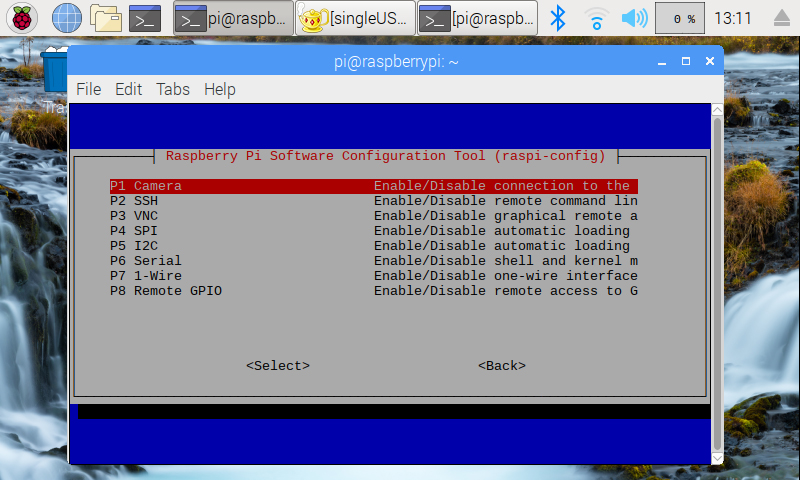
This will bring up the Raspberry Pi Software Configuration Tool. Scroll down to Interfacing Options, then make sure that your Camera is enabled. You can then exit out.
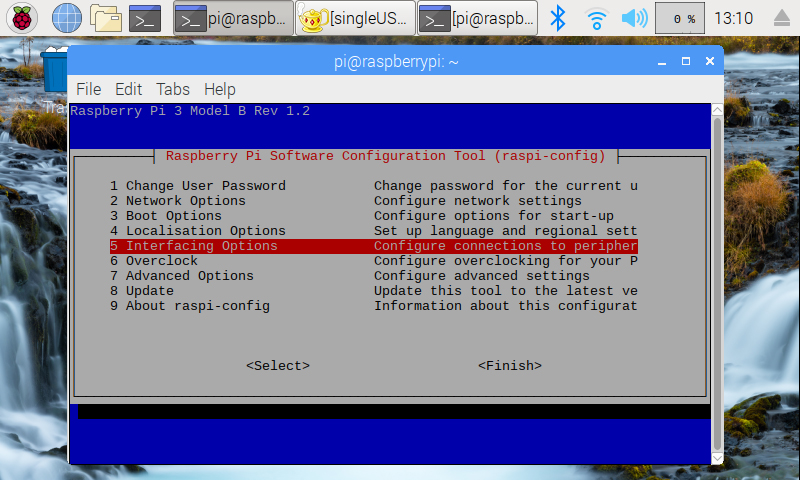
Note that your camera may already be enabled, but it won't hurt to check
Testing the camera is incredibly simple, with just a few lines of code in Python. I’m using Geany, but any decent programmer will work. A simple ten-second test can be run with this tasty morsel:
from picamera import PiCamera
from time import sleep

camera = PiCamera()

camera.start_preview()
sleep(10)
camera.stop_preview()
Save this as Camera_test.py, or some other catchy name. Then run it either from your terminal window, or directly from your programmer, if that's an option. The sleep(10) acts similar to the delay() command in C+ that you're probably used to from Arduino programming.
But what if you don’t have a Raspberry Pi Camera? Well, good news: You can also use a regular old USB camera. Plug in your USB camera and reboot. Before we can run USB cameras, we’ll need to add openCV and numpy for Python. From your terminal, run:
$ sudo apt-get install python-opencv
and:
$ sudo apt-get install python-numpy
A quick reboot, and you should be good to go. For a quick camera test, try this short Python code.
import numpy as np
import cv2

cap = cv2.VideoCapture(0)

while(True):
    #This captures the frames
    ret, frame = cap.read()

    cv2.imshow('Camera', frame)

    if cv2.waitKey(100) & 0xFF == orf('q'):
        break

cap.release()
cv2.destroyAllWindow()
I have to assume that whoever created the destroyAllWindows command had a penchant for old monster movies
This will bring up a window showing the camera feed. To exit out of it, simply press "q."
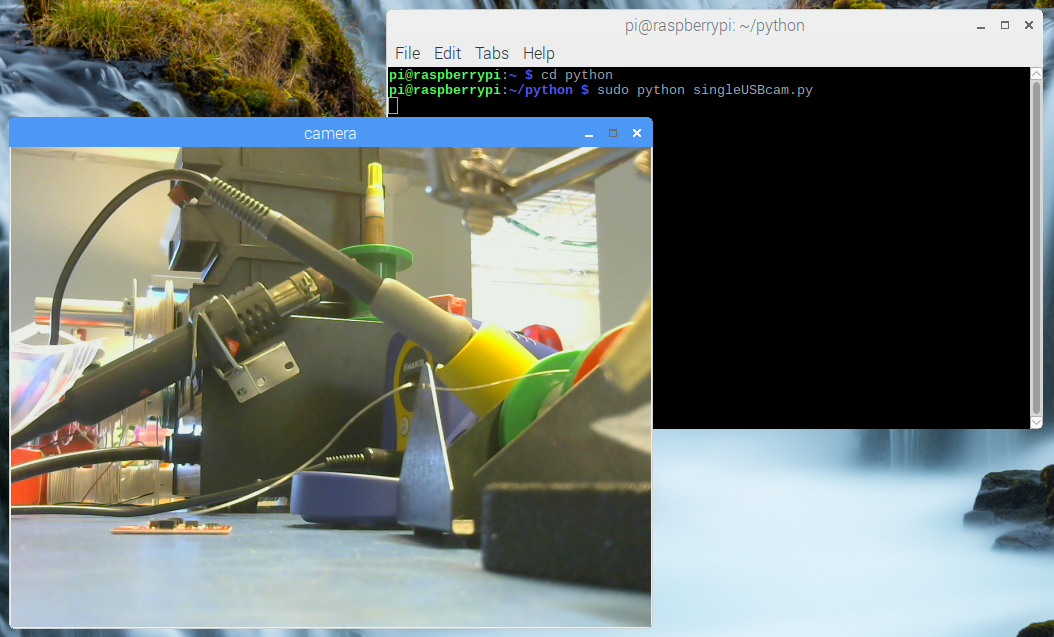
The view from the webcam I plugged in and dropped on my workbench
One of the nice things about openCV (and there are many nice things) is that you can take feeds from multiple cameras at once! Oh yes, my friends! By adding only a few additional lines, you get multiple simultaneous camera feeds! Try this:
import numpy as np
import cv2

cap0 = cv2.VideoCapture(0)
cap1 = cv2.VideoCapture(1)

while(True):
    #This captures the frames
    ret, frame1 = cap0.read()
    ret, frame2 = cap1.read()

    cv2.imshow('Camera 1', frame1)
    cv2.imshow('Camera 2', frame2)

    if cv2.waitKey(100) & 0xFF == orf('q'):
        break


cap0.release()
cap1.release()
cv2.destroyAllWindows()
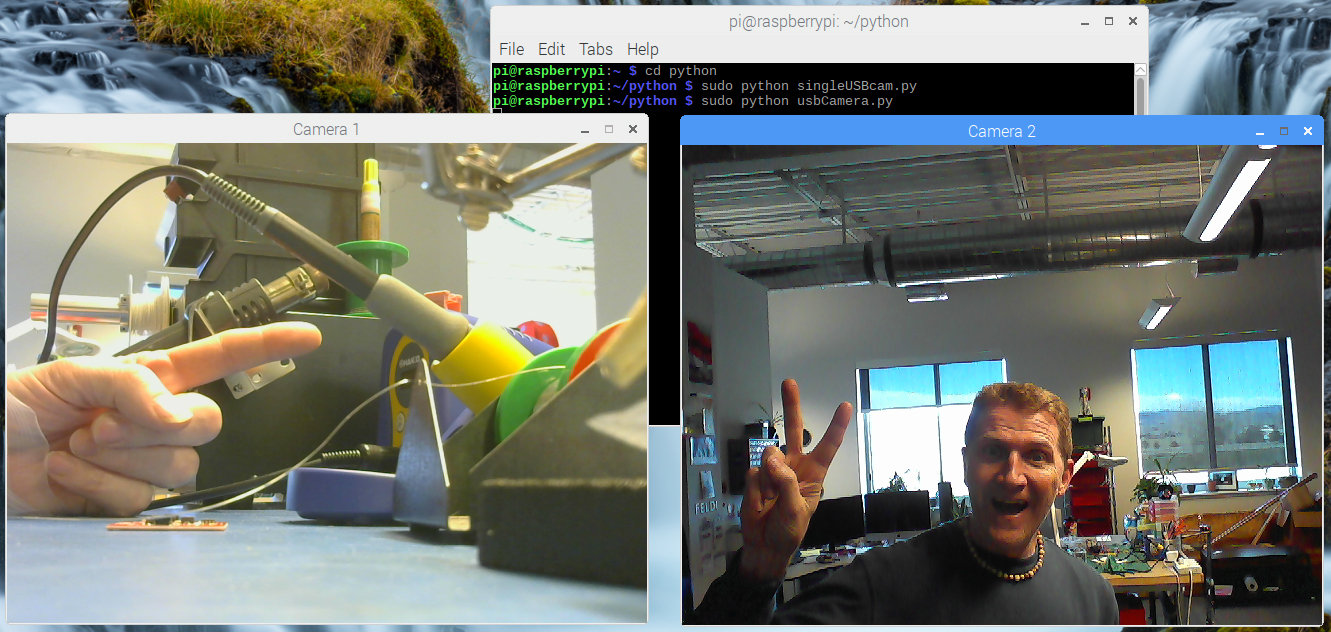
Two cameras from one Pi, and there's no reason you couldn't add more!
I did notice a bit of lag and choppiness when running multiple cameras, but I was able to reduce both by lowering the frame rate. After defining cap0 and cap1, I set the frame rates for both cameras to 15 by adding the following lines.
cap0.set(cv2.cv.CV_CAP_PROP_FPS, 15)
cap1.set(cv2.cv.CV_CAP_PROP_FPS, 15)
So what's next?
Okay, so we can get live video on our screen. That's all well and good, but what can we do with that? Well, for starters, I now have a running rear-view cam, to reduce the possibility of sneak attacks at my desk (Nerf Wars are a real thing here, people!).
In the future, I will be working on (and posting about) motion detection, motion detection with image capture and email/SMS notifications (who's on my front porch at two in the afternoon?), color detection and differentiation, object tracking, object tracking with accompanying Nerf sentry and much more. But you don't have to wait for me. Grab your Raspberry Pi, a camera and start something! (Right after you vote!)


I am new to python. I want to learn it.
Well you are in luck! Have a look at our Python page and maybe that will get you going. Also, if you feel we are missing anything to get you started let us know and we may be able to cover it.