From the Field: When the Space Robots are Away...
We get by with a little help from our friends, specifically Sam Povilus.

Over the next few weeks, we’ll be letting some of our customers take over the blog to talk about how they use their favorite SparkFun tools and products in their projects, businesses and everyday lives. The best part? All the SparkFun items on their wishlist will be on sale today only!
I’m Sam Povilus. I work at Ball Aerospace and I am a long time customer of SparkFun. Professionally, I write software for space robots, either for testing or actual on-orbit operations. A vast majority of my time is spent making sure that my software or others is going to work all of the time. With the space shuttle no longer in operation, the products I make cannot be touched by human hands once delivered. That means our software is the only thing that can be changed, so it has to be perfectly reliable.
As you can imagine at work I do a lot of very intense, frustrating tasks, so when I come home I don’t really want to deal with the nitpicky details, I just want a product that I can put together and have it work. This is where SparkFun comes in: I like knowing there are parts available for the projects I want to build, and the tutorials available to teach myself anything I need to know. I have made a number of things with SparkFun products that I am kind of proud of, and that sit around my house being more or less functional.
Sam's Wishlist (on sale today only!)
I should mention at this point that I am a huge fan of the Raspberry Pi, especially the Pi 0 Wireless. Easy access to I2C, SPI and GPIO on a platform that also has SSH access and Linux packages, and it costs $10, making it my favorite “edge node” (I am not an IoT engineer and find the concept foreign, but I think this is the right term, feel free to correct me in the comments). I own a totally unreasonable number of them.
Here’s a collection of some of the projects I've worked on at home:
Linux patch
I used an SSOP to DIP adapter to work on and test my kernel patch. I ran into a problem where another engineer had picked out the ADS7828 and I had to make the software work no matter what. Thankfully we were using Linux and I had a number of options when it came to interfacing with it. The simplest for me was to write a userspace driver that interfaced with the Linux I2C subsystem. That worked, but I wanted to go further on my own time.
A driver already existed for that part, but it wasn’t doing what I wanted (it didn’t allow for the use of an external reference). One of the things that my hardware engineer had done was use an external reference. The ADS7828 has a built-in reference, but it isn’t as accurate as using an external one. In most applications the internal reference is fine, and when I started looking at the code it appears that the driver did not support using it when initializing the drive with the device tree (this patch implied it did, and was extraordinarily misleading and cost me a lot of time).
I wanted to add the full functionality of the ADS7828 to the kernel, first so I could say I had submitted kernel code, and second so anyone in the future could use this part without the confusion I faced. To do this I need a platform for testing the driver, that’s where the SSOP to DIP adapter came in. This tiny, $0.95 part made it possible for me to get that code into the kernel. Without that I never would have been able to create a test setup that made me confident enough in the code to submit it upstream.
This is probably the project I am most proud of; getting something into the Linux kernel is kind of a pain, both from a political and technical perspective. If you have a need for it there is a lot of information out there about how to do it, but the maintainers are (rightly) very strict about what gets into the kernel and how you must submit it.
Cat toy
I made a cat toy on a Raspberry Pi 0 Wireless using the SparkFun Pi Servo HAT and a laser module.
Is the Raspberry Pi overkill for this project? Absolutely. Is having NTP and SSH available so I can turn it on and off from my bedroom and automate timing worthwhile? Heck yeah. (It really pissed off my girlfriend when it went off at three in the morning and our cats played with it. Side note: Make sure you set up the timezone on your Raspberry Pi right or you are destined for an angry significant other). You can find the code here.
The cats played with it for about a month. They completely ignore it now.
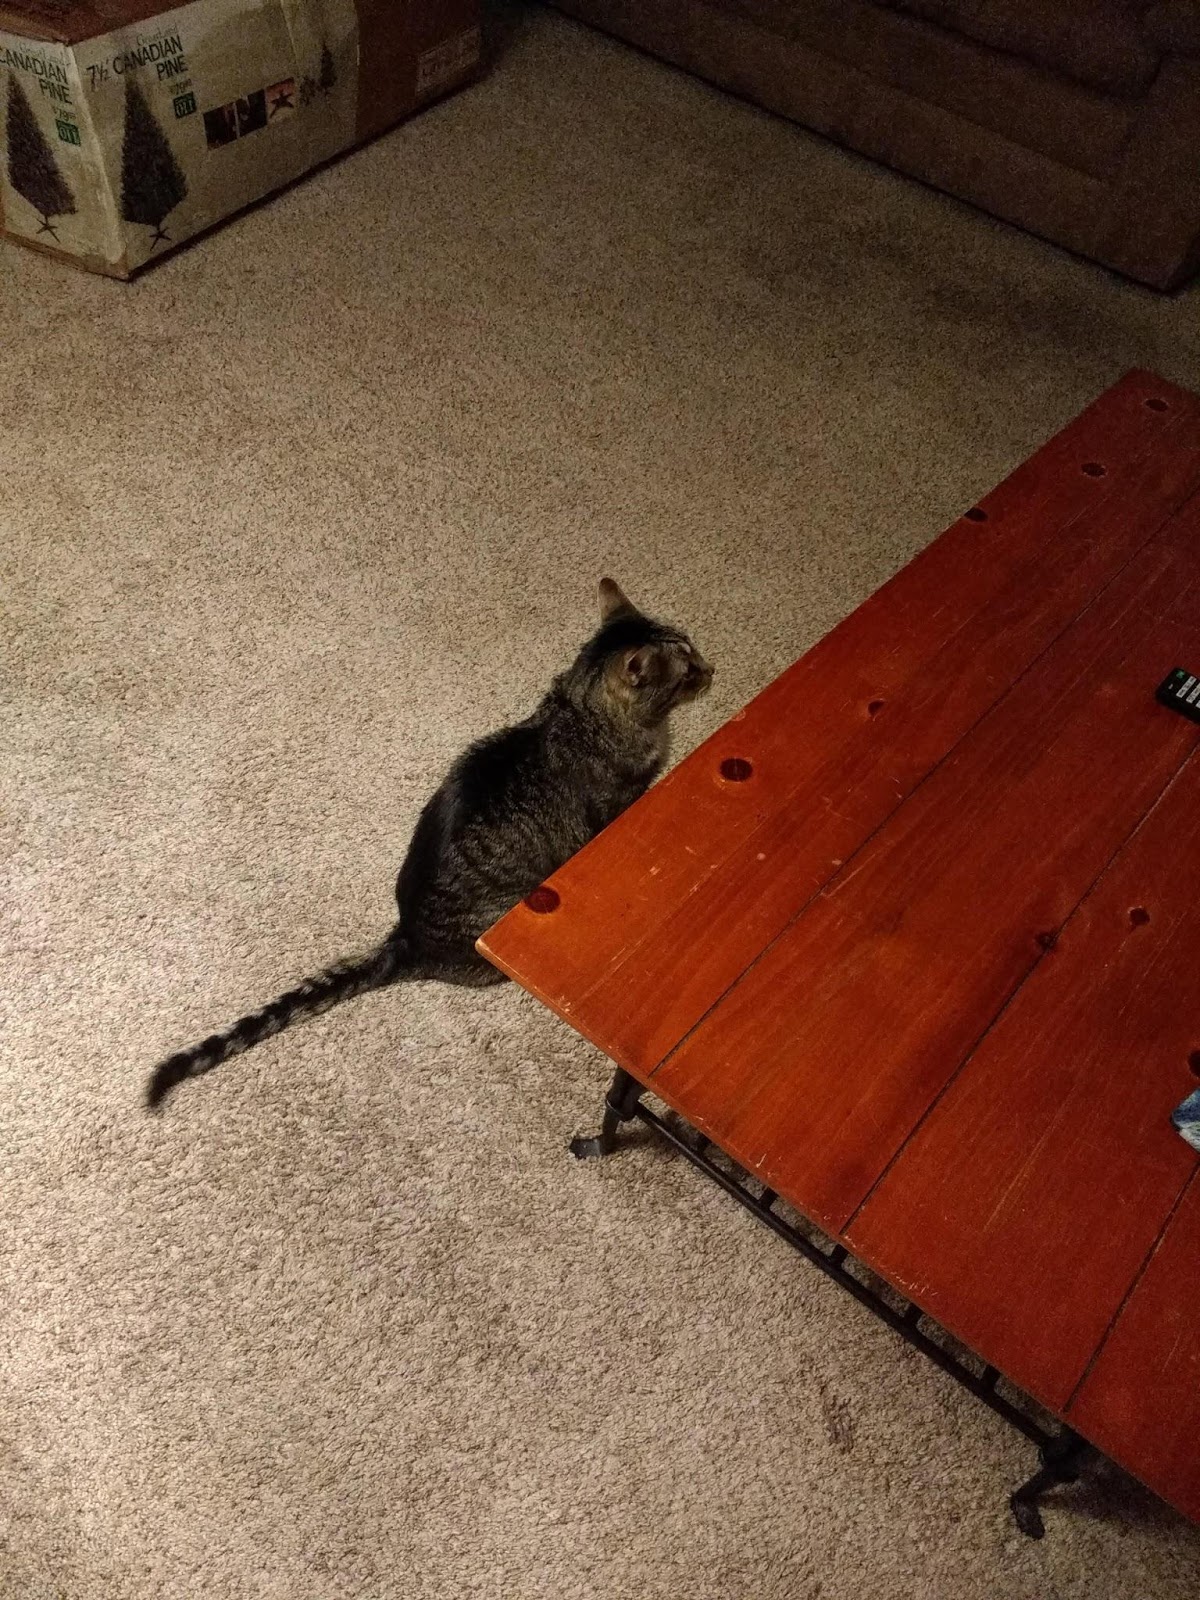
Cat ignoring laser, staring at the wall. There is nothing more interesting going on. He still doesn't want to play with it. Cats are dumb.
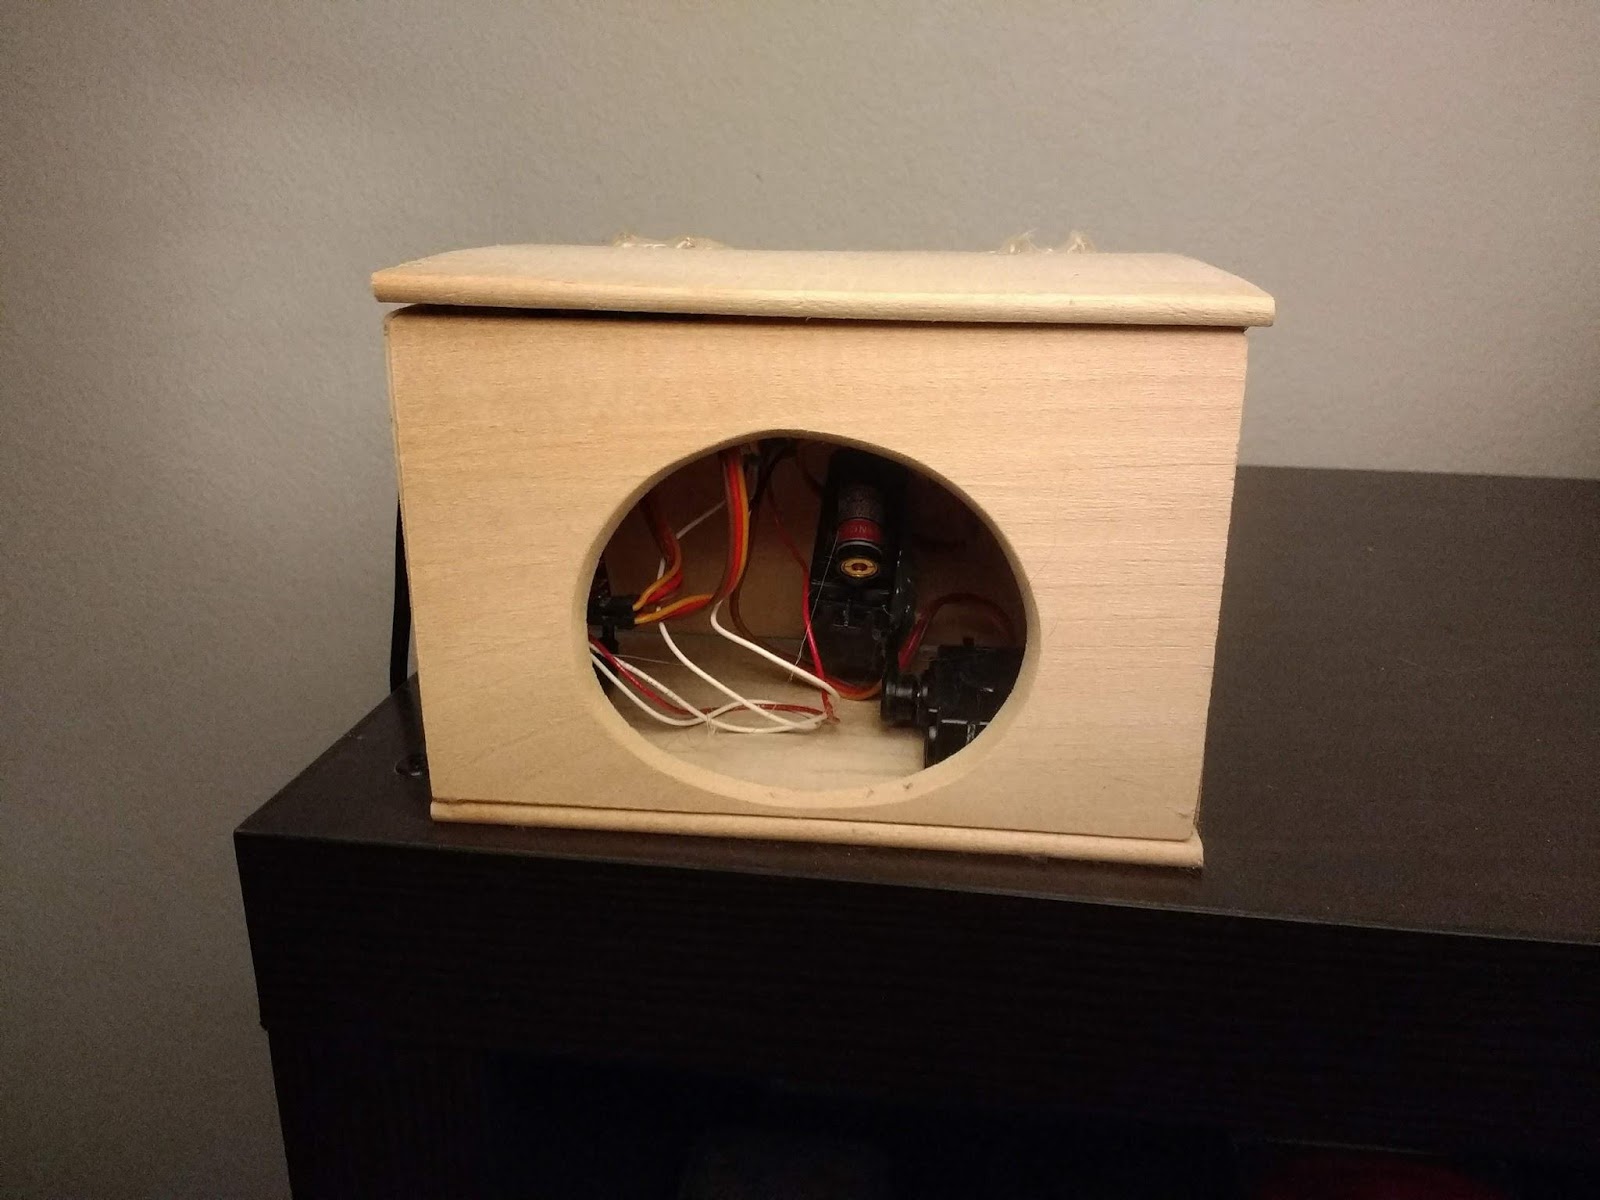
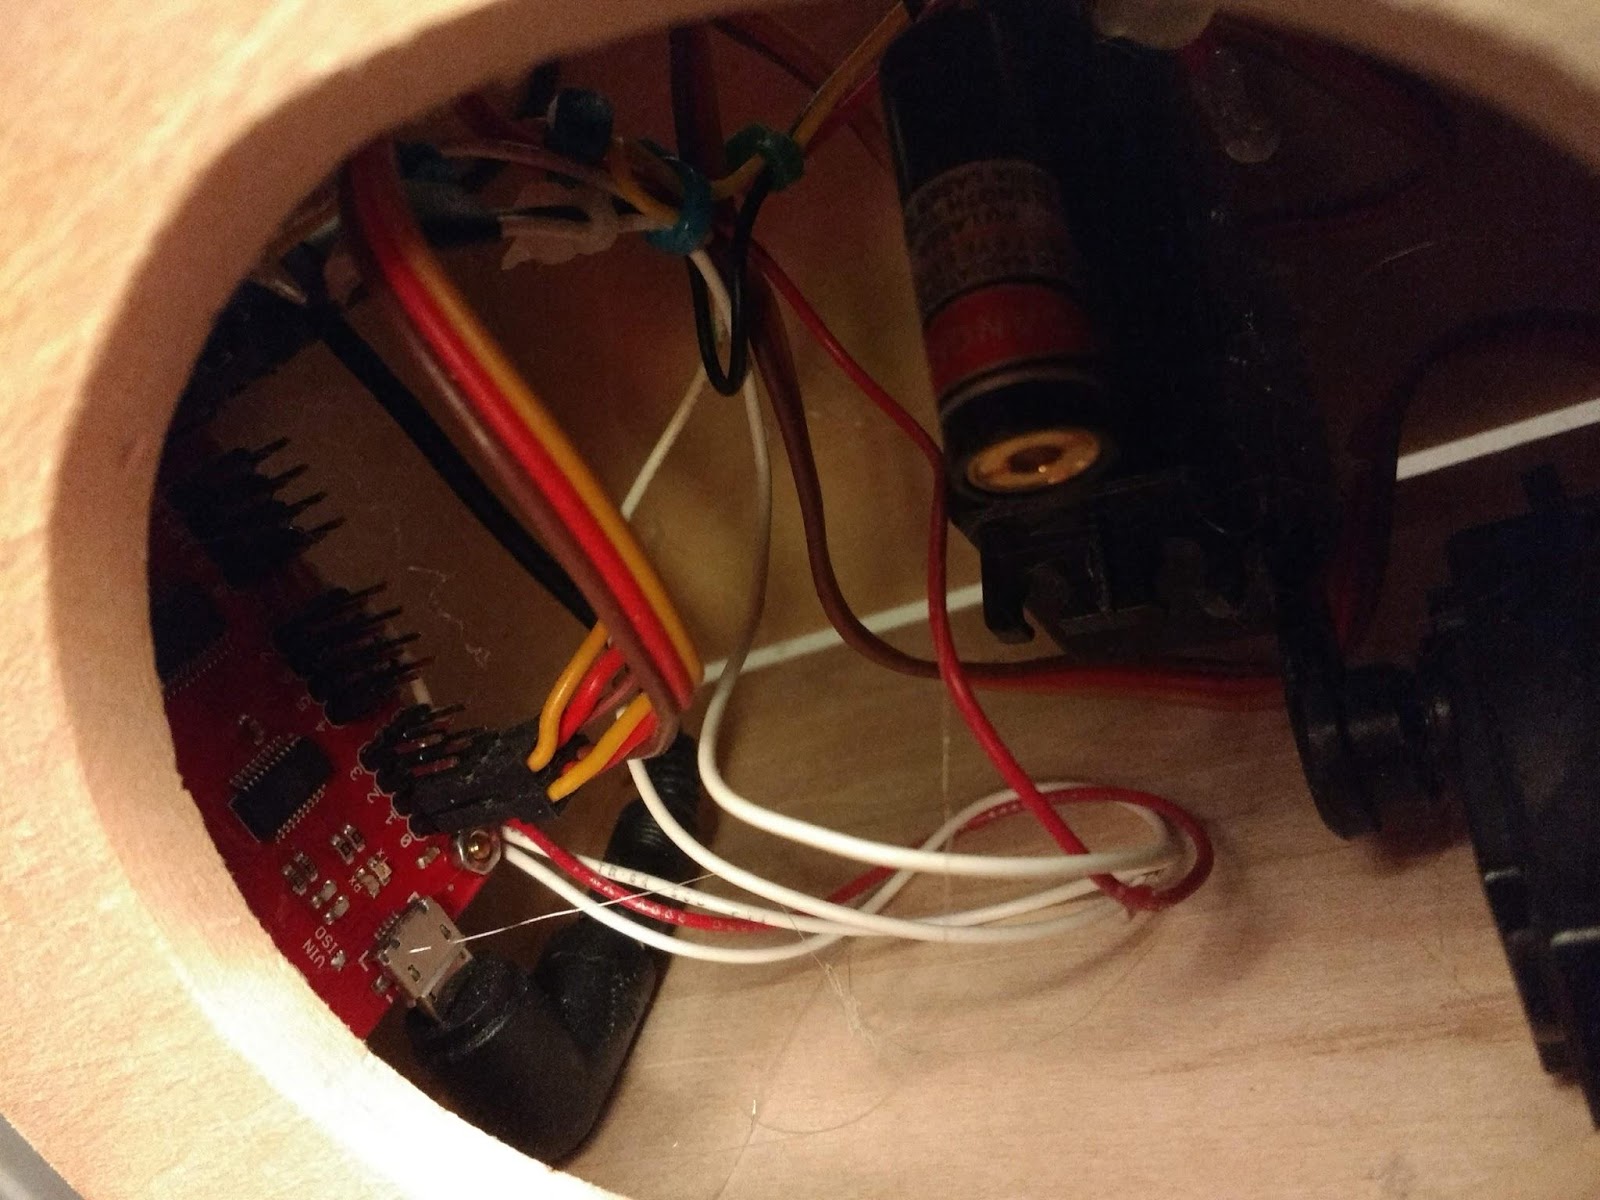
Laser toy and enclosure
Humidity/temp sensor
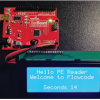
I live in Colorado and get really dry skin and nose bleeds in the winter. Accordingly, I wanted to log the humidity of my condo, just so I would know. I used a Si7021 breakout, a 3.3V Pro Micro (used a 5V RedBoard first and blew up my first Si7021 breakout; don’t make my same mistake, check your voltage) and a SparkFun 7-Segment Serial Display, along with a Pi 0 W. The neat thing about this project is it both displays the temp and humidity while logging it to another Raspberry Pi that runs a PostgreSQL server. I have another application that runs on my laptop (or anything with Python) and connects to that database server and creates a Django web page that graphs the humidity.
I was really lazy in that the way the Si7021 works, it doesn't lend itself to Linux use (it will hold the I2C bus, which makes Linux pretty mad), so I used the Pro Micro as an intermediary. You can find the code here, here and here.
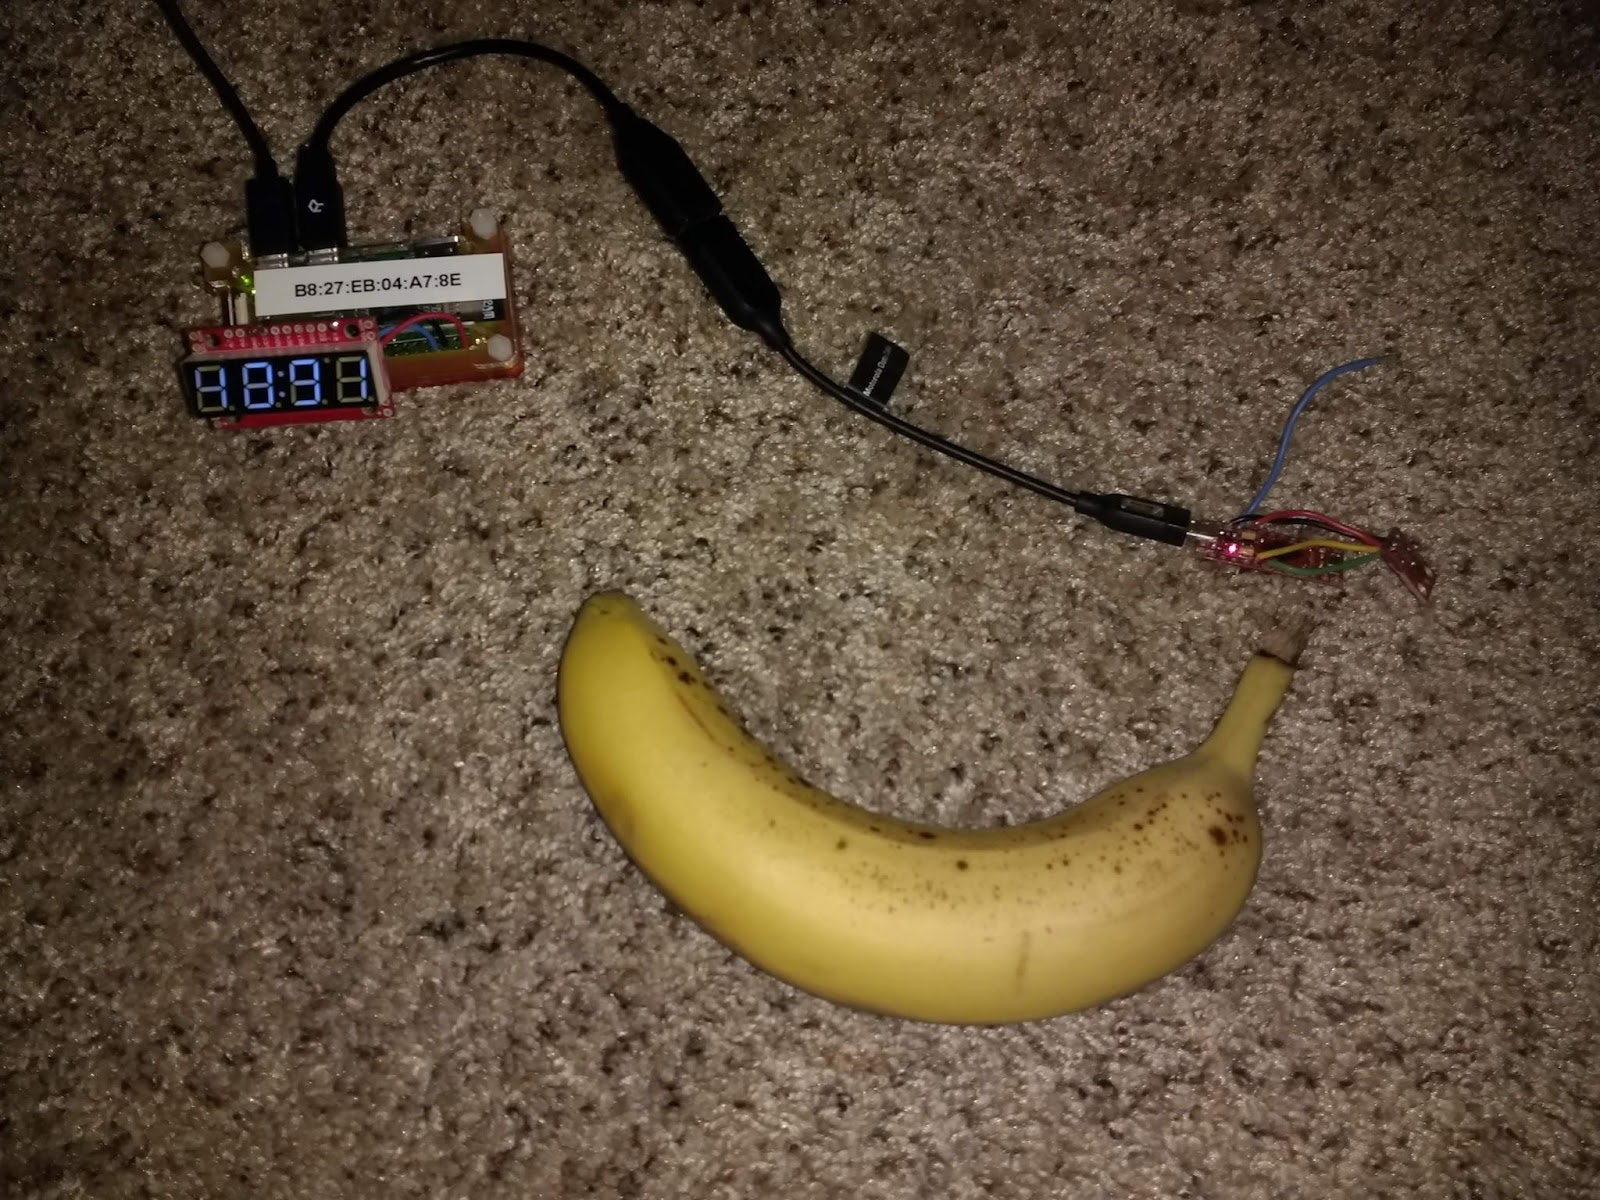
This is the whole thing. The blue wire is the reset wire on the Pro Micro. There is, in internet tradition, a banana for scale. I have something on the order of 20 Raspberry Pi’s in my house, so the MAC address is strictly necessary for identifying devices if the DNS self-reporting function goes down for some reason.
Garage parking sensor
I, too, wanted to make a garage parking sensor. I took a slightly different route than @ROB-24601 did here. I used a 5V Pro Micro, an Ultrasonic Sensor and a Lumenati 3x3. This code is still very much in development and not working.

You can find the code here. Feel free to respond in the comments with any suggestions to make this work, or ideas on how to get my cats to play with the toy I made them.
Special one-day pricing available to customer and guest checkouts only. Prices expire at 11:59 p.m. on the day each post is published.


Great post! One minor point, I had to look up on Digi-Key to find out that the ADS7828 is an Analog to Digital Converter (ADC), that happens to have 8-channels, 12 bit resolution, and is capable of 50 kHz sample rate (with an I2C interface).
Thanks for adding that. I just know it as "that thing I had to write a driver for" and have seen more of that datasheet than I care to remember, but most people probably don't have the same history with it as me :P
I built my parking sensor with a HC-SR04 ultrasonic sensor, ESP8266-12E (NodeMCU v3), and a RED/GREEN LED. I used the ESP8266 to enable it to post to a MQTT server the status of "parked" or not, and if changing from EMPTY to PARKED it triggers my internal entry light to turn on :)