
In April this year, my wife gave birth to our first child. It’s been an amazing experience to get to know a human that is brand new to this world. He’s surprisingly funny for a sack of flesh...

I'm not one of those baby picture spammers.
...and being a Dad is an awesome responsibility. On the flip side, it's also limited my free time in the evenings, leaving less time to make cool things. Luckily, my wife had a simple request: could I make a nightlight so that we can see in the middle of the night when we’re woken by the baby? Seems easy enough.
The Electronics
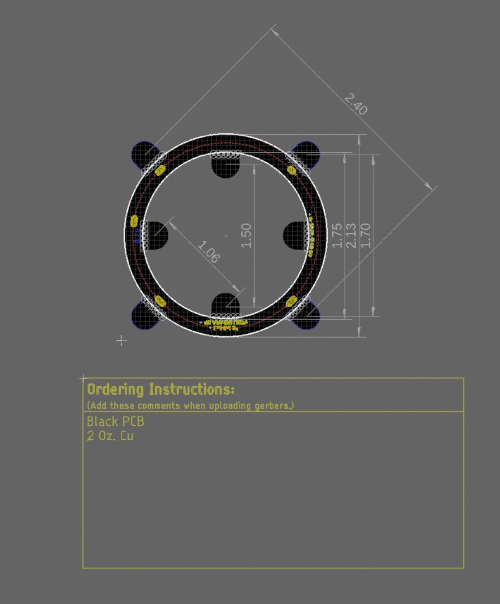
My wife sent me links of orbs that turned on when touched. It was an easy thing to recreate from parts I had sitting on my desk: the SparkFun LumiDrive, 2-Inch Lumini Ring, and the Capacitive Touch Breakout Board.
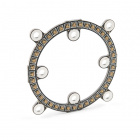

I prefer the SparkFun LumiDrive for LED projects because its USB-C connector can pull larger amounts of current than its Micro USB cousin, and the Poke-home connectors make it easy to connect LEDs. The Capacitive Touch Breakout Board is sensitive enough to be activated through acrylic, which adds a sophisticated feel to any project. However, I would have exchanged the LuMini ring for the cheaper round Lumenati LED board because I don’t need the 60 LEDs packed onto that board – I just need it to glow, Chernobyl style.
The Design
In an ideal world I’d be able to make a frosted acrylic globe, but instead I went about building a 3-inch tall cylinder that is flat on one side, by stacking layers of quarter-inch opaque white acrylic. Inside the base acrylic layer, I set about designing a cutout that fit the LumiDrive. The 2-inch LuMini Ring will sit on top of the base layer, illuminating up. The cylinder will be hollowed out with a quarter-inch wall to diffuse the glow. Inside and along the flat side of the cylinder, I will affix the Capacitive Touch Breakout Board facing outward. It would have looked something like this:
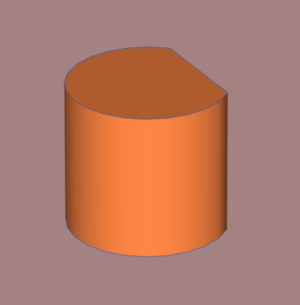
Good ol' Sketch Up
I was trying very hard to avoid making a box because it’s creatively uninteresting, but as I thought about it more and more, the quantity of acrylic required to stack layers for my initial design is much higher. Also, how would the light diffuse through the edge of the cut acrylic?
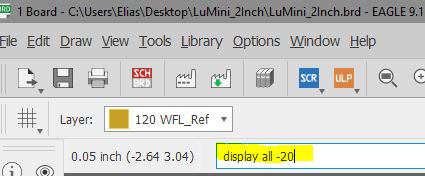
To do this quickly, I designed the layers directly in Eagle 9 using the board files for the electronics for the project. This is an easy way to get the exact dimensions of the electronics, and Eagle can export files to the dxf format used in all drawing and CAD programs. The process is rather simple: first grab everything in the schematic and delete it. You should be left with nothing but a black screen. Now when we look at the board file, type display all in the command line. It'll show all the things left over that were not deleted with the schematic. We'll use the Lumini Ring as an example:
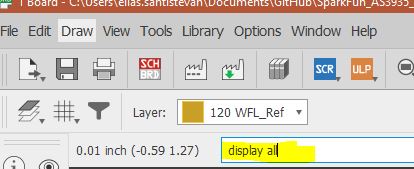
Display all
The last remnants of the board file
I want to keep the outline of the board, so typing display all -20 will display everything but the dimension layer, which is the outline of the board. If you group select everything, delete it, and then type display all one more time, all you should see is the outline. You could alternatively just turned off the other layers, but then you'll run into a layer you don't want overlapping a layer you do want.
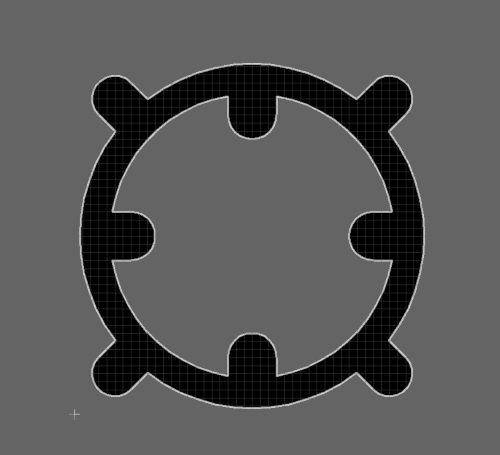
Just the Lumini Ring
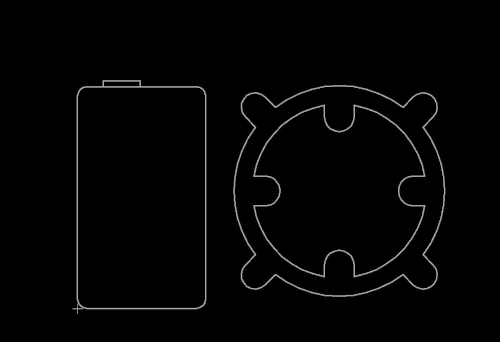
Collecting the outlines of the other electronics
After you combine all of them on one page, you can build out the design around the products.
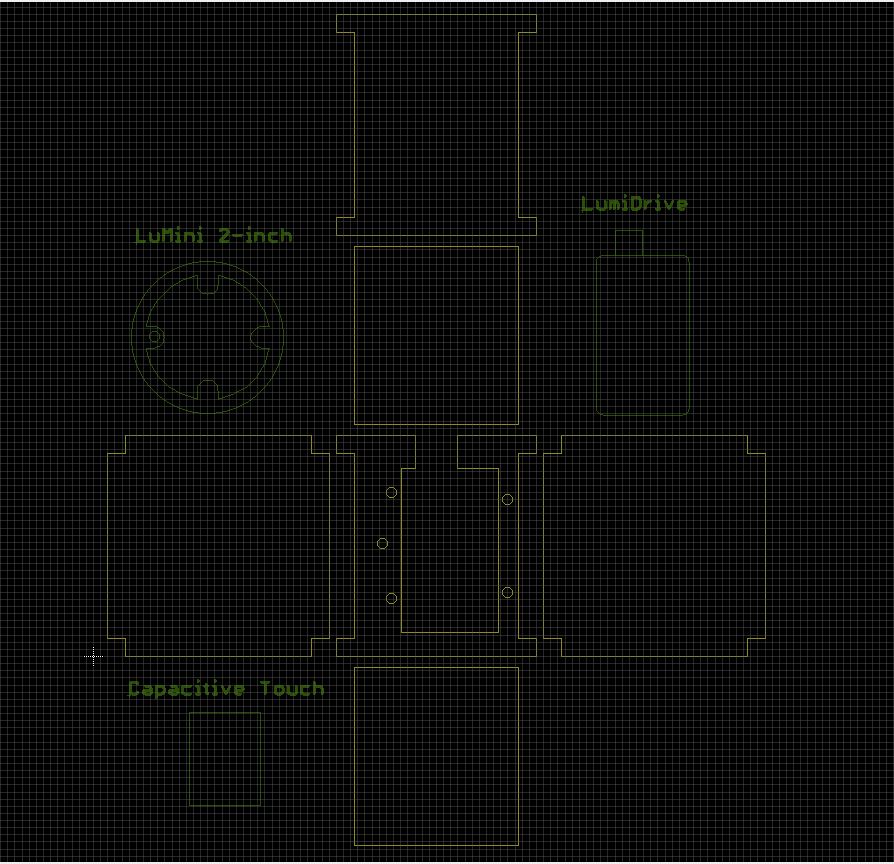
To export as DXF, keep in mind that it'll export whatever layer is active. I put my electronics on a separate layer than the box that would house them; you can see that by the different colors of the outlines in the image above. Make sure to only have the layers you want to export as your active layers. One other note, these lines need to be .001-inch width or less to get cut by a laser cutter. You can group select all of these lines and change their width at once. Now go to File->Export->DXF. You can keep all of the check boxes checked and in your board file folder a DXF file will appear.
Code
Below I’ve provided code written in Python and Arduino. It’s nothing fancy. I need the Capacitive Breakout Board to turn on and off the LEDs, dim when I hold down down the onboard button D6, and that’s it! I found that it's not possible to modify the brightness with the DoTStar Library for Circuit Python, so that was omitted.
Assembly
I had two options: glue or long screws. I decided on glue so that I could have a sleek looking outer layer. After assembling the acrylic box, attaching the electronics and uploading the code, it looks good - radioactive even.
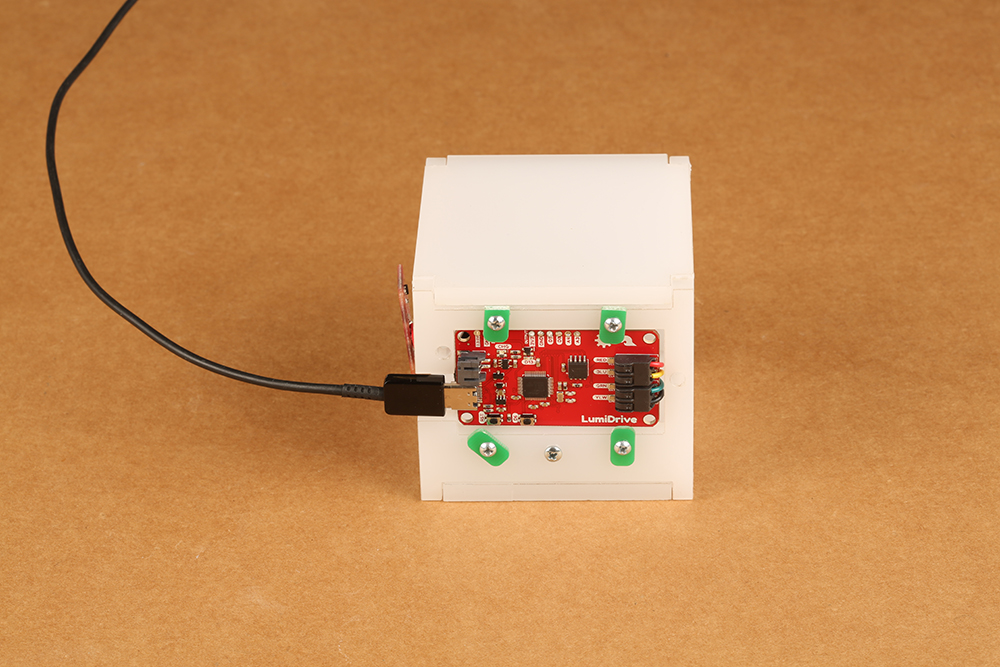
The underside. I wanted to see the LumiDrive and get to the D6 button.
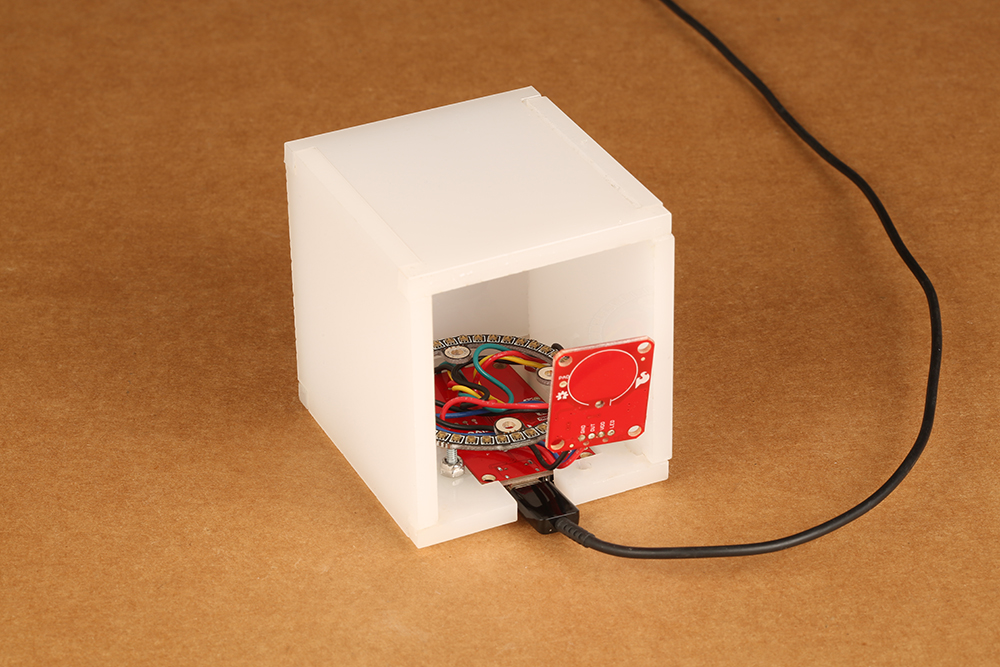
LumiDrive facing down, LuMini Ring on top, Capacitive Touch Button ready to rest against the backside
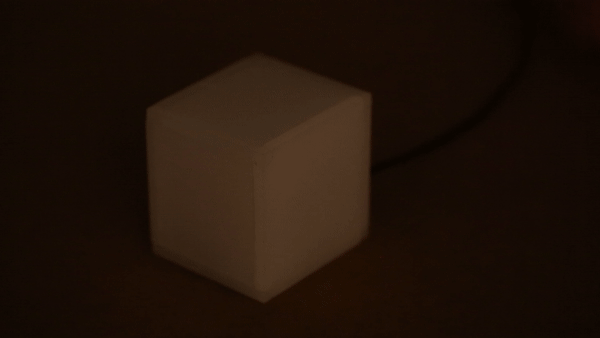
Nice warm glow
If you want the design files, both Eagle and the DXF, you can download them from the link below.
Improvements
I wish the Capacitive Touch Slider had been out when I was making this project; it would have given me access to dimming up and down, as well as three different buttons for different color options. That would have meant that I would have to use a different microcontroller, because I didn’t design a Qwiic connector into the LumiDrive for some reason. It would make sense, since I’m not taking advantage of the USB-C on the LumiDrive, but if I wanted to put in a disco mode, well then I’d be sorely missing that USB-C connector. Also, why didn’t I design a lid?! GUH!
I know someone out there is wondering why spend the extra cash to make something that you could easily get online. I don’t think it’s a good habit to reduce any creative or intellectual pursuit to dollars – I love walking around a house full of things I've made and it's something I want my son to experience.
Happy pre-Father’s Day to all the fathers out there! Hope you enjoyed the write up, and if anyone has created an enclosure stacking layers of acrylic, I’d very much like to hear how that light diffuses through the edges!
Interested in learning more about LEDs?
See our LED page for everything you need to know to start using these components in your project.


Great Write up Elias! very simple yet useful, will make one of these for myself
I hope you do. I really want/need to experiment with different shapes for acrylic enclosures.