Updated micro:bot Kit Experiment Guide!
We updated some code for the micro:bot kit to help debug and interpret line following sensor readings using the MakeCode Console.

Based on your feedback, we have updated the micro:bot kit experiment guide!

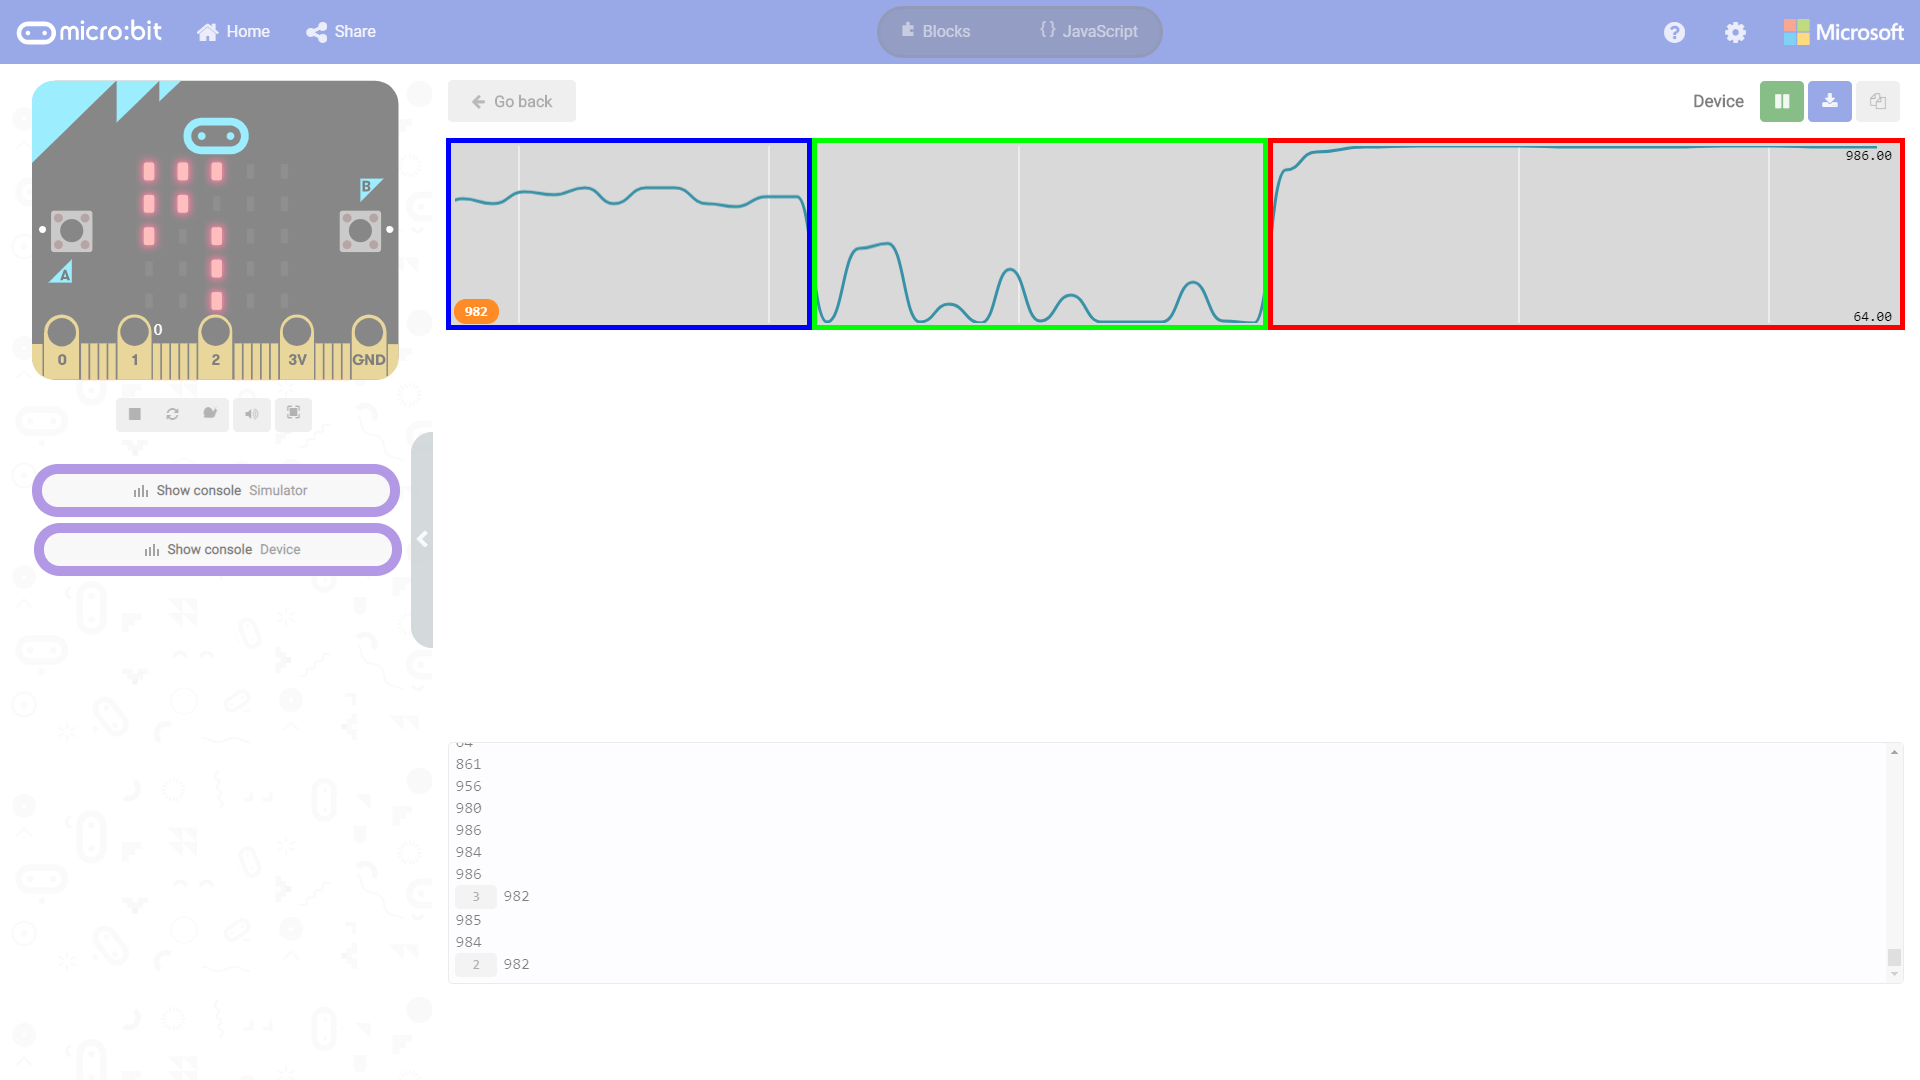
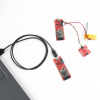
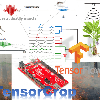
You'll find updated code for experiments two and three with an option to output serial data to the MakeCode Console. This is useful when you need to debug and interpret sensor readings when using a line following sensor(s) on different surfaces. If you choose to view the serial output, we include a few highlighted graphs to explain what is going on on different surfaces.
 |
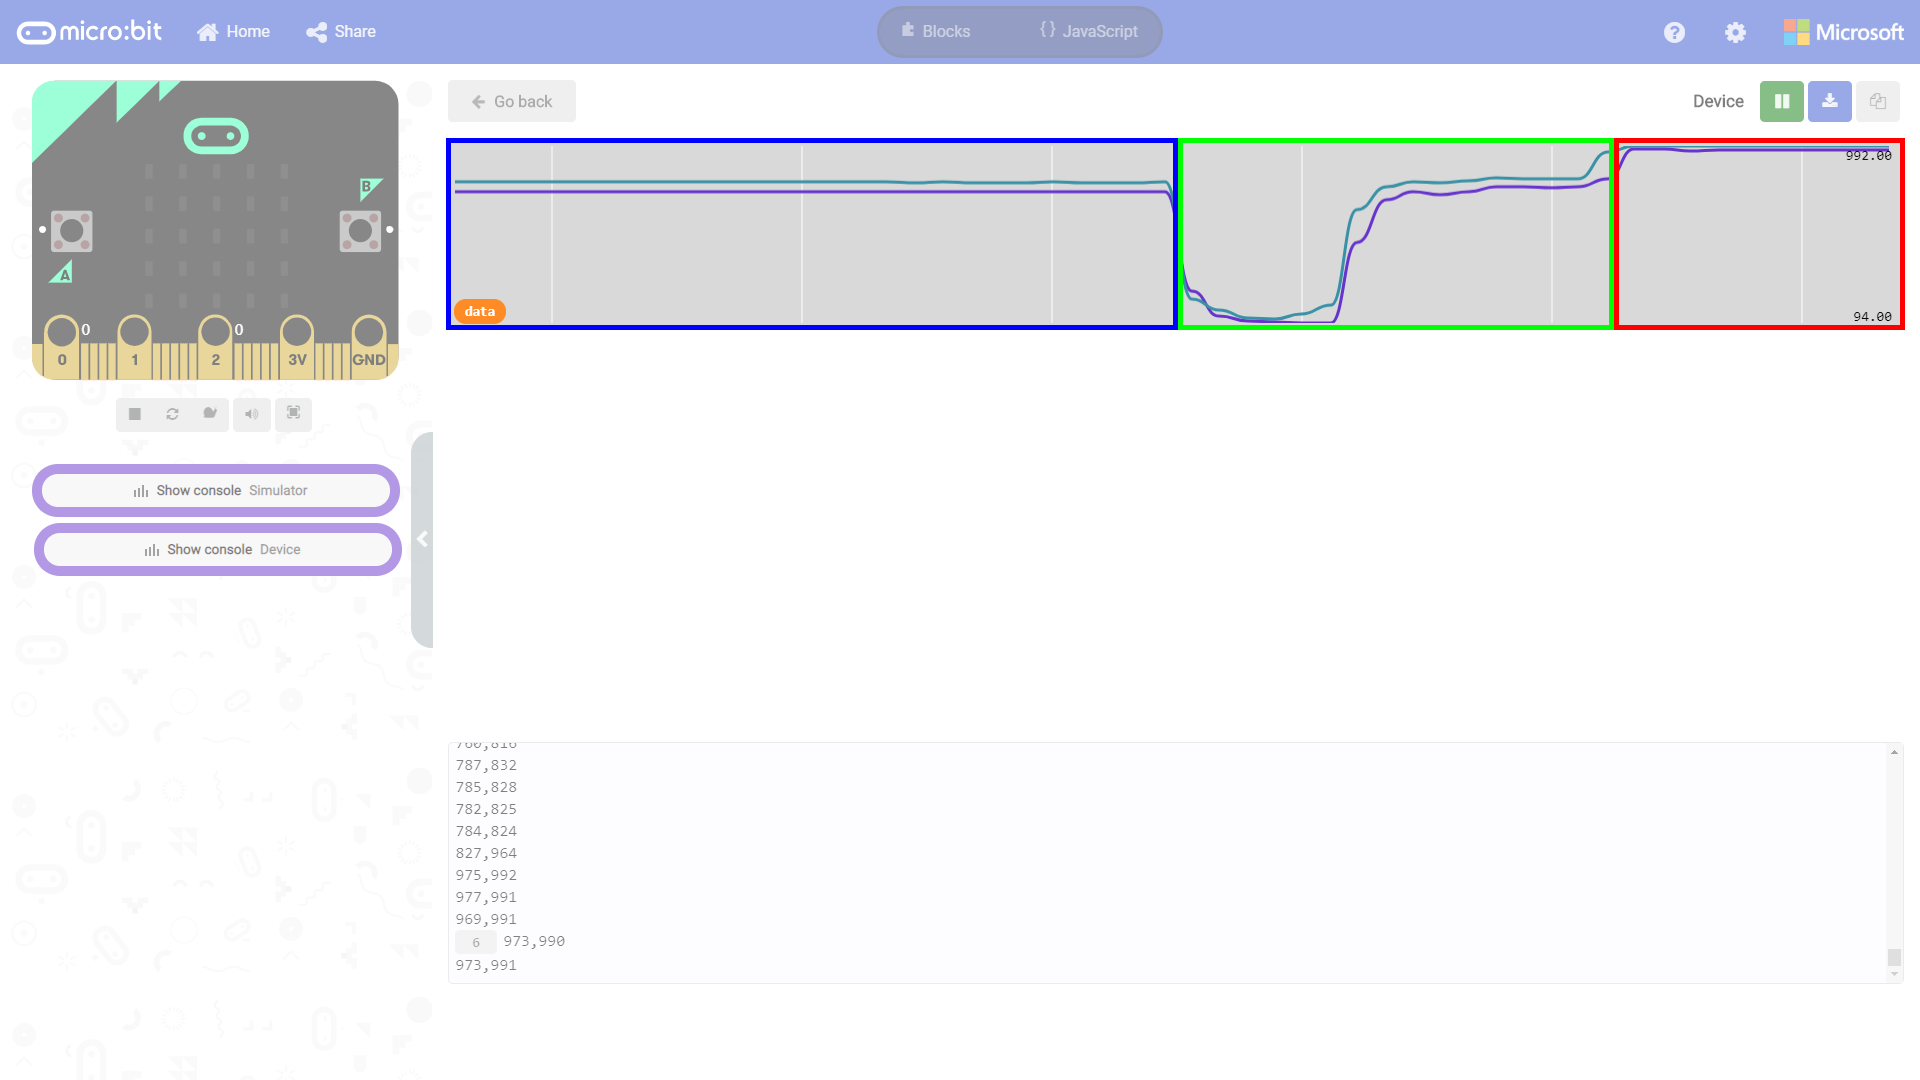 |
| Output Highlighted using One Line Following Sensor | Serial Output Highlighted using Two Line Following Sensors |
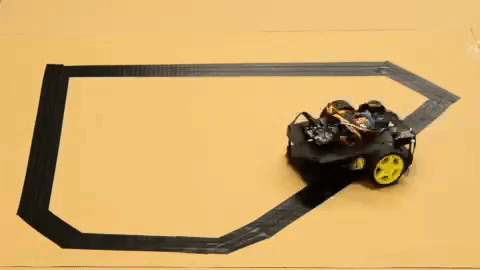
Experiment three is now broken up into two parts. We'll try to follow a straight line made from black electrical tape and stop when we fail to see it. Then we'll attempt to follow a simple polygon track.
If you have not gotten a kit yet, make sure to get one today! Otherwise, be sure to check out the updates in the micro:bot kit experiment guide!
micro:bot Kit Experiment Guide
February 20, 2020
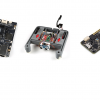
Get started with the moto:bit, a carrier board for the micro:bit that allows you to control motors, and create your own robot using this experiment guide for the micro:bot kit.
Looking for more tutorials related to micro:bit? Check out our tutorials tagged with micro:bit to add more functionality to your micro:bit projects!


