Getting Hands-On with the NVIDIA Jetson Nano 2GB
An overview and hands-on review of the newly announced Jetson Nano 2GB

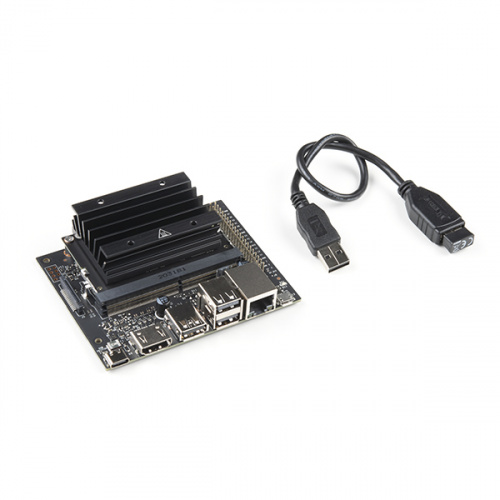
On Monday, we co-announced the release of the NVIDIA Jetson Nano 2GB Developer Kit. This new version of the Jetson Nano will be sold alongside the original at a lower price point, and is targeted at entry-level exploration and education in AI and machine learning. Today, we take a deeper look at the new Nano, compare it to its bigger sister, kick the tires a bit and then take it for a test spin in an initial, out-of-the-box experience.
I should note now that if you are looking for statistical analysis, benchmarking, and a hard-nosed technical evaluation, this post is not for you - this is mainly a user-experience perspective for someone looking to get started with machine learning and trying to decide on a platform for their use or their students'.
A 10,000-foot View of the Development Kit
Let’s jump in and take a look at this new and trimmed-down version of the NVIDIA Jetson Nano!
One of the obvious differences between the original Nano and the 2GB version is in the name – the new version has been limited to 2GB of onboard RAM. But, where else does this new development kit differ? Let’s take a look at them side-by-side.
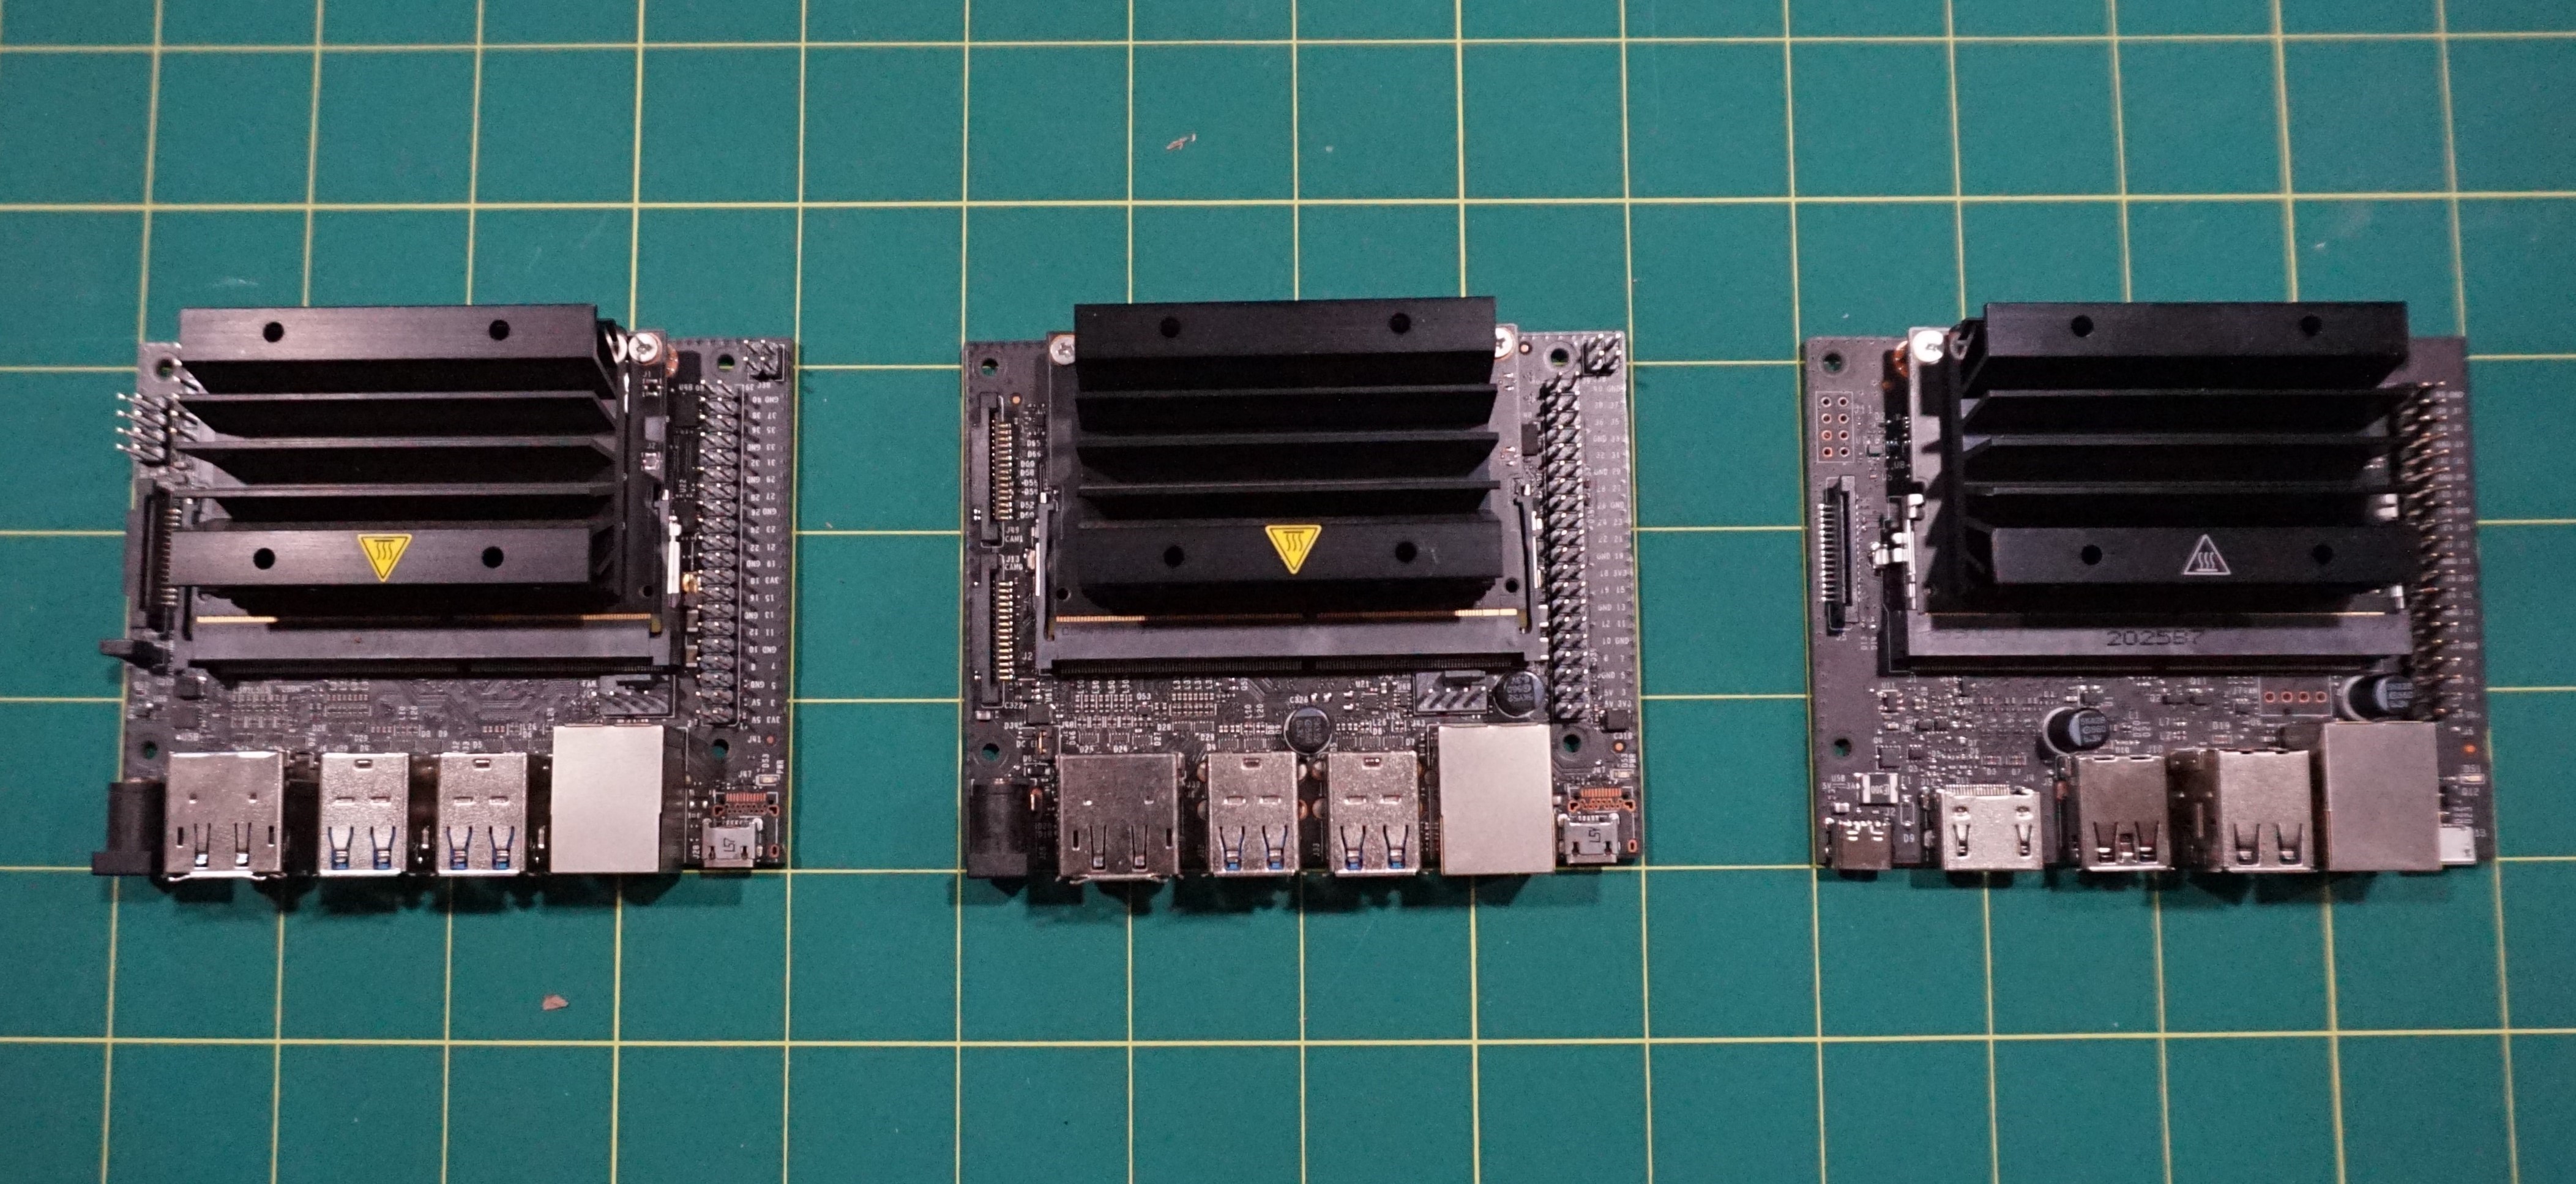
When we take a look at the 2GB compared to the previous two versions of the development kit there are some obvious differences, but also some that are nuanced as well.
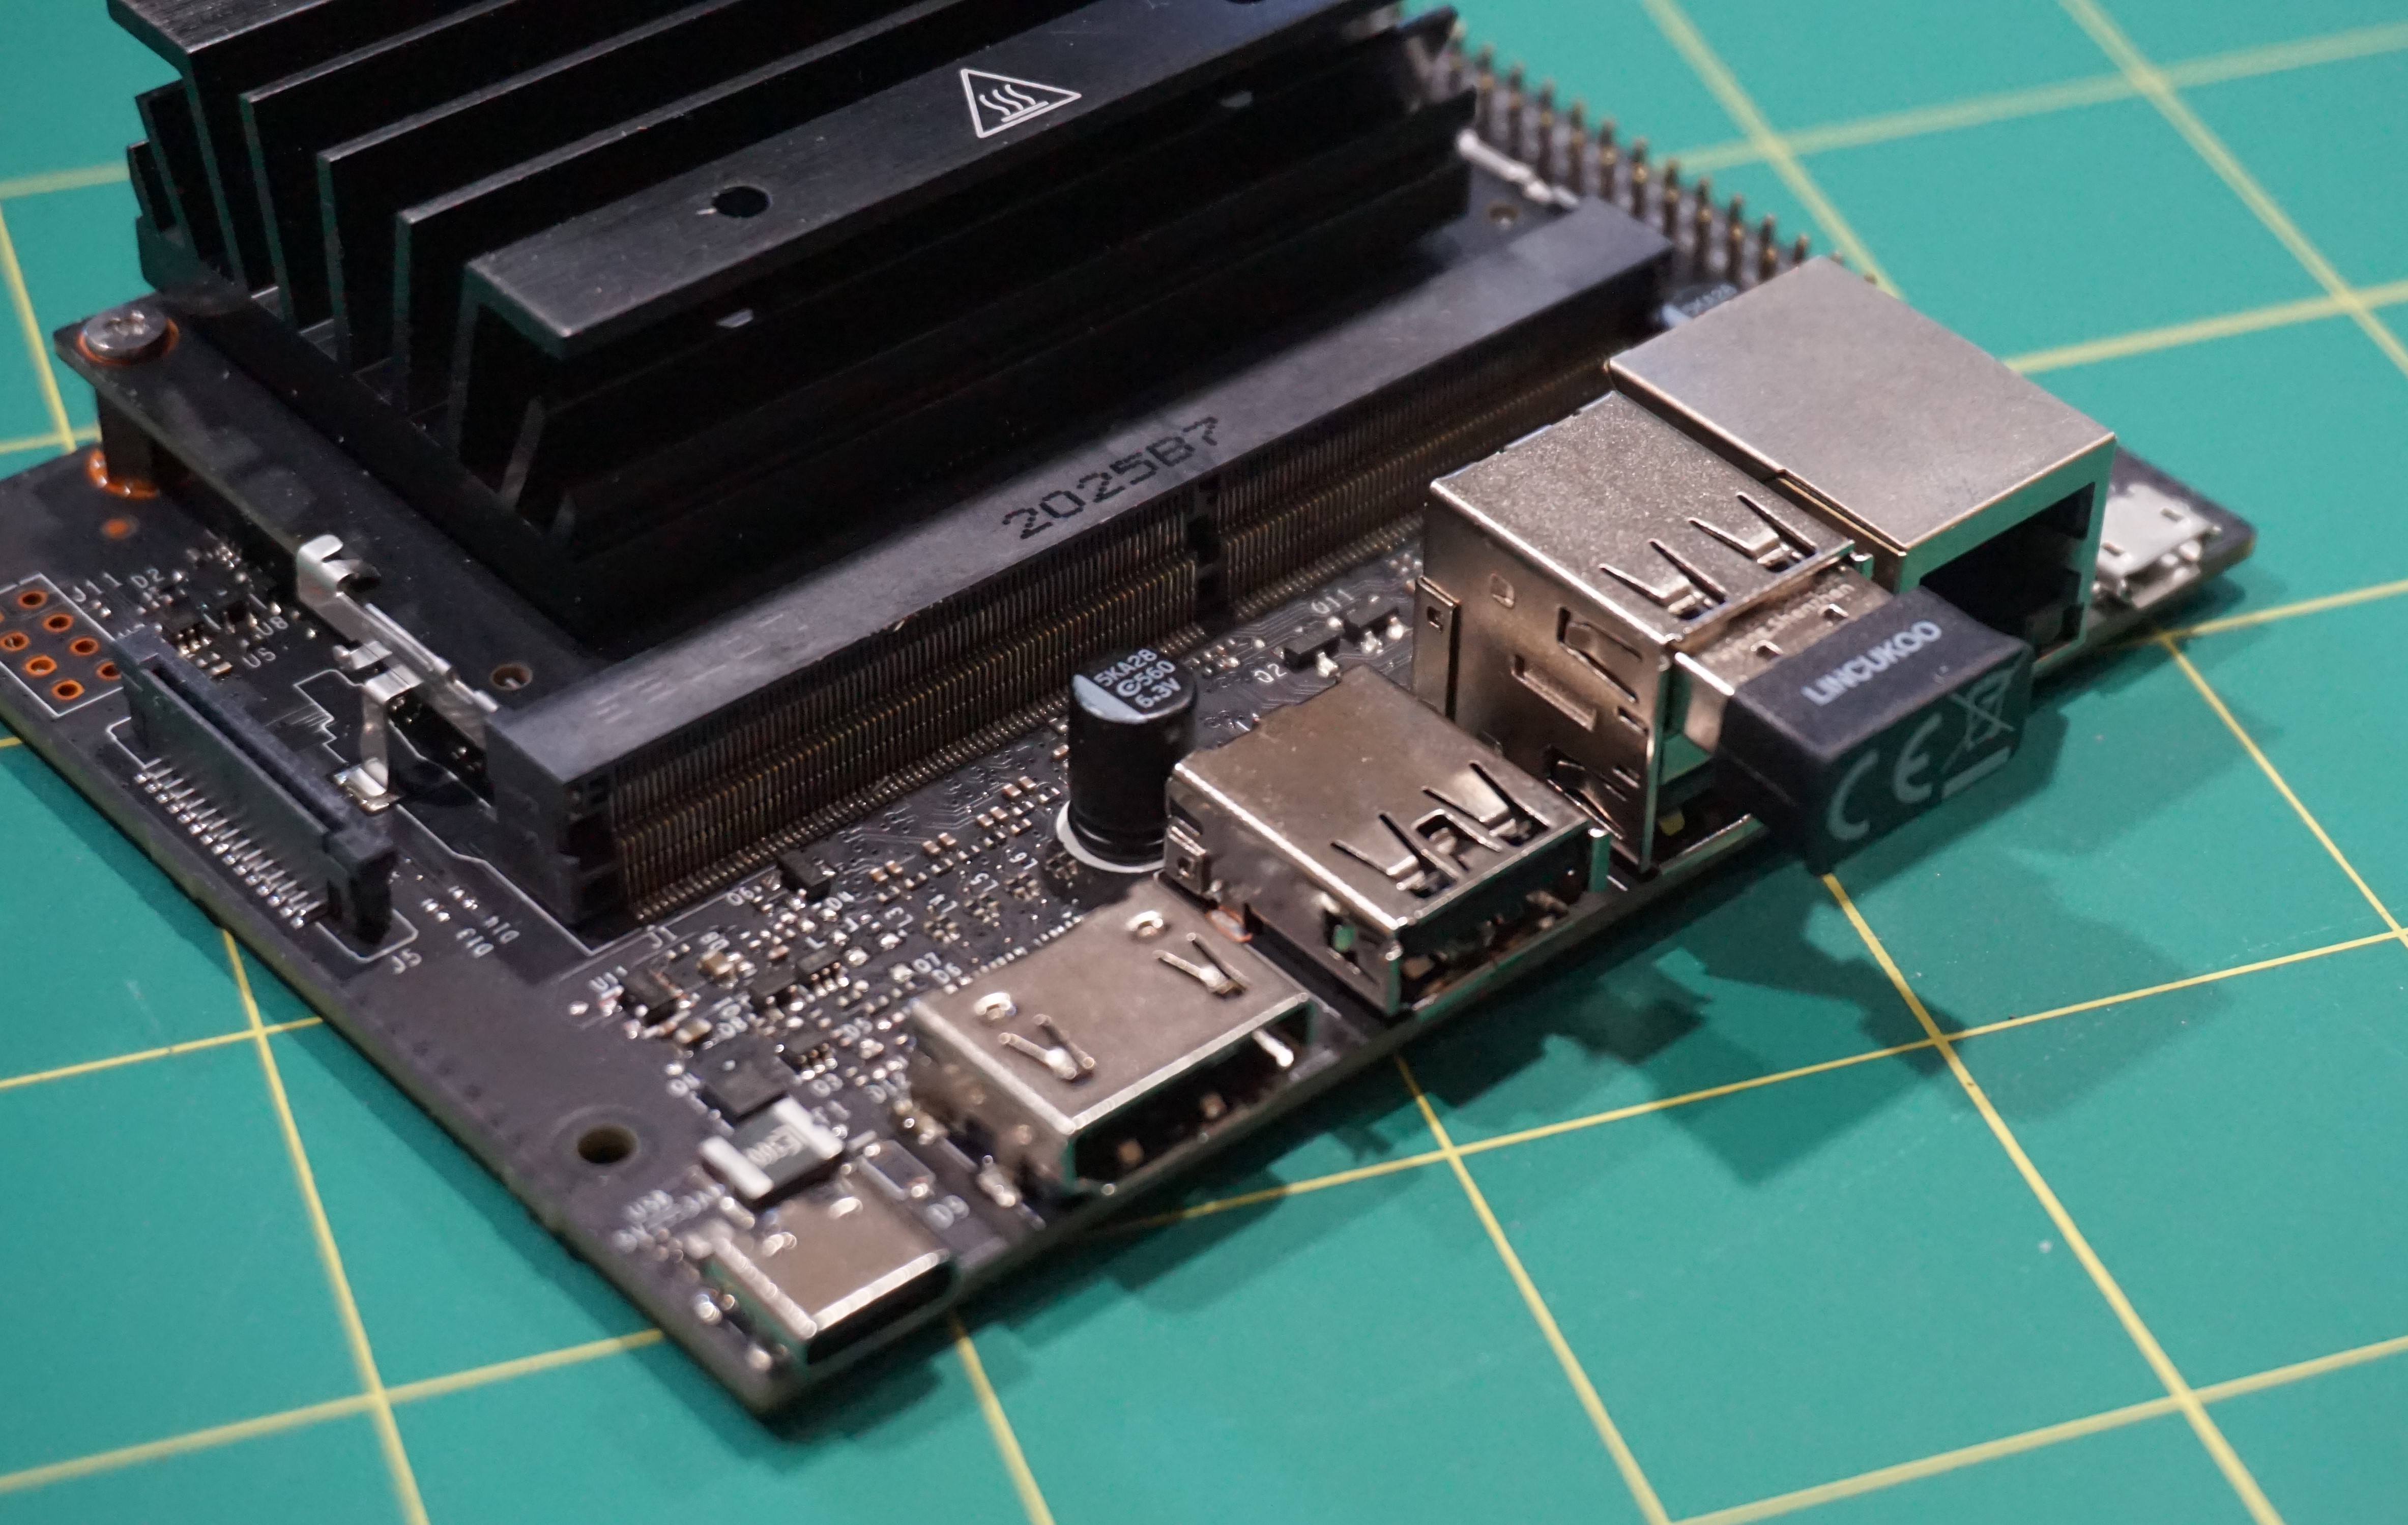
From a first glance, things like the return to a single CSI camera slot, the addition of a USB-C type power connector and one fewer USB connection are pretty obvious to spot. Many of you may have already noticed these differences from press photos, social media, etc. At a deeper look, some of the changes to the developer kit make sense when you take into account the target customer for the 2GB - educators and entry-level learners.
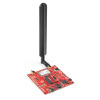
With that target customer in mind, the obvious changes - USB-C power and the removal of the power supply jumper, the move to one CSI adapter, cutting the DisplayPort to go with just HDMI output, and the addition of a WiFi adapter to the kit - make complete sense. Keep it simple and straightforward!
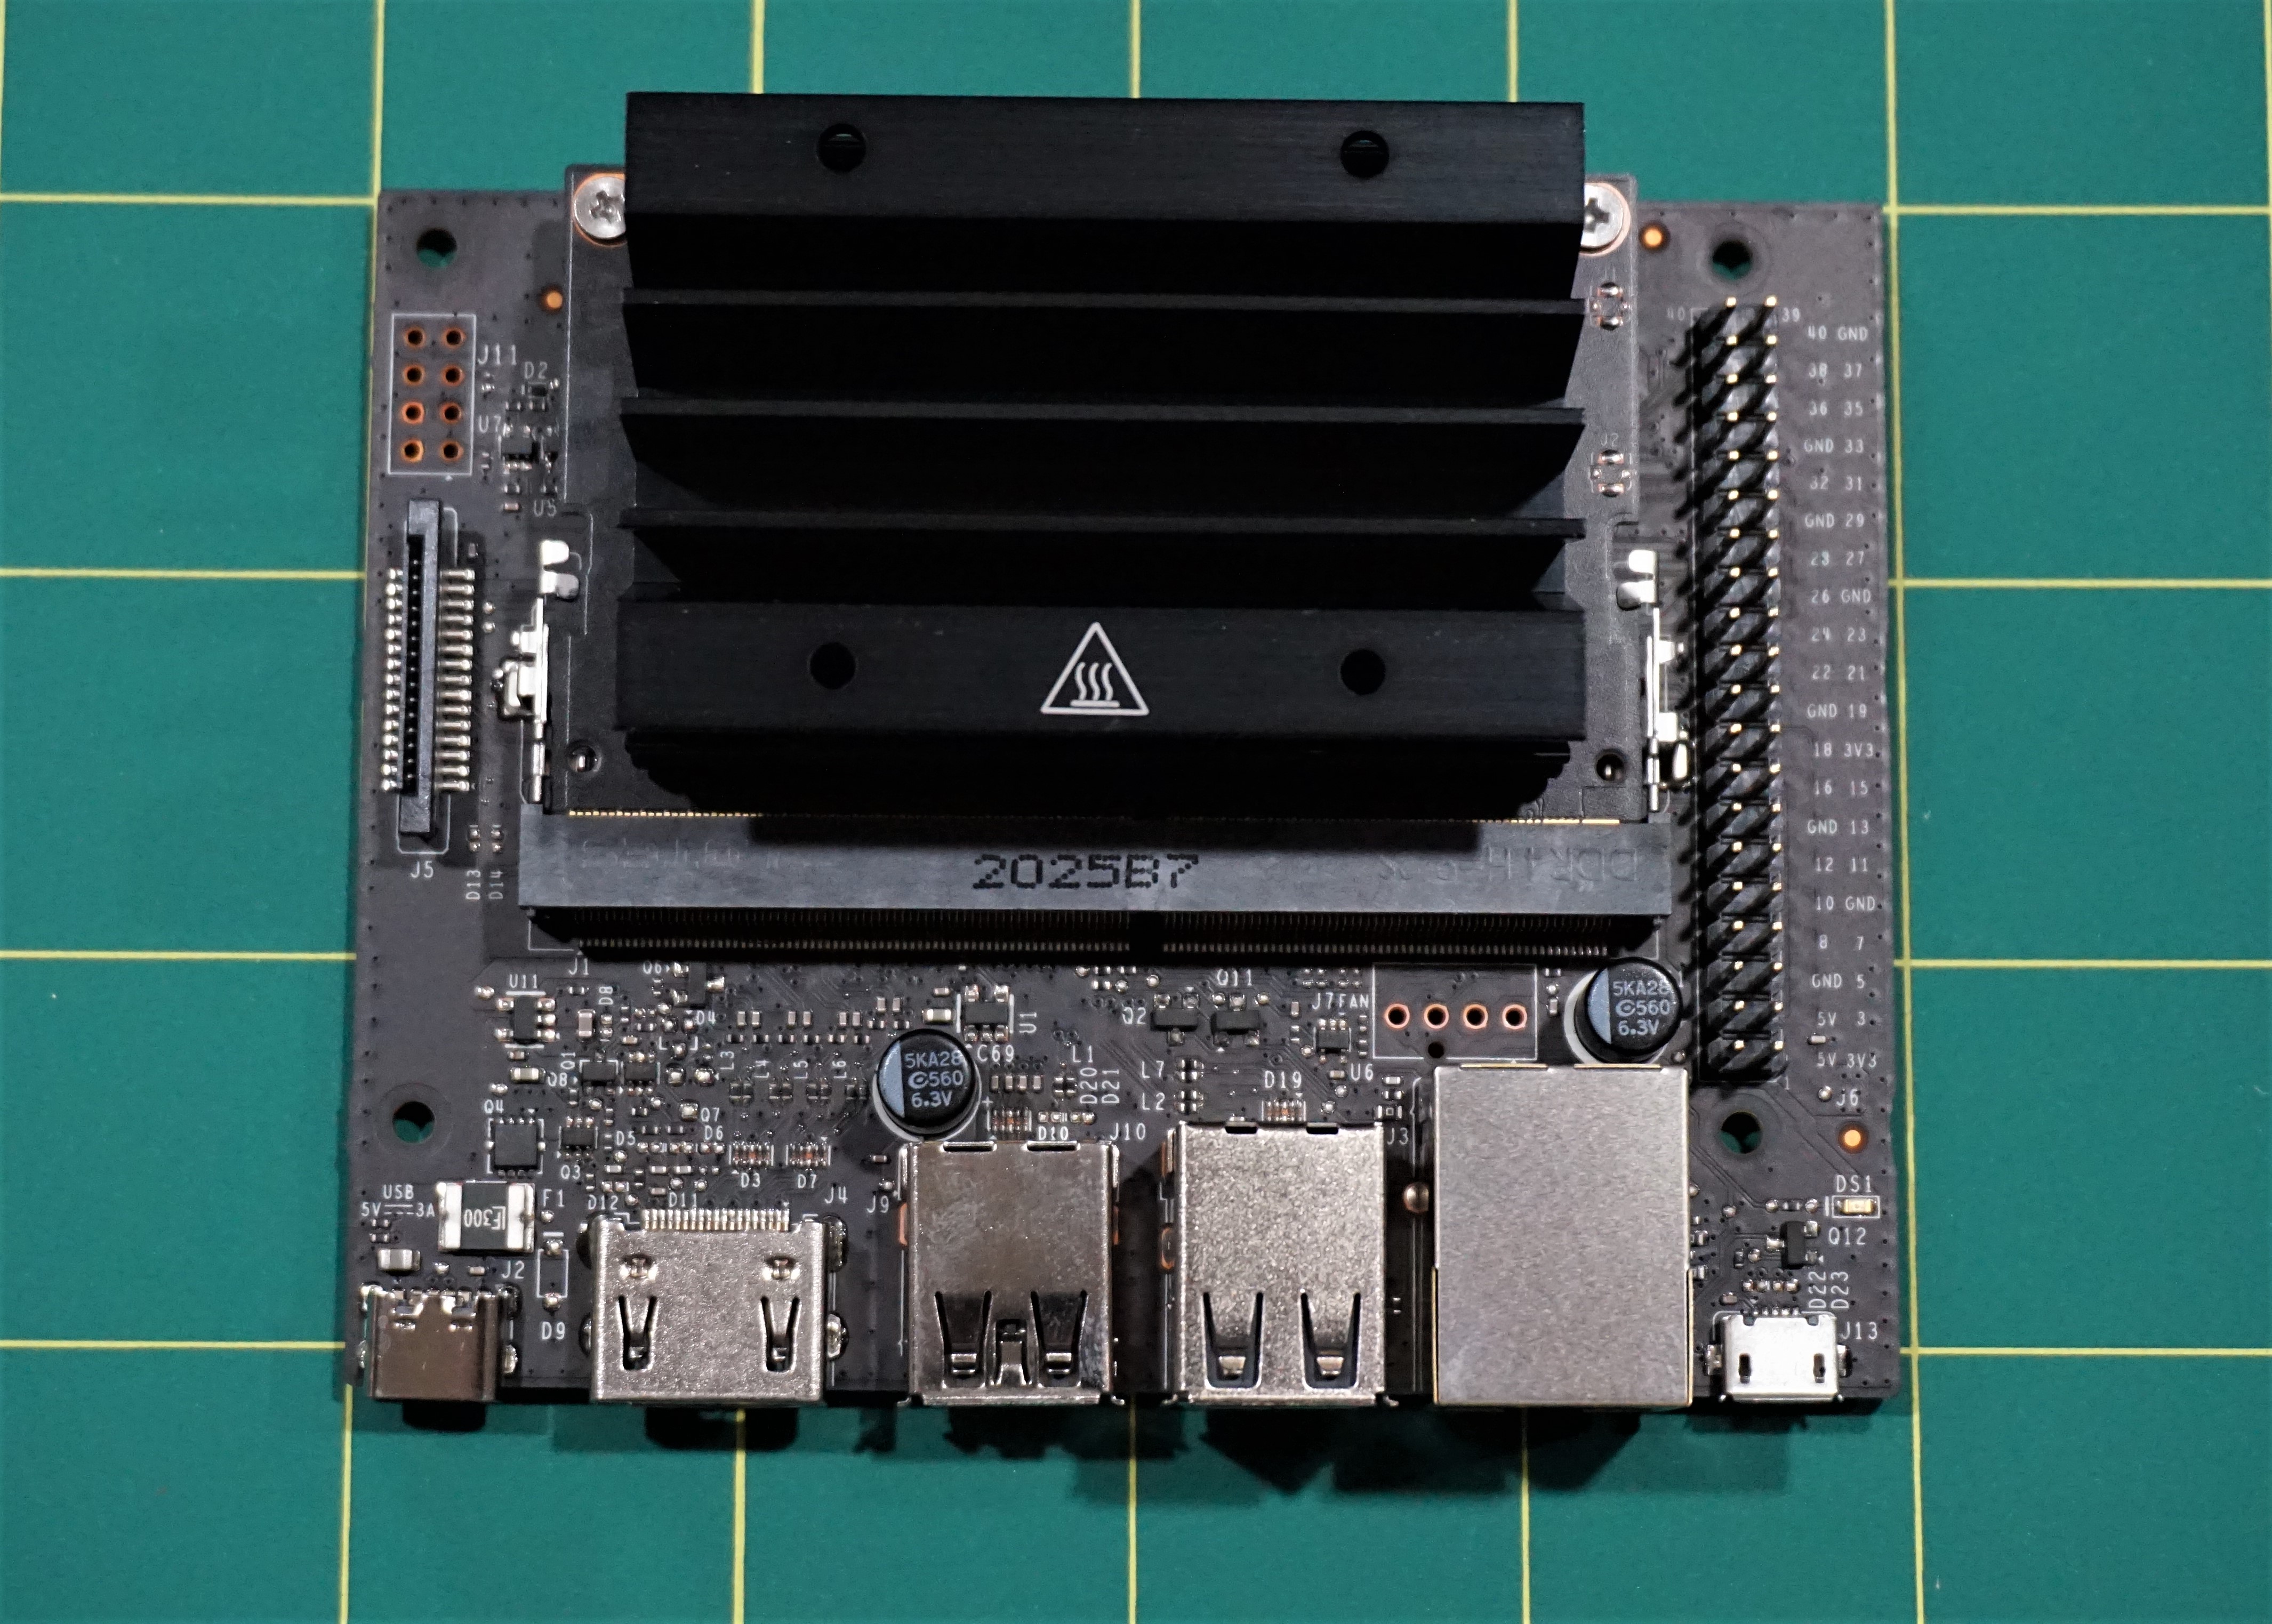
Going deeper, many of the accessory and utility headers have either been moved, removed or unpopulated on the 2GB version of the development kit. For those educators and students who are working with a Jetson Nano for the first time, this helps keep things simple. For a seasoned user, the unpopulated headers are still there for you to use, you’ll just need to pick up your soldering iron and add those pin headers to your kit yourself.

If you are like me and had a slight panic moment that a certain header was removed completely, fear not, those pins are still there and have been moved to a single row on the carrier board just under the microSD card slot, all labeled and ready to go, similar to the B01 carrier board. This was a great change with the B01 and, I think, a feature that goes with the theme of keeping the board clean for first-time users.
Finally, the addition of a WiFi adapter, though still a USB adapter, is a must for this development kit, and anyone who worked with the original Nano knows there were frustrations in this area originally. When working with the Nano, especially through Jupyter Notebooks, a solid and consistent WiFi connection is a must. Including the WiFi adapter as part of the development kit is nice and makes it something you know will be consistently supported out of the box.
In terms of accessories to the development kit you will still need to purchase the following:
- Power supply
- microSD card
- USB micro- B (for headless bootup)
- Camera (if you are going to do any camera vision)
If you are looking to get a one-box solution here, we recommend our DLI Course Kit for the NVIDIA Jetson Nano 2GB - it has everything you need to get started!
Getting Hands-On
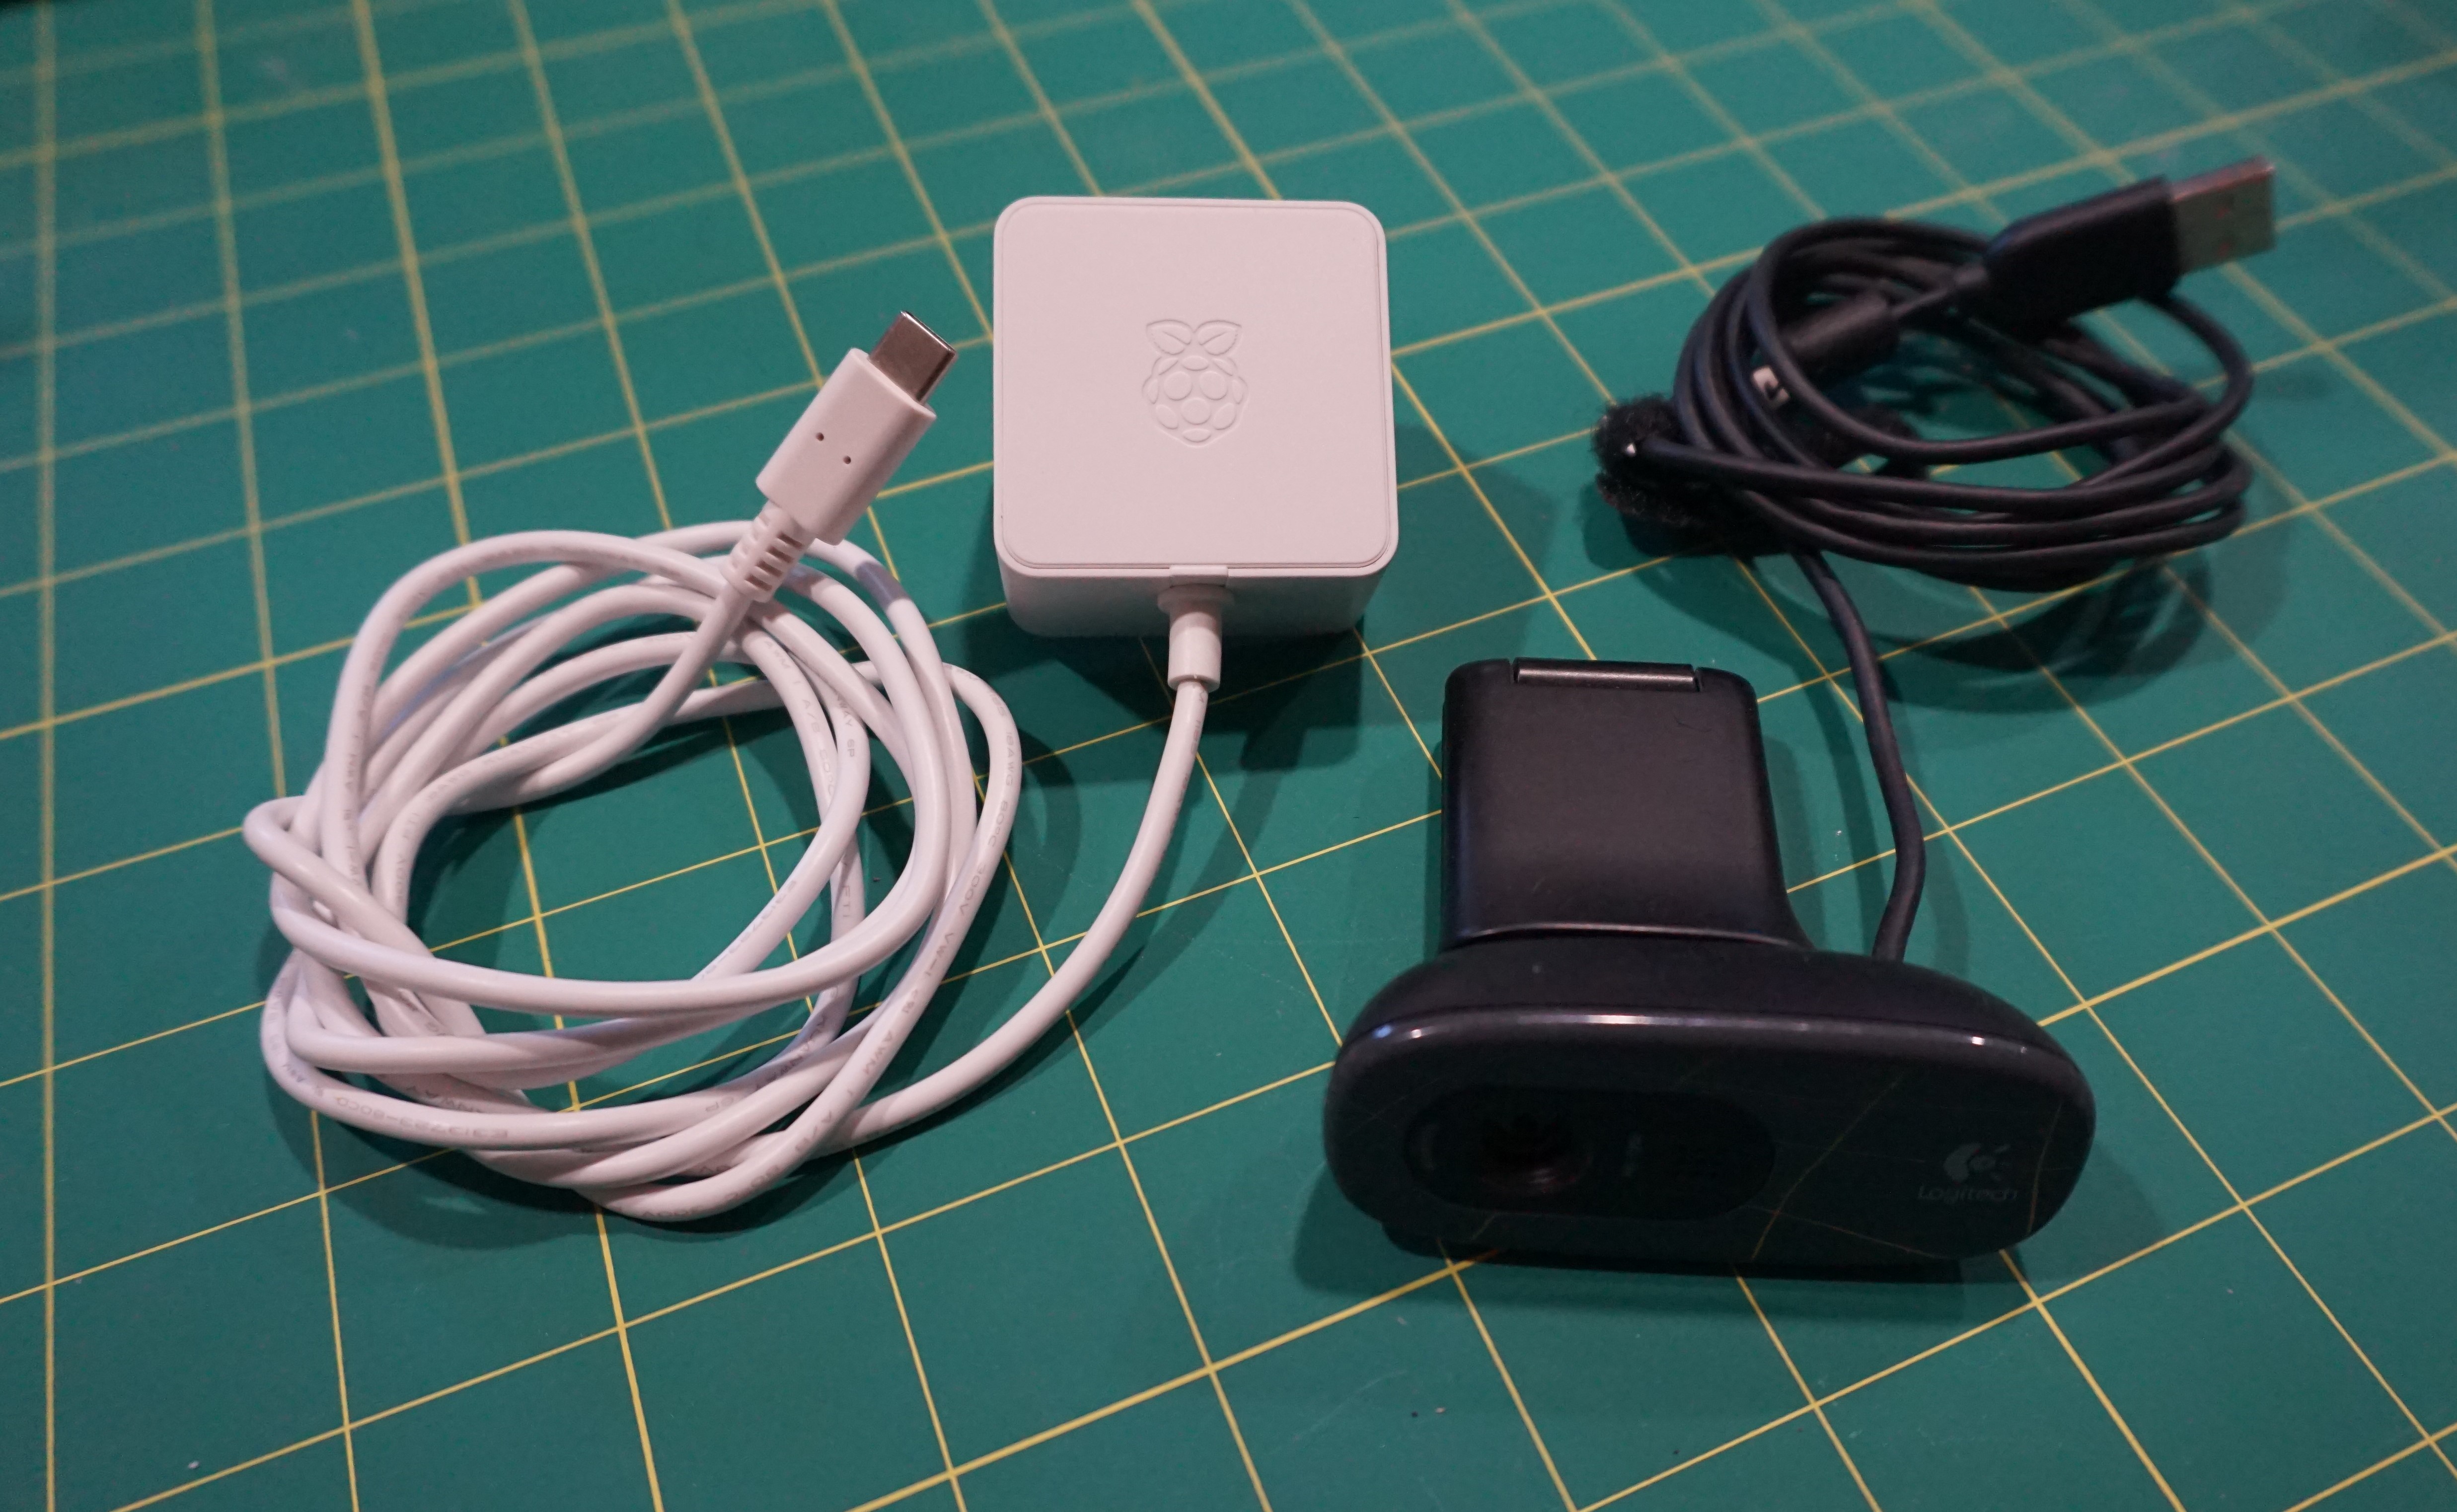
For my hands-on test of the 2GB, I grabbed an official Raspberry Pi Power Supply, which is within the specifications for the Jetson Nano 2GB, as well as the Logitech C270 USB webcam that comes in our DLI Course Kit.
I flashed the provided image to a 64GB microSD card (note: you should definitely be using a high quality card for this application) using Balena Etcher, as per the instructions in the Getting Started Guide provided by NVIDIA. Now, this was a hefty image coming in at 6GB, but to be expected.
The first time I booted my Jetson Nano 2GB, I opted for the GUI version and used a monitor, keyboard and mouse. With the WiFi adapter plugged into the USB port I powered up the board and ran through the standard Linux GUI setup process. Compared to previous iterations of the Jetson Nano image setup, this was clean and simple. I was delightfully impressed that part of the setup includes an option for automating the process for creating a SWAP file, which is ideal to optimize the Nano for AI/ML training on board. After moving through the prompts, I was greeted with a desktop environment. As mentioned before this process was much faster than the setup of previous Nano images on the 4GB, and was more guided and clean feeling. Kudos to the NVIDIA team for streamlining this process and also for using LXDE (Lightweight Desktop Environment) - everything feels a bit more agile than my previous experiences with the 4GB.
With the initial set up done, I moved onto running the 2GB through a headless setup on my laptop to work through the DLI course content using Jupyter Notebooks. In the past, we normally recommended users download, burn and install a specific image for the DLI course, which while annoying and somewhat tedious was the best bet for beginners.
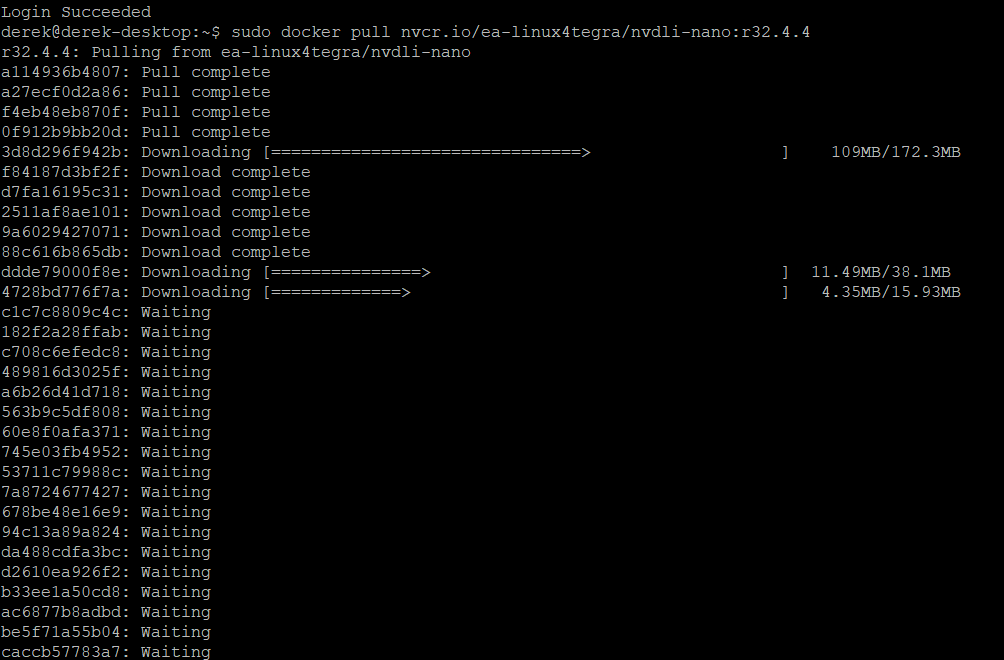
Now, using Docker containers through NVIDIA GPU Cloud (NGC), installing and running the different content images seems to have been simplified and cleaned up. Using NGC, I logged in and pulled the appropriate container for the DLI Course (more to come on this process in later content). Though this process took some time to download, it was much shorter and easier compared to downloading, burning and installing a whole new image on a microSD Card.
Now all I had to do was launch the container I just installed according to the camera I planned to use, and I had my DLI course image up and running - life changing for someone who uses a number of these different images day in and day out!
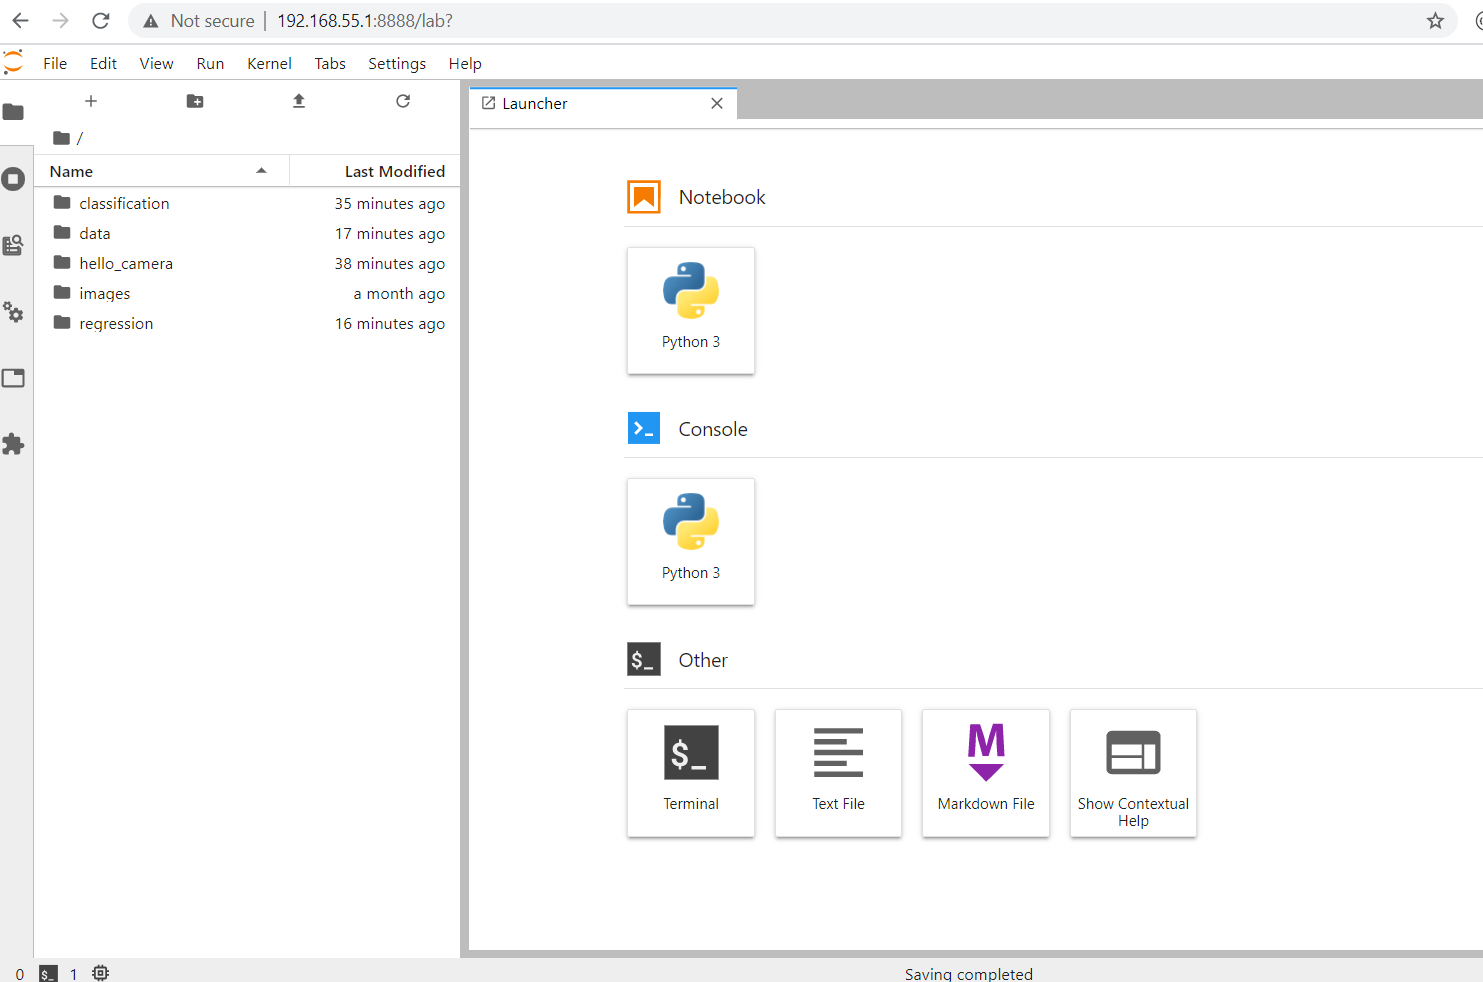
After waiting for the container to load I went to the URL provided to connect to the Jupyter Notebook service on the Nano 2GB, and I was off to the races working through the class content.
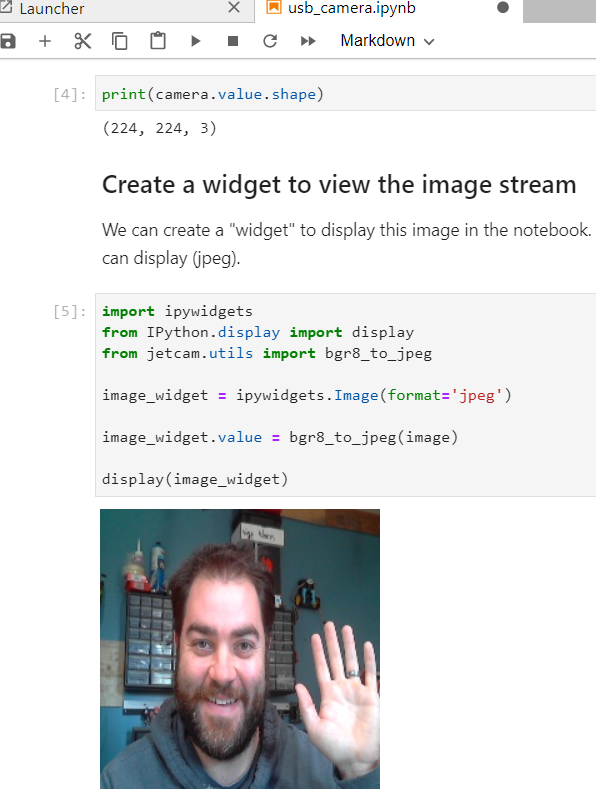
I started with the basic “Hello Camera” notebook and the camera fired up just fine. When it got to streaming a camera feed, I was pleasantly surprised by the frame rate and response time of the feed. In all honesty, I was expecting the lag and choppy response that I had experienced with the 4GB out of the box (without optimization). There was none of that!
Next, I moved onto the initial ML exercise of “Thumbs up, Thumbs down.” In this lesson the notebook walks you through the process of creating a widget in Jupyter Notebooks used to collect images of your thumb in an “up” position or “down” position. You then train the Nano, creating a model from your images and then using that model to make a prediction from a live feed.
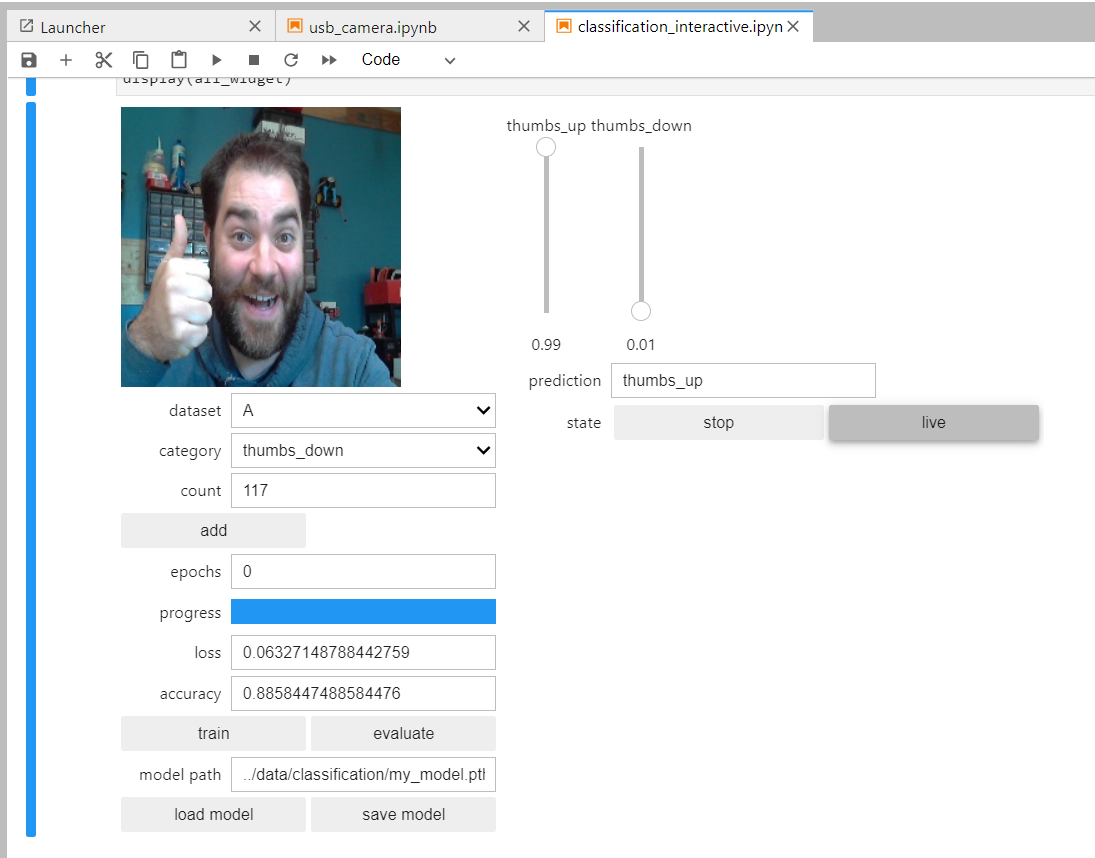
This is where I thought we would see the difference in the 2GB and the 4GB in terms of performance. Much to my surprise, the 2GB performed perfectly and, from a user experience perspective, I would say better than the 4GB (again, not a benchmark review here). The 2GB handled extensive clicking to capture just over 100 images of my thumb in various thumb poses. I then clicked the train button and, after an expected churning of GPU power, started 30 epochs of training against my data. Within a few minutes I had a live demo that produced wonderful results!
Final Thoughts
I am greatly impressed by the NVIDIA Jetson Nano 2GB. The design of the carrier board and what was left on, what was removed and/or moved around were wise design changes for less experienced customers. I feel like NVIDIA listened to the community by including a “known good” and supported WiFi adapter with the kit. Most of all, I am flabbergasted (in the best way) by the software setup and user experience. I understand the idea of cutting performance, features and even some hardware specifications to bring a price point down to reach a different market. I think the reworking of the Nano is a wonderful example of a development board that was able to cut cost AND improve performance through both hardware and software innovation for a market that requires a smooth onboarding process from setup through “Hello World” and beyond. I can say that NVIDIA is on the right course to achieve ML education for anyone who is interested in the release of the 2GB.
With an initial kicking of the tires done on this new version, I am looking forward to building a few more projects that integrate our Qwiic ecosystem and our Python Libraries for Qwiic in Jupyter Notebooks and start combining real-time data and actuation with machine learning in the near future!


What type coin cell and socket? What does the coin cell back up?
sounds good
Are the streamlined setup and performance improvements specific to the new 2GB board or would those improvements apply to the existing 4GB boards? It wasn't clear from the wording in the article whether it was a combination of software and hardware changes and whether the software changes (especially setup) are compatible with the old boards.
Very exciting to see a cheaper Jetson Nano and thanks for the informative write-up.