Qwiic Cones for your Mario Kart Live Tracks
Add some blink and glow to your Mario Kart Live races using the Qwiic Quad Relay to hack cheap dollar store junk.


When I first saw the trailer for Mario Kart Live, I was very excited. In college, I studied art, and focused a lot of my time on creating immersive, room-sized art installations, but since graduation I haven’t really had the space to continue this part of my art practice. Mario Kart Live offers the opportunity to create similar immersive experiences at a small scale and to share them widely via social media, and now that I got my hands on a copy of the game, I’m just getting started annoying my partner by taking over the whole apartment to set up tracks, not to mention creating fancy track props. My cat is dubious of the tiny drone.
To make my blinky cones, you'll also need these parts:


After a (masked, socially distant) trip to the Dollar Tree, I returned with some cheap LED book lights, playground cones, some science fair boards, and a bunch of glow sticks.

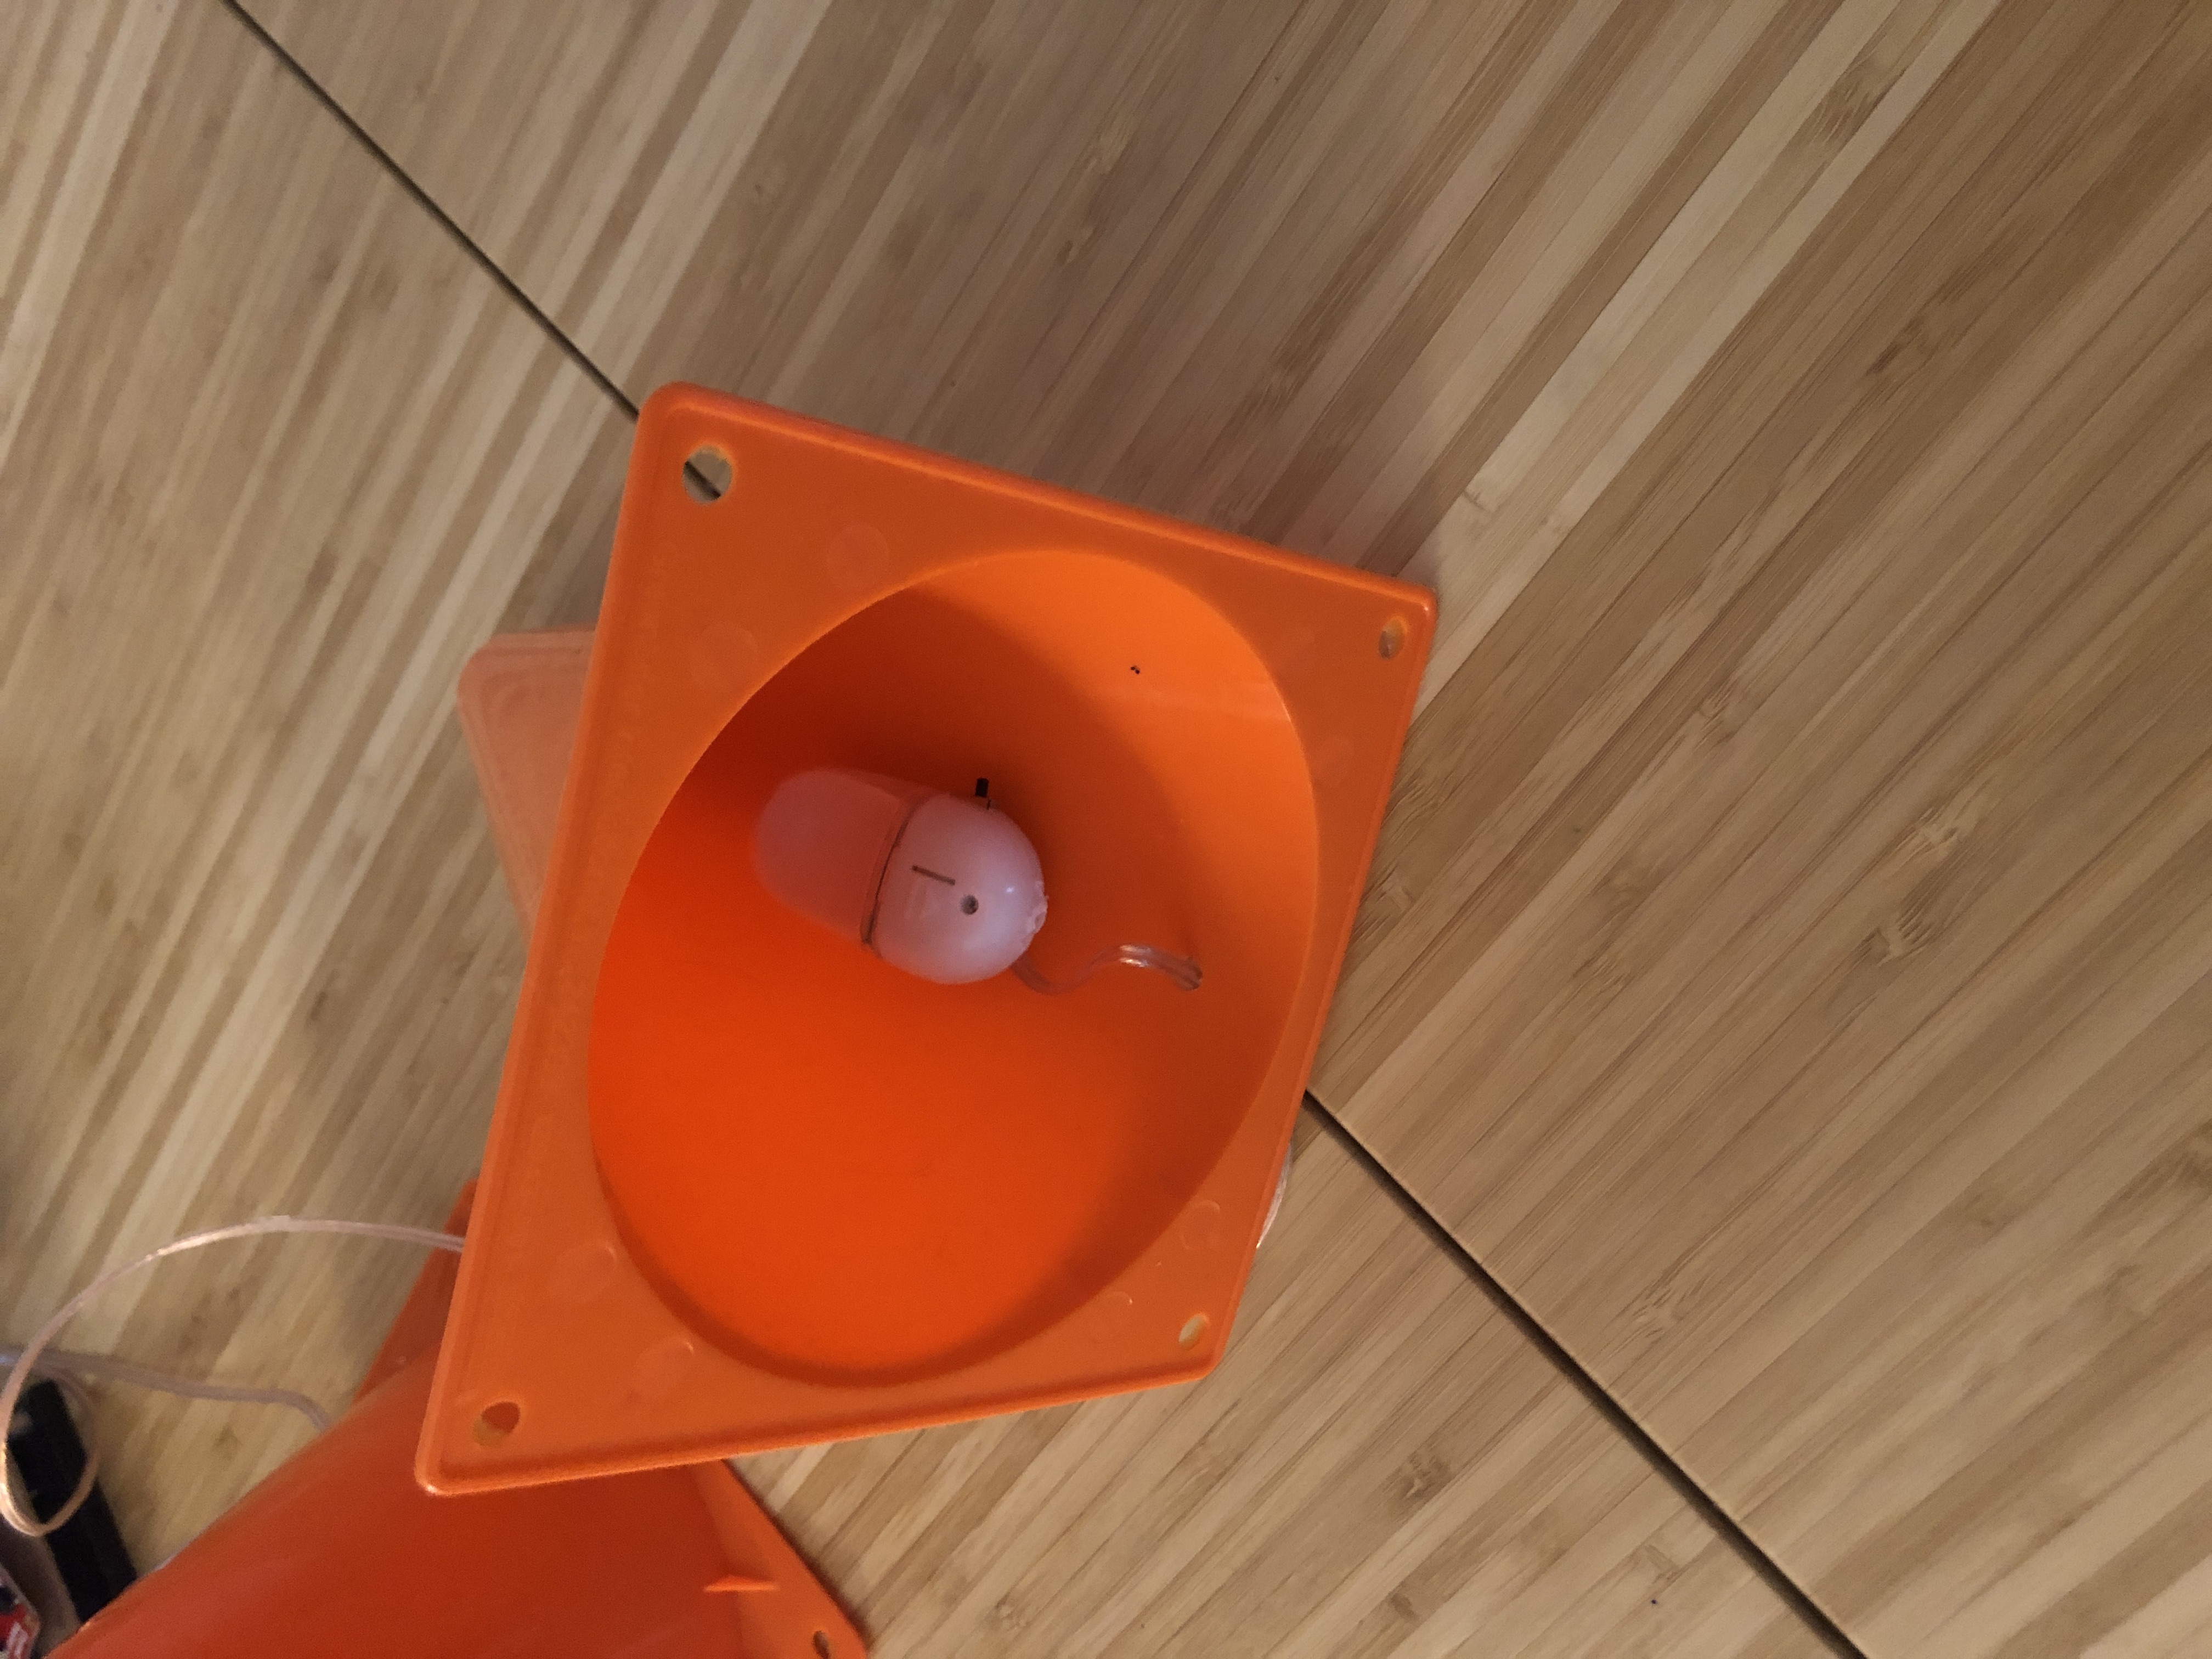
I broke the bendy arms and clips off of the led book lights, leaving me with just the electronics and their enclosure.
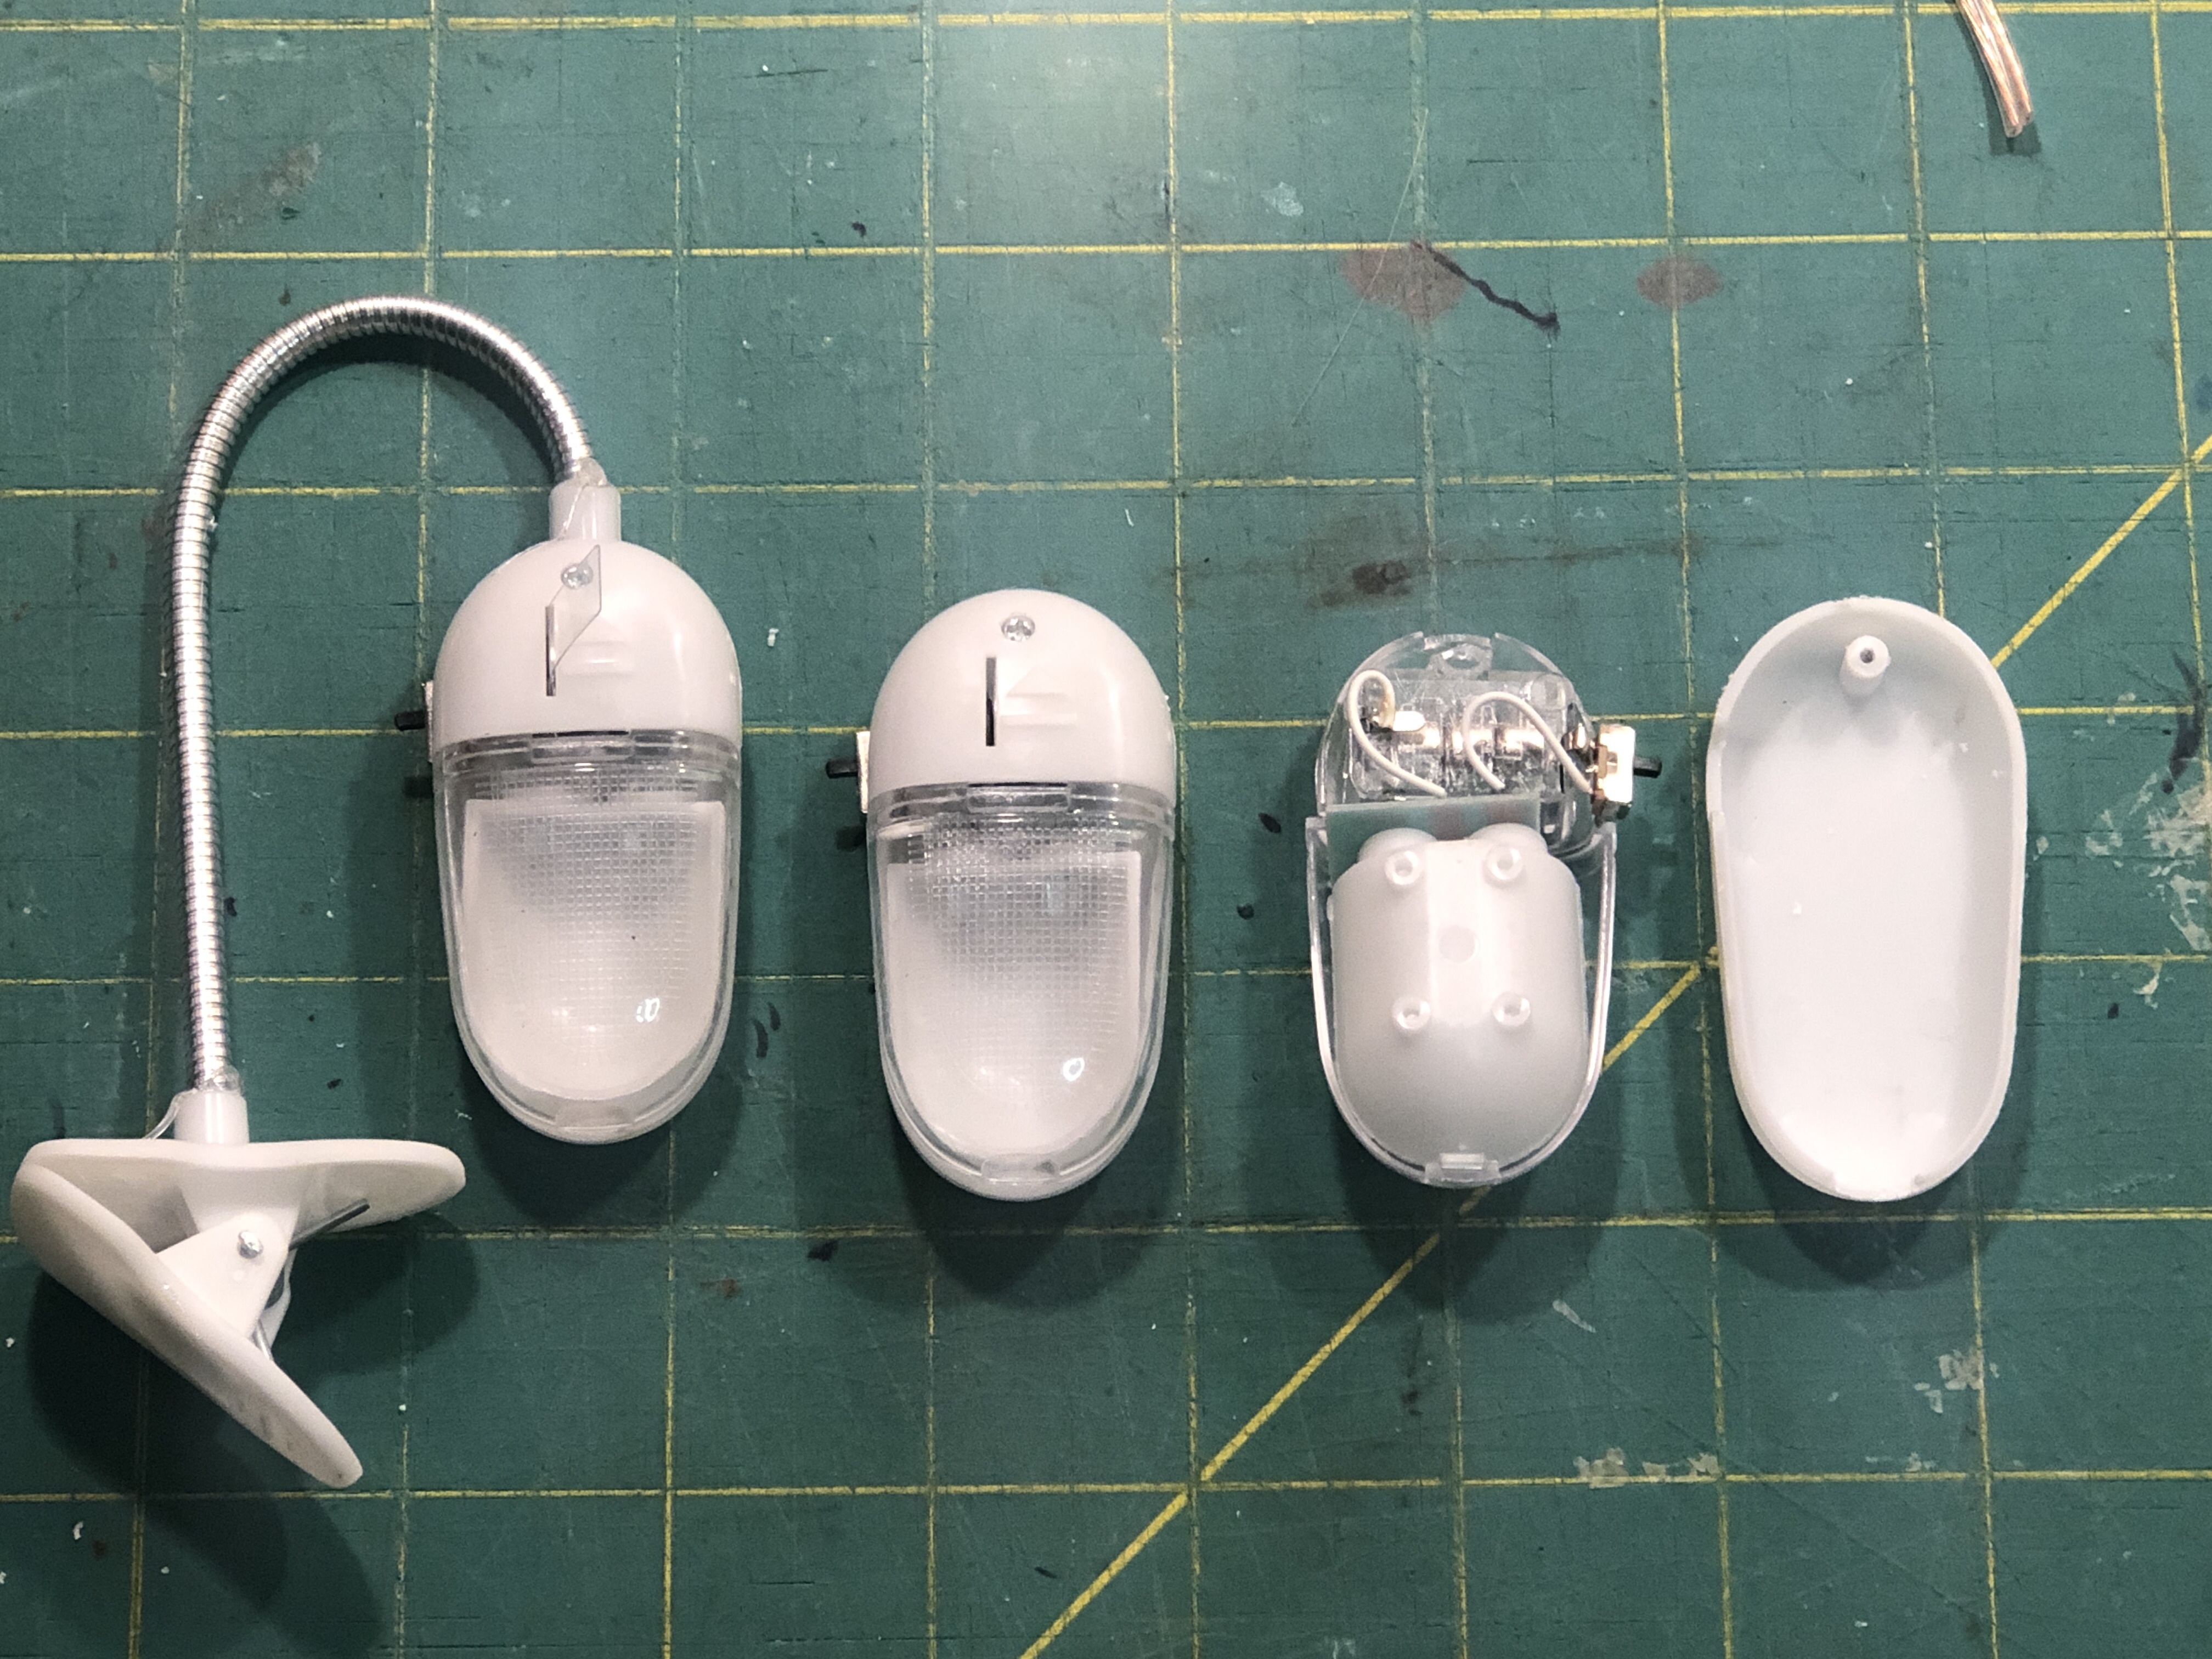
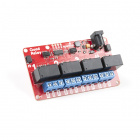
Then I opened each up and soldered some speaker wire into the circuit in order to bypass the switch and control the lights with my Qwiic Quad Relay.
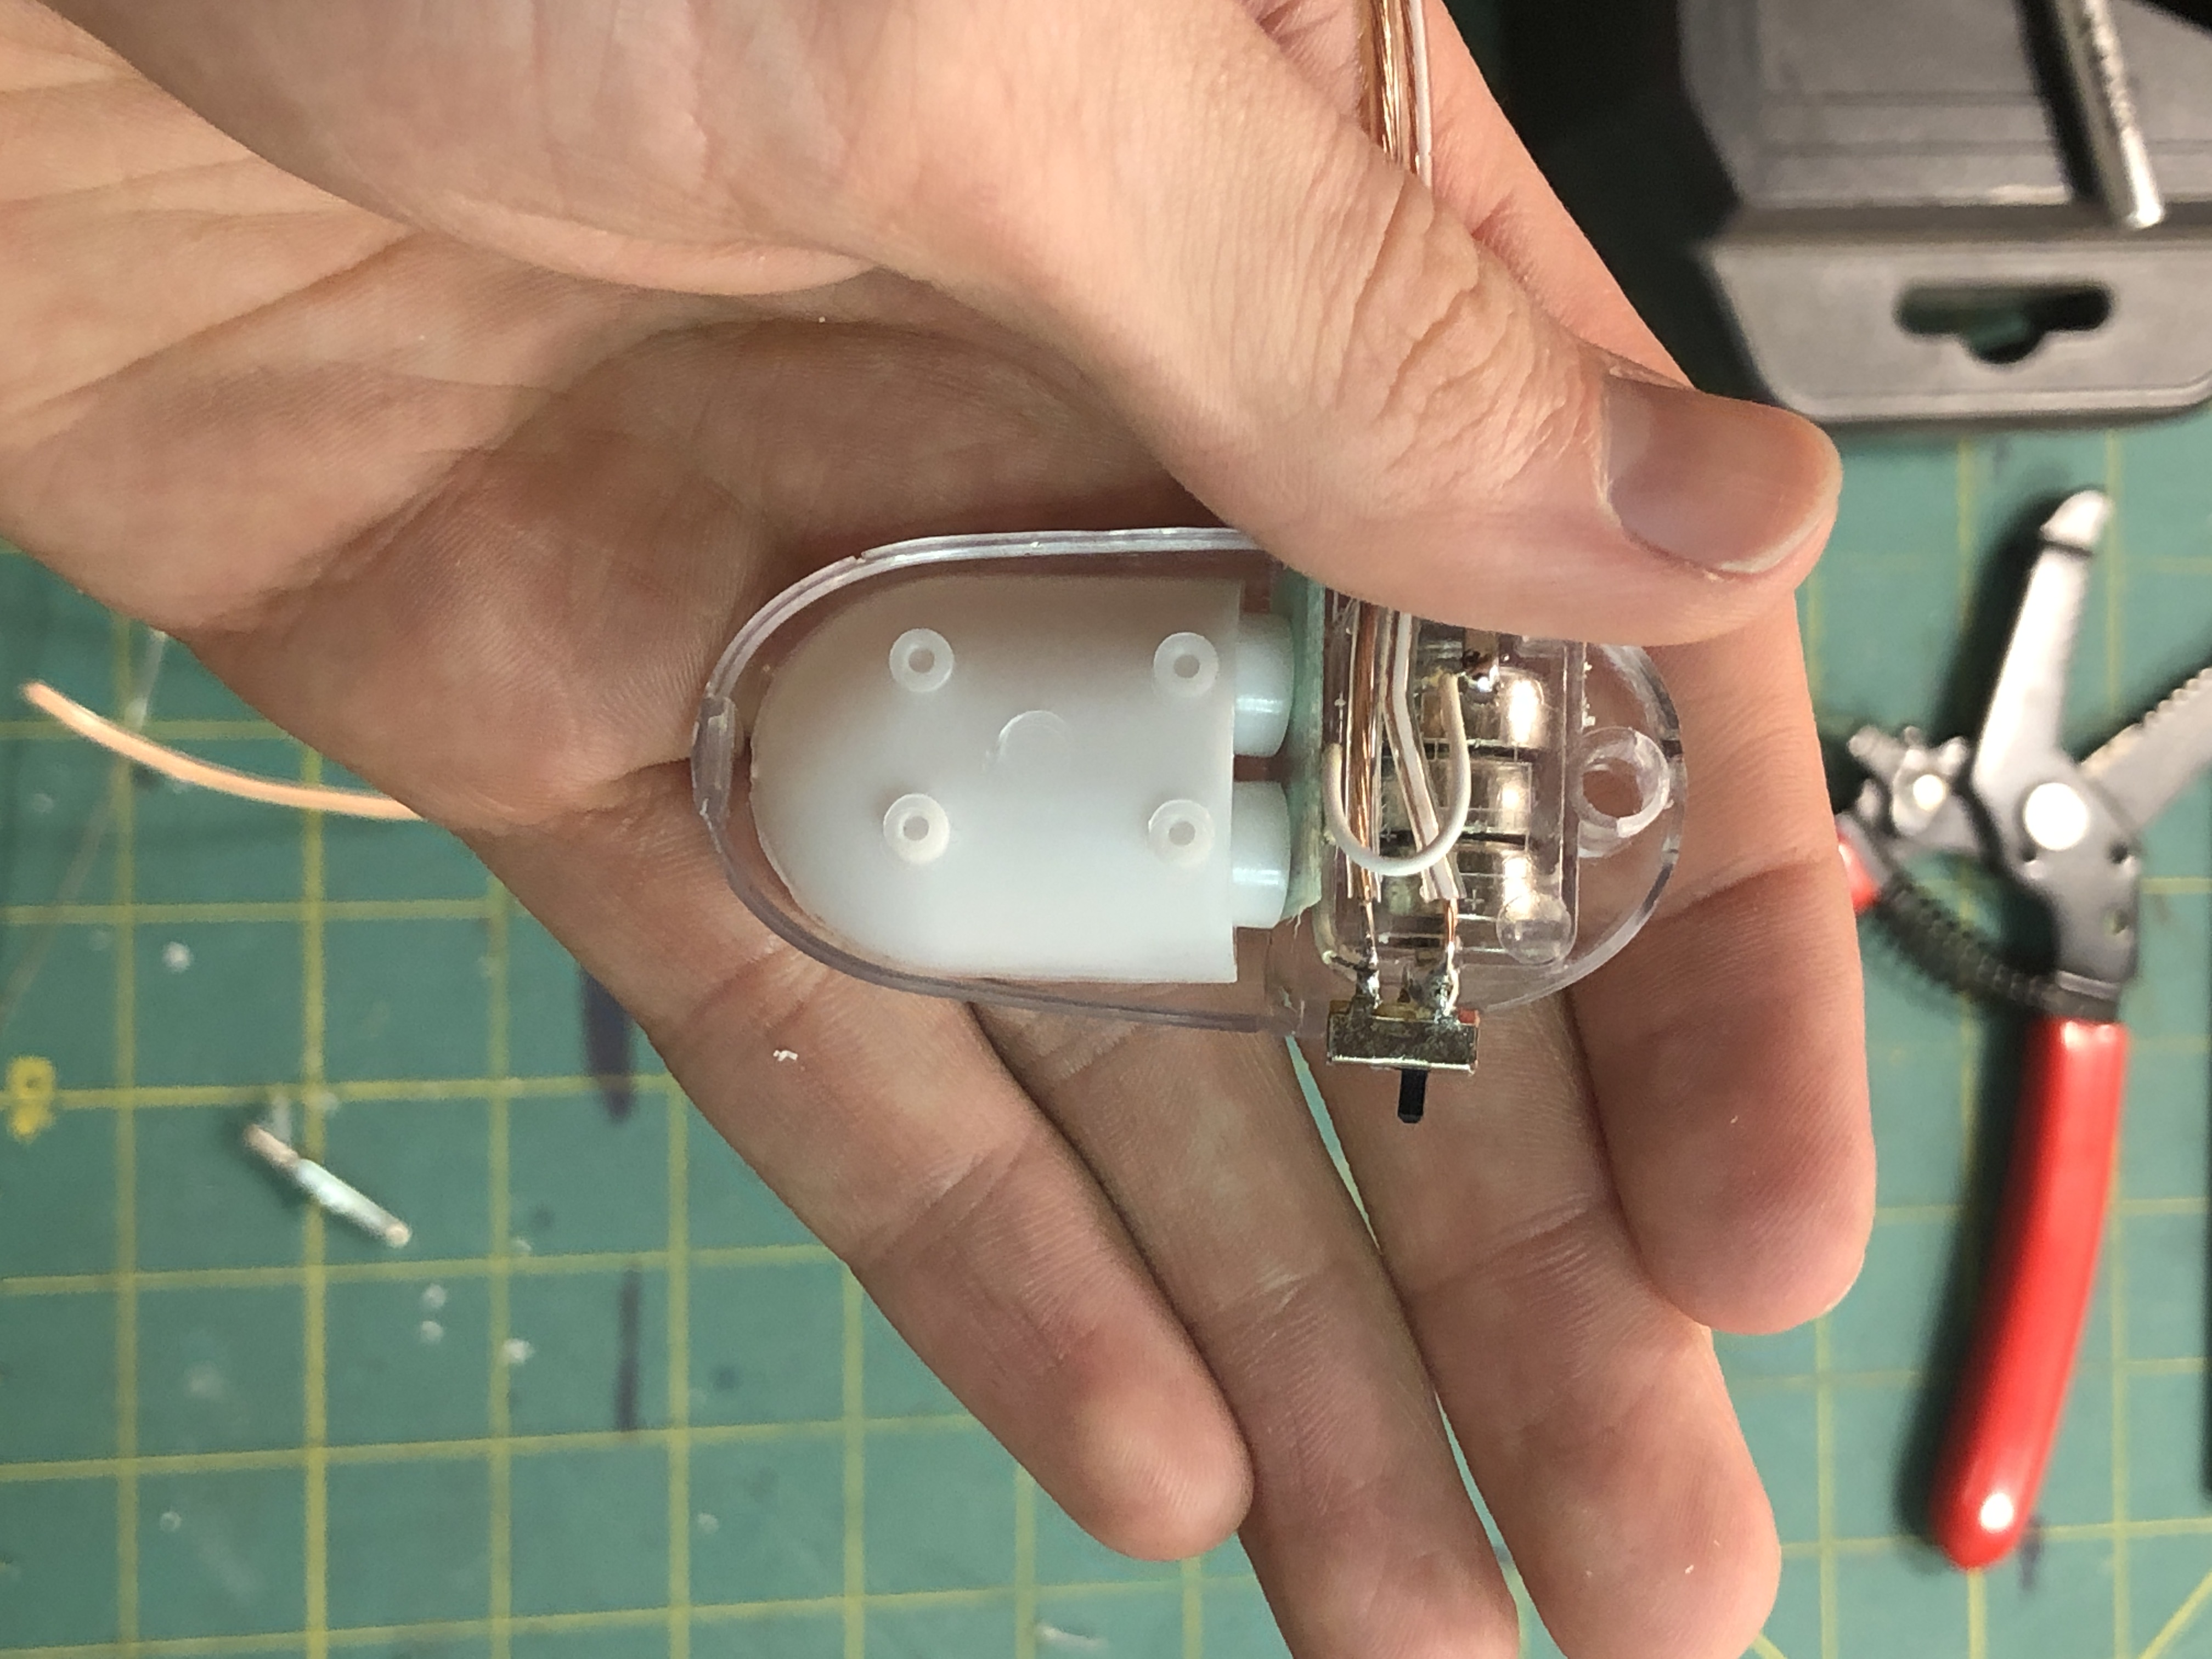
I drilled a hole in the enclosures for the wires to stick out of and reassembled the LED Housing. Then I simply hot-glued each light into a playground cone and wired up the other ends of the speaker wires to the screw terminals on my Qwiic Quad Relay.
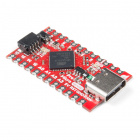
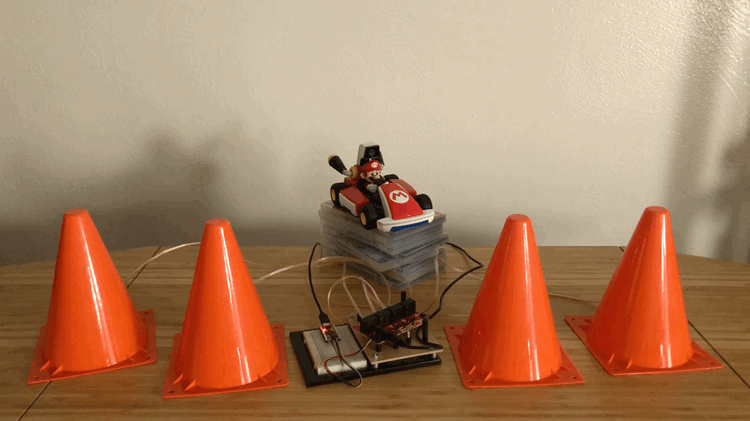
To control the relays, I’m just using a Qwiic Pro Micro connected via the Qwiic cable (obviously). The code I’m using is just the “turn one relay on at a time” example, but copied into the loop() instead of setup().
#include <Wire.h>
#include "SparkFun_Qwiic_Relay.h"

#define RELAY_ADDR 0x6D // Alternate address 0x6C


Qwiic_Relay quadRelay(RELAY_ADDR);

void setup()
{
  Wire.begin();
  Serial.begin(115200);

  // Let's make sure the hardware is set up correctly.
  if(!quadRelay.begin())
    Serial.println("Check connections to Qwiic Relay.");
  else
    Serial.println("Ready to flip some switches.");
}

void loop()
{Serial.println("Let's turn each relay on, one at a time.");
  // To turn on a relay give the function the number you want to turn on (or
  // off).
  quadRelay.turnRelayOn(1);
  delay(200);
  quadRelay.turnRelayOn(2);
  delay(200);
  quadRelay.turnRelayOn(3);
  delay(200);
  quadRelay.turnRelayOn(4);
  delay(1000);

  // You can turn off all relays at once with the following function...
  Serial.println("Now let's turn them all off.");
  quadRelay.turnAllRelaysOff();
  delay(1000);
}
Just upload that to the Pro Micro and plug a 12v power supply into the barrel jack on the Qwiic Quad Relay, and your cone should light up in succession, and then turn off ad nauseam (click click click). Admittedly these relays are overkill for the tiny LED lights, but whatever.
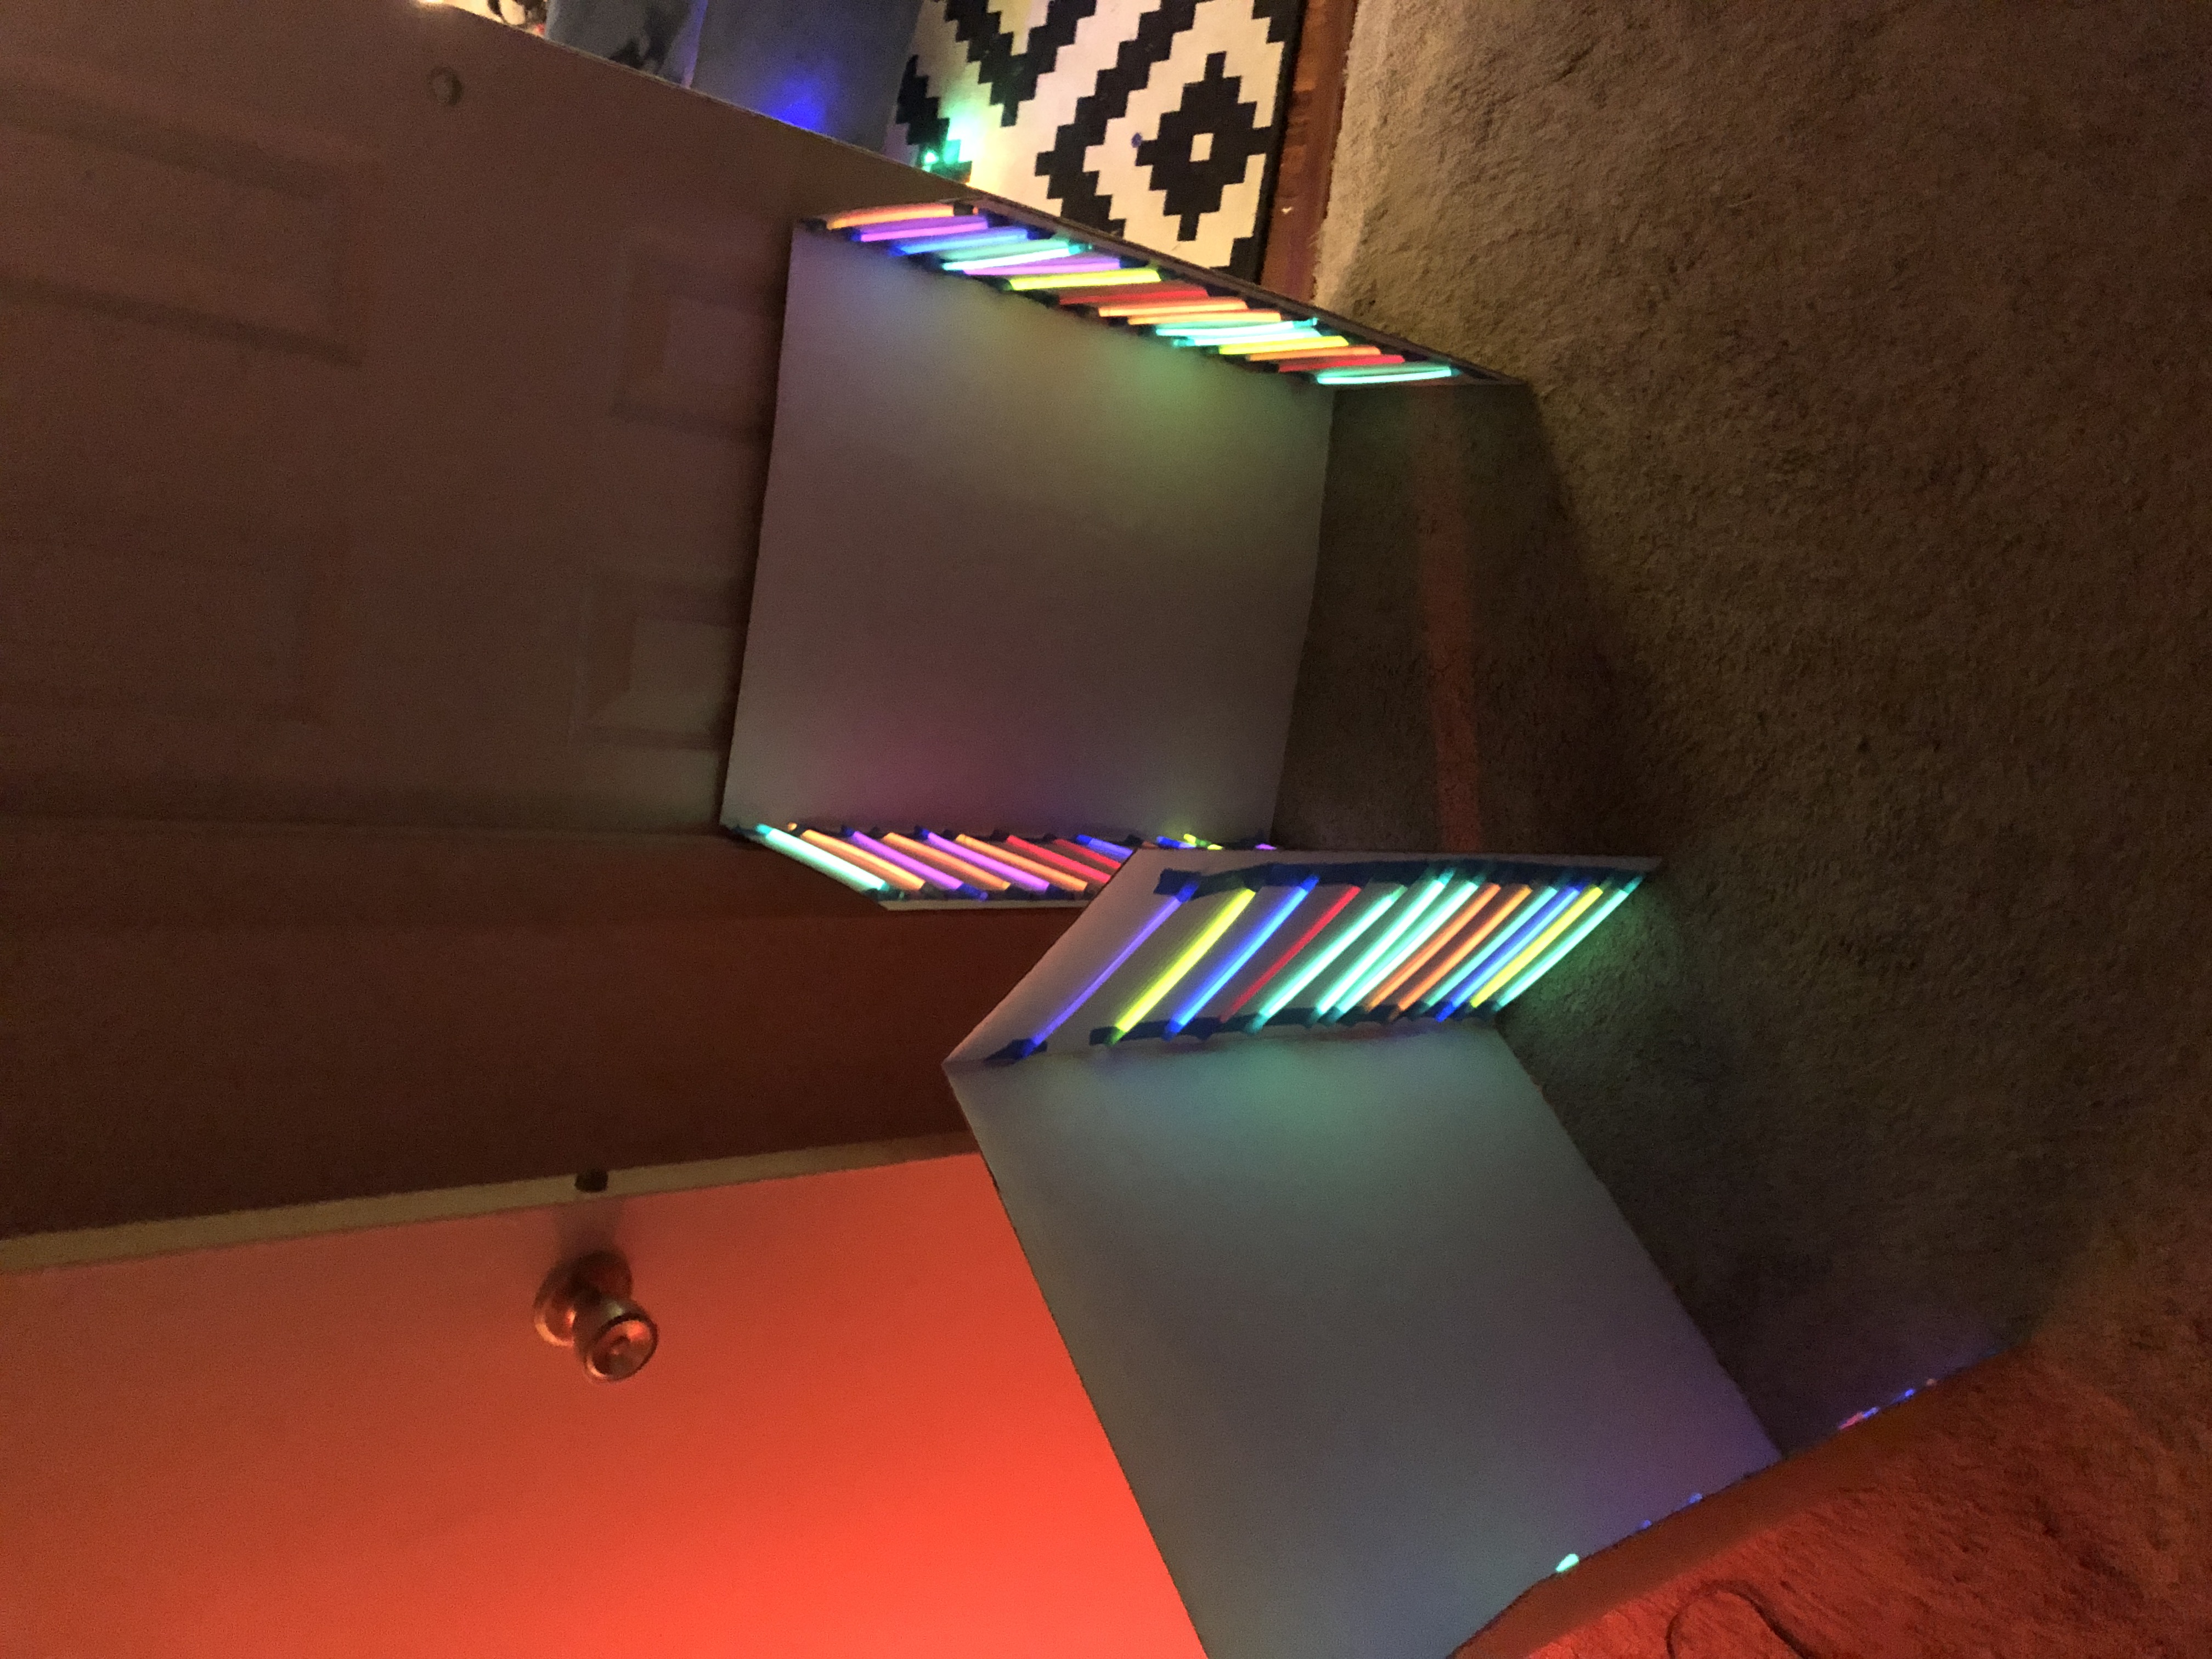
With my glowsticks and science fair display boards, I created a couple of glowy tunnels for the dark section of my track. I used painter’s tape to secure everything. Obviously, you want to do this last, as the glowsticks don’t last very long. I also used a couple of cheap clamp lights with colored LED bulbs in them in the dark section of my track. Pretty self-explanatory:
Here’s the final track, props and all! I prefer to race myself in time-trial mode, rather than the virtual opponents. I’m also using the 8BitDo SN30 Pro Bluetooth Gamepad that I purchased personally as soon as it became available on SparkFun.com. I can’t recommend it enough given the SNES style and cross-platform compatibility. I use it constantly now.

Project Submissions:
If you have a project that you want to show off and are interested in writing a post for SparkFun, tweet us @SparkFun, tag us on Instagram @SparkFun, or shoot us an email, but the best way is to submit your project by clicking the link below. We'd love to work with you and share your project!


If you use UV LED strips you can still make the glow sticks react after they've lost their chemically induced glow.
So what's the penalty for hitting Jones the Cat?