- Home
- Product Categories
- LilyPad
- LilyPad FTDI Basic Breakout - 5V


LilyPad FTDI Basic Breakout - 5V
This is the LilyPad revision of our FTDI Basic. It is the same as our other FTDI Basic, but has a purple LilyPad board which is half the thickness.
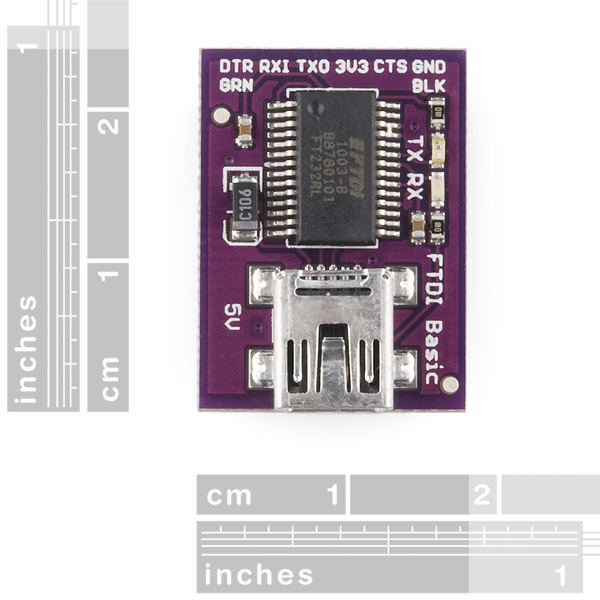
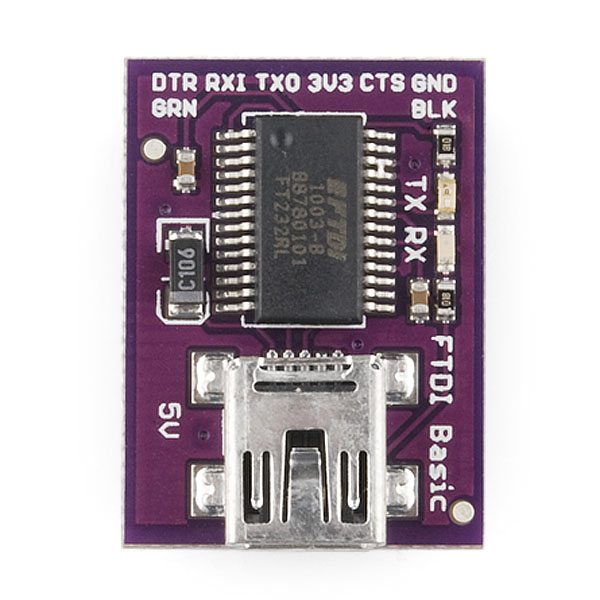
This is a basic breakout board for the FTDI FT232RL USB to serial IC. The pinout of this board matches the FTDI cable to work with official Arduino and cloned 5V Arduino boards. It can also be used for general serial applications. The major difference with this board is that it brings out the DTR pin as opposed to the RTS pin of the FTDI cable. The DTR pin allows an Arduino target to auto-reset when a new Sketch is downloaded. This is a really nice feature to have and allows a sketch to be downloaded without having to hit the reset button. This board will auto reset any Arduino board that has the reset pin brought out to a 6-pin connector.
The pins labeled BLK and GRN correspond to the colored wires on the FTDI cable. The black wire on the FTDI cable is GND, green is CTS. Use these BLK and GRN pins to align the FTDI basic board with your Arduino target.
This board has TX and RX LEDs that make it a bit better to use over the FTDI cable. You can actually see serial traffic on the LEDs to verify if the board is working.
This board was designed to decrease the cost of Arduino development and increase ease of use (the auto-reset feature rocks!). Our Arduino Pro boards and LilyPads use this type of connector.
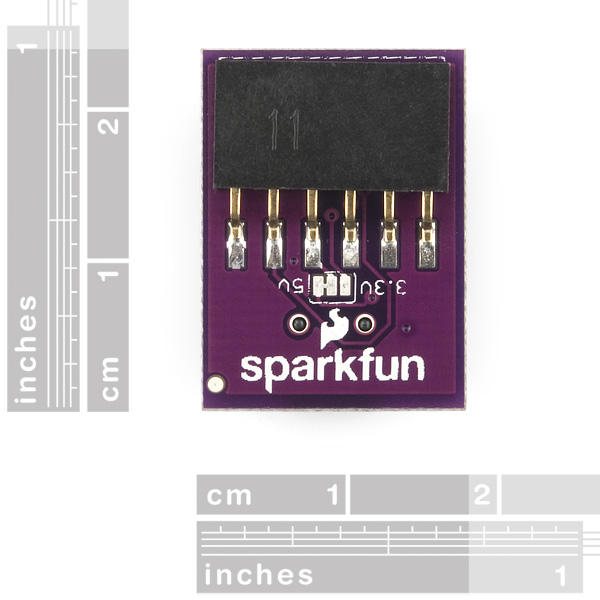
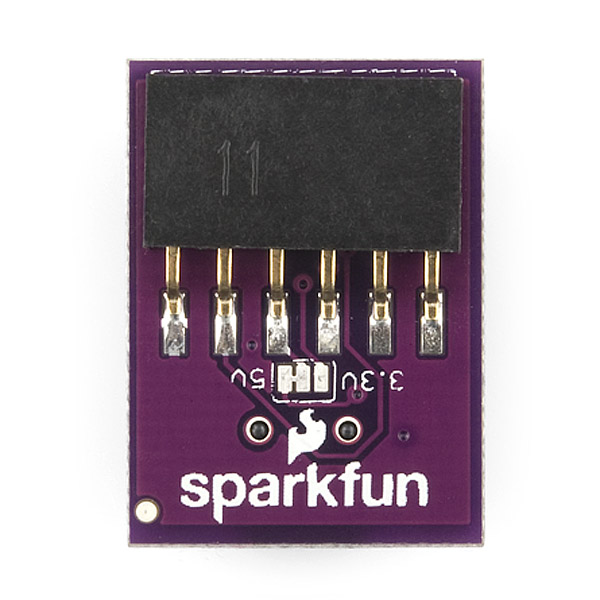
One of the nice features of this board is a jumper on the back of the board that allows the board to be configured to either 3.3V or 5V (both power output and IO level). This board ship as 5V, but you can cut the default trace and add a solder jumper if you need to switch to 3.3V.
Note: We know a lot of you prefer microUSB over miniUSB. Never fear, we've got you covered! Check out our FT231X Breakout for your micro FTDI needs!
Note: A portion of this sale is given back to Dr. Leah Buechley for continued development and education of e-textiles.
LilyPad FTDI Basic Breakout - 5V Product Help and Resources
How to Work with Jumper Pads and PCB Traces
April 2, 2018
Handling PCB jumper pads and traces is an essential skill. Learn how to cut a PCB trace, add a solder jumper between pads to reroute connections, and repair a trace with the green wire method if a trace is damaged.
SparkFun USB to Serial UART Boards Hookup Guide
February 18, 2016
How to use the SparkFun FTDI based boards to program an Arduino and access another serial device over the hardware serial port, without unplugging anything!
How to Install FTDI Drivers
June 4, 2013
How to install drivers for the FTDI Basic on Windows, Mac OS X, and Linux.
Core Skill: Electrical Prototyping
If it requires power, you need to know how much, what all the pins do, and how to hook it up. You may need to reference datasheets, schematics, and know the ins and outs of electronics.
Skill Level: Noob - You don't need to reference a datasheet, but you will need to know basic power requirements.
See all skill levels
Comments
Looking for answers to technical questions?
We welcome your comments and suggestions below. However, if you are looking for solutions to technical questions please see our Technical Assistance page.
Customer Reviews
4.8 out of 5
Based on 10 ratings:
Holding up to great use.
I teach 6th graders the basics of arduino with the lilypad and we use the FTDI to connect with the usb cable. The amount of use these little things go through is quite a bit and I have yet to run into one that has failed. Going on 3 years now.
Had trouble comm w/pc
I bought this for my lilypad arduino. I spent a week troubleshooting this thing until it finally starting communicating with my pc. It won't work at all on my mac. I finally got it to work on my laptop with Windows 7. I installed the drivers fine on both pc's and selected the proper com port, but it only worked on my windows pc when I selected "Arduino UNO" board. It didn't work at all when I selected Lilypad 328. I tried changing programmers, reversing rx/tx, and I even scratched out the 5V and added a jumper so it will operate at 3.3V which were all recommendations made by various enthusiasts online. Nothing worked until I selected "UNO" as my board. Besides all the hurdles and hoops I've had to jump through, I'm quite satisfied with the outcome of my project. I wish, however, that the lilypad had a built in RC + inverting schmitt trigger circuit to filter out alot of the debouncing that my SPST push-buttons are generating. My programming solutions for this problem are insufficient. I'll have to add another circuit just to clean the signal.
Make sure you check out our Installing FTDI Drivers tutorial linked on the product page. As for the board selection, that actually has nothing to do with the FTDI board. The Arduino IDE board selection to to select which bootloader is on the chip you are using, if it can't find that bootloader it will give an error. Remember, if you ever have any questions feel free to email techsupport@sparkfun.com, they are pretty helpful.
I'm loving the lilypad system
as a new "tech head", the lilypad combined with the "Sew Electric" book is a terrific introduction to arduino. Thanks for a great product
Easy to use!
I recently purchased the FTDI Basic Breakout along with the Lilypad Simple Board, and it seems pretty easy to use. I am new to wearable electronics, but within a very short time, I was able to light up some LEDs like a pro. I'm very excited to see what projects I can come up with. This piece is a must if you're working with the Lilypad Simple Board!
Solid little adapter
I've worked with enough bad USB-to-serial adapter boards that I just expect them to be flaky at this point. This breakout board has been rock solid and dead simple, though! It installed perfectly on Windows 10 and has worked reliably for me. I'm genuinely impressed with it.
It does what it gotta do
From all the LilyPad series, this is the most stable item. It just works great!
As an amateur, I'm having a really hard time figuring out which cable to use. I know that it says that it's the same as the FTDI cable for official Arduino and cloned 5V Arduino boards, but I still don't know which one that means. A link to the specific cable, or a more specific description would be really handy. I have four different USB converter cables at home, and none of them fit.
You need to use a USB A to Mini B cable with this, like the one sold here.
So, this is basically exactly the same as this:
http://www.sparkfun.com/products/9716
...except it's thinner?
I ask because The regular FTDI Basic 5V is currently back-ordered. Is there really any reason I would pick FTDI Basic 5V over this one, other than cosmetics?
Yeah it's pretty much exactly the same, just a different color PCB.