- Home
- Product Categories
- Distance
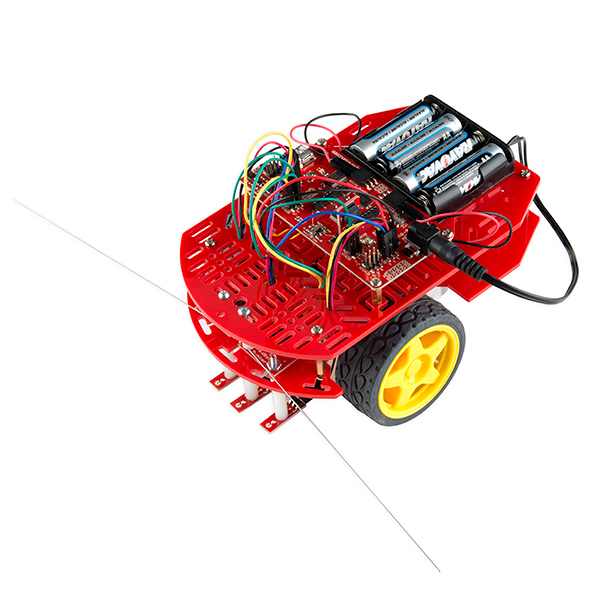
- SparkFun RedBot Sensor - Mechanical Bumper

SparkFun RedBot Sensor - Mechanical Bumper
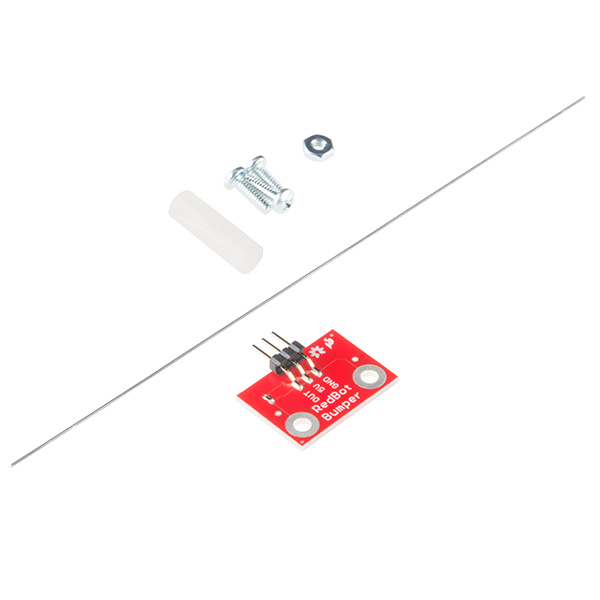
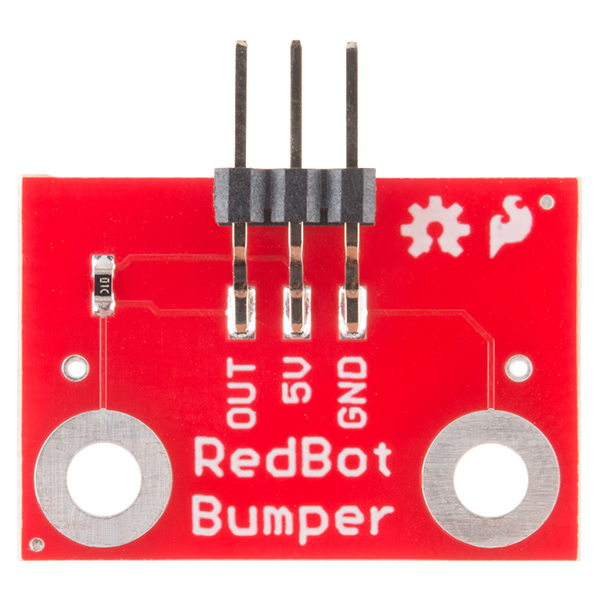
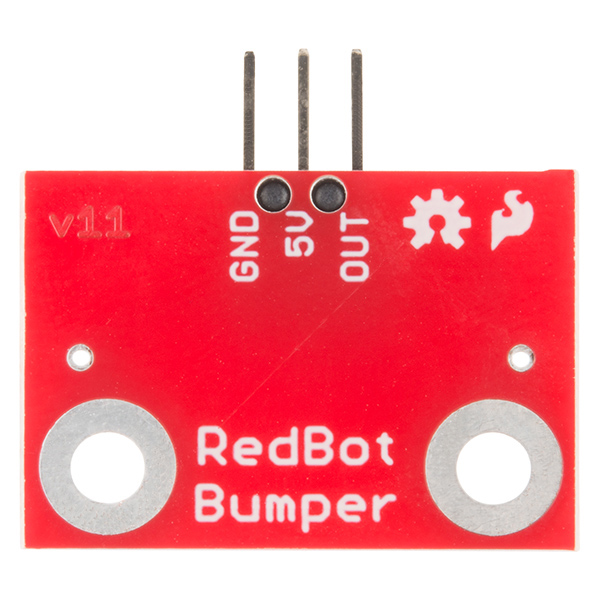
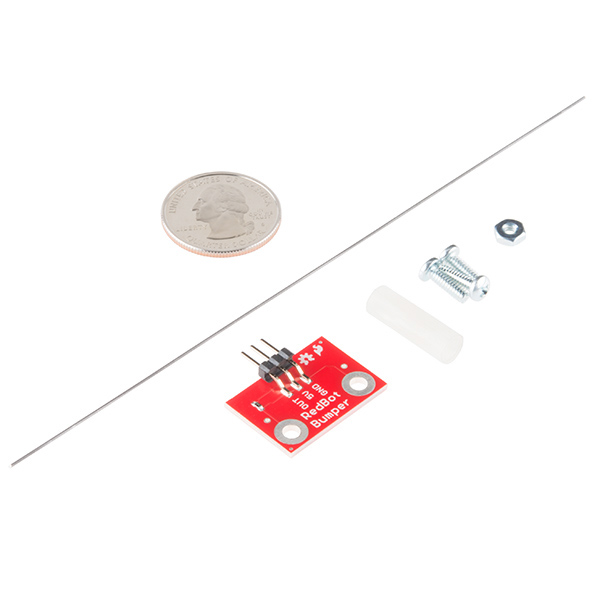
These simple switches are the Mechanical Bumper sensor for the SparkFun RedBot, giving you the ability to detect a collision before it really happens. This sensor works by acting as a SPST switch. When the "whisker" bumps into a foreign object it will make contact with a nut next to it, closing the connection and, by default, turning off the motor. By attaching these mechanical bumpers to you robot the whisker will bump something before your robot crashes into it.
The sensor has a 3-pin header which connects directly to the RedBot Mainboard via female to female jumper wires. Use the included RedBot library to make sure your robot never crashes into anything again.
Check out the entire RedBot family of products!
Note: Our RedBot tutorials utilize two of these Mechanical Bumper Sensors. Please take this into consideration before placing your order.
- 1x Mechanical Bumper Board
- 1x Whisker
- 1x 3/4" 4-40 Nylon Standoff
- 1x 4-40 Hex Nut
- 3x 3/8" 4-40 Phillips Machine Screw
- 1.03 x 0.69" (26.27 x 17.67 mm)
SparkFun RedBot Sensor - Mechanical Bumper Product Help and Resources
Continuous Rotation Servo Trigger Hookup Guide
May 26, 2016
How to use the SparkFun Continuous Rotation Servo Trigger with continuous rotation servos, without any programming!
Experiment Guide for RedBot with Shadow Chassis
May 28, 2015
This Experiment Guide offers nine experiments to get you started with the SparkFun RedBot. This guide is designed for those who are familiar with our SparkFun Inventor's Kit and want to take their robotics knowledge to the next level.
Wire Gauge
The wire is 0.025" in diameter and made out of spring steel. This should be about 22 gauge.
Core Skill: Robotics
This skill concerns mechanical and robotics knowledge. You may need to know how mechanical parts interact, how motors work, or how to use motor drivers and controllers.
Skill Level: Noob - You will be required to put together a robotics kit. Necessary parts are included and steps will be easy to follow. You also might encounter basic robotics components like bearings, mounts, or other hardware and need a general idea of how it goes together.
See all skill levels
Core Skill: DIY
Whether it's for assembling a kit, hacking an enclosure, or creating your own parts; the DIY skill is all about knowing how to use tools and the techniques associated with them.
Skill Level: Rookie - Basic hand tools are required and instructions will allow more freedom. You may need to make your own decisions on design. If sewing is required, it will be free-form.
See all skill levels
Core Skill: Electrical Prototyping
If it requires power, you need to know how much, what all the pins do, and how to hook it up. You may need to reference datasheets, schematics, and know the ins and outs of electronics.
Skill Level: Rookie - You may be required to know a bit more about the component, such as orientation, or how to hook it up, in addition to power requirements. You will need to understand polarized components.
See all skill levels
Comments
Looking for answers to technical questions?
We welcome your comments and suggestions below. However, if you are looking for solutions to technical questions please see our Technical Assistance page.
Customer Reviews
3.5 out of 5
Based on 2 ratings:
Had Issues with making it compatible with arduino
I figured since it was just a bumper sensor that is supposed to send a 5V output signal when the rod is not in contact with the nut, the arduino would read this input fine and be able to respond accordingly, however this was not the case. The arduino would respond to the sensor correctly about 1 in 100 times. After about 12 hours of debugging my circuit, I ended up tossing the board and just mounting the stem to a limit switch which was 100% effective.
Hello!
Sorry to hear about the issues with the mechanical bumper sensor. Have you contacted our technical support department @ techsupport@sparkfun.com ? They're usually pretty good at getting these working, or helping to debug a system.
Just a word of caution -- you need two of these to make your redbot look like the example in the final picture.
The music wire used for this kit is 0.025"(.64mm) in diameter if anyone was curious.
Can you add a picture of it assembled by itself without the RedBot?
You don't real need a breakout board for whiskers. Definitely not one with 3 leads.
OWW ! I poked my eye out %#%$$@# I think the whiskers should have loops on the ends for safety.
That... is actually a really good idea. as this is spring steel (I'm guessing) it will be really hard to curl the ends once you have it. If sparkfun could do this (if not for eyes, then to avoid poking ankles and walls when the bot is running around) it would be quite awesomer than the current product as it is. (yes, I just made up that word)
Considering that the user needs to bend the wire to make it work in the first place, I think we'll leave it unbent for the time being. It would also add significantly to the time required to assemble the kit.
How much does it weigh?
According to our internal shipping calculator, it weighs about 6 grams. That's the whole kit- wire, screws, board, etc.