- Home
- Product Categories
- Magneto
- SparkFun Triple Axis Magnetometer Breakout - MAG3110

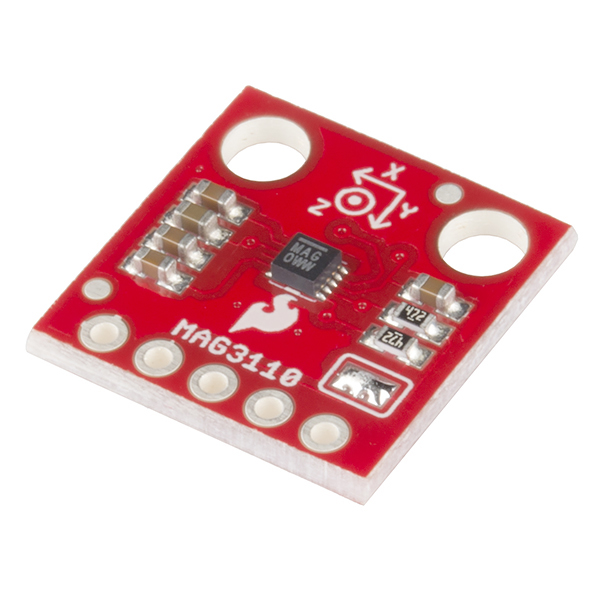
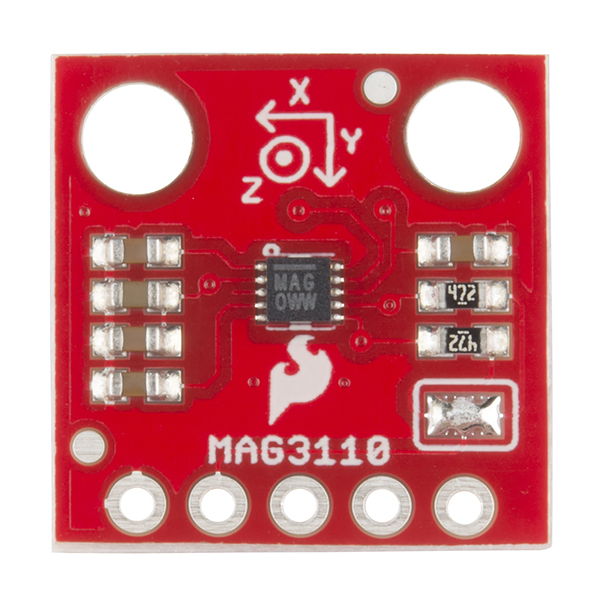
SparkFun Triple Axis Magnetometer Breakout - MAG3110
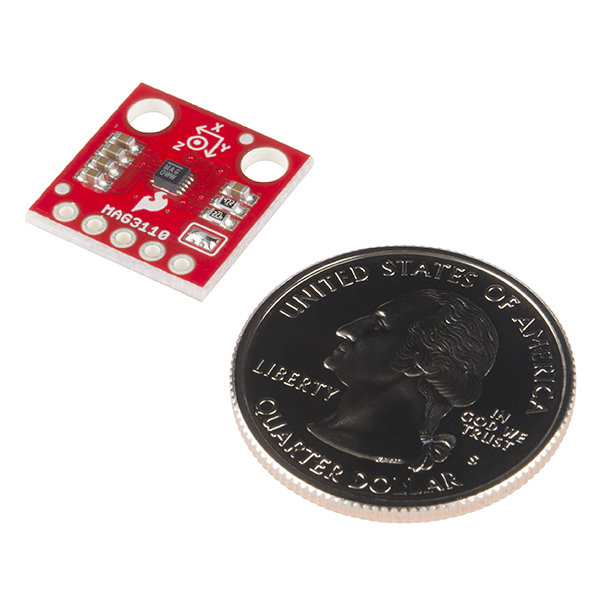
Freescale’s MAG3110 is a small, low-power, digital 3-axis magnetometer. The device can be used in conjunction with a 3-axis accelerometer to produce orientation independent accurate compass heading information. It features a standard I2C serial interface output and smart embedded functions. It's also a tiny QFN package which isn't very easy to play with so here is our easy to use breakout board. This board breaks out all of the pins for the MAG3110 to a standard 0.1" header and also supplies the necessary filtering capacitors so that you can easily use it in your next navigation project.
Note: You will need to use a logic level converter if you are using an Arduino Uno or similar 5V logic device. Even if 3.3V is to be supplied to the VDD, an Uno putting out 5V logic can still fry this breakout.
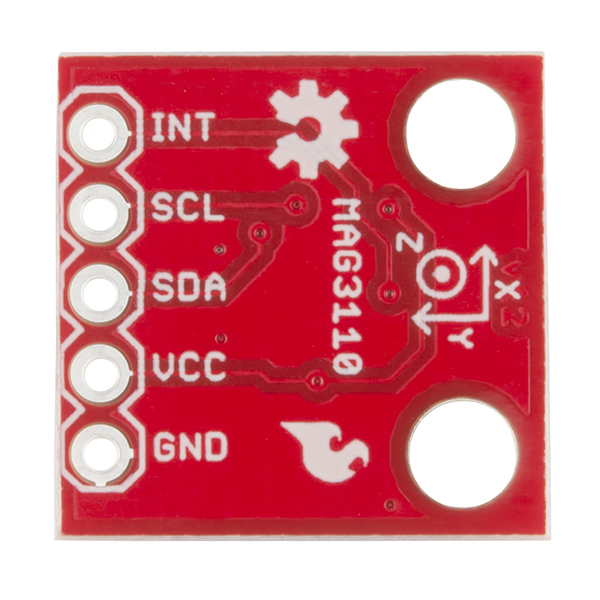
- 1.95V to 3.6V Supply Voltage
- 7-bit I2C address = 0x0E
- Full Scale Range ±1000 μT
- Sensitivity of 0.10 μT
- Pull Up Resistor Jumper
- 13.3 x 14.5 mm
- Schematic
- Eagle Files
- Hookup Guide
- Datasheet (MAG3110)
- Example Code
- GitHub (Design Files)
- GitHub (Libraries)
- Product Video
SparkFun Triple Axis Magnetometer Breakout - MAG3110 Product Help and Resources
MicroView Digital Compass
October 24, 2016
Build a portable digital compass using the SparkFun MicroView and the MAG3110 Magnetometer Breakout.
MAG3110 Magnetometer Hookup Guide
October 24, 2016
Get started with the MAG3110 3-Axis Magnetometer and learn how to make your own digital compass that senses the Earth's magnetic fields.
Core Skill: Soldering
This skill defines how difficult the soldering is on a particular product. It might be a couple simple solder joints, or require special reflow tools.
Skill Level: Noob - Some basic soldering is required, but it is limited to a just a few pins, basic through-hole soldering, and couple (if any) polarized components. A basic soldering iron is all you should need.
See all skill levels
Core Skill: Programming
If a board needs code or communicates somehow, you're going to need to know how to program or interface with it. The programming skill is all about communication and code.
Skill Level: Competent - The toolchain for programming is a bit more complex and will examples may not be explicitly provided for you. You will be required to have a fundamental knowledge of programming and be required to provide your own code. You may need to modify existing libraries or code to work with your specific hardware. Sensor and hardware interfaces will be SPI or I2C.
See all skill levels
Core Skill: Electrical Prototyping
If it requires power, you need to know how much, what all the pins do, and how to hook it up. You may need to reference datasheets, schematics, and know the ins and outs of electronics.
Skill Level: Rookie - You may be required to know a bit more about the component, such as orientation, or how to hook it up, in addition to power requirements. You will need to understand polarized components.
See all skill levels
Comments
Looking for answers to technical questions?
We welcome your comments and suggestions below. However, if you are looking for solutions to technical questions please see our Technical Assistance page.
Customer Reviews
3.5 out of 5
Based on 2 ratings:
1 of 1 found this helpful:
It does work, but...
Ordered this sensor since it fell between this or the HMC5883L, I had no immediate reason to pick one over the other so I just went with this one. After receiving it and working it into my autonomous vehicle project, I found it very difficult to get running. First I had little experience with I2C so it was difficult to get the data off. Once that hurdle was passed I thought it would be smooth sailing, boy could I have not been more wrong. At no point could I find any information on how to calibrate the compass or how to convert the raw data to something usable. There is virtually no information surrounding this chip that isn't horrifically out dated to the point that it isn't even worth looking at. Also, it seemed I was not the only person who issues like this.
For fun I decided to look up how to set up the HMC5883L magnetometer and found plenty of info and help regarding all sorts of little yet easily solved issues. I admit I went into my purchase a little uninformed thinking it did not matter which chip I chose. If I had to suggest buying this, I would say don't and just use the HMC5883L. It will save you a lot of headaches
Does what it says
It's perfectly good and does what it says, but it would be even better with a logic level converter.
Hey guys, just a heads up that there is a error in the coordinate system marked on the breakout. On the top side, the z-axis points down. On the bottom silk screen, the z-axis is drawn correctly, but the arrow for x is mirrored from the correct orientation! Handy breakout, but this did cause some confusion when looking at the sign of some of the data. Thx!
The sample code doesn't compile with the current Arduino environment. The calls to the Wire
sendmethod need to change towriteand thereceivemethod should beread. Or you can grab it from my gist.If you want to do a pull request on our GitHub repo, we'd gladly accept those updates! We prefer the pull request because it gives a history showing all the awesome contributors from the community.
I'll gladly do a pull request, but as far as I can determine, there is no existing repo for the example code.
Whoops! Looked at the wrong repo yesterday. The files are in there now - we keep all the code in the individual product's repository. Sorry about that!
Is see that this is an update to the SEN-10619 MAG3110 breakout, which no longer is available. Aside from making the I2C pull-ups optional, the features of this version 12 breakout are the same as the prior version 11. So why did you change the pinout? Keeping the pinout the same would have let me use this version-12 breakout on my 35 circuit boards, which are designed for the version-11 pinout.
Is there something particularly appealing about this magnetometer I am missing? It only have a FSR of 10 Gauss and is sensitive to 1 milligauss, which doesn't seem to be competitive with other current MR(I am guessing based on the need for a reset current) parts with similar power consumption.
How about an inexpensive board with both the accerometer, and magnetometer?
check out our IMUs, I believe we have a few 9DOFs (also have a gyroscope) on a single chip that are pretty cheap.