- Home
- Product Categories
- Sockets
- microSD Socket for Transflash

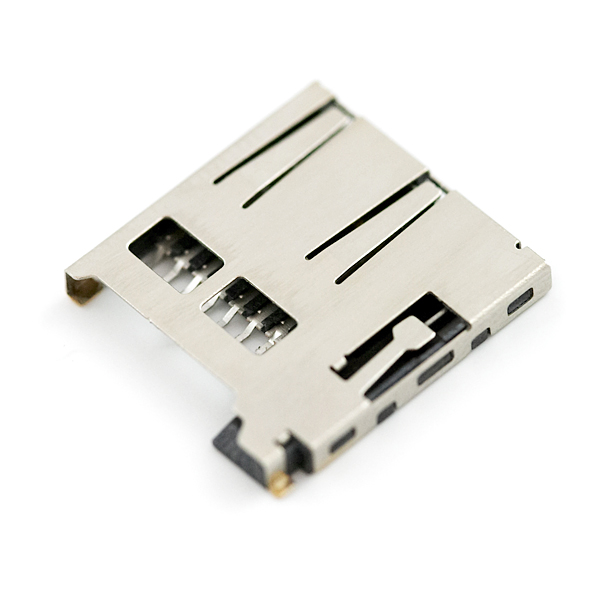
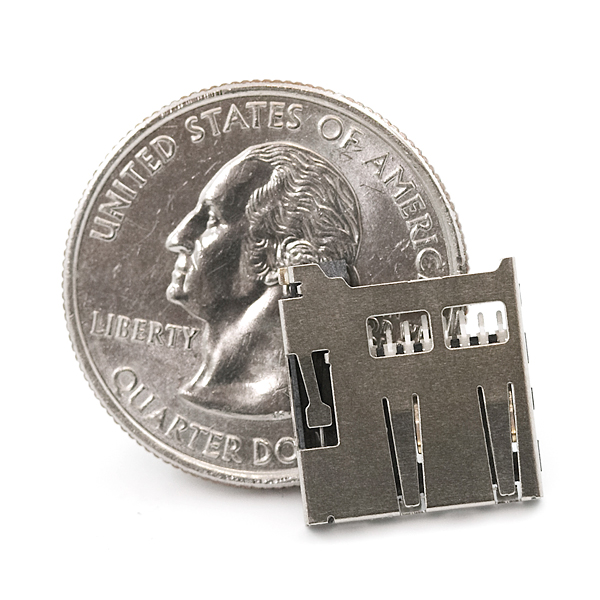
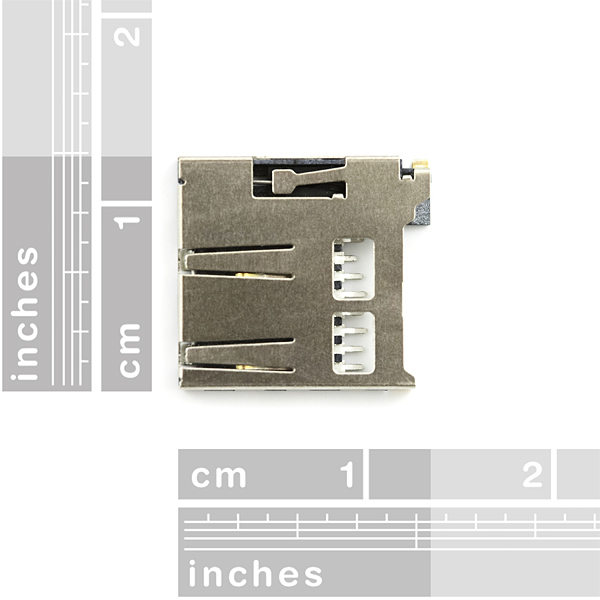
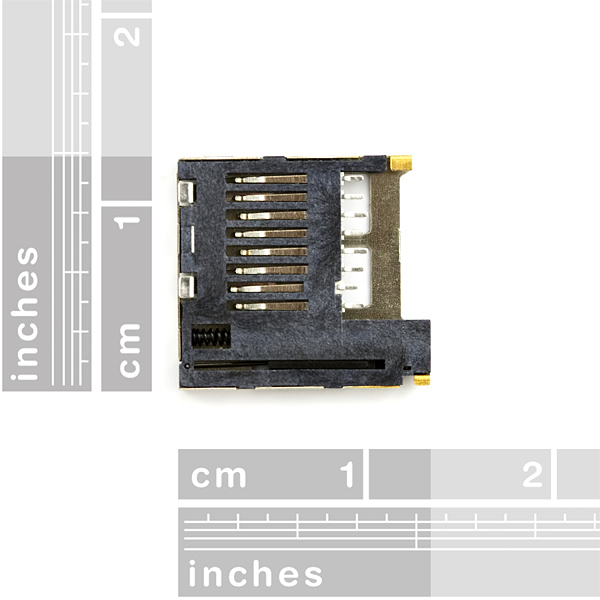
Do you need *a lot *of space? But you need it in the size of your pinky nail? microSD (uSD) is here to save the day. TransFlash has now completed standards certification and is now known as microSD. Compatible with the SPI interface found on any SD card, this tiny form factor was created for cell phone storage and is perfect for your next MP3 project! This is a high quality push-push type SMD socket.
A breakout board is available below.
**Note: **The default detect state of this socket is detect pin to ground.
Need a custom board? This component can be found in SparkFun's À La Carte board builder. You can have a custom design fabricated with this component - and your choice of hundreds of other sensors, actuators and wireless devices - delivered to you in just a few weeks.

- Datasheet
- Eagle Files for Breakout Board (has footprint!)
- microSD Specification
- Adding SD to a Router - Thanks Jake! Eagle Layout as well!
- MMC to Serial Adapter
microSD Socket for Transflash Product Help and Resources
Core Skill: Soldering
This skill defines how difficult the soldering is on a particular product. It might be a couple simple solder joints, or require special reflow tools.
Skill Level: Competent - You will encounter surface mount components and basic SMD soldering techniques are required.
See all skill levels
Comments
Looking for answers to technical questions?
We welcome your comments and suggestions below. However, if you are looking for solutions to technical questions please see our Technical Assistance page.
Customer Reviews
3 out of 5
Based on 1 ratings:
5 of 6 found this helpful:
The pins are not perfectly flush with the ground. If you apply solder with a stencil, not all the pins may make a full connection due to a very thin layer of solder, which can be very frustrating.
If you apply solder paste with a syringe manually, you can get the right amount of solder needed.
But other than that, does what it is supposed to.
Where would I find the Eagle .lbr for this component?
I was able to carefully solder this onto my board using a basic iron without taking the top off.
First, I coated each pad, including the outer ones, with a little bit of solder. Then, I moved the socket over the pads, aligned it, and anchored it down by soldering the outer pads. Be sure to apply gentle pressure to the top of the socket so that it lays down flat.
Next, I was able to poke the iron through the two little rectangular holes on the top to solder the contacts below. I would highly recommend getting an eye loupe for this so that you can see what you're doing- SparkFun sells a nice one for $8. You don't want to accidentally form a bridge between two pins, which luckily didn't happen to me, but which appeared all too easy to do.
Final tips: Be sure to keep the socket flat, as before. Also be sure to press down the contacts onto the pads as flat as possible. Otherwise, when you insert the card, a pin will scrap into the side of it and damage it.
I have created a 3D Model of this component in blender, and x3d.
Hi,
Is this a 3.3 Voltage strict? or can I just use the 3.7V nominal form the Polymer Lithium Ion batteries you guys sell? also, do these just plug in to say MISO, MOSI, SS, CS VSS and GND directly or do I need some circuitry to interact with the "uController"? I've noticed SparkFun's breakout board is just that: "A breakout" which apparently can directly connect to the uController, whereas the Adafruit's breakout board of the uSD has some capacitors and resistances... any advice and help would be greatly appreciated.
Why is the card detect pin grounded on the footprint for this part?
EDIT: never mind. I completely misread something. Ignore my question.
A hand solderable microSD surface mount card socket is Yamaichi PJS008-2003-0. Its eight signal pins, two card detect pins and four mounting solder tabs all extend away from the socket to be accessible. None are underneath the socket. It is a push-push type with normally open card detect switch when no card is inserted and its signal pins are located opposite from the card insertion side. The card inserts upside down when viewing the socket from the top, so it probably is meant to be mounted on the bottom of a pcb. Available from Mouser as part 945-PJS008-2003-0.
Hilrose looks like they have a few you can easily solder...
http://www.mouser.com/Search/ProductDetail.aspx?R=DM3CS-SFvirtualkey99990000virtualkey798-DM3CSSF
Can you stencil this?
Did you ever try stenciling this? I didn't realize there were problems stenciling this part before I ordered my board and stencil. My stencil is 3mil thick but the mfg offers a 5mil thickness. I might try that next time.
Sorry, I had 0 electronics experience back then. Disregard.
I'm really confused about using this part in EAGLE. In the latest library there is a part called "MICRO-SDCARD" but it only has one package available, and that is the actual card (called "MICRO-SDCARD"), not the socket on this page. I do see the package called "MICRO-SD-SOCKET-PP" in the parts library that looks like the right thing, but I can't seem to apply it to the MicroSD device.
Our naming conventions are a bit odd in the SparkFun Eagle library. Both old and new sockets are located under 'USD-SOCKET'.
Ok i have ordered this part from digi-key:
http://search.digikey.com/scripts/DkSearch/dksus.dll?Detail&name=101-00660-68-6-1-ND
and it is exactly same socket, and fits the model of SFE sparkfun library.
to solder it, apply liquid flux on a board, and on the pins of the socket. then just put it, and try to put ur iron under the metal cap...simple iron can do this easily, no need for fine point or anything extra.
Ok here is a link to DigiKey:
http://search.digikey.com/scripts/DkSearch/dksus.dll?Detail&name=101-00660-68-6-1-ND
For some reason SparkFun doesnt indicate who is the manufacturer of the part (i didnt find it). and on digikey that part costs 1.66$ what is twice cheaper than here...
the part looks almost same, i guess its the correct replacement. im ordering it.
While this is perhaps the correct footprint replacement, it should be noted that the second Card Detect pin is grounded permanently on the Digikey item. If the device actually samples this pin, it may result in the host assuming a card is present when it is not, and thus create some generally odd problems.
I suspect the top metal part can be taken off for soldering the pins underneath to board, can anyone confirm this?
It's possible, just note that this could decrease the sturdiness of the socket.
SD Card Specification link is broken.
Sorry - SDcard must have moved some pages. The simplified SD spec can be found here: http://www.sdcard.org/developers/tech/sdcard/pls/simplified_specs/
Does anybody know how to solder this part with just a common soldering iron (not a hot air station)? It seems pretty difficult. :-S
The latest version of the SFE-Eagle library has the new footprint.
Hey SparkFun, any chance you could send me your new protel footprint for this microSD socket? The one in the SFE-Eagle library is out of date! :-(
Warning: This part does not match the SparkFun Eagle Library part that references the PRT-00127.
one last question. How would i use this in a 5V circuit?
I figured this out to.
what are the yellow lines in front of the card socket in the new socket from the Sparkfun eagle library? Do they show how far the card extends? If so, which line is the right one?
I figured it out from another comment.
to interface with a Teensy(or any microcontroller) via SPI, using the sdfat library, what pins should I connect to which?