- Home
- Product Categories
- Kits
- Digital Oscilloscope DIY Kit

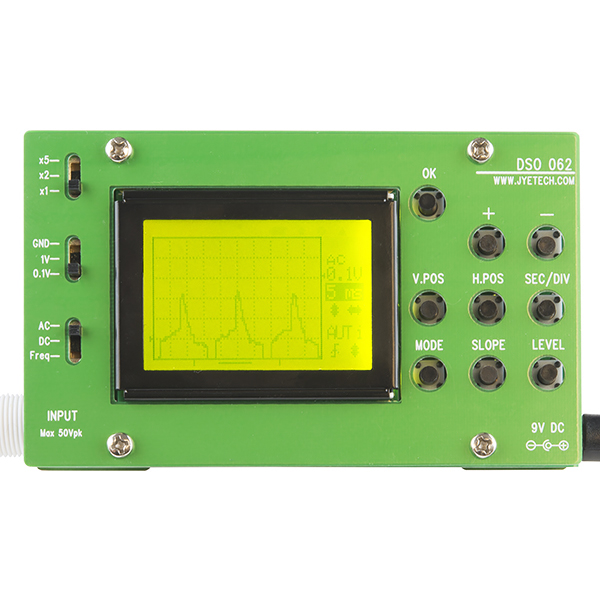
Digital Oscilloscope DIY Kit
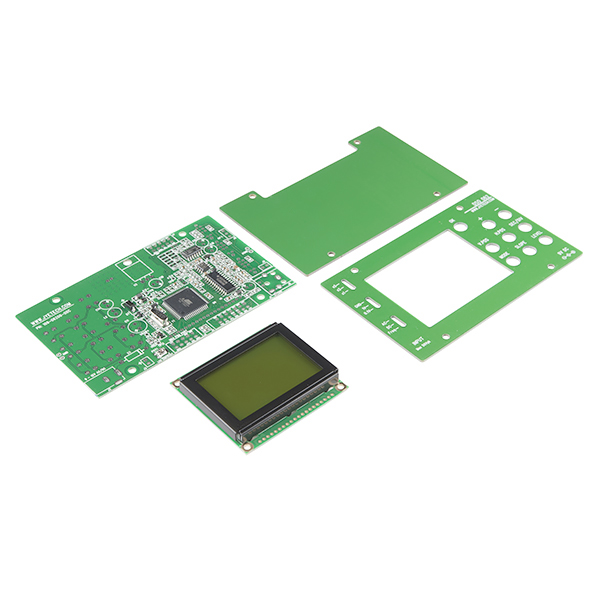
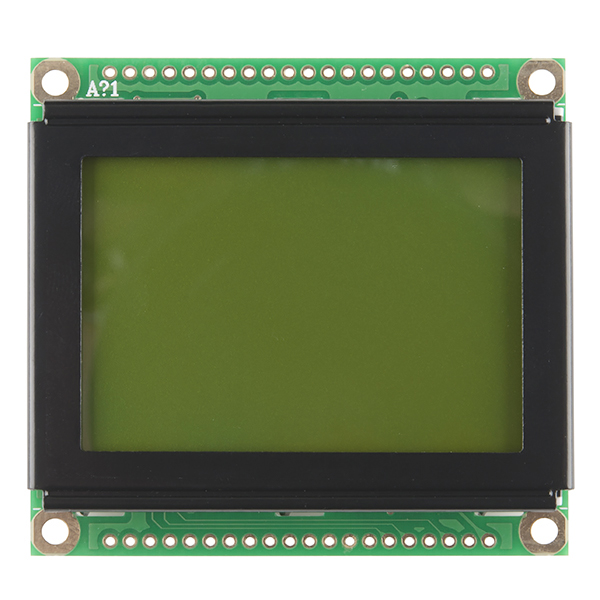
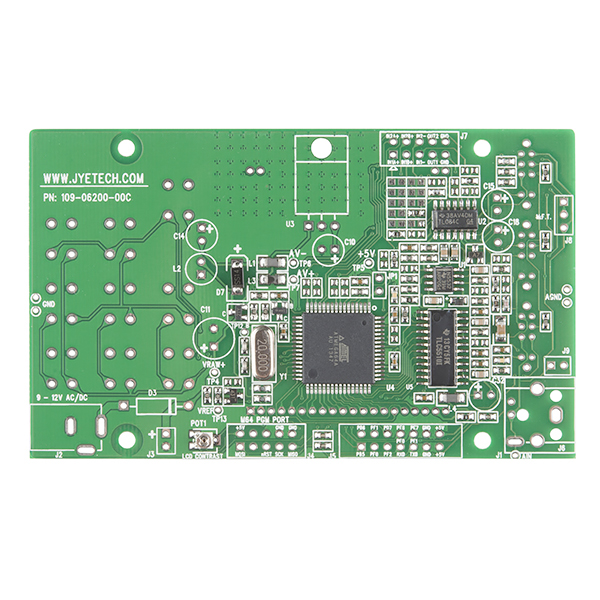
This kit includes everything you need to build your very own, fully functional, digital oscilloscope. Once you've got it up and running, the oscilloscope features up to 5M samples/second, 8-bit resolution, up to 50Vpp max input voltage, and more!
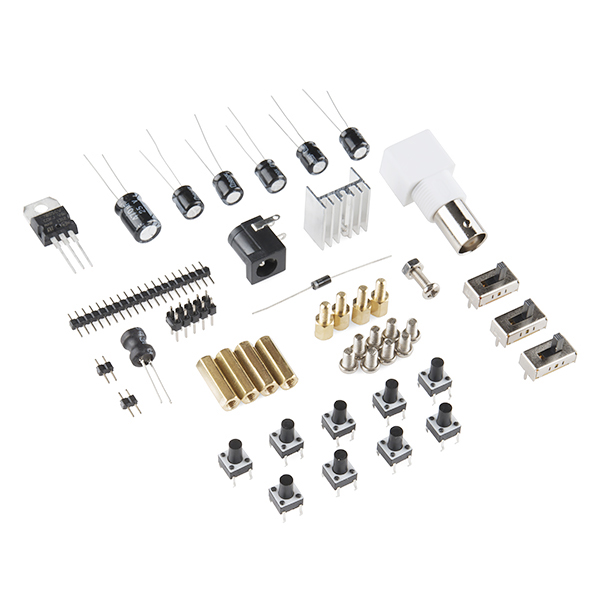
This kit includes a semi-populated PCB, with all of the surface mount components already soldered on for you. The components left for you to solder are all through-hole. This is on the higher end of difficulty as far as through-hole kits go.
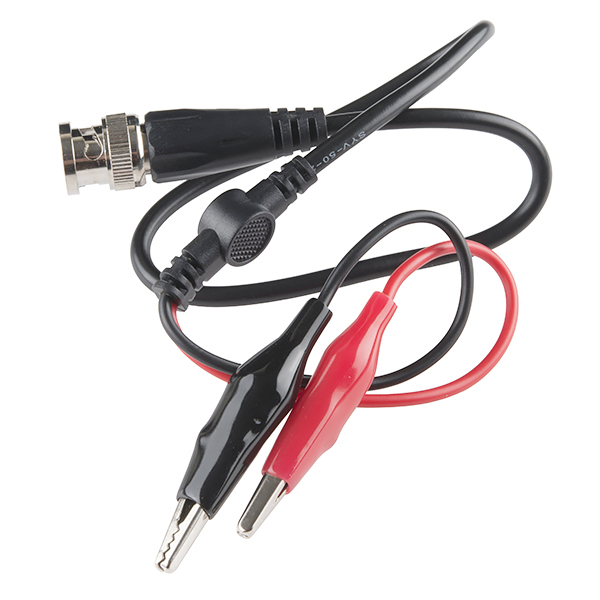
This kit pairs nicely with our BNC Probe Kit! A 9V power supply is required to run the oscilloscope; supply is not included.
- 9VDC power supply voltage
- <280mA current draw
- 5M samples/second (AUTO mode only)
- 8 bit resolution
- 256 sample memory depth
- 1MHz analog bandwidth
- 100mV/Div-5V/Div sensitivity
- 1MΩ impedance
- 50Vpeak-to-peak max input voltage
- DC/AC coupling
- Save and display up to 6 captures to memory
- Transfer screen capture to PC as a bitmap file (serial adapter not included)
- Backlit LCD display
- BNC Connector* 110x65x25mm
- Weight: 70g
Digital Oscilloscope DIY Kit Product Help and Resources
How to Use an Oscilloscope
February 25, 2014
How to work the dials and buttons on an oscilloscope, and a glossary of the o-scope lexicon.
LCD Backlight Troubleshooting Tips
If you are having issues where the LCD backlight does not light up and you cannot see anything on the display, try looking at this troubleshooting guide by JYE Tech.
Core Skill: Soldering
This skill defines how difficult the soldering is on a particular product. It might be a couple simple solder joints, or require special reflow tools.
Skill Level: Rookie - The number of pins increases, and you will have to determine polarity of components and some of the components might be a bit trickier or close together. You might need solder wick or flux.
See all skill levels
Core Skill: DIY
Whether it's for assembling a kit, hacking an enclosure, or creating your own parts; the DIY skill is all about knowing how to use tools and the techniques associated with them.
Skill Level: Noob - Basic assembly is required. You may need to provide your own basic tools like a screwdriver, hammer or scissors. Power tools or custom parts are not required. Instructions will be included and easy to follow. Sewing may be required, but only with included patterns.
See all skill levels
Core Skill: Electrical Prototyping
If it requires power, you need to know how much, what all the pins do, and how to hook it up. You may need to reference datasheets, schematics, and know the ins and outs of electronics.
Skill Level: Rookie - You may be required to know a bit more about the component, such as orientation, or how to hook it up, in addition to power requirements. You will need to understand polarized components.
See all skill levels
Comments
Looking for answers to technical questions?
We welcome your comments and suggestions below. However, if you are looking for solutions to technical questions please see our Technical Assistance page.
Customer Reviews
4.3 out of 5
Based on 9 ratings:
3 of 3 found this helpful:
A fun project
The kit arrived well packed. It took roughly an hour to solder in parts. The documentation is good and easy to find. I have owned many Textronic scopes over the last 55 years but donated my last one to the ham club here. Then I needed a scope. For my use it is great, takes up very little room and is easy to use. Whether it is a first time scope or if you have used one for years, this is a good portable, fun tool. Bruce KT4ET
2 of 2 found this helpful:
Good purchase
Was a fun kit to assemble and performs as advertised and expected. Would've been nice to have a power supply included but no problem. Overall I'm satisfied.
2 of 2 found this helpful:
Well Worth The Price And Effort
The instructions are excellent and the testing along the build process is great too. Some of the soldering is trickier, requiring some patience and a good soldering iron, but most of it is not too bad. Expect to be carefully adjusting the contrast of the screen at the end: it is only visible in a small range of the adjustment screw, so be patient there as well. In the end you'll have a useful little tool. Much thanks to the Customer Service people at SparkFun as well, because I have yet to have an interaction with them that doesn't make me a happier person.
3 of 3 found this helpful:
Buy from jyetech.com
I think the product is fine. Works well, easy to use. However I paid $79.95 for it from Sparkfun and on the documentation sheet it came with was an address for support at jyetech.com. When I went to that website I found the same oscilloscope on sale for $49.00. Needless to say I will not be buying from Sparkfun again without doing much more research. I feel ripped off! Update: After seeing the above review, I received an email from Sparkfun giving me a $20 credit matching the price I originally paid with the current price. I consider that very good customer service and am changing to 4 stars. Would be 5 except there is no case which would be nice. And it's still $10 cheaper at Jyetech.
Hey there! I'm sorry about the inconvenience - please keep an eye out for an email from me addressing this. :)
Great kit!
I did some videos about this kit, showing how to use it and detailing the build. I hope you find it helpful. This kit requires intermediate soldering skills.
Build Tips https://www.youtube.com/watch?v=zjhpEm7OONc
How To Use This Scope https://www.youtube.com/watch?v=ZwvjVlGbkSI
Looking at RC Signals from a Quadcopter https://www.youtube.com/watch?v=y6OZMhDg3OU
Cool videos, thanks for sharing!
Great project, but watch the price.
A cool little project. The build wasn't bad, probably a little much for a total beginner but I don't remember there being any highly aggravating components. A few close and tricky places you have to get a little creative with iron placement, and places where there is a pretty tight pin pitch (display board). Watch the build video posted, I agree his order of soldering is superior to the provided instructions. I had to adjust the heat a few times as well for places where there is a large thermal mass vs other places with smaller components I wanted to protect. You probably have to at least half know what you are doing.
I find I am grabbing this thing first when I need to measure simple signals (checking PWM circuits, basic PS ripple, etc...) because it's small and handy enough I can just leave it out on the bench most of the time. I am going to use a 9V battery with a jack to power it remotely and use it for automotive troubleshooting and remote signal testing. It is handy to turn the timebase down and use it to watch signal voltages over time (better than my CRT scope in this regard). It is also a noticeably cleaner signal (at smaller voltage ranges) with the battery vs using the recommended 9V adapter, but I was not getting any major 60Hz harmonics through the power supply, which is nice.
The FFT and frequency finder are pretty nice bonus features, but don't seem to like picking up low frequencies as easily and requires a very distinct signal with little distortion/interference (as I would have expected). I've noticed a few bugs and display glitches, but nothing terrible that isn't usually fixed just by recycling settings or something. One minor point is that the largest you can get is 5V divisions and with 6 divisions you can show a max of 30V spread on screen at once, even though the unit is rated 50Vpk. So it technically has a range of 100V (+/- 50), but you can only show 30V of the waveform at once.
However, like the other poster, I will have to concede although it was a fun project that I enjoyed and will probably get some decent use out of, IMHO it was definitely not worth the $79.95 I paid for it a few months ago. For a smaller price I would do it again, but I could have nearly bought a much more functional and ready-built DSO or a much better featured kit from JYE for what I paid (not sure what I was thinking at the time).
Gift
Reported very pleased.
Nice kit. Soldering is a bit challenging making sure it is a good connection without making solder bridges. Need a small soldering iron and steady hands. Finished scope works very well with no problems.
As usual with Chinese kits and instructions translated into English, they can be a bit confusing and a few steps are deleted. The manufacturers should have an English technician check the instructions for clarity to remove any confusion.
Great Learning Tool
My 15 year old granddaughter did most of the soldering on this. We are using it as a part of a science fair project that uses PWM. There are two soldering challenges. First, the caps can be difficult, but we followed the advice of another person that was to do the switches and buttons first. Second, the headers on the display are tricky and I recommend plugging them into a female header when soldering to keep the pins aligned. The assembly and user instructions are adequate. Very pleased with the quality and the results.
Has anybody been successful in getting images downloaded from the scope? I've tried minicom on my Mac with a FTDI cable. The transfer starts, but it stops after a short time and the scope says that it was unsuccessful. I've tried with a level shifter and without, same thing with both. It looks like it's starting to transfer but then goes out of sync after a few bytes.
I've been eye-ing this for a probably as long as I've been shopping at SparkFun. I don't really need an O-scope, I have two already. But what I do need is a logic analyzer and since I want/need it only for supporting hobby stuff and my own (and my daughter's) learning I'd especially prefer it to be in kit form. This kit seems pretty close int hat direction, has anyone heard of a modification to this kit to turn it into an 8->16 channel logic analyzer?
SparkFun folks: would it be possible for ya'll to stock more of these types o'DIY kit's? Hoenstly, I don't think they are really DIY since no design, parts sourcing, etc that I associate with DIY anything, but so what! As far as I'm concerned these sorts of kits are the electronic equivalent of a plastic or balsa stick model and I love them! Where or where is Heath kit when I actually have a bit of money and time and the right tools to put together stuff like this!? WEll, in a large sense I imagine ya'll (and adafruit && the rest) have filled that void and I think ya'll are doing just amazing things: your tutorials and blogs are some of my favorite thigns to read!!
In anycase, any chance ya'll might give some thought to adding more kit's for various types of tools aimed at hobby, self-education level?
Things on my wish list would be: 1. Bench LCR with snazzy display, hackable, no real case (I built a 3d printer from a KIT, so I can print one fer myself, like I did for that super cool function generator kit you'll sell, that was a fun build:)). 2. 8 or 16 channel logic analyser 3. More board and component kit's like the joystick && beef cake relay controller (that caused plenty of terror in my home as my daughter learned to use it and has had no end of fun terrorizing my wife with stuff turning on and off randomly - beware crafty teenagers!! They complaion about learnign a bit, but dear lord what they do with the knowledge!!), 4. WIFi ip CAM kit that uses an uno, fyfli care, etc just all bundled together. 5. Bench powersupply with snazzy display. I looked high and low for a kit that was in this area and while I found loads of nice ps kits and even more true DIY projects of all sorts, I wasn't able to find one that sported a display comparable with even low end commercial ones and ended up buying a "Mastech HY3005F-3Triple Linear DC Power Supply, 30V, 5A" which is great, but I'd have liked a better (read cooler, geek-ee-er display I could maybe modify via software).
In any case, though my wife'll probly kill me I do think I'm gunna have to have one of these here O'SCope kits.
Did I just buy this kit for 80 dollars here that I could have bought for 30 dollars less via the firmware link above (or 20 dollars less fully assembled)?
It sure looks like it, and if so, I feel a bit silly for buying it here. :-(
Thank you for pointing this out to us! Our Customer Service team will be in contact with you soon to help resolve this issue.
Thank you (and Customer Service) for taking care of me xtopher. I do appreciate it. :-)
This is a great kit and was easy to solder. A couple of things though. Note that included pins that need to be soldered for LCD are not standard 2.54mm pins but smaller ones, probably with pitch similar to XBee's headers, so if they break or something, replacing them won't be easy; soldering these pins is not easy as the pads are pretty small and somewhat oxidated, I had to put additional soldering flux on them to prevent cold joints and allow solder to bind to pads. When used with 12V supply, power regulator and its heatsink (I actually added a bit of thermal paste between them) get uncomfortably hot, but that can probably be modded to a 5V switching supply or a booster from LiPo battery. Also LCD initially required contrast adjustment as it was a bit washed out.
What a great bit of kit. I did a couple of mods, added an on off switch and a 9v battery lead . The on off switch I put in by lifting the +ve leg of the diode nearest the power connector and putting a switch in between the lifted leg and the hole it came out of, sleeving the lifted leg to switch end.. The 9v battery lead I soldered directly to the power connector contacts,. Now to mount it all in a neat little box. Why didn't I get the probe kit!
The 50V Peak to Peak maximum voltage looks as if it occurs with a X1 probe. Would a X10 probe allow 500 v PP?
I really like this kit, and the specs look really good for general use.... I ordered one for my lab assistant.
Looking over the design specs, it looks like it's made for easy modification. I'd probably replace the push buttons with some knobs. I got one of those Nano V3 scopes from Sparkfun to play with, and I never use it because it's too slow and clumsy to navigate through all the menus.
P.S. About dual channel: The schematics show that most of the guts of the thing are taken up with the single channel circuitry (see the link above). Maybe a cheap way to add a second channel would be to order two of the kits and modify the software to multiplex them onto a single I2C bus LCD somehow.
Looks fantastic and a great price. Any chance of a dual channel ? That would be completely AWSOME even at double the price!