- Home
- Product Categories
- WiFi
- SparkFun Blynk Board - ESP8266


SparkFun Blynk Board - ESP8266
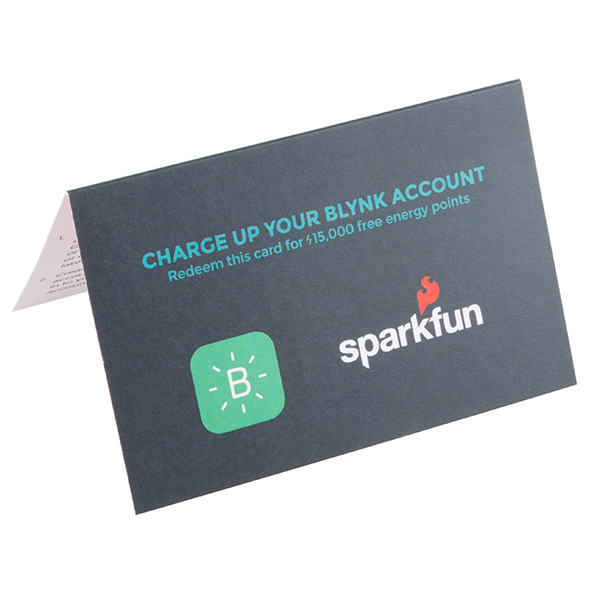
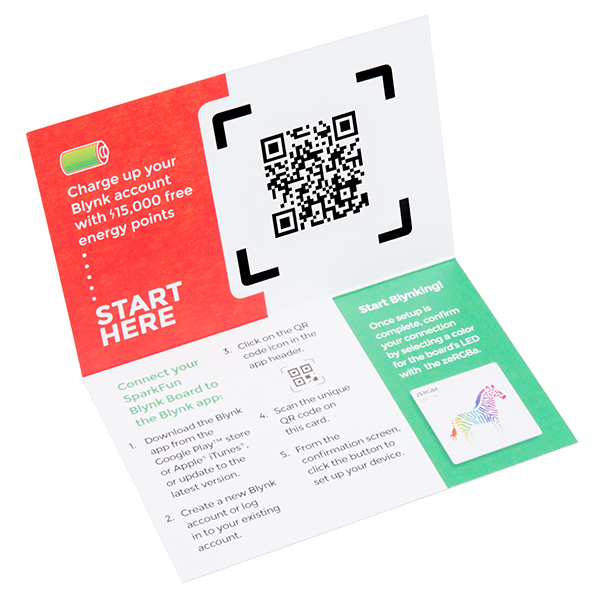
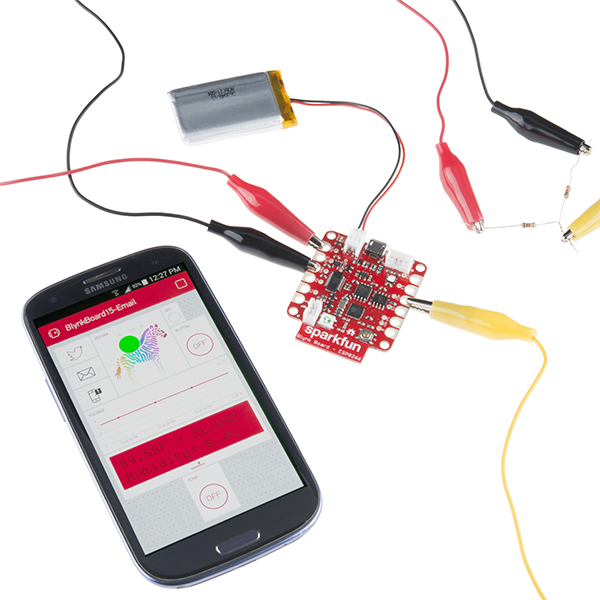
Blynk is an easy to use app builder that allows users to add a variety of buttons, sliders, graphical displays and even RGB controllers to their phone. The SparkFun Blynk Board is specially designed to work with the ‘widgets’ within the Blynk mobile app to create your next IoT project. Monitor local weather conditions, control LEDs from your phone, even send a tweet when it’s time to water your plants! Every Blynk Board comes fully programmed and also includes a Blynk subscription code card (15k Energy at a $10 value), which will be needed to connect the Blynk Board to your Blynk account, connect to a Wi-Fi signal and you are ready to start Blynking! You’ll be controlling the Blynk Board from half way around the world in no time.
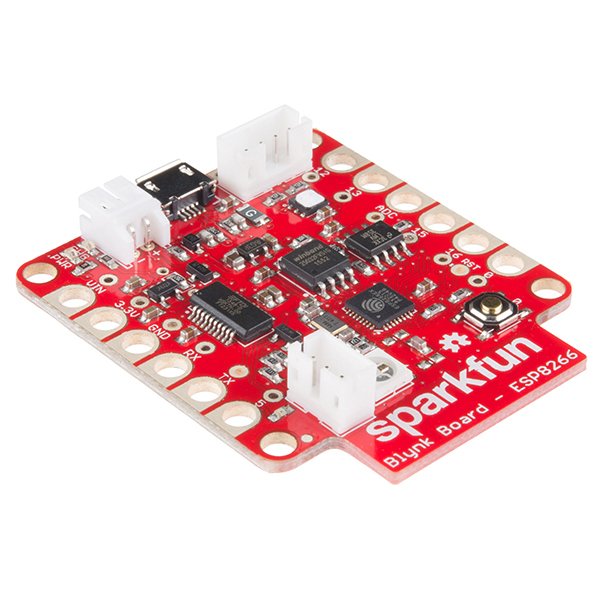
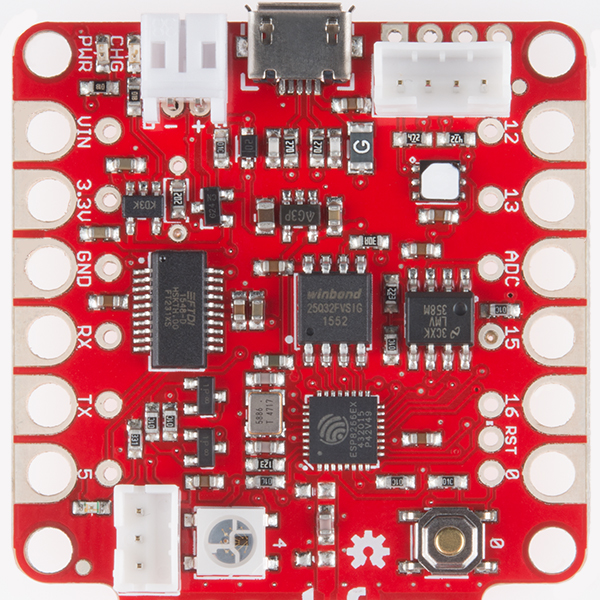
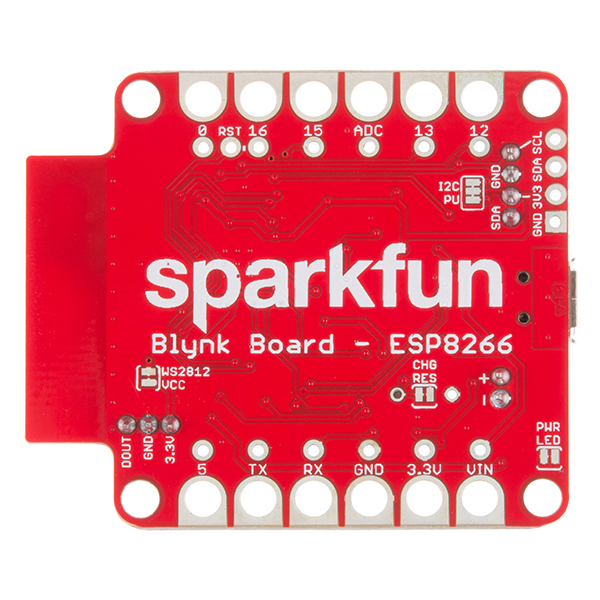
On board every Blynk Board is the economic yet powerful ESP8266 framework that will allow you to connect to most 2.4GHz WiFi networks, that are either open (no password) or protected with WPA, WPA-2, or WEP authentication. The Blynk Board interfaces with the outside world using input/ouput (I/O) “pins” that can either control real-world objects, like motors or LEDs, or read in values from sensors (like light or position). Each of the Blynk Board’s pins are accessible via the large, metal-encircled holes on the edge of the board. These large holes are designed to interface with alligator clip cables – a staple interface cable for beginner and advanced electrical engineer alike. During setup, the RGB LED on the Blynk Board will be your window into its soul. The board uses this multi-colored LED to indicate all sorts of status modes including how to identify which board is yours.
Blynk is a digital dashboard for your iOS or Android device that allows you to easily build graphical interfaces by dragging and dropping widgets to control for your newest IoT projects! With the Blynk app you will be able to control the Blynk board or any other compatible hardware remotely by displaying sensor data, analyzing your surroundings, activating a function of your project and much more.
Are you just getting started with IoT or electronics? Our IoT Starter Kit includes all the parts to complete the fourteen starting IoT projects.
Note: The Blynk app is compatible with iDevices running iOS 7.0+, and Android’s running any version above or equal to 4.0.
- ESP8266-Based
- On-Board Si7021 Temp/Humidity sensor
- Solderless pin connectors - compatible with alligator clips
- On-Board FTDI for re-programming
- On-board WS2812 RGB LED
- General purpose LED and button
- ADC scaled to 0-3.3V
- Expansion connectors for I2C and WS2812 output
- LiPo battery charger
- Arduino programmable
- Over a dozen pre-loaded Blynk projects!
- No programming required to connect the board to Blynk and run through the example projects
- Blynk Subscription Code-Card Included
SparkFun Blynk Board - ESP8266 Product Help and Resources
Blynk Board Bridge Widget Demo
March 25, 2016
A Blynk project that demonstrates how to use the Bridge widget to get two (or more) Blynk Boards to communicate.
Blynk Board Washer/Dryer Alarm
March 31, 2016
How to configure the Blynk Board and app to notify you when your washer or dryer is done shaking.
Blynk Board Project Guide
March 25, 2016
A series of Blynk projects you can set up on the Blynk Board without ever re-programming it.
Getting Started with the SparkFun Blynk Board
March 25, 2016
How to provision a Blynk Board - get it connected to Wi-Fi and Blynk, so you can start Blynking!
Blynk Board Arduino Development Guide
March 25, 2016
How to get your computer set up with Arduino and the Blynk Board hardware definitions -- so you can start creating Blynk projects of your own!
Choosing an Arduino for Your Project
December 11, 2017
Examining the diverse world of Arduino boards and understanding the differences between them before choosing one for a project.
Virtual pins.
You can find a list of virtual pins available on request here.
Restoring original firmware.
If you need to load their original firmware back on this board, download the firmware from the GitHub link on the product page.
Unzip that file and point Arduino to the "BlynkBoard_Core_Firmware" folder and open the "BlynkBoard_Core_Firmware.ino" file. All the other necessary files will load in tabs.
Re-provisioning the Blynk board.
If you need to re-provision your Blynk board take the following steps:
Remove power from the board.
Re-apply power.
When you see the LED flashing blue quickly, press and hold the ‘0’ button.
The LED should fade on and off in a white color. Hold the button for about 4-5 seconds while the LED fades white.
After 4-5 seconds, release the ‘0’ button. The LED should start flashing a four color code.
At this point you’re ready to re-provision your board in the Blynk app.
Core Skill: Programming
If a board needs code or communicates somehow, you're going to need to know how to program or interface with it. The programming skill is all about communication and code.
Skill Level: Noob - Programming will be limited to basic drag and drop interfaces like ModKit or Scratch. You won't be writing code, but you will still need to understand some basics of interfacing with hardware. If you?re just using a sensor, it's output is analog.
See all skill levels
Core Skill: Electrical Prototyping
If it requires power, you need to know how much, what all the pins do, and how to hook it up. You may need to reference datasheets, schematics, and know the ins and outs of electronics.
Skill Level: Rookie - You may be required to know a bit more about the component, such as orientation, or how to hook it up, in addition to power requirements. You will need to understand polarized components.
See all skill levels
Comments
Looking for answers to technical questions?
We welcome your comments and suggestions below. However, if you are looking for solutions to technical questions please see our Technical Assistance page.
Customer Reviews
4.2 out of 5
Based on 16 ratings:
1 of 1 found this helpful:
nice and easy
Pros: The board hardware it's well concibed and functional. The firmware it's described with detail. The documentation and support it's great.
Cons: Only one ADC channel. The calibration of the humidity sensor. The self-heating of the board makes noise over the temperature sensor.
1 of 1 found this helpful:
Great product great tutorials
It's all about the tutorials if they aren't great I won't be able to use the board.
Since the Blynk Board and the Blynk App are in their infancy, we're still working on expanding and improving the available information and tutorials. If you're looking for a tutorial on something that's not covered, let us know, or check http://docs.blynk.cc/ and http://community.blynk.cc/!
1 of 1 found this helpful:
Board runs hot
This is a great little guy, but it runs hot, rendering it somewhat useless for the onboard temperature sensor. The form factor is nice though, and connecting to the blynk interface was seamless enough that I hope to use it for other projects.
Really easy to get started with.
This board is amazingly easy to do cool things with.
Board runs hot
This is a great little guy, but it runs hot, rendering it somewhat useless for the onboard temperature sensor. The form factor is nice though, and connecting to the blynk interface was seamless enough that I hope to use it for other projects.
Just what I was looking for!
One of the many projects on my "todo" list was to detect the end of the washing machine cycle and announce it somehow. So when I saw the Sparkfun Washer tutorial for this board, I had to build it. Everything worked, the only hiccup was that after programming the board, I had skipped over the instruction "Once the board connects to WiFi and Blynk, the LED should turn green." and it thus took me a while, and a couple of unnecessary programming cycles, before I had success with the application. For my washer I used a "shakiness" of 45 and a "Stop Time" of 120 seconds. One tip, when adding the slider controls choose the longer ones as the short ones can be hard to adjust precisely.
Temperature sensor is useless
I bought this specifically because it had an onboard temperature sensor, and I figured I could simplify a project that used a EspThing and an external sensor. Unfortunately the temperature sensor is useless, because the board runs hot enough to render the readings are meaningless.
Lots of fun - great for learners - hard stuff already done
Granddad working with grandkids -- great starter kit. Can do a lot right away to make things interesting without the tedious wiring of complex circuitry. Would be nice if it stayed connected or reconnect to wifi better (needs improvement). Lot of fun.
Good!
Great really, I use a bme 280 for the temp hum and baro since the temp sensor on board runs hot and ends up being just for cheking if the i2c bus is working.
I was tinkering with the eeprom and now the original firmware does not load! So beware if you are like me and like playing arrownd. If you touch the eeprom forget the blynkboard firmware!
Nice compact device
This is my first blynk board project, and being a real novice, made it really difficult to get it working. The instructions seem straight forward but turn into a disorganized shotgun blast of divergent web links, without any kind of overall roadmap. It would be exremely helpful to make a master document that outlines the step by step process to complete the project. Step 1 go here and download this library of code, and cy it here on your hard drive. Step 2 go to this web link and download this to this library. Step 3 launch this application and copy this code into it... Etc. Chasing so many squirrels down multiple holes, and trying to find your way back to the next step is a really inefficient and frustrating way to learn how to use a device. Even a simple document that just lists the libraries you need to load and in what directory for them to be found where would be a delight to find. I'm sure my steep learning curve is making this more complicated than it should be but Im at the point to give up on my project. I'm sure the product isn't at fault just my skill level.
Super neat!
Super handy, still learning new things to do with it! Fun and useful!
Good job!
This is the first time I buy boards from SparkFun. The board is well made and well documented. I haven't done full tests but everything I tried just worked. Shipment was received in one week, which met my expectation. I will buy other products from SparkFun again.
Simple Easy and impresses other geeks
I went with this kit rather than from scratch to get a feel for the Ethernet<->IOS environments. It worked the first time.
Plus the Zebra is fun.
Great design but spotty connection
Great design and customer service from Sparkfun, but having frequent connection drop outs. Tried two different wifi networks and a phone hotspot a meter away from the board. Unclear if it is the wifi modem or Blynk backend. Customer service was stellar and replaced one of the boards that was especially problematic and interestingly the replacement had a much dimmer neopixel. When it's working right, its responsive enough to control something like a RC car but it's often too spotty for that kind of rapid control. I am in a semi-urban environment.
The amount of credits ("energy") that comes with it is plenty to do most stuff.
Very usefull board!
I love the way the pins and functions work. Here is what I did for my daughter https://youtu.be/wckkvam70Sg
My only sugestion is to add a virtual value to an if condition, and that value could trigger an email.
The reason is that with my baby I don't have time to program my custon functions. The Blynk was wonderful because it was very fast to custon with the app.
I already have a RedBoard to deal with the leds but it used a push button. Now the Blynk does this job and the boards are away from my daughter's hands.
:D
Really neat idea!
Blynk Board and Blynk are two really exciting, forward looking, products! The Blynk Board works as advertised. I've used several of the applications that were included on the board.with no issues. I did have some issues in loading the Blynk Board parameters into the Arduino IDE to include my own code but they appeared to be glitches in my computer. I've been off doing some other things so haven't got the chance to actually try to load my own code. The step-by-step set-up instructions for the standard applications are extremely well done and hats off to SparkFun people for devoting the resources to do that!
-------------------- Tech Support Tips/Troubleshooting/Common Issues --------------------
Default Blynk Firmware
If you ever need to reload the original Blynk firmware to your board:
Download the this file from Github that contains the core firmware plus the Blynk board Eagle files.
Unzip that file, and in Arduino, navigate to the BlynkBoard_Core_Firmware folder in the file you unzipped.
Open the BlynkBoard_Core_Firmware.ino file in Arduino. You should see several other tabs open besides the main sketch.
Click upload and you should be good to go!
Note: It takes a long time to compile. This was tested in Arduino v1.6.6.
Re-Provisioning Blynk Board
If you only need to re-provision your Blynk board take the following steps:
Blynk Board Add On
Make sure that you have the Blynk board add-on installed. If you have not installed the board add-on in the Arduino IDE , try looking at this tutorial [ https://learn.sparkfun.com/tutorials/blynk-board-arduino-development-guide#install-the-blynk-board-arduino-addon ].
SparkFun Blynk Board Not Showing Up?
Are you not seeing the SparkFun Blynk Board board definition in Tools>board after installing the board add-on? This might have something to do with your Arduino IDE version. I heard from another tech support representative that v1.6.13 did some weird merging of different board definitions.
Try uninstalling any board add-ons called "esp8266 by ESP8266 Community" and the Blynk board add-on. After closing out your board manager, try reinstalling the Blynk board add-on. You might want to uninstall/reinstall the Arduino IDE or delete any temporary files related to Arduino.
Disabling the Self Test
If you are uploading the Default Blynk Firmware, make sure that you comment out line 29 in the Blynkboard_Core_Firmware.ino where by adding "//" where it says:
Once you are done uploading, the LED will blink blue. Just let the board configure itself and do remove the board. After a couple of seconds, the LED will begin to blink white. You would just need to follow the steps to re-provision your board
Otherwise, you might see the RGB LED flash red, green, and blue repeatedly. The WiFi name might also be called "ESP_CCXXXX" instead of "BlynkMe-XXXX". The XXXX will be different depending on how the board randomizes the WiFi SSID.
feels a little too clash-of-clans for my tastes.
My worry is 5 or 10 years from now (or sooner) the cloud connection will disappear and I'll have to throw away any work I've done developing it. I don't like subscription web-based options. I want to run my own server.
I believe you can run your own server. Check it out here: http://docs.blynk.cc/#blynk-server
Hey I just wanted to say thanks SparkFun for the deadly Graphical Datasheets, I can understand new boards very quickly. Great Idea!
Cheers.
You are very welcome! That's M-Short's awesome work. She did a whole homepage post if you want to read how she generates them.
We love the ESP8266 because it just works.. but mostly because of it's price sub $2 - "...thousands-of-sensors-launched-out-of-a-cannon cheap...". Are you really adding 10X value here.. and endorsing a PAYG subscription - even if you use your own server? Are we losing our way Sparkfun?
Remember the ESP8266 does little on it's own. You need to provide it with power, it using a battery you need to make sure it is charge, you need to provide sensors etc. You rarely end up at $2 when you are done. We definitely believe that a plain ESP8266 has it's uses which is why we still carry them. But what about someone who just wants to start programming and learning? What about a school that doesn't want to have to keep track of parts and have kids soldering sensors on? Now you can learn to get data to the internet and all you need to do is power the board. As for the PAYG service we've played with it and for someone who just wants a quick app and doesn't know how to write there own it is a great option to start with. And if you do know how and want to write your own you can. While we worked with Blynk on this board and specifically getting the firmware to talk with it, the service itself is completely optional. In other words we're trying to provide you with option and more options. This board isn't for everyone just like the ESP8266 bare module isn't for everyone.
so many companies and individuals rushing into this sphere. the concept of paying virtual currency for a slider button just makes my skin itch. very nice hardware though.
Is it possible to provision this board (connect to wifi) without the QR code card? I left it at work and want to experiment tonight!
Kinda sorta. In addition to the WiFi info, you'll need to supply the board with a Blynk auth token, which you may already have if you've provisioned the board before.
Any of the alternative provisioning methods discussed here should work. If you need to get it from connected mode, back into provisioning mode, this section of the tutorial has a bit about that.
I screenshotted the "price structure." Hopefully that helps!
Brilliant! So with the $15 of energy that comes with this board you should get between 13k and 28k 'Energy.' We should know the exact number you receive soon.
Update: I just heard back and the value isn’t $15, it is actually $10 and you get 15k Energy. Hopefully this clears things up. I also updated the description!
I'm not that familiar with Blynk. I've quickly looked at Blynk's web-site but I can't find the information that I want: I see on the subscription card language about "free" energy points. This tells me that transactions take points and there must be a way to pay to recharge the account. I didn't find information on exactly how energy points are used or how much it costs to recharge in my 3 minutes of searching. I did see something about setting up a private Blynk server, would that eliminate fees? Would you be able to provide a direct link(s) to the energy usage and recharging information? I understand that you aren't Blynk so you don't have any control over the usage fees, I'm just hoping you can point me in the right direction.
Thanx.
Also, here is this: http://community.blynk.cc/t/introducing-blynk-energy-first-paid-services/4975
Each Blynk subscription code card contains $15 worth of 'Energy.'
Thanx. Reading that post and the associated comments does answer many of my questions. And considering it was posted about 2 hours ago, I can see why I couldn't find a static page about it. (It's all in flux!)
Indeed. I just asked the powers at be to give a little more insight on how much 'Energy' you actually get with $15. I will be updating the page and comment again when I find out.
Update: I just heard back and the value isn't $15, it is actually $10 and you get 15k Energy. Hopefully this clears things up. I also updated the description!
Good Afternoon,
I found the info on the Blynk subscription , link below
http://community.blynk.cc/t/blynk-will-introduce-paid-subscription-in-q1-2016/3177
Hope this helps.
Hi Guys,
Had this board like a few weeks ago. With the Blynk energy point. But once I started to test with a simple data collection using the onboard temp/humid sensors. (Wanted to collect my room parameters). The issue is that once the battery was run dry and I recharge it using the USB power supply. The board will not automatically connect back with the WIFI connection. Does anyone here face the same problem? How do u solve it?
For now, i have to add in a physical switch to disconnect the battery power to the board and reconnect after a while.
Hi there, it sounds like you are looking for technical assistance. Please use the link in the banner above, to get started with posting a topic in our forums. Our technical support team will do their best to assist you.
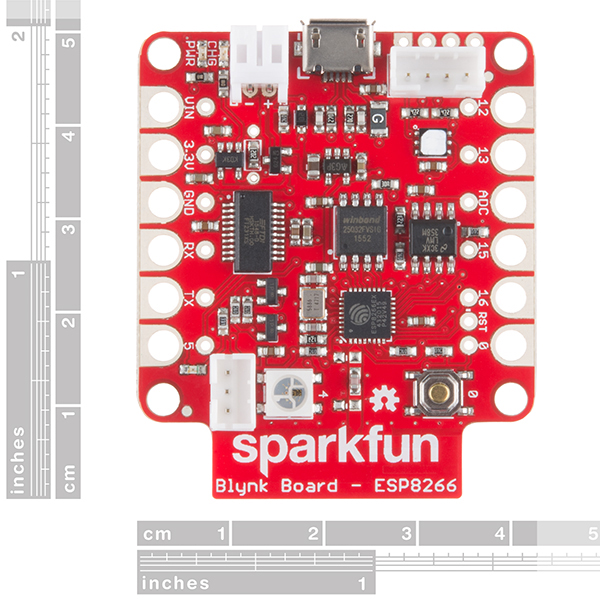
I'm not 100% sure but I think the model must be scaled up 105% (1.05X) before it is to scale.
hi, why better use lmv358 in ADC scaling? if compere with classic voltage divider which using just two series resistors. Thank You!
this board (with this firmware) can handle interruptions?
Is there a list of what all 32 virtual pins are and do?
Because the board runs hot, the temperature sensor seems to read somewhere around 90F no matter the temperature of the room, rendering it somewhat useless for monitoring the temperature in a room. Anyone have a simple solution to this ?
What is the Blynk subscription service and how does the 'Energy' work? Are there premium features that require additional payments? Also, when I go to the IOS App Store, the app is only available for iPhone and displays in a bad aspect ratio on my iPad Air 2.
"Blynk subscription code card (15k Energy at a $10 value), which will be needed to connect the Blynk Board to your Blynk account, connect to a Wi-Fi signal and you are ready to start Blynking!"
The Blynk App itself is free to use and comes with a few energy credits. Basically the energy lets you add more widgets and more advanced widgets. 15k is quite a bit of energy and it sounds like you can recycle widgets and get 80% of that energy back as well. For more information check out the announcement on their forums. As for the app, I'd check their forums and posts, but my guess is they are aware about it and working on it.
It's no longer 80% - I just checked on the app, and you get the full 100% back when you recycle a widget.
IS there a way to add an Antenna to this board? We are having a lot of problems when we are not in good range of router.
Does it talk via SSL to the Blynk Server?
Well - I got this provisioned via laptop browser, and tried out a few of the demo projects on the android app.
I then wanted to see if I could modify an arduino sketch that I use on for a simple Neopixel project. I got it working just fine, but now I can't figure out how to get the "default" code/firmware back on the board (so I can try some more of the demo projects. I tried loading the Blynkblink sketch via arduino IDE, but it doesn't seem to work.
The serial output (via terminal or arduino IDE looks like this (repeated over and over): 8ŸŽþ‚ƒ‡‡þÿ[344] Blynk v0.3.4 [344] Getting IP... [647] DHCP Failed!
Any suggestions?
EDIT: I found the forum and posted this there too! EDIT 2: Solved. I found the firmware section on github and loaded the BlynkBoard_Core_Firmware.ino sketch. Thanks!
I am having the same problem, but I can not compile BlynkBoard_Core_Firmware.ino. I think all the libraries are loaded correctly, but the errors I get are: sketch\SFEblynkCore.ino.cpp.o:(.text.setup+0x3c): undefined reference to
initHardware()'
sketch\SFEblynkCore.ino.cpp.o:(.text.setup+0x40): undefined reference to
checkSelfTestFlag()' sketch\SFEblynkCore.ino.cpp.o:(.text.setup+0x44): undefined reference toperformSelfTest()' sketch\SFEblynkCore.ino.cpp.o:(.text.setup+0x48): undefined reference tocheckFailAPSetupFlag()'Do you have any thoughts for me? Thanks.
Glad you got it all working!
The Blynk Arduino library includes a few examples which might help you get started developing your own code. Check out the ESP8266_Standalone sketch under the File > Examples > Blynk > BoardsAndShields menu. That's a great skeleton - the bare minimum you'd need to start your own Blynk project. The hardware pins (0, 5, ADC, etc.) will work out of the box with that sketch, then you can start mixing in NeoPixels, virtual variables, and other sensors.
I'm wondering how well controlling the WS2812 LEDs work with a DIN at 3.3V? How about a string of WS8212s - assuming their max current is 20mA each and leaving some for the ESP8266 how does a string ~25 LEDs long work at 3.3V? Anyone try this yet?
I ask because I just designed a custom shield for a Particle Photon that takes in 5V, supplies the WS2812 string at 5V (up to 1A) and provides logic level from 3.3V (Photon) to 5V (WS8212). Had I known this existed, I might have ditched that idea and gone with this. Maybe next time.
The board's WS2812 is powered at 3.3V as well - cuts it close on the blue LED forward voltage, but eliminates any undervoltage potential on the DIN line. The datasheet's I've seen for the WS2812 recommend a minimum of 0.7VDD for a high, so 3.3V might be a little dicey going into a 5V-powered LED.
I had the board driving a 1m LED Strip (60 LEDs). Current was lower than I'd expect (~890mA) when all LEDs were set to max, so I suspect the regulator was dragging it down. I wouldn't recommend that many LEDs (or more) without cutting the "WS2812 VCC" jumper and supplying the LED power externally - and, in that case, supplying the LEDs with a LiPo or something a bit less than 5V would probably be safest.
Thanks for the info! I'll keep that in mind. I've already got my other board in hand, but for future reference these may be a nice way to do it. Since I was a Blynk backer on Kickstarter, I've got plenty of "energy" to build projects.