- Home
- Product Categories
- LilyPad
- LilyPad ProtoSnap Plus

LilyPad ProtoSnap Plus
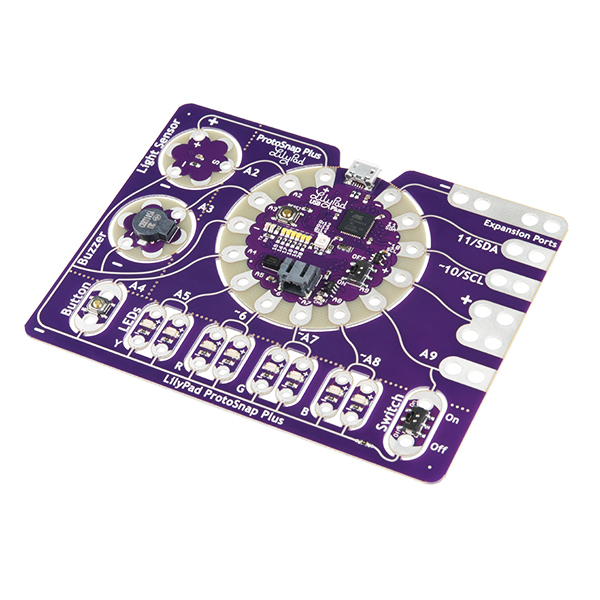
The LilyPad ProtoSnap Plus is a sewable electronics prototyping board that you can use to explore circuits and programming, then break apart to make an interactive fabric or wearable project. Programming the ProtoSnap Plus is easy with the free Arduino software you’ll need to program the ATmega32U4 on LilyPad USB Plus at the heart of the board. Once you’ve installed the software, you’ll be able to write and upload your own programs to the board, making it do almost anything you want.
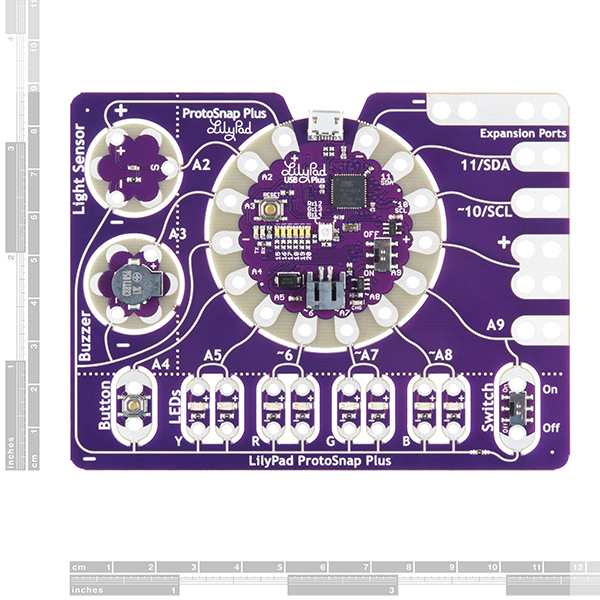
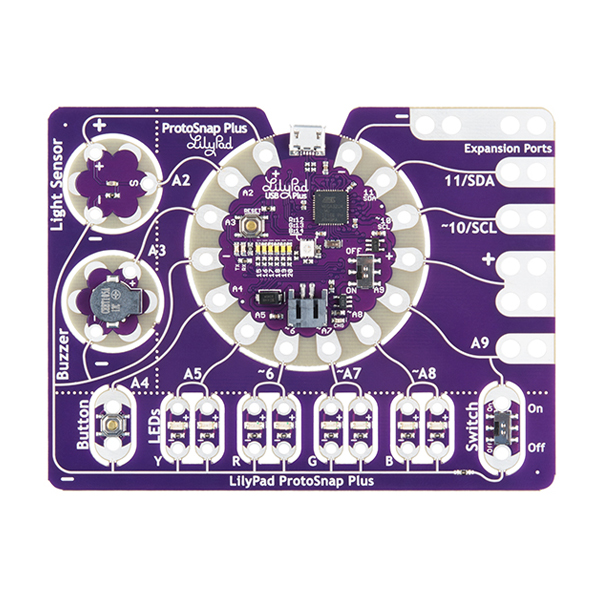
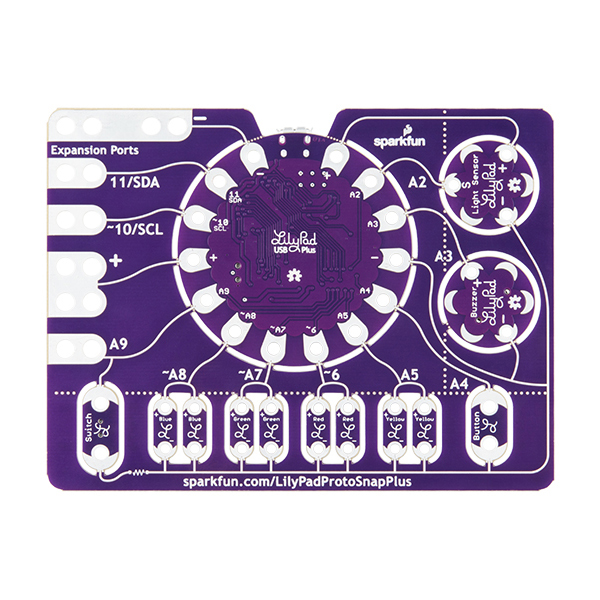
At the center of the ProtoSnap Plus is the LilyPad USB Plus microcontroller, pre-wired to a LilyPad board including a LilyPad Light Sensor, LilyPad Buzzer, LilyPad Button Board, four pairs of colored LilyPad LEDs and a LilyPad Slide Switch. Because these components are connected together on the ProtoSnap board, you can test out your project ideas before you sew. The ProtoSnap Plus also includes expansion ports that let you sew your wearables together or use alligator cables to easily connect external sensors and components. After testing out your coding ideas using the attached LilyPad pieces, you can break apart the prototyping board and sew them into your project!
Please be aware that the Lilypad ProtoSnap Plus is NOT supported on Windows 7/8 due to a lack of support drivers for those specific OS's.
Note: A portion of this sale is given back to Dr. Leah Buechley for continued development and education in e-textiles.
Included on the ProtoSnap
- 1x LilyPad USB Plus
- 1x LilyPad Light Sensor
- 1x LilyPad Buzzer
- 1x LilyPad Button
- 1x LilyPad Switch
- 2x LilyPad LED - Yellow
- 2x LilyPad LED - Red
- 2x LilyPad LED - Green
- 2x LilyPad LED - Blue
- 5x Expansion Ports
LilyPad ProtoSnap Plus Product Help and Resources
LilyPad Buttons and Switches
July 23, 2018
Learn about the button and switch offerings in the LilyPad line and how to use them.
LilyPad ProtoSnap Plus Activity Guide
December 7, 2017
Learn how to program in Arduino with the LilyPad ProtoSnap Plus. This guide includes 10 example activities that use the pre-wired LilyPad boards on the LilyPad ProtoSnap Plus.
Getting Started with LilyPad
October 27, 2017
An introduction to the LilyPad ecosystem - a set of sewable electronic pieces designed to help you build soft, sewable, interactive e-textile projects.
LilyPad ProtoSnap Plus Hookup Guide
October 5, 2017
The LilyPad ProtoSnap Plus is a sewable electronics prototyping board that you can use to learn circuits and programming with Arduino, then break apart to make an interactive fabric or wearable project.
Adapting LilyPad Development Board Projects to the LilyPad ProtoSnap Plus
May 24, 2018
An overview of the updates made in the redesign of the LilyPad Development Board to the LilyPad ProtoSnap Plus and how to adapt code written for the old board to the new one.
LilyPad USB Plus Hookup Guide
June 7, 2018
The LilyPad USB Plus is a sewable microcontroller that you can use with Arduino.
LilyPad Light Sensor V2 Hookup Guide
June 7, 2018
How to hook up the LilyPad Light Sensor as well as some project ideas and example code.
LilyPad Vibe Board Hookup Guide
January 16, 2019
The LilyPad Vibe Board is a small vibration motor that can be sewn into projects with conductive thread and controlled by a LilyPad Arduino. The board can be used as a physical indicator on clothing and costumes for haptic feedback.
Recovering a board that lost it’s COM port when you upload code with the wrong board definitions:
1- Press the RESET twice quickly and you should see a blue LED fading in and out for about 8 seconds.
2- Quickly, go to /Tools/Port and select the port labeled ‘LilyPad USB Plus.’ If it’s not there, get out of /Tools/Port, retry step 1 and then retry this step. You don’t have much time between pressing the button twice and selecting the port, so it may take a few tries to get this to work.
3- Once you have that com port selected, make sure you have the Arduino IDE set to a board type of ‘LilyPad USB Plus.’
4- Open up the ‘Blink’ example from /File/Examples/01.Basics/Blink.
5- Click the ‘upload’ button in Arduino.
6- Once you see ‘Uploading…’ appear in the status bar in Arduino, quickly double press RESET again. The ‘Blink’ sketch should upload and you will see a blinking green LED on the board. If that happens, the board is now recovered and ready to go.
7- If it doesn’t work, try step 6 again. The timing can be tricky to get this step to work and it may take a few tries to get the code to upload, but once it does, you’re in the clear.
Comments
Looking for answers to technical questions?
We welcome your comments and suggestions below. However, if you are looking for solutions to technical questions please see our Technical Assistance page.
Customer Reviews
No reviews yet.