- Home
- Product Categories
- Capacitive
- SparkFun Capacitive Touch Slider - CAP1203 (Qwiic)

SparkFun Capacitive Touch Slider - CAP1203 (Qwiic)
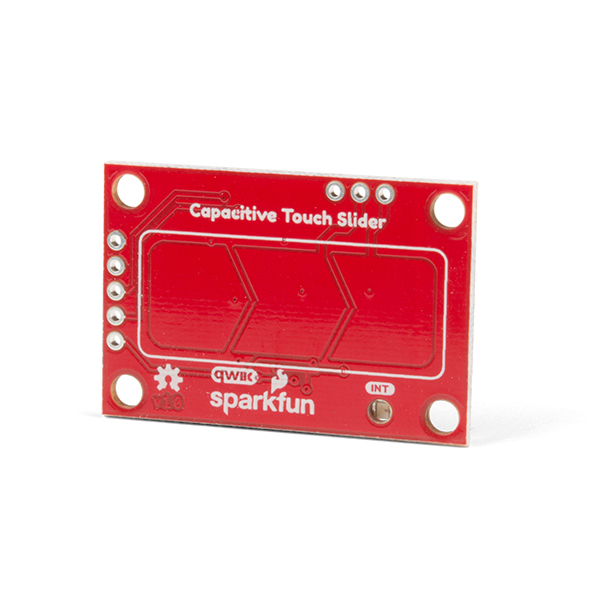
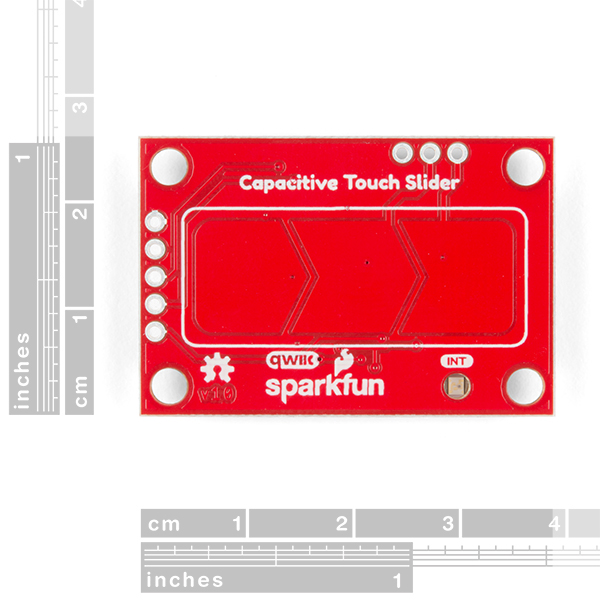
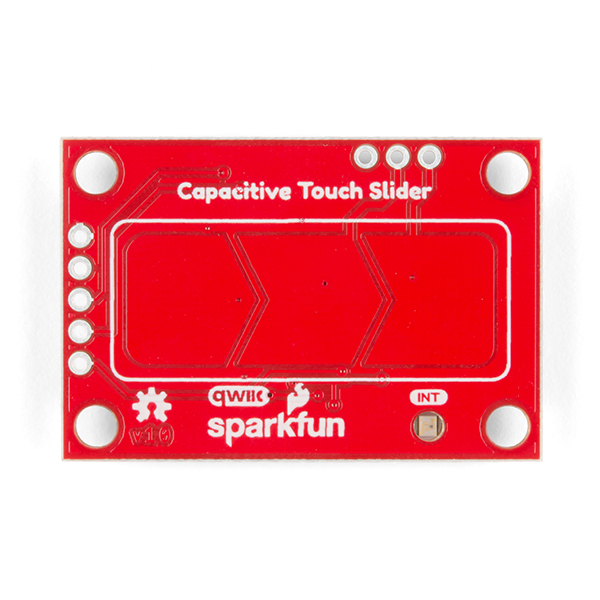
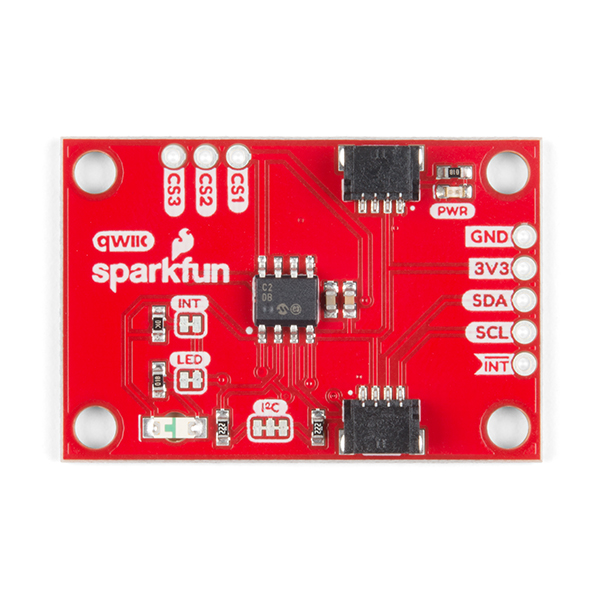
Do you want to replace a slider or a button on your art project or science experiment with a more interesting interface? This Capacitive Touch Slider is a "Qwiic" and easy way to add capacitive touch to your next project. With the board's built in touch pads, you can immediately start playing with the touch capabilities as three unique touch inputs or as a slider. You can also enable a touch input to act as a power button, customize the sensitivity for your own touch pads, and play with the interrupt alert LED. Utilizing our Qwiic system, no soldering is required to connect it to the rest of your system. However, we have broken out 0.1"-spaced pins in case you prefer to use a breadboard or create your own touch pads.
On the front of the board, there is an arrow shape which contains three separate capacitive touch pads. We also broke out the capacitive touch sensor lines as plated through-holes on the top of the board. You can use these pins to connect to your own capacitive touch pads. The CS1 pin connects to the left pad, the CS2 pin connects to the middle pad, and the CS3 pin connects to the right pad.
NOTE: The I2C address of the CAP1203 is 0x28 and is hardware defined. A multiplexer/Mux is required to communicate to multiple CAP1203 sensors on a single bus. If you need to use more than one CAP1203 sensor consider using the Qwiic Mux Breakout.
The SparkFun Qwiic connect system is an ecosystem of I2C sensors, actuators, shields and cables that make prototyping faster and less prone to error. All Qwiic-enabled boards use a common 1mm pitch, 4-pin JST connector. This reduces the amount of required PCB space, and polarized connections mean you can’t hook it up wrong.
- Capacitive Touch
- 3 unique capacitive touch inputs
- Features
- Emulated slider
- Power button setting
- Programmable sensitivity
- Automatic recalibration
- I2C Address: 0x28
- Qwiic Enabled
- Operating Range
- Supply Voltage: 3.3V - 5V
SparkFun Capacitive Touch Slider - CAP1203 (Qwiic) Product Help and Resources
Capacitive Touch Slider (CAP1203) Hookup Guide
May 30, 2019
An easy and Qwiic way to add capacitive touch to any of your projects using the CAP1203! In this guide, we go over how to connect and set up your Capacitive Touch Slider so you can start playing with it right away.
Core Skill: Programming
If a board needs code or communicates somehow, you're going to need to know how to program or interface with it. The programming skill is all about communication and code.
Skill Level: Rookie - You will need a better fundamental understand of what code is, and how it works. You will be using beginner-level software and development tools like Arduino. You will be dealing directly with code, but numerous examples and libraries are available. Sensors or shields will communicate with serial or TTL.
See all skill levels
Core Skill: Electrical Prototyping
If it requires power, you need to know how much, what all the pins do, and how to hook it up. You may need to reference datasheets, schematics, and know the ins and outs of electronics.
Skill Level: Rookie - You may be required to know a bit more about the component, such as orientation, or how to hook it up, in addition to power requirements. You will need to understand polarized components.
See all skill levels
Comments
Looking for answers to technical questions?
We welcome your comments and suggestions below. However, if you are looking for solutions to technical questions please see our Technical Assistance page.
Customer Reviews
No reviews yet.
Does this have exact dimensions somewhere? I’ve looked but can’t seem to find any. If not, can someone at Sparkfun provide me with them?
I've added a board dimensions image to the tutorial. It measures 1.5"x1". Hope this is helpful!